21 Small Kitchen Organization Ideas for a Clutter-Free Space
Quick answer: The best small kitchen organization ideas start with a purge, then group items by task, store them where you use them and contain them in labelled bins and dividers. Keep counters mostly clear, put daily items at hand, and set a short weekly reset so the kitchen stays easy to use.
Small kitchen organization ideas matter more than in any other room, because every item competes for a few feet of counter, cabinet and drawer. A system that matches how you cook saves time, prevents waste and makes a tiny kitchen feel calm. This guide shares 21 ideas, a purge plan, task zones, a fridge and pantry guide, a weekend schedule, a routine and a checklist.
Purge before you organize
Organizing only works after you have removed what you do not need. Take one category at a time out of the cabinets: pots and pans, dishes, glasses, food, storage containers and gadgets. Check each item. Is it broken, duplicated, unused or expired? If you have not used it in a year, it is probably not essential. Keep one good tool for each job and donate extra pieces. Check dates on spices, oils and canned goods, and recycle what has expired.
Wipe the empty shelves before you put anything back. Think about which items you use daily, which you use weekly and which you use rarely, and place them accordingly. Daily items go at eye level and within a step of where you use them. Weekly items go slightly higher or lower. Rare items go on the highest shelf or in another room.

21 small kitchen organization ideas
1. Group items by task
Store everything for baking together, everything for coffee together and everything for cooking near the stove. Task groups save steps and prevent hunting through several cabinets.
2. Use shelf risers
A riser lets you stack plates, bowls and mugs without a leaning tower and uses the full height of the cabinet.
3. Add clear bins
Clear bins hold packets, snacks and small items and make the contents visible. Use one for each category and label the front.
4. Use drawer dividers
Dividers keep utensils, knives and tools in sections. Choose adjustable ones so they fit your drawers and your tools.
5. Store containers with their lids
Keep lids in a separate bin or a rack on the door, and match each container to a lid before you put it away. Donate any that do not match.
6. Use a lid and pan rack
A rack inside a cabinet or on the door holds lids upright and keeps pans from scratching each other.
7. Hang a rail with hooks
A rail holds mugs, utensils and small pots and keeps them off the counter. Choose a rail that fits your wall and the weight of your items.
8. Use stackable canisters
Square canisters for flour, sugar, rice and pasta keep food fresh and use space well. Label each one with the name and the date.
9. Use a spice organizer
A drawer insert, a wall rack or a tiered shelf keeps spices visible. Group by cuisine or alphabet, and keep a list of what you have.
10. Use a lazy Susan
A turntable in a corner cabinet or on a shelf brings oils, sauces and jars to the front.
11. Use the inside of cabinet doors
Hooks, racks and bins on the doors hold cutting boards, wraps, towels and cleaning tools.
12. Set up a coffee or tea station
A tray with a kettle, mugs, tea and sugar keeps the mess in one spot and makes mornings easier.
13. Use a trash and recycling system
A slim bin with two compartments fits in a cabinet or on a door. Keep bags in the bottom of the bin so you can change it quickly.
14. Organize the fridge in zones
Use bins for dairy, produce, drinks and leftovers. Put older items at the front and keep a “eat first” bin. Label the shelves if you share the fridge.
15. Organize the freezer
Use bins and stack items flat. Label bags with the contents and date. Keep an inventory on the door.
16. Create a pantry zone
Group by category: breakfast, baking, grains, snacks and cans. Use a tiered shelf for cans and a basket for packs.
17. Use a bulletin or a small chalkboard
A board by the fridge holds the shopping list, the menu and reminders.
18. Keep a “grab and go” basket
A basket for lunch boxes, water bottles and bags keeps the mornings calm and the counters clear.
19. Store knives safely
Use a magnetic strip or a block and keep them away from children. Sharp, well-stored knives make cooking safer.
20. Keep cleaning supplies together
Use a caddy under the sink or on a door. Keep sponges in a dish so they dry, and label spray bottles.
21. Review and reset weekly
Once a week, return items to their homes, wipe the shelves and check the fridge. Ten minutes keeps the system working.
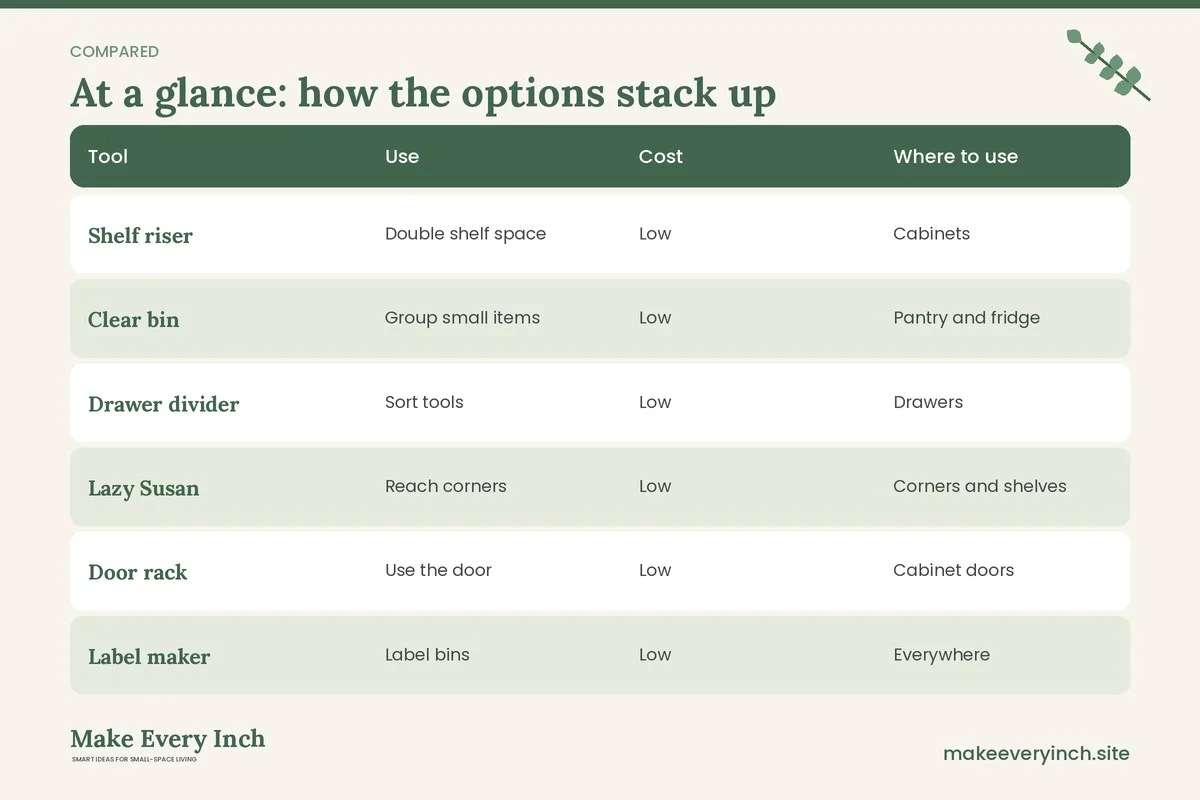
Tools that make organizing easier
| Tool | Use | Cost | Where to use |
|---|---|---|---|
| Shelf riser | Double shelf space | Low | Cabinets |
| Clear bin | Group small items | Low | Pantry and fridge |
| Drawer divider | Sort tools | Low | Drawers |
| Lazy Susan | Reach corners | Low | Corners and shelves |
| Door rack | Use the door | Low | Cabinet doors |
| Label maker | Label bins | Low | Everywhere |
| Rail with hooks | Free up counters | Low | Wall |
A weekend plan to organize a small kitchen
- Saturday morning: empty and purge the pantry, checking dates
- Saturday afternoon: sort pots, pans and dishes, and clean the cabinets
- Sunday morning: purge the drawers and tools and set up dividers
- Sunday afternoon: organize the fridge and freezer, add bins and labels, and set up a routine
Take photos before and after, and keep a list of what you need to buy. Do not buy organizers until you finish the purge, so you can choose the right sizes.
Organization by area
Counters
Keep a clear zone for prep and place only the items you use daily on the counter. Use a tray for oils and condiments. Keep a mat or a board where you work.
Cabinets
Use shelf risers and bins. Place heavy items low and light items high. Keep one cabinet for food and one for dishes near the dishwasher.
Drawers
Use dividers and keep items in the same drawer as their task. Keep a drawer for towels and one for wraps and bags.
Fridge and freezer
Use bins and keep a clear space for leftovers. Wipe shelves weekly and check dates.
Under the sink
Use a tension rod for spray bottles, a bin for supplies and a slim trash can. Keep a mat to catch leaks.
The pantry
Use clear containers and labels. Rotate older items to the front and keep a list.
Organizing for different households
A single person
Keep a small set of dishes and tools. Use stackable containers and buy smaller packs. Keep one pan for each job.
A couple
Share the space with clear zones. Use a shared list for shopping and a tray for the things you use together.
A family
Add a basket for school lunches and snacks and a low shelf for children’s cups. Use labels with pictures for children. Keep sharp or hot items out of reach.
A roommate household
Use labelled bins or shelves for each person and a shared shelf for staples. Agree on cleaning rules and keep a whiteboard for notes.
A rental
Use freestanding shelves, adhesive hooks and a cart. Keep the original hardware and avoid permanent changes. See apartment kitchen ideas.
Daily, weekly and monthly routines
Each day, wipe the counters, put dishes away and take out the trash if needed. Each week, check the fridge, plan meals, update the list and return stray items. Each month, review one cabinet and remove what you do not use. Each season, swap seasonal items and clean the shelves. A short routine keeps the kitchen under control and makes cooking more pleasant. Choose a time that fits your day, such as after dinner, and link the routine to an existing habit.
Meal planning that supports an organized kitchen
An organized kitchen is easier to keep when you know what you will cook. Plan five dinners a week, write the ingredients on a list and check the fridge and pantry before you shop. Buy only what you need, and choose recipes that share ingredients, such as one roasted vegetable used in a bowl, a wrap and a soup. Keep a “use first” bin in the fridge for items that will spoil soon and plan one meal around it. Batch-cook grains or beans on the weekend and store them in labelled containers. Planning reduces the amount of food you store, which means fewer containers, fewer shelves and less clutter.
Kitchen organization for people who cook a lot
If you cook daily, set up your kitchen like a workshop. Keep your most used tools in a crock or on a rail by the stove. Place a knife, a board and a bowl within one step of the sink. Use a prep tray to carry ingredients from the fridge to the board. Keep oils, salt and pepper at hand in a small tray, and store backups in a cabinet. Group pans by size and keep the two you use most on the front of the shelf. When you finish cooking, return each tool to its place while the meal rests, and wipe the counter before you serve. Organization helps skilled cooks work faster and with less stress.
Kitchen organization for people who rarely cook
If you cook rarely, you need less. Keep a minimal set of tools: one good knife, a cutting board, a skillet, a saucepan, a baking sheet, a few bowls and basic utensils. Store the rest of the gadgets in a box in a closet, and check in six months to see whether you missed them. Keep simple pantry items such as pasta, rice, canned tomatoes, oil and spices so that a meal is always possible. Use the space you save for a coffee corner, a small table or a plant, and let the kitchen reflect how you actually live.
Labels, lists and systems that stick
Make your organization visible. Put a label on each bin and a list on the inside of each cabinet door. A short inventory on the pantry door helps you shop and prevents duplicates. Use color to group items: blue lids for baking, green for snacks, red for things to use first. Take a photo of the pantry and the fridge once a week and keep it in your phone for shopping. A system only works if it is easy to understand, so choose clear words and simple categories. If a label confuses anyone in the household, change it.
Organizing small appliances and gadgets
Appliances take up more room than almost anything else. Group them by how often you use them: daily, weekly and rarely. Keep daily items, such as the kettle and the toaster, on a tray on the counter. Store weekly items, such as a blender or a mixer, in a low cabinet with a pull-out shelf. Store rare items, such as a bread machine or a slow cooker, on a high shelf or in a closet. Wind cords with a clip or a velcro strap and keep the attachments in a bag inside the appliance box. Before you buy a new gadget, check what it replaces and remove the old one.
Organizing food storage containers
Containers are the number one source of cabinet chaos. Keep only matching sets, with each lid fitting a container. Choose a few shapes, such as rectangles for the fridge and round ones for soups. Store containers nested with the lids in a separate bin or on a rack. Keep glass for reheating and plastic for lunches. When a container warps or stains, replace it. Use masking tape and a marker to label leftovers with the date, and make it a habit to eat the oldest food first.
Organizing the sink area
The sink is where clutter appears first. Use a dish rack that folds or sits over the sink, a small tray for soap and a sponge dish. Hang a towel on a hook inside the cabinet. Keep a basket under the sink for cleaning supplies and a small trash can for scraps. Wipe the faucet and the counter at the end of each day. If you have a window above the sink, add a small plant or herb, and keep the sill clear. A neat sink area makes the whole kitchen look cleaner.
If a bin keeps overflowing, do not buy a bigger one; instead remove half of what is in it and see how the kitchen feels after a week.
When something does not fit your routine, change the system rather than blaming yourself; a good kitchen setup bends to the way you actually cook, shop and clean.
One more habit that helps is a fifteen-minute pause at the end of each weekend to restock the baskets, wipe the shelves and put away anything that wandered, so the next week starts clean.
Common organization mistakes
- Buying bins before purging
- Storing items where you do not use them
- Overstuffing cabinets
- Using bins that are too big or too small
- Not labeling containers
- Storing heavy items on high shelves
- Forgetting the inside of doors
- Letting the system slide
Finish by taking a quick photo of each shelf and drawer, so you can restore the system after a busy week.

Organization checklist
- Purge one category at a time
- Group items by task
- Use risers, bins and dividers
- Use doors, walls and corners
- Label containers
- Organize the fridge and freezer
- Set up a coffee or tea station
- Do a weekly reset
FAQ
How do I organize a small kitchen with few cabinets?
Use walls, doors and a cart, and edit the items you own. Group by task and use stackable containers.
What is the best way to organize kitchen cabinets?
Use shelf risers, bins and dividers, and place items near where you use them. Keep heavy items low.
How do I organize kitchen drawers?
Use adjustable dividers, keep like items together and limit each drawer to one purpose.
How can I organize a small pantry?
Use clear containers, risers and labels. Group by category and rotate older items to the front.
How do I keep my kitchen counters clear?
Store small appliances in cabinets, use a rail and a tray and keep only daily items out.
How do I organize the fridge?
Use bins for each category, keep a spot for leftovers and put older food at the front.
How often should I organize my kitchen?
Do a quick reset weekly and a deeper review each season.
How do I keep the system going?
Keep it simple, label everything and make it easy to put things back.
Keep going: Explore our small kitchen ideas, small kitchen storage ideas and tiny kitchen ideas.
Save this guide for later
Pin the ideas you like to Pinterest so you can come back to them when you plan your space.