Small Kitchen Cabinet Organization Ideas: A Cabinet-by-Cabinet Plan
Quick answer: The best small kitchen cabinet organization ideas work one cabinet at a time. Put pots and pans in the cabinet nearest the stove, plates and bowls near the dishwasher or drying rack, spices within one step of the cooktop, and everyday items between knee and shoulder height. Add shelf risers to use the empty air above short stacks, hang light items on the back of doors, and use a turntable in deep corners. Measure first, empty the cabinet, and keep only what you use weekly at the front.
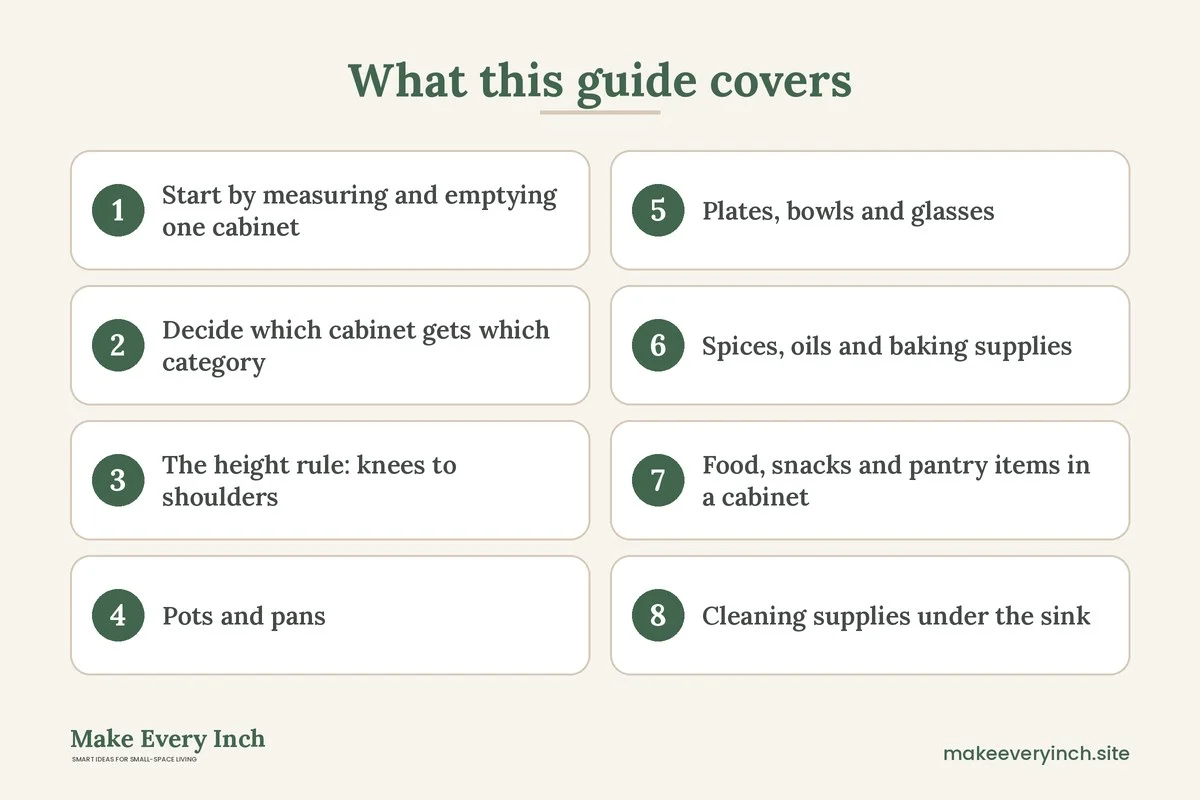
Small kitchen cabinet organization ideas are really a set of small decisions, repeated cabinet by cabinet. A tiny kitchen rarely has too little storage on paper. It usually has storage that is hard to reach, badly shaped for what lives in it, or filled with things that belong somewhere else. Pots stacked in a heap, plates with a gap of wasted air above them, spices that slide around in a corner: these are fixable problems. This guide walks through a typical small kitchen one cabinet at a time. It covers how to measure and empty a cabinet, a rule for deciding which cabinet gets which category, specific plans for pots, plates, spices, glasses, food and cleaning supplies, then shelf risers, door-back racks and lazy susans, a comparison table, three example kitchens, safety notes, a checklist and an FAQ. For the full overview, read our pillar guide on small kitchen ideas, along with the companion guides to small kitchen organization ideas and small kitchen storage ideas.
Start by measuring and emptying one cabinet
The most common mistake is buying organizers before measuring. Pick one cabinet to begin with and take everything out. Wipe the shelves and the inside of the doors. Then measure four things and write them on your phone or on a sticky note taped inside the door.
- Interior width from side to side, measured at the narrowest point, because hinges and face frames often steal an inch or two.
- Interior depth from the front edge of the shelf to the back wall. Many base cabinets are roughly 21 to 24 inches deep, while wall cabinets are often about 12 to 13 inches deep.
- Height between shelves, or from the shelf to the ceiling of the cabinet. Wall cabinets often have 12 to 16 inches of height per shelf, and base cabinets are often taller.
- Door opening size, because a door that opens only partway limits what you can slide in and out.
With the cabinet empty, sort the contents into three piles: used weekly, used a few times a year, and not used. Anything in the third pile leaves the kitchen. Anything in the second pile moves to the highest or lowest shelves, or out of the kitchen entirely to a closet or a storage bin. The first pile is what earns the prime space. This step alone often frees up an entire shelf, and it makes every later decision cheaper because you are only organizing what you actually use.
Decide which cabinet gets which category
Before filling any cabinet, decide what belongs where. The rule is simple: store things where you first use them. A small kitchen has fewer steps between stations, but each step still costs time, and a good cabinet map saves dozens of reaches a day.
Think of the kitchen as four stations: cooking, prep, cleanup and serving. Each station gets the cabinet nearest to it.
- Cooking station (around the stove): pots, pans, lids, cooking oils, spices, spatulas, oven mitts and a trivet.
- Prep station (the main counter): cutting boards, mixing bowls, measuring cups, a colander and baking sheets.
- Cleanup station (around the sink and dishwasher): dish soap, sponges, a drying rack, and ideally the plates and glasses, so unloading is a one-step job.
- Serving station (near the table or the pass-through): plates, bowls, cutlery and mugs, if they are not already beside the dishwasher.
If your kitchen is a single run of cabinets, the same logic applies in a line: stove at one end of the story, sink at the other, and plates close to the sink. When cabinet placement works against this rule, as with a plate cabinet across the room from the dishwasher, swap the contents of two cabinets. Moving mugs from the left side to the right is free, and it often changes how the whole kitchen feels.
The height rule: knees to shoulders
Cabinets have good and bad zones. The easiest reach is the band between roughly knee height and shoulder height. Everything you use daily belongs in that band. The top shelf of a wall cabinet, which many adults cannot reach without a step stool, is for the rarely used. The floor of a deep base cabinet is the hardest place to reach, because you bend and look into a dark space, so heavy cookware that you use often should go in a drawer or on a pull-out shelf instead, if you have one.
Place heavy items low and light items high. A stack of ceramic plates on a high shelf is a safety risk, and a bag of paper cups on the floor of a base cabinet wastes the best space. If you have small children or share the kitchen with someone shorter, adjust the zones, and keep sharp tools, cleaning products and breakable glass out of children’s reach.
Pots and pans: the heaviest, trickiest cabinet
Cookware is the hardest category in a small kitchen because it is bulky, heavy, awkward and often stored in a heap. The goal is to see every item at a glance without lifting a stack.
Vertical storage for pans and lids
Standing pans on their sides, like records in a crate, is the single biggest upgrade for a base cabinet. A tension-based or freestanding rack with slots keeps baking sheets, cutting boards and skillets upright, so you pull out the one you want without moving the rest. Lids can stand in a small rack or in a narrow holder on the inside of a door. Putting lids and pans in two separate systems avoids the pile that forms when lids slide off the pots.
Nest and stack with protection
Pots that nest inside each other save the most space. If your set does not nest, choose one pot that does most jobs and a second smaller one, then retire the rest. Place a felt pad, a paper towel or a thin cloth between stacked non-stick pans, because stacking can scratch coatings. Heavy cast iron pieces are best kept on a low shelf and stacked no more than two high.
Pull-out or sliding options
If your base cabinet is deep, a sliding shelf or a pull-out frame brings the back of the cabinet to you. Many are tool-free and sit on the existing shelf, so they suit renters. Check the weight limit on the product, as a full set of cookware can be heavy, and make sure the cabinet door opens far enough for the shelf to slide out.
Plates, bowls and glasses
Dishes are best placed beside the dishwasher or the drying rack, in a cabinet that opens fully. Most small households need far fewer plates than they own. A typical rule is to keep one set per regular household member, plus four to six for guests, and store the rest elsewhere.
Use a shelf riser for plates
Plates stacked directly on a shelf leave the air above them unused. A two-level shelf riser or a half-shelf lets you stack a second set above the first, so a single shelf holds two layers. Pick a riser that is slightly shorter than the clearance, so the top layer does not touch the cabinet above. Keep dinner plates and salad plates on separate levels, so a daily dish is always on top.
Bowls and mugs
Bowls stack well and take little room, but mugs waste space because of their handles. A hook rail or a mug rack under a wall cabinet lifts mugs off the shelf. Alternatively, a small tiered riser holds mugs in rows, so each one is visible and the front row does not block the back.
Glasses and stemware
Glasses go on the shelf nearest the fridge or the sink, where you fill them. Taller glasses fit best on the lowest shelf of a wall cabinet. A stemware rack, which clips to the underside of a shelf, hangs wine glasses upside down and frees the shelf below. Do not stack glasses inside each other unless the manufacturer says it is safe, because they can stick or break.
Spices, oils and baking supplies
Spices cause more small-kitchen frustration than almost anything else because the containers are small, mismatched and easy to lose. A good spice system has three goals: see every label, reach any jar without moving another, and keep them close to the stove but away from heat.
- Tiered riser. A three-step shelf makes every jar visible in a shallow cabinet. Place the most-used jars on the front step.
- Door-back rack. A narrow rack on the inside of a cabinet door holds jars in a single layer, using space that is otherwise empty. Make sure the jars do not hit the shelf when the door closes.
- Drawer insert. If a drawer sits next to the stove, use an angled insert and label the lids, not the sides, so you can read them from above.
- Magnetic tins. Tins with magnetic backs stick to a metal board inside a door. This works in any cabinet with a steel backing sheet, and you can use adhesive-backed metal strips if the door is wood.
Group spices by use rather than by alphabet. A baking set, a savory set and a quick-reach set for everyday salt, pepper and oil keep the most common items together. Heat and light shorten the life of dried spices, so avoid the cabinet directly above the stove if you can, and keep oils out of sunny spots.
Food, snacks and pantry items in a cabinet
Without a pantry, one or two wall cabinets become the food store. Decant loose items such as rice, pasta and flour into clear, stackable, square containers, which waste less space than round ones. Square containers on a shelf use about 20 percent more of the surface than round ones of the same capacity, as a rough guide. Label each with the contents and, if useful, the cooking time or the expiry month.
Use shallow bins as drawers on a shelf. Group snacks in one bin, baking supplies in another and breakfast items in a third. When you want the snacks, you pull out one bin rather than rummaging through every box. For more depth on this topic, read our guide to small kitchen pantry ideas.
Cleaning supplies under the sink
The cabinet under the sink is awkward because of the pipes, but it is also a big cavity. A two-tier sliding organizer built around the pipe, or a pair of stackable bins placed on either side, makes the space usable. Hang a spray bottle holder on the inside of the door, and keep a small bin for sponges and gloves. Store cleaners in a closed bin, away from food and out of reach of children and pets. Never mix cleaners, and keep any item with a strong smell away from open food.
If the cabinet has ever been damp, line the floor with a washable mat and check for leaks every few months. A small leak under a sink is easy to miss when the cabinet is packed.
Shelf risers: doubling the space you already have
Shelf risers are the most flexible small kitchen cabinet organization idea because they suit almost every category. A riser is a platform, a rack or a stepped stand that lifts part of what you store, so you stack in two layers rather than one. Use a riser when the gap above a stack is more than about 4 to 5 inches, and avoid it when the gap is smaller than the item you want to put underneath.
- Stepped risers for spices, cans and small jars, where the back row sits higher than the front.
- Single-level risers for plates and bowls, which create a second layer on one shelf.
- Expandable risers that you can widen to fit odd shelf widths.
- Under-shelf baskets that clip to the underside of a shelf and hang into the empty space below it, good for wraps, foil and lightweight packets.
Always check the weight rating before loading a riser, and set it on a non-slip liner so it cannot slide when you open the door.
Door-back storage: the free real estate
The inside of every cabinet door is unused wall. Hang a slim rack, a set of hooks or a rail to hold items that would otherwise clutter a shelf. Good candidates include cutting boards, foil and wrap boxes, pot lids, spice jars, measuring spoons, a small trash bag dispenser and cleaning cloths.
Door-back storage comes with three rules. First, measure the clearance between the door and the shelf edge, because a rack that is too thick will stop the door from closing. Second, check the hinge type, since some hinges need clearance on one side. Third, choose adhesive hooks or over-the-door racks rather than screws if you rent. Adhesive products vary in what they hold, so read the weight limit and test on a hidden spot first. Ask your landlord before using screws or drilling anything into a cabinet, and never drill into a rental without permission. For a deeper look at this approach, see our guide to no-drill storage ideas for renters.
Lazy susans and corner cabinets
Corner cabinets are the biggest source of lost space in a small kitchen. Items slide to the back and disappear. A turntable, often called a lazy susan, solves this problem by letting you spin the contents to the front.
- Round turntable on a shelf. The cheapest and simplest. Choose a diameter about 2 inches smaller than the narrowest width of the shelf, so the edge does not catch on the door.
- Two-tier turntable. Doubles the surface for oils, jars and sauces. Check that the top tier clears the shelf above.
- Kidney-shaped or pie-cut turntable. Designed for blind corner cabinets, where the door opening is much smaller than the cabinet itself.
- Pull-out corner system. A more complex solution that is often permanent, so ask the landlord before installing anything that requires fixing to the cabinet.
Turntables also work in the middle of a wall cabinet, for oils, vinegars, syrups and sauces. Keep the rim lip high enough that bottles do not slide off, and place heavy bottles near the center so the base does not tip as you spin. A turntable full of glass bottles is heavy, so use a low shelf where you can control the load.
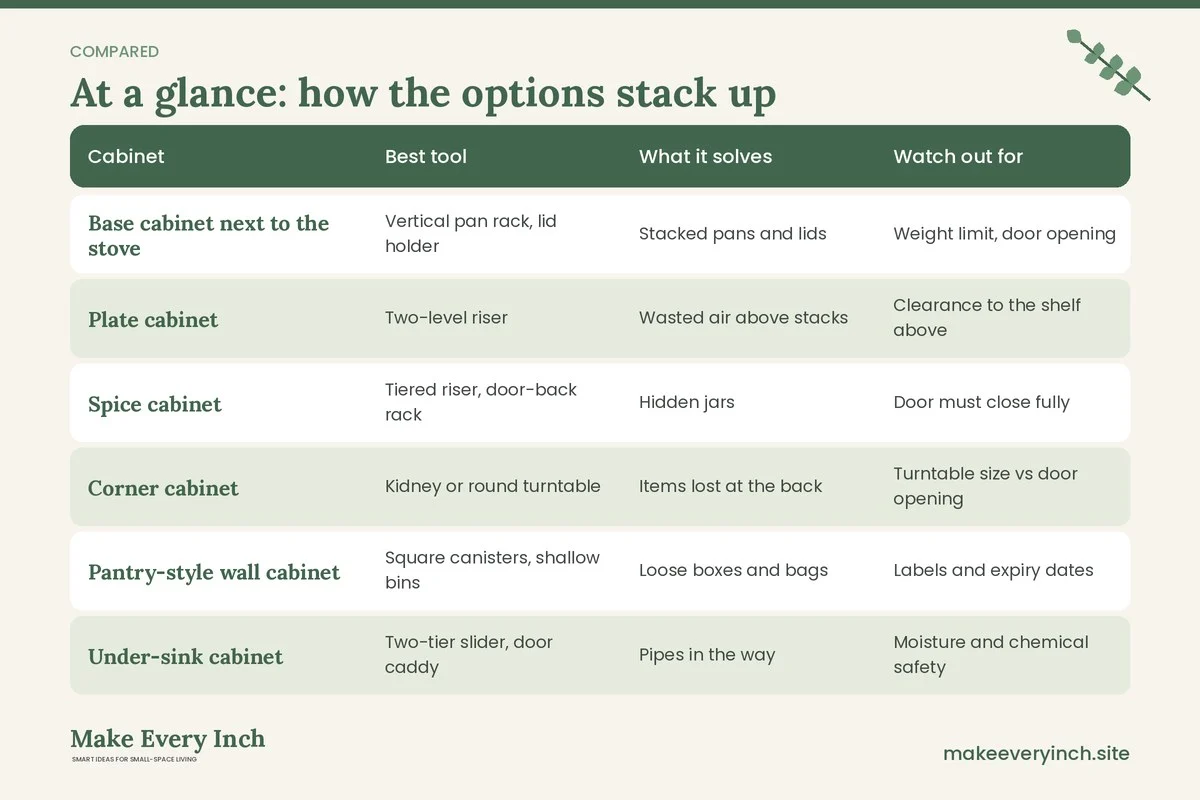
Comparison table: which tool for which cabinet
| Cabinet | Best tool | What it solves | Watch out for | |
|---|---|---|---|---|
| Base cabinet next to the stove | Vertical pan rack, lid holder | Stacked pans and lids | Weight limit, door opening | |
| Plate cabinet | Two-level riser | Wasted air above stacks | Clearance to the shelf above | |
| Spice cabinet | Tiered riser, door-back rack | Hidden jars | Door must close fully | |
| Corner cabinet | Kidney or round turntable | Items lost at the back | Turntable size vs door opening | |
| Pantry-style wall cabinet | Square canisters, shallow bins | Loose boxes and bags | Labels and expiry dates | |
| Under-sink cabinet | Two-tier slider, door caddy | Pipes in the way | Moisture and chemical safety | |
| High shelves | Labeled bins | Rarely used items | Weight and step stool safety |
Three example small kitchens
Example 1: The rental galley, 8 feet of counter
Mira rents a narrow galley with four wall cabinets and four base cabinets. She starts by swapping her mug cabinet with her plate cabinet, because the plates were across the room from the dishwasher. She puts a vertical rack in the base cabinet beside the stove for pans, a lid holder inside the door, and a two-level riser in the plate cabinet. A turntable in the corner holds oils and sauces. Everything is freestanding or adhesive, so nothing needs fixing to the cabinets. The result is not extra space but easier reach and should make unloading the dishwasher a shorter job.
Example 2: The studio with one wall of cabinets
Jonas has a studio with a single wall of cabinets, which means the kitchen is visible from the sofa. He uses matching square containers and a consistent label style so open shelves look tidy when the doors are left open. Spices go on a door-back rack in the cabinet above the stove, and a shallow bin system sorts snacks, baking and breakfast items. He keeps seasonal items, like a roasting pan, in a bin on the top shelf, with a small step stool nearby that stores flat behind the fridge.
Example 3: The family kitchen with a corner cabinet
A family of four has a compact L-shaped kitchen with a deep blind corner. They install a kidney-shaped turntable in the corner for oils, flour and cereal, and use a second, round turntable in a base cabinet for spices and baking. A riser holds the children’s plastic cups at kid height on a low shelf, while cleaning products and sharp tools move to a high cabinet. They label bins with pictures so the children can help put things away.
Safety notes
- Anchor tall or loaded shelving units to the wall if they could tip. Ask the landlord before drilling into walls or cabinets, and never drill without permission.
- Do not overload a riser, rack or door-back hook. Follow the weight limits, and put the heaviest items on the lowest shelf.
- Store cleaning products in their original, labeled containers. Keep them away from food, and out of reach of children and pets.
- If you add a plug-in light inside a cabinet, use a product intended for that use, keep cords away from heat and water, and do not run cords through hinges.
- Keep flammable items such as paper towels, oven mitts and bags away from the stove and its hot surfaces.
- Use a stable step stool for high shelves, and never stand on a counter or a chair.
- Check shelf pegs and the cabinet’s own weight rating before stacking heavy items, since shelves can sag or fall.
Common mistakes to avoid
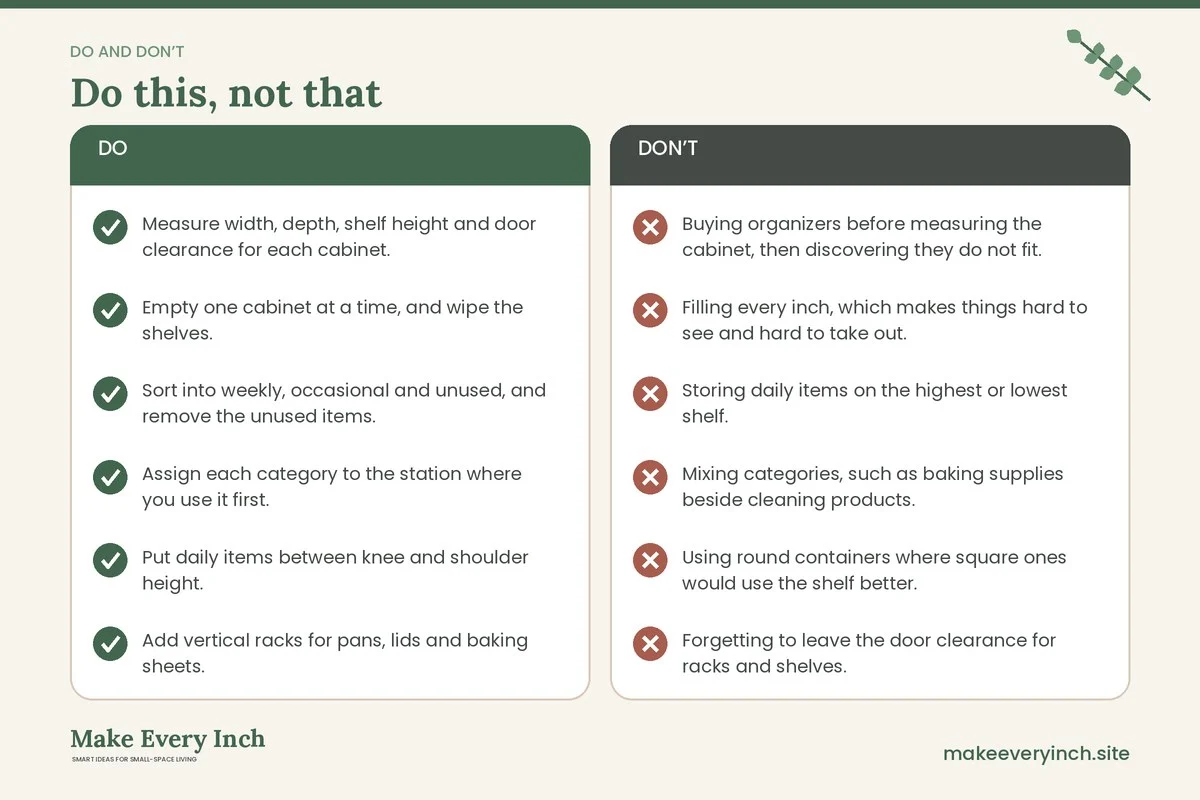
- Buying organizers before measuring the cabinet, then discovering they do not fit.
- Filling every inch, which makes things hard to see and hard to take out.
- Storing daily items on the highest or lowest shelf.
- Mixing categories, such as baking supplies beside cleaning products.
- Using round containers where square ones would use the shelf better.
- Forgetting to leave the door clearance for racks and shelves.
- Keeping duplicates of items, such as three whisks, that you rarely use.
- Not labeling bins, so the system falls apart after a month.
Cabinet organization checklist
- Measure width, depth, shelf height and door clearance for each cabinet.
- Empty one cabinet at a time, and wipe the shelves.
- Sort into weekly, occasional and unused, and remove the unused items.
- Assign each category to the station where you use it first.
- Put daily items between knee and shoulder height.
- Add vertical racks for pans, lids and baking sheets.
- Add a riser where there are 4 to 5 inches of unused height.
- Use door-back racks for light items, with the clearance checked.
- Place a turntable in corner cabinets or for oils and sauces.
- Decant dry foods into square, labeled containers.
- Check weight limits and door closure before the final fill.
- Photograph the finished cabinet and put the photo on your phone to help reset it.
- Review after two weeks, and adjust anything you keep reaching past.
Frequently asked questions
How do I organize kitchen cabinets when I have very little space?
Start by removing what you do not use, then assign categories to stations. Use vertical racks, shelf risers and door-back storage to add layers rather than area. Keep daily items between knee and shoulder height, and group by task, such as baking or coffee.
What is the best way to store pots and pans in a small cabinet?
Stand pans on their sides in a rack so you can reach any pan without lifting others. Nest pots that fit together, store lids in a separate holder or on the inside of the door, and keep the heaviest pieces on the lowest shelf.
Do shelf risers really make a difference?
They can, when the gap above a stack is large enough. A riser turns one layer into two, which can nearly double the capacity of a shelf of plates, bowls or cans. Measure the clearance first and check the weight rating.
Are lazy susans worth it in a corner cabinet?
In many kitchens, yes. Items in a deep corner are easy to forget, and a turntable brings them to the front with one spin. Pick the right shape for your cabinet and keep the load balanced.
Can I add door-back storage in a rental?
Often yes, using adhesive hooks or an over-the-door rack, but check your lease and the product’s weight limit first. Avoid screws and drilling unless the landlord allows them.
How often should I reorganize my kitchen cabinets?
A quick reset every few months, and a full review each season or when your habits change. If you keep reaching past an item, move it. A cabinet should follow how you cook, rather than the other way round.
Should I buy matching containers?
Matching containers save space and look tidy, but they are not required. If you buy new, choose square, stackable shapes that fit your measured shelf. Reusing jars and tubs from your own kitchen is a good, low-cost start.
Putting it all together
Good cabinet organization in a small kitchen is a sequence rather than a shopping trip. Measure, empty, sort, assign stations, then add only the tools that solve a clear problem. Start with the cabinet that annoys you most, finish it fully, and then repeat. After a few weeks the whole kitchen will follow the same logic, and the system will be easy to keep up.
Keep going: Keep going with our guides to small kitchen drawer organization ideas, small kitchen counter organization and vertical storage ideas, then browse the small kitchen ideas pillar for the full plan.
Save this guide for later
Pin the ideas you like to Pinterest so you can come back to them when you plan your space.