How to Choose the Best Over-the-Toilet Storage: 19 Checks
Quick answer: The best over-the-toilet storage fits the exact space above your tank with room for the lid, the flush handle and a way to reach the shutoff valve. Measure width, depth and height, choose moisture-resistant materials, anchor tall freestanding units, and match the style to your lease and to everyone who uses the bathroom.
The best over-the-toilet storage is the unit that disappears into your bathroom routine: the lid lifts, the handle flushes, nothing drips on your towels and nothing tips when someone leans on it. The space above a toilet is one of the few spots in a small bathroom that is usually empty, which is why it is so tempting, and why mistakes are so common. A shelf that blocks the lid, a cabinet that rusts in a year or a tall frame that wobbles can turn a clever idea into daily irritation. This guide shows you how to choose by measuring, comparing construction, planning for stability and testing the space with tape. It includes a comparison table, three example bathrooms, budget ranges, mistakes and a checklist. For wider ideas, see our guide to tiny bathroom storage ideas.
Disclosure: this guide is educational, not a product review. The site does not test or rank specific products, so use the checks here to evaluate any listing you find.
Start with a clear picture of the space
Open the bathroom door and look at the toilet from the side. You are looking at a box: the width of the tank, the depth from the wall to the front of the tank, and the height from the top of the tank to the ceiling, a light fixture or a window sill. Add the items that live in that box, such as the flush handle, the tank lid, a supply line and the wall behind it. Then add what you want to store. If your plan is towels and spare toilet paper, you need very different shelf depths than if you want to store cleaning bottles or a hamper basket.
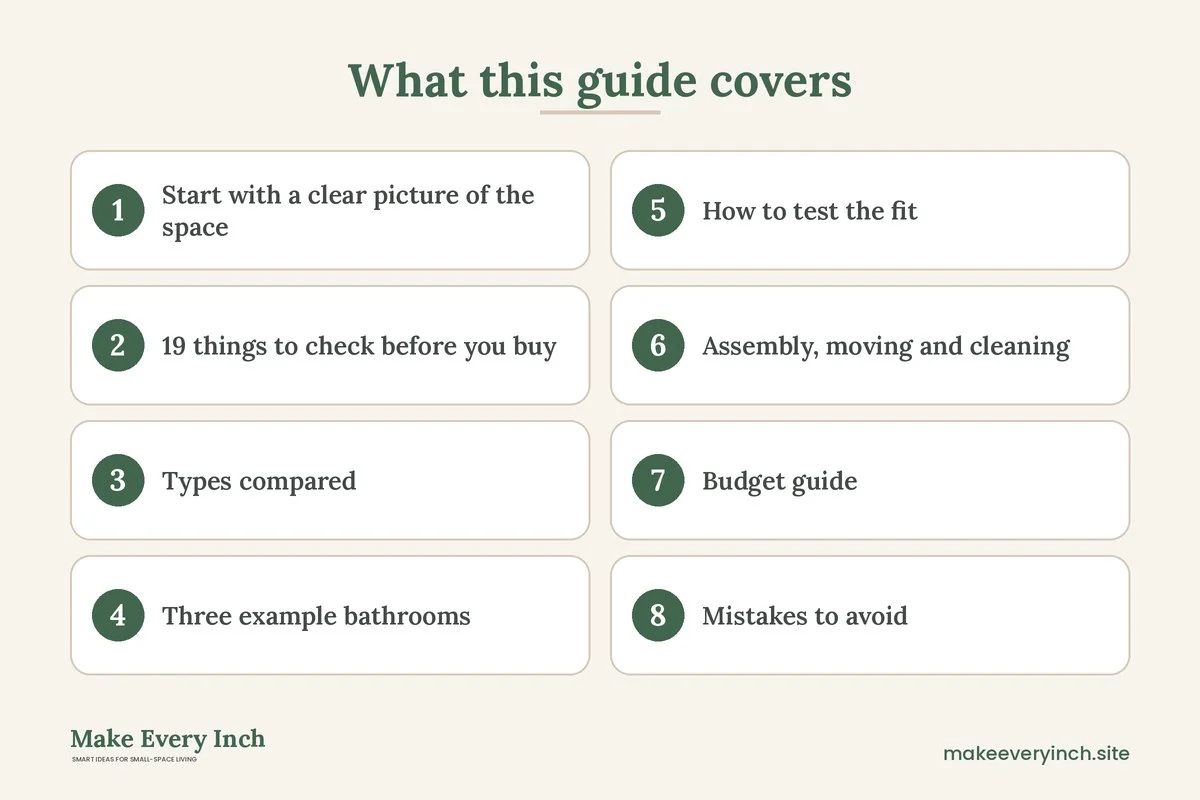
19 things to check before you buy
Style and mounting
1. Freestanding or wall-mounted
A freestanding unit stands on the floor around the toilet with legs, a frame or a spanning shelf. It needs no drilling, but it uses floor space beside the toilet and can be knocked. A wall-mounted unit fixes to the wall above the tank and keeps the floor clear, but needs screws and anchors. Choose freestanding for rentals and wall-mounted when the lease allows and the wall is solid.
2. Over-the-tank shelf, cabinet or ladder
Shelves are open and show everything. Cabinets with doors hide clutter and are better for products that look messy. Ladder-style units lean on the wall and provide several shelves in a slim footprint. Pick the style for what you store, not just for looks, and check how easy it is to see and reach the top and bottom items.
3. Spanning or side-leg frames
Spanning frames place the legs on either side of the toilet and put the shelves above the tank. Check the width between the legs against the widest part of your toilet, which is often the base or the lid hinge, not just the tank. A frame that touches the bowl can rock and scratch the porcelain.
Measurements and clearances
4. Width over the tank
Most tanks are between about 14 and 22 inches wide, but some round-front and corner models differ. Measure at the widest point, including the lid, and add the width of the unit’s legs. Leave a little air on each side so you can clean around the unit.
5. Clearance above the tank for the lid
You need enough room to lift the lid straight up or slide it back. Many tank lids need several inches of lift, and some are heavy porcelain. Measure from the tank top to the underside of the first shelf and allow room for your hands, not just the lid.
6. The flush handle and the button
Side-mounted handles stick out about 3 to 5 inches, and top buttons are flat. Make sure no shelf, rail or leg blocks the handle’s swing, and that there is a way to reach it without banging your knuckles. A unit with a notch or an offset leg can work around a side handle.
7. Depth from the wall
The distance from the wall to the front of the tank is often between 6 and 10 inches at the tank and more at the bowl. A deep shelf above the tank can overhang the seat, so check that you can sit down without leaning forward into it and that the seat lid can rest open against the wall.
8. Height below the ceiling, window or light
Measure from the floor to the lowest ceiling feature above the toilet, including sloped ceilings, vents and sconces. Leave a gap at the top for dusting and airflow, and make sure a tall unit does not cover a window latch, a switch or an outlet that you need.
9. Distance to the walls and the door
Sit on the toilet and measure the space on each side. Building codes often expect about 15 inches from the center of the toilet to the nearest wall or fixture, so a legged unit can crowd side clearance. Check that the bathroom door can open without hitting the unit.
Materials and moisture
10. Metal frames and rust
Steel frames are strong and slim, but bathrooms are humid. Look for powder-coated, galvanized, stainless or chrome finishes. Bare steel and thin plating can bubble where the finish chips. Check the feet and the joints, which sit in damp air and get splashed during cleaning.
11. Wood, bamboo and engineered wood
Solid hardwood and bamboo with a sealed finish tolerate humidity better than raw wood. Particleboard and fiberboard can swell if the edge sealing fails, particularly at the bottom shelf and the feet. Ask how the edges are finished and wipe splashes quickly.
12. Plastic and resin
Plastic and resin do not rust or swell and are easy to wipe clean. Thin plastic can flex under load, so check the shelf thickness and weight rating. Choose a finish that does not stain, since cleaning products and hair dye can mark light colors.
13. Hardware and fasteners
Screws, hinges and hooks should resist rust, and plastic hinges on doors are often the first failure point. Check whether the fasteners are included and whether the assembly relies on cam locks that loosen with humidity changes.
Stability and safety
14. Tip-over risk and anchoring
Tall, narrow freestanding units can tip if overloaded at the top, or if a child or pet climbs them. Many come with a wall strap or bracket, and you should use it. If you rent, look for anchor options that leave small holes, or choose a lower unit. Place heavier items on the lower shelves and light items on the top.
15. Weight rating per shelf
Check the rating per shelf as well as the total, and compare it with the weight of your items. A full set of towels is light, but a bottle of cleaner, a large jar of bath salts or a wet basket can add up. Do not place heavy items above the tank lid, because a dropped item can crack porcelain.
16. Feet, levelers and uneven floors
Bathroom floors slope slightly toward drains, and tile can be uneven. Adjustable feet help level the unit. Rubber tips protect tile and add grip, but check that they do not trap moisture underneath.
Living with the unit
17. Tank access and plumbing
You or a plumber must reach the tank lid, the fill valve and the shutoff valve at the wall, usually behind or beside the toilet. A unit that is bolted tightly around the tank can make a repair a nuisance. Choose a design that lifts off, slides aside or has a removable shelf, and keep a clear route to the shutoff.
18. Rentals and lease rules
Ask what your lease allows. Drilling can mean patching and repainting, so many renters prefer freestanding units or adhesive-free solutions. If you do use wall anchors, keep the fasteners and note their positions so you can fill holes at move-out. Our renter friendly bathroom ideas cover more no-damage options.
19. Accessibility and daily use
Think about everyone who uses the bathroom. A shelf placed too high may be out of reach for a child or a wheelchair user, and a bulky unit can block a grab bar or a transfer space. Keep frequently used items between knee and shoulder height, and leave room for any support bars.
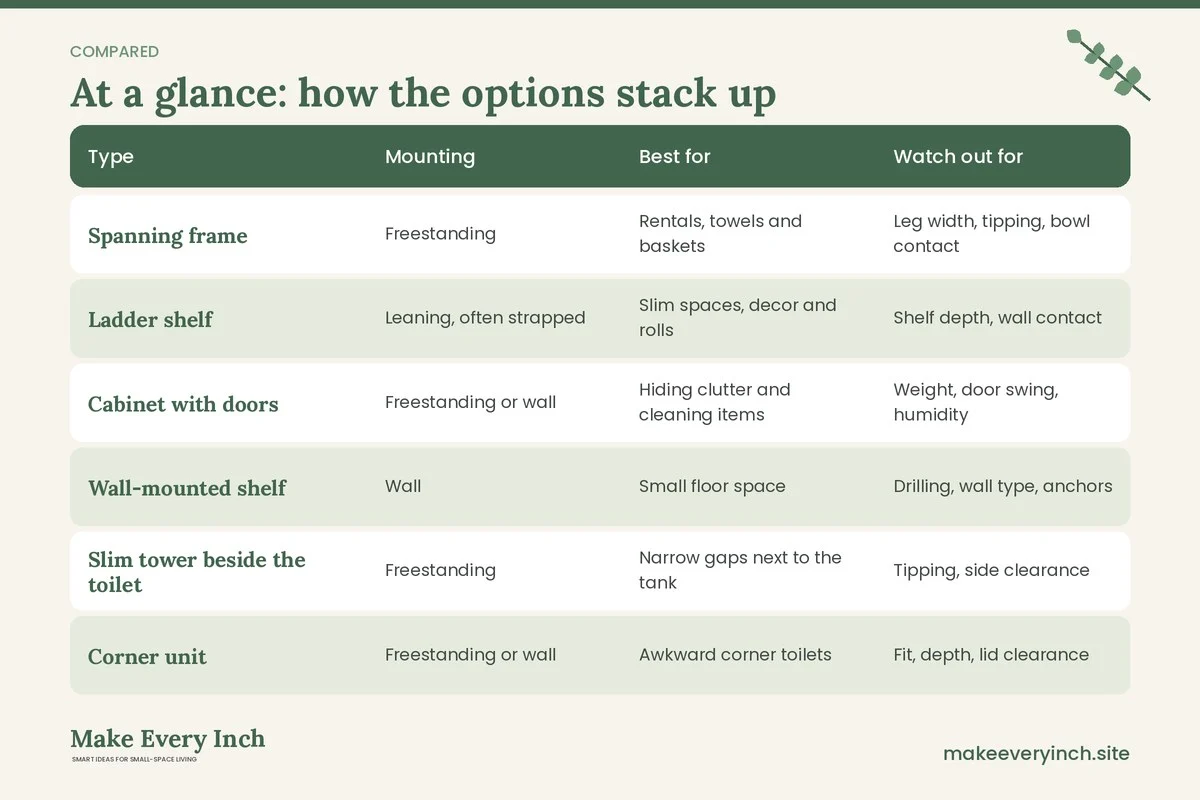
Types compared
| Type | Mounting | Best for | Watch out for |
|---|---|---|---|
| Spanning frame | Freestanding | Rentals, towels and baskets | Leg width, tipping, bowl contact |
| Ladder shelf | Leaning, often strapped | Slim spaces, decor and rolls | Shelf depth, wall contact |
| Cabinet with doors | Freestanding or wall | Hiding clutter and cleaning items | Weight, door swing, humidity |
| Wall-mounted shelf | Wall | Small floor space | Drilling, wall type, anchors |
| Slim tower beside the toilet | Freestanding | Narrow gaps next to the tank | Tipping, side clearance |
| Corner unit | Freestanding or wall | Awkward corner toilets | Fit, depth, lid clearance |
Three example bathrooms
The rental half-bath with a low ceiling
A renter with a half-bath and an 8-foot ceiling needs a freestanding spanning frame that leaves a few inches at the top. Measure the lid lift and the handle swing, choose rust-resistant finishes and use a strap if the frame is tall. Items on the lower shelf should be heavier, and a basket on top can hold spare rolls. See also small apartment bathroom ideas.
The narrow bathroom with a window above the toilet
A narrow bathroom has a window just above the tank. A unit that blocks the sill would trap moisture and block light, so choose a shorter shelf or cabinet that ends below the sill. Mount it only if the wall is solid and the lease allows, or choose a slim freestanding unit. Our narrow bathroom ideas show alternatives for a long, skinny room.
The family bathroom with kids
A family bathroom needs closed storage for cleaners and medicines, out of reach of small children. A wall-mounted cabinet with a latch, or a tall unit that is firmly anchored, keeps products away from curious hands. Choose rounded corners, sturdy shelves and a unit that does not invite climbing. Keep the lower shelves for towels and the upper cabinet for products that need to be locked.
How to test the fit
The tape-on-floor and wall test
Use painter’s tape to outline the unit’s footprint on the floor around the toilet, and tape its width and top height on the wall. Include the legs, the shelves and any doors. Sit on the toilet, lift the lid, flush and clean around the tape. If any step feels awkward, the unit is too big.
The paper-template test
Cut paper or cardboard to the size of each shelf and tape them to the wall at the planned heights. Place your real items on a nearby stool to check that they fit under each shelf and that you can reach the top one. Measure the lid lift by holding the lid open and measuring from the tank top to the highest point.
The shake test after assembly
Once built, push the top of the unit gently from several directions and check that nothing twists. Fix any wobble by tightening fasteners and adjusting feet. If it still rocks, anchor it or return it.
Assembly, moving and cleaning
Assembly
Assemble in the bathroom floor space if you can, since a built unit may not fit through the door. Tighten bolts loosely, square the frame and then tighten fully. Recheck in a week, since humidity and use can loosen joints.
Moving
Disassemble tall units before moving, and keep the fasteners in a labeled bag. Take photos before you take them apart so you can rebuild the same layout.
Cleaning
Wipe shelves weekly with a damp cloth, and dry metal parts to slow rust. Use mild cleaners on wood and sealed finishes, and move the unit to clean the floor under it. Check feet and joints for rust or swelling every few months, and touch up chips in the finish at once.
Budget guide
Prices vary widely by size, material and retailer, so treat these as hedged ranges, not quotes.
Lower range
Often under about $50. Expect lighter frames, thin shelves and simple finishes. Suitable for towels and rolls, but check the weight rating and the rust protection.
Middle range
Often roughly $50 to $150. This range commonly brings sturdier frames, better finishes, cabinets and adjustable feet, which suit most households.
Higher range
Often $150 and up. Expect solid wood, stronger hardware and cabinets with soft-close doors. Choose this range for long-term use and heavier storage.
Mistakes to avoid
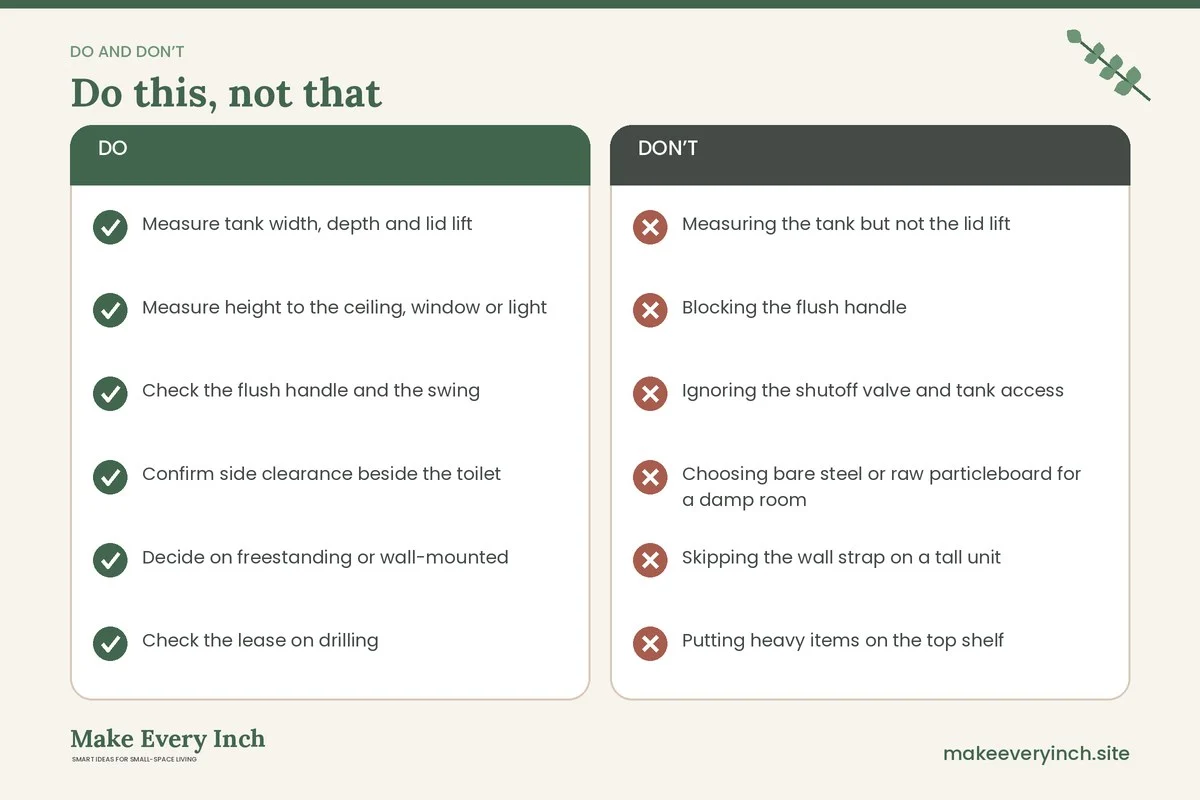
- Measuring the tank but not the lid lift
- Blocking the flush handle
- Ignoring the shutoff valve and tank access
- Choosing bare steel or raw particleboard for a damp room
- Skipping the wall strap on a tall unit
- Putting heavy items on the top shelf
- Covering a vent, outlet or window latch
- Forgetting the door swing
- Placing decor on the lid area where it can fall
Over-the-toilet storage checklist
- Measure tank width, depth and lid lift
- Measure height to the ceiling, window or light
- Check the flush handle and the swing
- Confirm side clearance beside the toilet
- Decide on freestanding or wall-mounted
- Check the lease on drilling
- Choose moisture-resistant materials
- Check the weight rating per shelf
- Plan to anchor tall units
- Keep a clear route to the shutoff valve
- Tape the footprint and test it
- Confirm the return window
FAQ
How much space do I need above the toilet?
You need room to lift the lid, reach the handle and clean. Measure the tank, add the lid lift and leave a gap at the top for dusting and air.
Is freestanding or wall-mounted better?
Freestanding suits rentals and avoids drilling, while wall-mounted keeps the floor clear. Choose based on your lease and wall type.
Will over-the-toilet storage rust?
Bare steel can rust in a humid bathroom. Look for powder-coated, galvanized or stainless finishes and wipe splashes.
Do I need to anchor a tall unit?
Yes, for tall and narrow units, particularly with children or pets. Use the supplied strap, or choose a lower unit if you cannot drill.
Can I still reach the shutoff valve?
You should be able to. Choose a unit that lifts off or moves aside, and keep a clear route to the valve.
What can I safely store above the tank?
Towels, spare toilet paper and light baskets work well. Keep heavy items low, and keep medicines and cleaners in a latched cabinet away from children.
What materials hold up best in a bathroom?
Sealed hardwood, bamboo, coated or stainless metal and resin are generally more resistant than raw particleboard or bare steel.
Will it fit a round or elongated toilet?
Check the measurements of the bowl and tank, not just the shape. Elongated bowls extend further, which matters for depth and for legs placed beside the bowl.
Keep going: Keep planning with our small bathroom shelving ideas, small bathroom organization ideas and small bathroom ideas.
Save this guide for later
Pin the ideas you like to Pinterest so you can come back to them when you plan your space.