How to Choose the Best Narrow Shoe Cabinets: 19 Things to Check
Quick answer: To choose the best narrow shoe cabinets, measure the wall width, the door swing and the walking clearance, then compare tilt-out and shelf designs by how many pairs they really hold. Check the depth against your largest shoes, the boot height, the ventilation, the shelf weight rating and whether it can be anchored to the wall.
The best narrow shoe cabinets are the ones that fit the wall, the door swing and the shoes you actually own, and the number printed on the box is often the weakest guide. A cabinet can look slim in a photo and still block an entry, stick out into a hallway or hold half the pairs it claims. This guide gives you 19 checks, a pairs capacity method, a decision table by entry size, a paper-template test, three example scenarios, budget ranges, common mistakes, a checklist and an FAQ. For wider ideas on managing footwear, see our guide to small shoe storage ideas.
This guide is educational, not a product review. The site does not test or rank specific products, so there are no brand names or picks here, only the measurements and checks that help you judge any cabinet yourself.
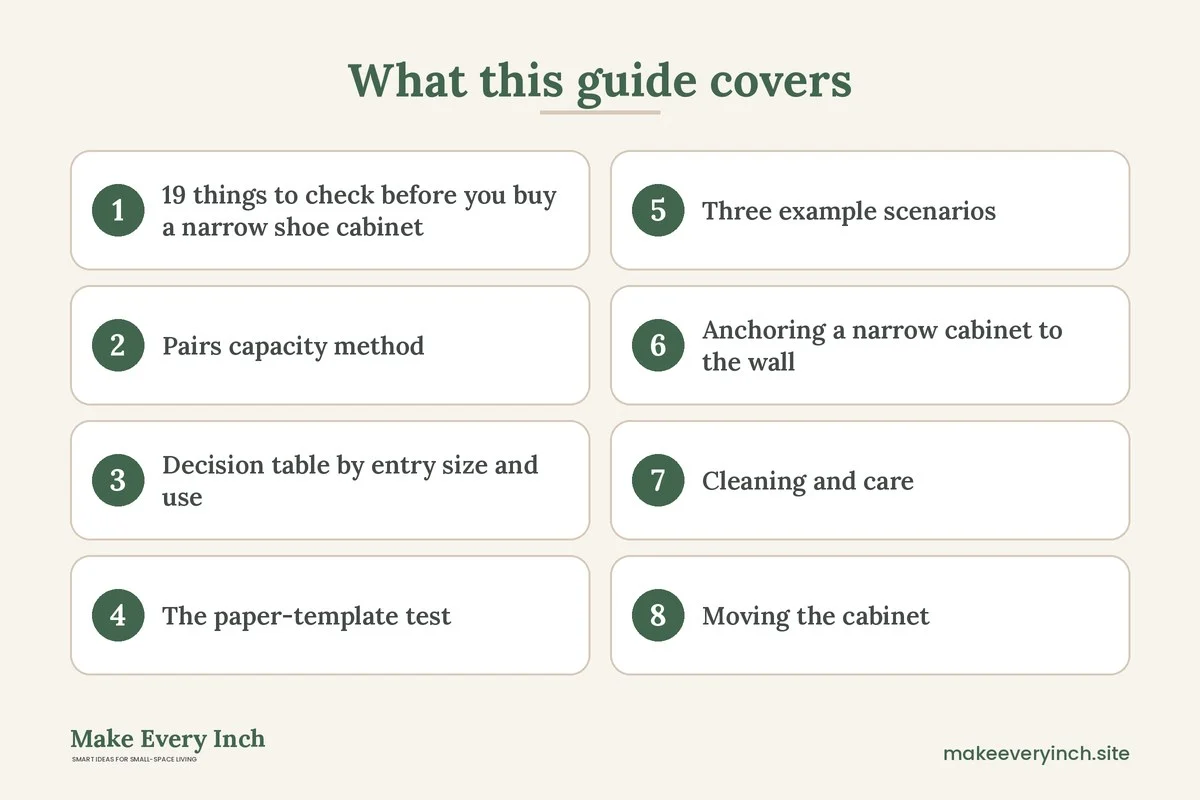
19 things to check before you buy a narrow shoe cabinet
1. Measure the wall and the path
Measure the width of the wall, the height to any shelf or switch, and the distance from the wall to the opposite side of the room or hall. Most people need a clear walking path of about 30 to 36 inches, so subtract what the cabinet takes from that. A cabinet that leaves less than that will bump knees and bags every day.
2. Choose the depth first
Depth does the most to decide how much space the cabinet takes in a narrow entry. Tilt-out designs are often around 6 to 9 inches deep because the shoes lie at an angle, while a shelf cabinet needs about 10 to 14 inches for a full shoe. Measure your longest everyday shoe, and check the interior depth, not just the outside.
3. Tilt-out versus shelf
A tilt-out cabinet has flip-down drawers or doors and stores shoes on a slant, which saves depth. A shelf cabinet has flat shelves behind a door or open, and it handles tall or bulky shoes more easily. Tilt-outs suit flats, sneakers and low heels, and shelves suit a mixed household with boots and work shoes. Many people end up wanting a cabinet with a tilt-out section and a shelf or two.
4. Check the interior height per compartment
For each tilt-out drawer, find the usable opening height. A slim drawer may fit a flat but jam on a sneaker with a thick sole or a shoe with a heel. Bring your thickest everyday pair to measure. If the listing does not give an interior height, ask the seller or choose a design with an adjustable divider.
5. Work out pairs capacity yourself
Manufacturers often count the smallest possible shoes. Use your own numbers: count the pairs you own, then divide by the number of compartments and check that each fits two shoes side by side, or one pair stacked toe to heel. A tilt-out compartment often holds two pairs of small shoes, but only one pair of larger ones. Plan for the number you own plus about 20 percent.
6. Account for boots
Ankle boots need a shelf about 8 to 10 inches high, and tall boots need around 15 to 18 inches or more, which most slim cabinets cannot do. Keep tall boots in a closet, on a boot rack or use a shelf cabinet with removable shelves. A boot shaper keeps the shaft upright.
7. Decide between a door and open shelves
Doors hide the clutter and the smell, and they give the entry a tidier look. Open shelves are airy and easy to use but show every pair. A mixed design with a closed lower section and an open top gives you a place for daily shoes and a spot for a tray or a bag.
8. Plan the door swing
A swinging door needs clearance equal to its width. In a narrow entry, that can hit the front door, a wall or you. A sliding door, a tilt-out front or a door that folds down avoids the problem. Mark the swing arc on the floor with tape before you decide.
9. Look for ventilation
Closed boxes trap moisture and odor. Look for slotted backs, small vent holes, mesh panels or doors with a gap at the bottom. Leave wet shoes on a tray or a mat to dry first. An open-air design helps in a humid climate, and a door with vents is a good compromise.
10. Check the material and the frame
Solid wood and thick plywood tend to hold shape and screws well. Thin particleboard can swell if exposed to moisture from wet shoes. Metal frames are strong and dry quickly, but may scratch. Look at the thickness of the shelves and the back panel, and note how the corners are joined.
11. Look at the weight rating
Check the load per shelf or per tilt-out drawer. A pair of adult shoes can weigh a pound or two, and boots can weigh more. A tilt-out compartment with a weak hinge will sag, so ask for the load rating. Do not use the top as a seat or a step stool unless the maker says it is designed for that.
12. Understand the tipping risk
Tall, narrow furniture can tip, especially when you pull open a tilt-out drawer that shifts the weight forward. Choose a model with a wide base or feet that spread the load, and anchor it to the wall. Think carefully about homes with small children or pets. Keep heavy items low and never let children climb on it.
13. Check the anchor options
A good cabinet has a pre-drilled anchor point or a bracket and a strap. Anchoring needs the right screw for your wall: a stud screw for drywall, or a masonry anchor for brick. Where you cannot drill, see our no-drill storage ideas for renters and ask your landlord about small anchor holes, which are easy to patch.
14. Look at the top surface
The top of a cabinet turns into a drop zone for keys, mail and a bowl. Check that it is flat, strong and deep enough, since a slim top may not hold a plant or a lamp. A raised edge or a tray keeps small items from sliding off. A smooth, wipeable finish copes with wet bags.
15. Think about the legs and the gap
A cabinet with legs lifts the base off the floor, so water and dust can be cleaned underneath. A gap of a few inches gives you a place to park slippers or a robot vacuum. A cabinet with a flat base looks more built-in and avoids dust, but is harder to clean, and the base can soak up water.
16. Check how it is assembled
Look for a clear instruction sheet, a parts count and a number of people needed. Tilt-out hinges can be fiddly. Take time with the hinge alignment, since misaligned drawers can bind or rub. Tighten all the fasteners again after a few weeks of use.
17. Check whether it can be reconfigured
Adjustable shelves or removable dividers let the cabinet change as your shoe collection changes. This matters for families, where children’s sizes change quickly. A fixed layout is fine for adults with a stable wardrobe.
18. Consider how it looks in the room
In a narrow entry, a cabinet in the same color as the wall looks lighter. A slim cabinet with a narrow footprint and legs looks less heavy. Match the finish to nearby furniture, and avoid bulky handles that catch on coats. See our ideas for small entryways for ways to style the area.
19. Read the return policy and the warranty
Bulky furniture can be costly to ship back, and some sellers charge a restocking fee. Check who pays for shipping and how long the return window is. Look for coverage on the hinges and the frame, since the tilt-out hardware is the part most likely to fail.
Pairs capacity method
Capacity claims are the easiest thing to misread, so run the numbers yourself. First, lay out every pair you wear in a normal month and count them. Second, sort them into flats, sneakers, heels, ankle boots and tall boots. Third, check each group against the compartment sizes: a tilt-out compartment usually takes one or two pairs of low shoes, a shelf takes two to four pairs depending on width and a tall boot needs its own space.
Add up what the cabinet can hold for each group, not the total. A cabinet that claims twelve pairs may hold four sneakers and two boots in practice. Aim for a cabinet that holds the count you own plus a margin of about one fifth, and keep off-season pairs in a bin in a closet. Our guide to small coat storage ideas shows how to organize the rest of the entry.
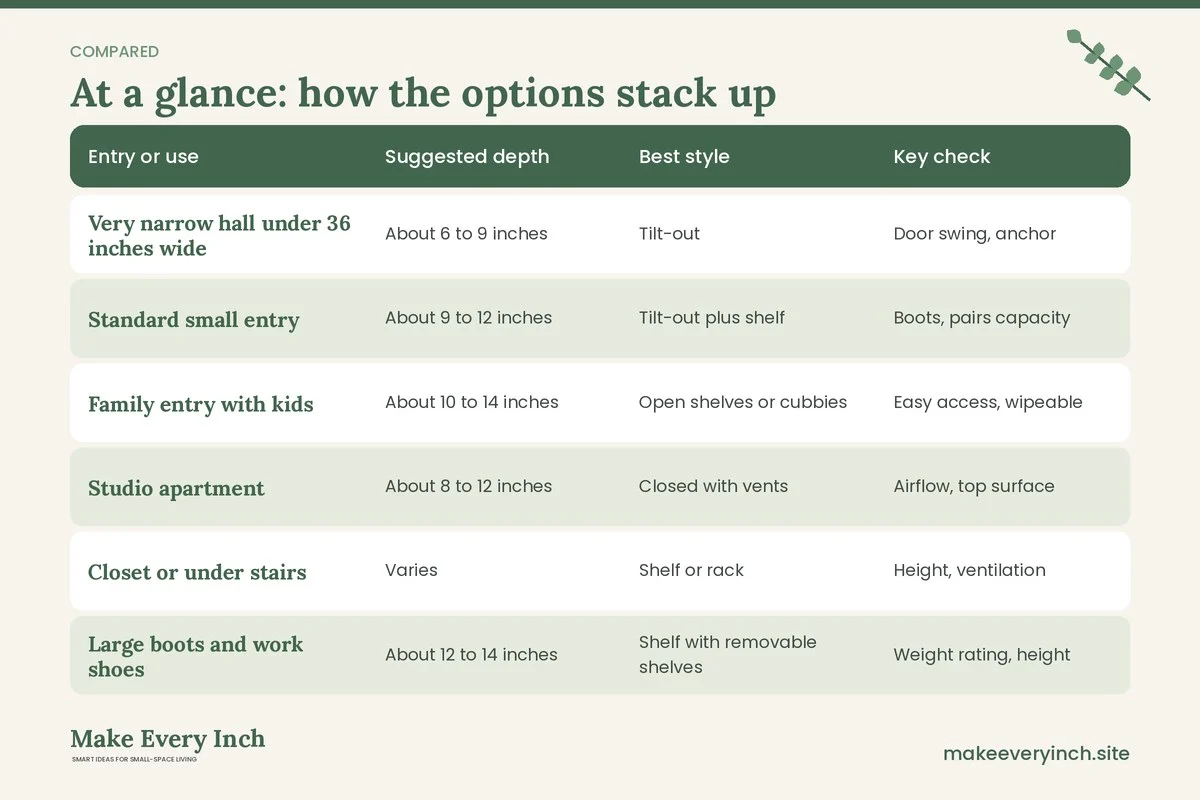
Decision table by entry size and use
| Entry or use | Suggested depth | Best style | Key check |
|---|---|---|---|
| Very narrow hall under 36 inches wide | About 6 to 9 inches | Tilt-out | Door swing, anchor |
| Standard small entry | About 9 to 12 inches | Tilt-out plus shelf | Boots, pairs capacity |
| Family entry with kids | About 10 to 14 inches | Open shelves or cubbies | Easy access, wipeable |
| Studio apartment | About 8 to 12 inches | Closed with vents | Airflow, top surface |
| Closet or under stairs | Varies | Shelf or rack | Height, ventilation |
| Large boots and work shoes | About 12 to 14 inches | Shelf with removable shelves | Weight rating, height |
The paper-template test
Cut a piece of cardboard or tape together sheets of paper to the exact width, depth and height of the cabinet. Tape the footprint on the floor and stand the cardboard against the wall. Open your front door fully and walk past with a bag. Try to swing a tilt-out drawer by marking its extended depth, which is the one most people forget.
Then check the details. Is the path wide enough for two people to pass? Does the cabinet block a light switch, a thermostat or a vent? Can you still reach the coat hooks? If you can, live with the template for a few days. If not, try a smaller one or a different style.
Three example scenarios
A narrow apartment entry
The hall is 38 inches wide, and the front door opens inward. A tilt-out cabinet about 7 inches deep leaves roughly 31 inches of path, and the tilt-out front means no swinging door. The key checks here are a wall anchor and the compartment height, since a household of sneakers needs thicker drawers. See tiny foyer ideas for ways to add a mirror and hooks above.
A family of four
The entry is wider but busy, with children’s shoes and coats. Open shelves or cubbies about 11 to 12 inches deep keep everyday pairs within reach, and a closed cabinet in the same space hides the rest. Wipeable surfaces, adjustable shelves and anchoring come first. A storage ottoman beside the cabinet gives a seat for putting on shoes.
A studio with no entry
The cabinet stands next to the door and doubles as a divider. Choose a closed, vented design with a flat top that serves as a console. A tilt-out cabinet about 8 inches deep keeps the area open. Check the height so it does not block a window or a light switch. For more options, read our small entryway storage ideas.
Anchoring a narrow cabinet to the wall
Locate a stud with a stud finder, and mark the position of the cabinet’s anchor point. Use the hardware that suits your wall: a screw into a stud is the most reliable, and for hollow drywall a rated anchor is the next best. Attach a bracket or a strap to the top back of the cabinet and to the wall, and tug firmly to test it. If the lease forbids holes, ask in writing about small anchor holes, which can be patched with spackle when you move. Check the fasteners every few months.
Cleaning and care
Wipe the surfaces every week, and vacuum under and inside the cabinet. Brush mud off shoes before they go in. Air out the cabinet by leaving the doors open for an hour on dry days. A small bag of baking soda or a cedar block helps with odor, and a tray keeps wet shoes off the wood. Wipe spills quickly, because moisture swells board. Check the hinges and tighten any screws that have worked loose.
Moving the cabinet
Take the shoes out before moving, and remove drawers or shelves if they come out. Keep the doors taped shut so they do not swing. Carry it upright, and avoid dragging it on the base. If you plan to move often, choose a model that can be disassembled and reassembled, though each time reduces the strength of the joints.
Budget guide
Prices vary by region, retailer and season, so treat these ranges as rough guides, not facts.
Lower budget
Expect thinner board, lighter hinges and fewer adjustments. These work for a small household and light shoes, but check the weight rating and the hinge carefully. Anchor them with care.
Mid-range
Here you are likelier to find thicker panels, better hinges, vents and adjustable parts. It is a sensible range for a family entry that sees daily use.
Higher budget
Solid wood or high-grade plywood, soft-close hardware and a quality finish. Spend on the frame and the hinges first, since looks matter less than structure in a part of the home that takes a beating.
Mistakes to avoid
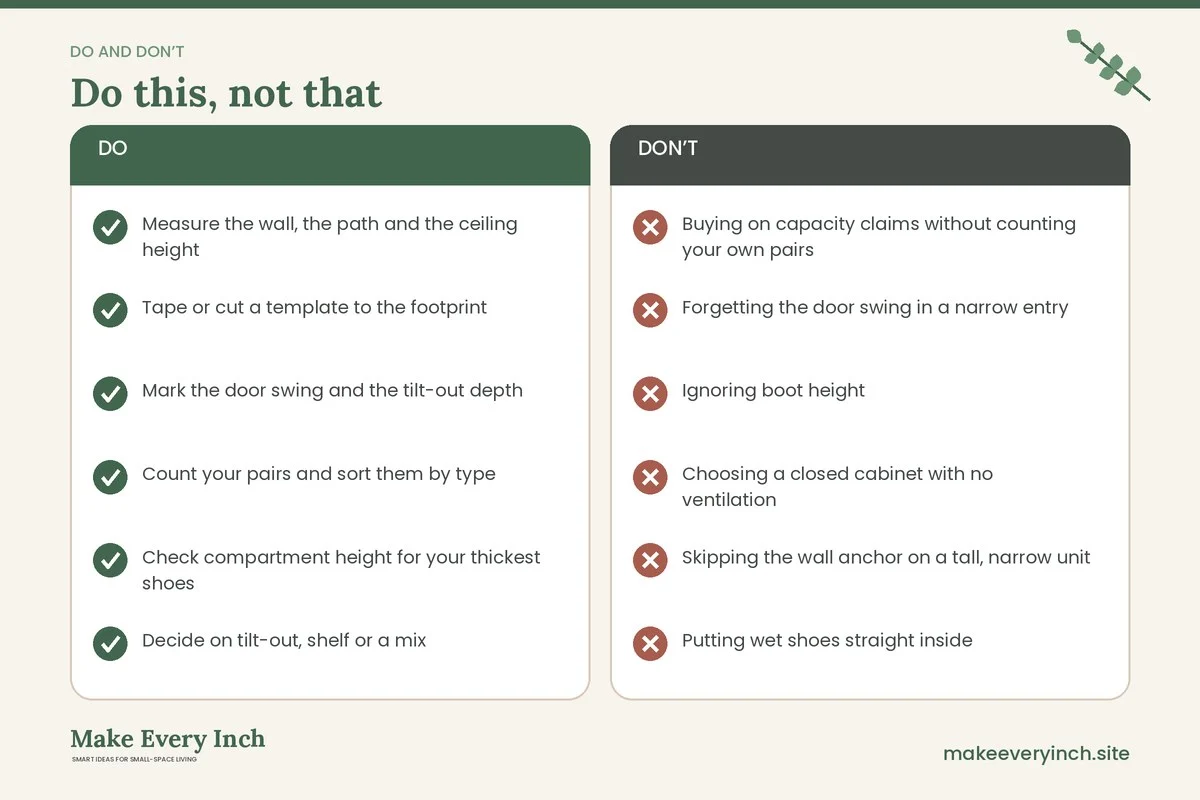
- Buying on capacity claims without counting your own pairs
- Forgetting the door swing in a narrow entry
- Ignoring boot height
- Choosing a closed cabinet with no ventilation
- Skipping the wall anchor on a tall, narrow unit
- Putting wet shoes straight inside
- Using the top as a seat without a stated rating
- Not checking the interior height of tilt-out compartments
Narrow shoe cabinet checklist
- Measure the wall, the path and the ceiling height
- Tape or cut a template to the footprint
- Mark the door swing and the tilt-out depth
- Count your pairs and sort them by type
- Check compartment height for your thickest shoes
- Decide on tilt-out, shelf or a mix
- Confirm the boot plan
- Look for vents or a slotted back
- Check the weight rating per shelf
- Check for anchor points and the right wall hardware
- Read the assembly notes
- Read the return and warranty terms
FAQ
How deep should a narrow shoe cabinet be?
Tilt-out designs are often about 6 to 9 inches deep, and shelf cabinets about 10 to 14 inches. Measure your longest everyday shoe and the space available.
Are tilt-out shoe cabinets better than shelves?
They save depth and hide shoes, but they suit flats and sneakers better than boots. Shelves handle bulky shoes. Many people use a mix.
How many pairs will a narrow cabinet hold?
It depends on the shoe types. Count your own pairs and compare them with the compartments. A stated number often assumes small shoes.
Where do tall boots go?
Most narrow cabinets are too short. Use a closet, a boot rack, a shelf with removable parts or a tall open section.
Do I need to anchor a shoe cabinet?
It is wise for any tall, narrow cabinet, because opening tilt-out drawers can shift the weight forward. Use the right hardware for your wall type, and follow the maker’s instructions.
How do I stop the cabinet from smelling?
Let shoes dry first, choose a vented design, leave the doors open now and then and use a cedar block or baking soda. Keep wet shoes on a tray.
Can I use the top as a console?
Often yes, but check the stated weight rating and make sure the surface is flat and deep enough. A tray keeps small items in place.
Can I use a shoe cabinet in a rental?
Yes, if you can anchor it or your lease allows small holes. Otherwise choose a lower unit, keep heavy items on the lower shelves and ask your landlord about the options. See our narrow hallway ideas for layouts that need no holes.
Keep going: Keep exploring with our small shoe storage ideas, small entryway organization ideas and guide to choosing a storage ottoman.
Save this guide for later
Pin the ideas you like to Pinterest so you can come back to them when you plan your space.