21 Renter-Friendly Kitchen Upgrades That Protect Your Deposit
Quick answer: The best renter-friendly kitchen upgrades are fully removable: peel-and-stick tile, new cabinet hardware you can swap back, plug-in lighting, contact paper, a runner, freestanding shelves and a cart. Read the lease, photograph the kitchen at move-in and keep every original part in a labelled box.
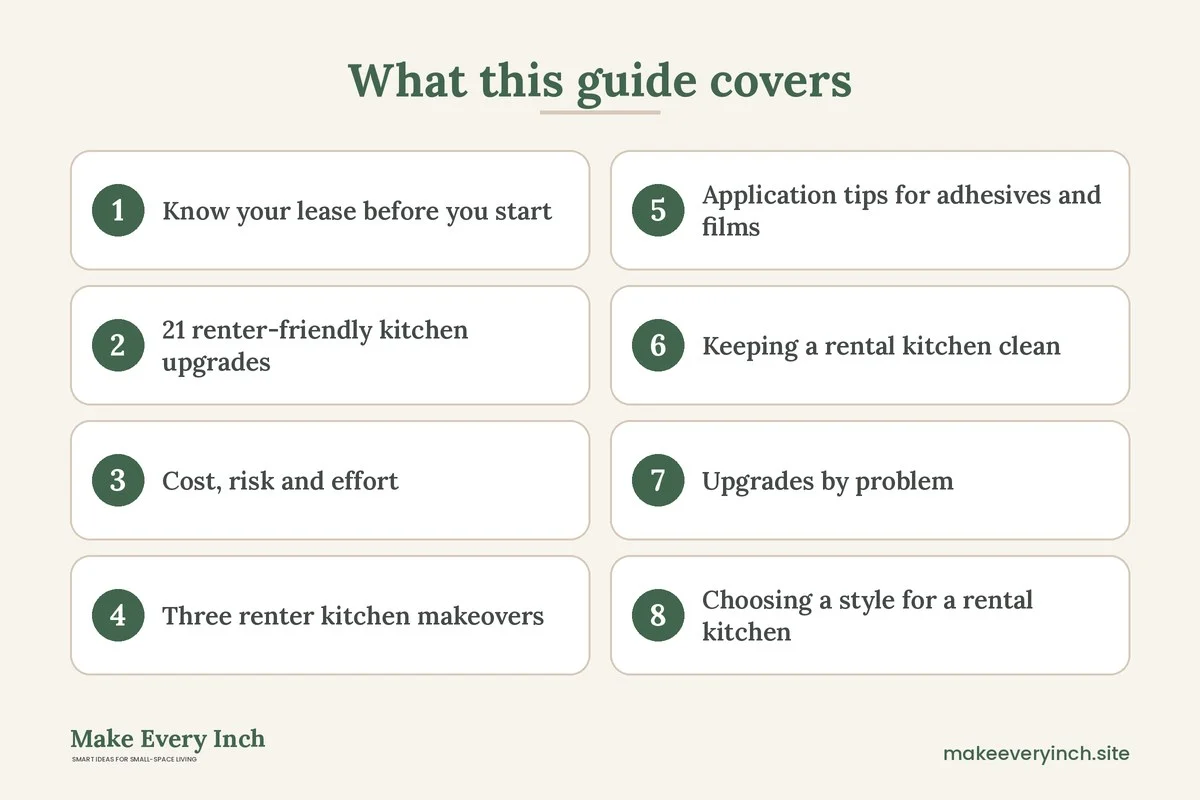
Renter-friendly kitchen upgrades have to work around a hard fact: you cannot touch the cabinets, counters, appliances or walls in any permanent way, and the kitchen may look dated. But a few removable changes can transform a rental kitchen in a weekend and cost less than a single new appliance. This guide shares 21 upgrades, a lease check, a cost and risk table, three makeover plans, a cleaning routine and a move-out checklist.
Know your lease before you start
Read the lease for rules on paint, adhesives, nails, appliances and fixtures. Some leases ban any change, and others allow small ones with permission. Send a short email listing what you plan to do, such as adding peel-and-stick tile and swapping the knobs, and ask for written approval. Keep the reply. Photograph the kitchen at move-in, including cabinet fronts, counters, floor, walls and the inside of the oven and fridge. These photos protect you at move-out and help you see the room afresh.
Think about what you can reverse in under an hour. A good rule is that if you cannot return it to its original state with a hair dryer, a screwdriver and a damp cloth, you should not do it.
21 renter-friendly kitchen upgrades
1. Peel-and-stick backsplash
Peel-and-stick tiles in white subway, soft sage or a simple pattern can be applied over clean, smooth walls in an afternoon. Wipe the wall with a degreaser, test one tile and press firmly. Use heat-resistant tiles near the stove. Peel slowly with a hair dryer at move-out.
2. New cabinet hardware
Swapping knobs and pulls is the cheapest way to change cabinet style. Measure the hole spacing, buy matching pulls and save the originals in a labelled bag. Choose brass, black or matte nickel to match your faucet and lights.
3. Cabinet contact paper or film
A removable film in white, wood grain or a solid color covers dated cabinet fronts. Clean the surface, apply in small sections and smooth bubbles with a squeegee. Test a small hidden spot first, since some films can lift paint or veneer.
4. Counter film or a large board
Peel-and-stick film in a stone or butcher block pattern can cover a worn laminate counter. For a quick fix, a large cutting board or a counter mat protects the surface and gives you a clean work area.
5. Plug-in under-cabinet lighting
Rechargeable or plug-in LED strips light the counter with no wiring. Choose 3000K to 3500K and a diffuser, and hide the cord with a paintable cover. See kitchen lighting ideas.
6. Replace the bulb and shade
A brighter, warmer LED bulb makes a dim fixture look new. Some leases let you swap a shade or a fixture if you keep the original.
7. A washable runner or rug
A runner in front of the sink and the stove adds color, cushions the floor and hides wear. Choose a washable, non-slip one and use a pad.
8. A tension rod curtain under the sink
A curtain hides cleaning supplies and an old pipe, and a tension rod needs no screws. Use it also on the window for a café curtain.
9. A freestanding shelf or baker’s rack
A rack 12 to 16 inches deep adds storage and display space for dishes, plants and appliances. Choose one with a finish that matches the cabinets.
10. A rolling cart
A cart adds counter and storage and moves with you. See kitchen cart ideas.
11. Adhesive hooks and rails
Rated adhesive hooks hold towels and utensils on cabinet sides and tile. Check weight limits and use them on clean, smooth surfaces. Remove by pulling the tab slowly.
12. A magnetic knife strip with adhesive
A strip mounted with strong adhesive tape holds knives and frees a drawer. Use it only on a smooth, dry surface.
13. Shelf liners and drawer liners
Liners protect old shelves, add color and make cleaning easier. Choose non-adhesive ones for a rental.
14. A faucet aerator or a clip-on sprayer
A new aerator saves water, and a clip-on sprayer improves rinsing without changing the faucet. Both are removable.
15. A dish rack and drying mat
A compact rack and a mat replace a bulky one and keep the counter dry. Use a color that suits the kitchen.
16. Peel-and-stick floor tiles or a vinyl mat
Peel-and-stick vinyl tiles can cover a worn floor, but check whether the adhesive harms the existing floor. A large vinyl mat or a rug is the safest alternative.
17. Plants and herbs
Pots of herbs on the sill or a hanging planter add color and fresh flavor. Use trays to protect the sill.
18. A pegboard or a hanging grid
A freestanding or adhesive grid holds tools, mugs and small pots. Use it near the stove and keep it away from heat.
19. New cabinet door bumpers and organizers
Felt bumpers quiet slamming doors, and door racks hold lids and wraps. Both are removable.
20. A statement piece of art
A framed print or a poster on adhesive strips adds personality. Keep it away from the stove and steam.
21. A cohesive color palette
Pick two or three colors for towels, mats and accessories and repeat them. A coordinated palette makes a dated kitchen look intentional.
Cost, risk and effort
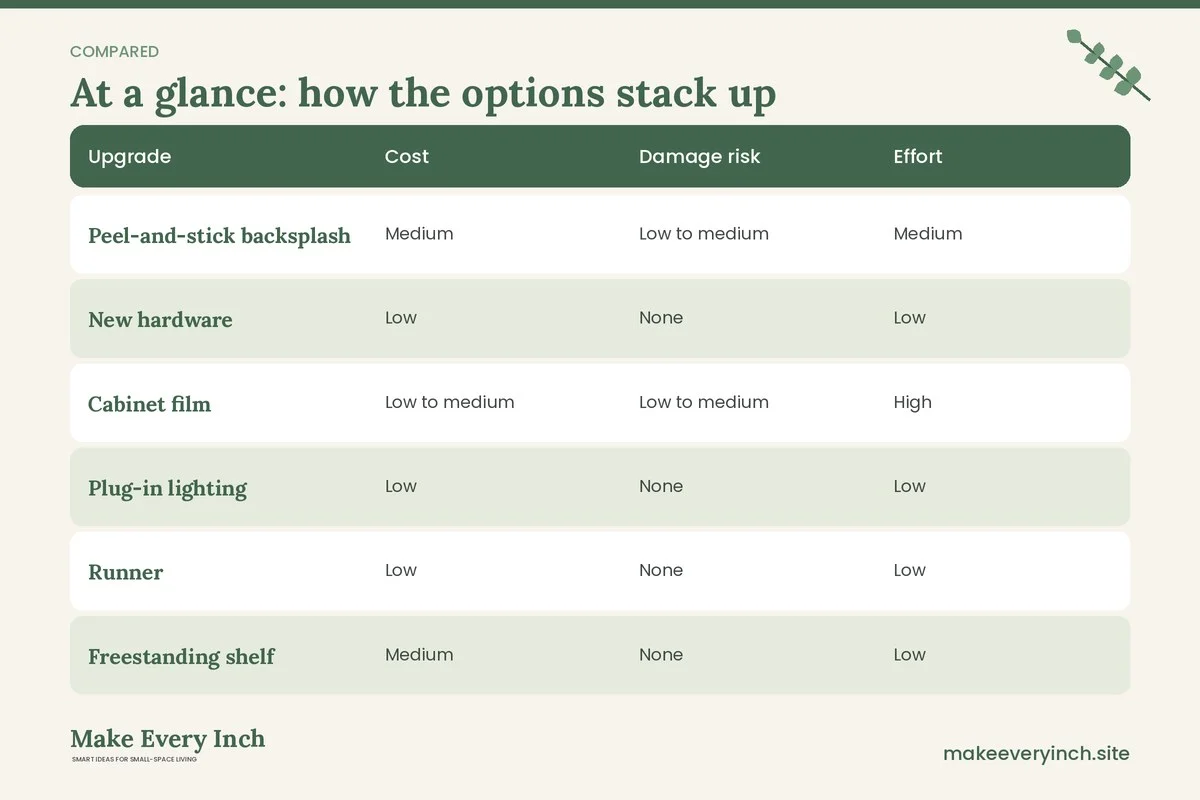
| Upgrade | Cost | Damage risk | Effort | Impact |
|---|---|---|---|---|
| Peel-and-stick backsplash | Medium | Low to medium | Medium | High |
| New hardware | Low | None | Low | Medium |
| Cabinet film | Low to medium | Low to medium | High | High |
| Plug-in lighting | Low | None | Low | High |
| Runner | Low | None | Low | Medium |
| Freestanding shelf | Medium | None | Low | Medium |
| Rolling cart | Medium | None | Low | High |
| Counter film | Low | Low | Medium | Medium |
| Adhesive hooks | Low | Low | Low | Medium |
Three renter kitchen makeovers
A 100 dollar refresh
Swap the hardware, add a runner and plug-in lights and put a plant on the sill. Hang a rail with adhesive and use a dish mat. The kitchen will look brighter and feel more personal.
A 300 dollar makeover
Add peel-and-stick tile behind the sink and stove, cover the counter with film or a board, add a cart and a freestanding shelf and replace the light bulbs. Add door racks and a tension rod under the sink.
A 600 dollar transformation
Cover the cabinet fronts with film, add new hardware and a backsplash, install plug-in lights and add a shelf and a cart. Add a large washable rug, art and a plant. Keep everything labelled for move-out.
Application tips for adhesives and films
Clean the surface with degreaser and let it dry fully. Measure twice and cut slowly. Work from one corner and smooth with a squeegee or a credit card to push out air bubbles. Use a hair dryer to soften the film around curves. Press the edges firmly and avoid stretching, which can cause peeling. Avoid applying in cold or humid conditions. Leave adhesives to cure for 24 hours before heavy use. When you remove them, warm with a hair dryer and peel slowly at a low angle, then clean any residue with a mild cleaner.
Keeping a rental kitchen clean
A removable upgrade looks best when the kitchen is clean. Wipe the backsplash and the cabinet fronts weekly, and clean the stove and the sink after use. Use a degreaser monthly on the walls near the stove, since grease can loosen adhesives. Wash runners and mats and shake out crumbs. Keep a small caddy of cleaning supplies under the sink. If an upgrade starts to peel, press it down or replace it right away. Regular cleaning also helps with your deposit.
Upgrades by problem
“My cabinets are dated and scratched”
Start with new pulls and a thorough clean, then consider film in a soft white or wood grain. Add door bumpers and organizers to make the cabinets work better. If the doors are damaged, a coat of paint may be possible with permission, but film is safer. Keep the originals in a labelled bag and photograph the doors before you start.
“My counters are worn or stained”
Use a large cutting board, a counter mat or a film. Place a trivet under hot pans and avoid cutting directly on the surface. For a quick improvement, clean with baking soda and a soft cloth, then dry well. A tray of items such as oils and a plant hides imperfections while you plan a bigger change.
“The kitchen is dark and yellow”
Replace bulbs with bright, neutral-warm LEDs, add plug-in task lights and brighten the walls with a mirror or glossy tile. Remove heavy curtains and keep the sill clear. Use white or light textiles to bounce light.
“There is no backsplash”
Peel-and-stick tile or a washable wallpaper panel protects the wall and adds style. Behind the stove, choose a heat-resistant product or a metal panel with adhesive. Clean the wall first and keep the edges sealed with a thin line of tape if recommended.
“There is no storage”
Add a cart, a baker’s rack, a rail, door racks and risers. Use the tops of the cabinets for baskets and the side of the fridge for magnetic hooks. See kitchen storage ideas.
“The floor is ugly”
Use a large rug or a series of runners, or a vinyl mat that you can roll up. If the lease allows it, peel-and-stick tiles can cover vinyl, but test one in a corner and avoid laying over damaged or uneven floors.
“The appliances are old”
Clean them thoroughly, polish stainless steel and add magnets or a cover for the fridge if it is dated. Replace knobs with matching ones if the manufacturer sells them. If an appliance is broken or unsafe, ask the landlord to repair it rather than covering the problem.
Choosing a style for a rental kitchen
Pick a style that works with what you cannot change. If the counters are beige, warm whites and sage will blend in. If the cabinets are dark wood, add light textiles, a pale runner and brass hardware. If the floor has a pattern, keep the rest simple. Take a photo of the kitchen and choose three colors from it, then repeat those in the upgrades. A cohesive scheme looks intentional even when the base is basic.
| Existing kitchen | Good upgrade palette | Accent ideas |
|---|---|---|
| Beige counters and white cabinets | Sage, cream and brass | Wood boards, plants |
| Dark wood cabinets | Warm white, soft gray | Brass pulls, light runner |
| White cabinets and gray counters | White, black and wood | Black hardware, greenery |
| Yellow-toned laminate | Cool white, blue-gray | Glossy tile, chrome |
| Mixed finishes | One metal finish throughout | Matching hardware |
Taking your upgrades with you
Plan the upgrades so most of them move with you. Cabinet hardware, rails, carts, shelves, runners, lights and organizers are portable. Keep the instructions and the screws for each, and store them in a labelled box. Measure and note which items worked in the room, since they may suit your next kitchen. Tile and film are not portable, so keep the cost in mind. When you move, remove the adhesive items first, then clean the surfaces, then reinstall the originals. A portable kitchen upgrade plan lets you carry your style from home to home.
Safety notes for rental kitchen upgrades
Keep adhesive products away from open flames and heat sources, and use heat-rated tiles behind the stove. Do not cover vents or the back of the fridge. Keep cords off the floor and out of water. Do not hang heavy items on adhesive hooks over the stove. If you smell burning or see a strip overheating, unplug it at once. Check the weight rating of every hook and shelf, and anchor tall items if the lease allows. If anything looks unsafe, ask your landlord to fix it before you decorate.
A renter’s kitchen shopping list
Before you buy, make a list sorted by priority and price. Priority one is what protects the kitchen and your deposit: a counter mat, shelf liners and felt pads. Priority two is what improves daily use: plug-in lights, a cart and door racks. Priority three is what changes the look: tile, film, hardware and a runner. Priority four is the finishing touch: plants, art and textiles. Measure before you buy each item, and note the return policy. Buy in order of priority, and live with each stage for a week before the next. This keeps your spending focused and the kitchen coherent, and leaves room in the budget for the unexpected.
Talking to your landlord about kitchen changes
A friendly, specific request often gets a yes. Say what you plan to do, how you will keep the original, and how you will restore the kitchen at move-out. Offer to send photos before and after. If you want to replace hardware, mention that you will store the originals. If you want to paint, offer to repaint in the original color and to pay for the paint. Many landlords appreciate tenants who take care of the home, and a written agreement protects both of you. If the answer is no, ask what is allowed, and focus on removable options.
Move-in and move-out checklist
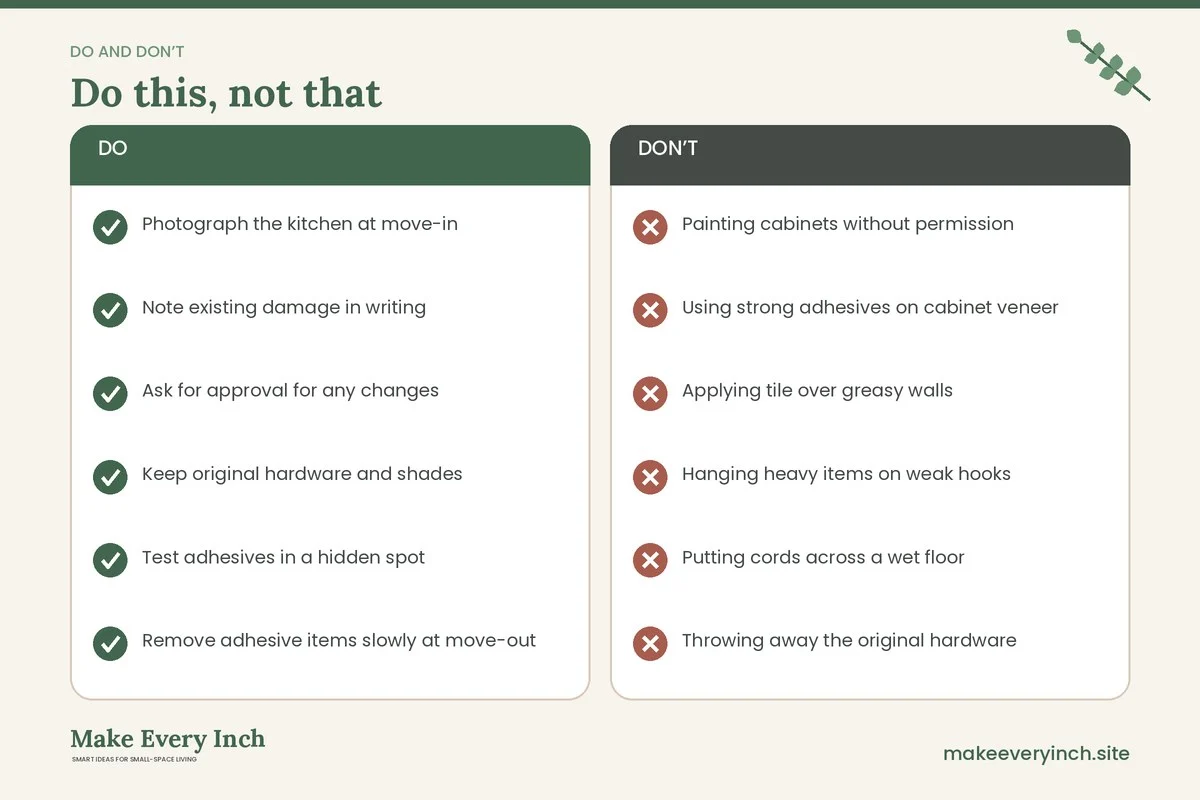
- Photograph the kitchen at move-in
- Note existing damage in writing
- Ask for approval for any changes
- Keep original hardware and shades
- Test adhesives in a hidden spot
- Remove adhesive items slowly at move-out
- Clean the oven, fridge and cabinets
- Take photos of the finished kitchen and return the keys
Mistakes renters make in the kitchen
- Painting cabinets without permission
- Using strong adhesives on cabinet veneer
- Applying tile over greasy walls
- Hanging heavy items on weak hooks
- Putting cords across a wet floor
- Throwing away the original hardware
- Blocking the oven or fridge vents
- Forgetting to take move-in photos
FAQ
What can renters do to improve a kitchen?
Add peel-and-stick tile, new hardware, plug-in lighting, a runner, a cart and freestanding shelves, and keep all the originals.
Can I paint rental kitchen cabinets?
Only with written permission and a plan to repaint before you leave if required. Contact film is a removable alternative.
Does peel-and-stick backsplash damage walls?
On smooth, well-painted walls it usually peels off cleanly. Test a hidden spot first, and remove it slowly with heat.
How do I add lighting to a rental kitchen?
Use plug-in or rechargeable strips, clip-on lamps and brighter bulbs, and hide cords with covers.
How do I add storage without drilling?
Use freestanding shelves, a cart, tension rods and rated adhesive hooks and racks.
How do I protect my deposit?
Photograph at move-in and move-out, follow the lease, keep the originals, clean thoroughly and remove adhesives carefully.
Can I change the kitchen faucet?
Often yes if you keep the original and reinstall it at move-out, but check the lease first.
What is the best first upgrade?
Lighting and hardware. They cost little and change how the kitchen looks and feels.
Keep going: Explore our small kitchen ideas, small apartment kitchen ideas and small kitchen makeover ideas.
Save this guide for later
Pin the ideas you like to Pinterest so you can come back to them when you plan your space.