19 Small Kitchen Counter Organization Ideas for More Workspace
Quick answer: Small kitchen counter organization starts by clearing everything off, then returning only what you use every day. Group those items on trays, hang tools on a rail, move appliances into cabinets and protect one clear prep zone of at least 24 by 24 inches. Reset the counter nightly.
Small kitchen counter organization is the quickest way to make a tiny kitchen work better, because the counter is the one surface you use for everything: prep, cooking, serving and often eating. When it is covered with appliances, mail and bottles, you lose the space you need. This guide shares 19 ideas, a zone plan, an item-by-item table, three example counters, routines and a checklist so you can gain workspace without a remodel.
Clear the counter and start again
Take everything off the counter, including the appliances, and wipe it down. Place the items on the floor or the table in groups: things you use every day, things you use weekly and things you rarely use. Be strict. Only daily items return to the counter, and only if they have a clear spot. Weekly items go in a low cabinet or a drawer. Rarely used items go on a high shelf or in a closet. If you cannot decide, put the item in a box for a week. If you do not retrieve it, donate it.
Measure the counter and mark a clear prep zone. For one cook, a clear area of 24 inches wide and 24 inches deep next to the sink or the stove is the minimum, and 36 inches wide is better. Keep this zone free at all times, and do not use it for storage or mail.
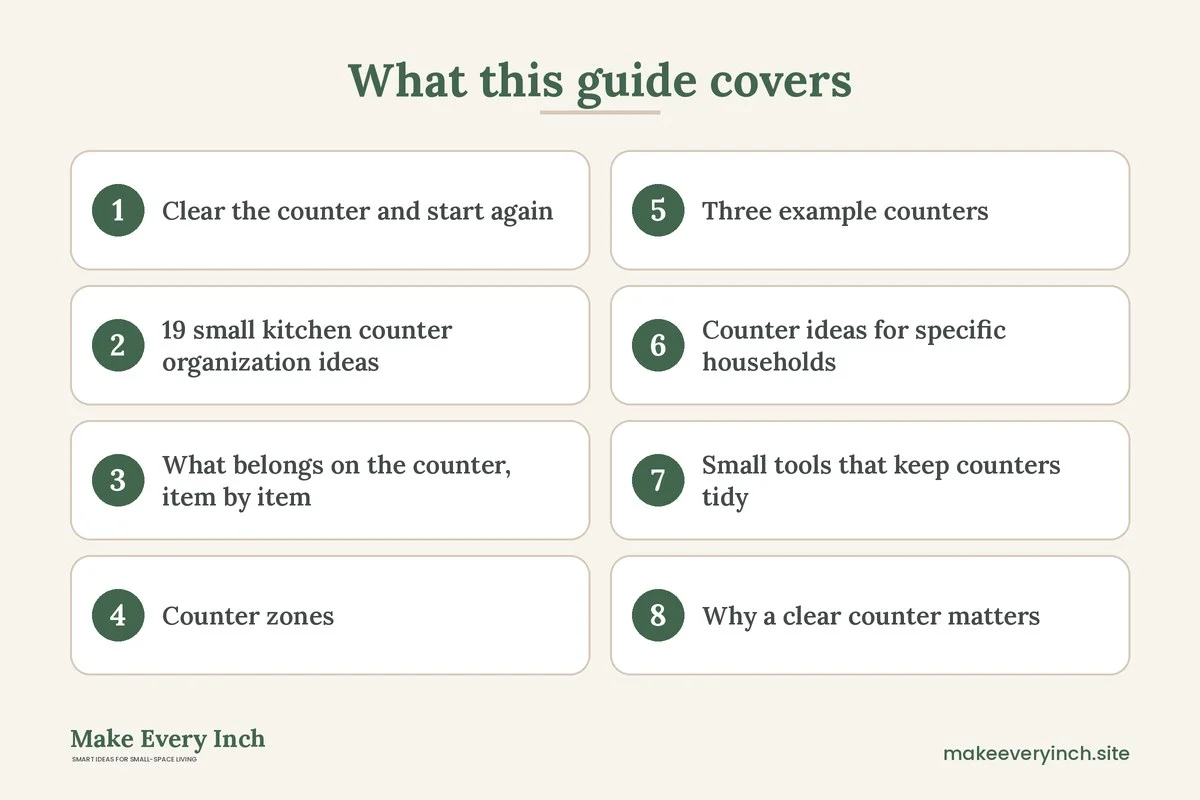
19 small kitchen counter organization ideas
1. Define a prep zone
Mark the area next to the sink and keep it clear. Place the cutting board, a knife and a bowl for scraps within reach but off the surface.
2. Use trays to group items
A tray holding oils, salt, pepper and a pepper mill keeps the counter tidy and makes it easy to lift and wipe. Use another for the coffee station.
3. Hang tools on a rail
A rail on the wall above the counter holds spatulas, ladles, scissors and mugs. Keep it within arm’s reach of the stove.
4. Use a magnetic knife strip
A magnetic strip frees up the counter block and keeps knives within reach and out of drawers.
5. Move appliances into cabinets
Keep only the one or two that you use daily. Store the blender, the mixer and the rice cooker in a low cabinet or a pantry and take them out when needed.
6. Use an appliance garage or a pull-out shelf
A shelf with a door or a roll-up cover hides the toaster and coffee maker. If you cannot build one, use a pull-out shelf in a cabinet.
7. Use a tiered stand or a riser
A two-level stand holds fruit, jars or spices in a smaller footprint than two separate items. Choose one with a narrow base.
8. Mount a paper towel holder under a cabinet
A holder under the upper cabinet frees the counter and keeps the roll within reach.
9. Use a wall rack for spices
A narrow rack on the wall or the inside of a door keeps spices out of the way.
10. Use a sink caddy and a drying mat
A caddy keeps the sponge, the brush and the soap together, and a fold-up mat dries dishes without a rack.
11. Put the trash and compost in a cabinet
A slim bin inside a cabinet keeps the counter free of bags and scraps. Use a small container for scraps while you cook.
12. Use a cutting board over the sink
A board that rests on the sink edges adds prep area when you need it.
13. Use a rolling cart as a second counter
A narrow cart gives you extra space for a mixer or a tray, and rolls away when not in use.
14. Create a charging and mail drop elsewhere
Do not use the kitchen counter for keys, mail and phones. Put a tray or hooks by the door.
15. Use drawer dividers and store tools in drawers
Move whisks, spoons and peelers into a divided drawer, so the counter does not need a crock of tools.
16. Keep a small bin for items to put away
A small basket at the end of the counter catches stray items. Empty it at the end of the day.
17. Use a wall-mounted fold-down shelf
A shelf that folds up gives you a surface only when you need it.
18. Limit decor
Use one plant, a bowl of fruit or a cutting board as decor. Everything else belongs in a cabinet.
19. Reset each night
Spend three minutes wiping the counter and returning items. Starting the day with a clear counter makes the whole kitchen feel calmer.
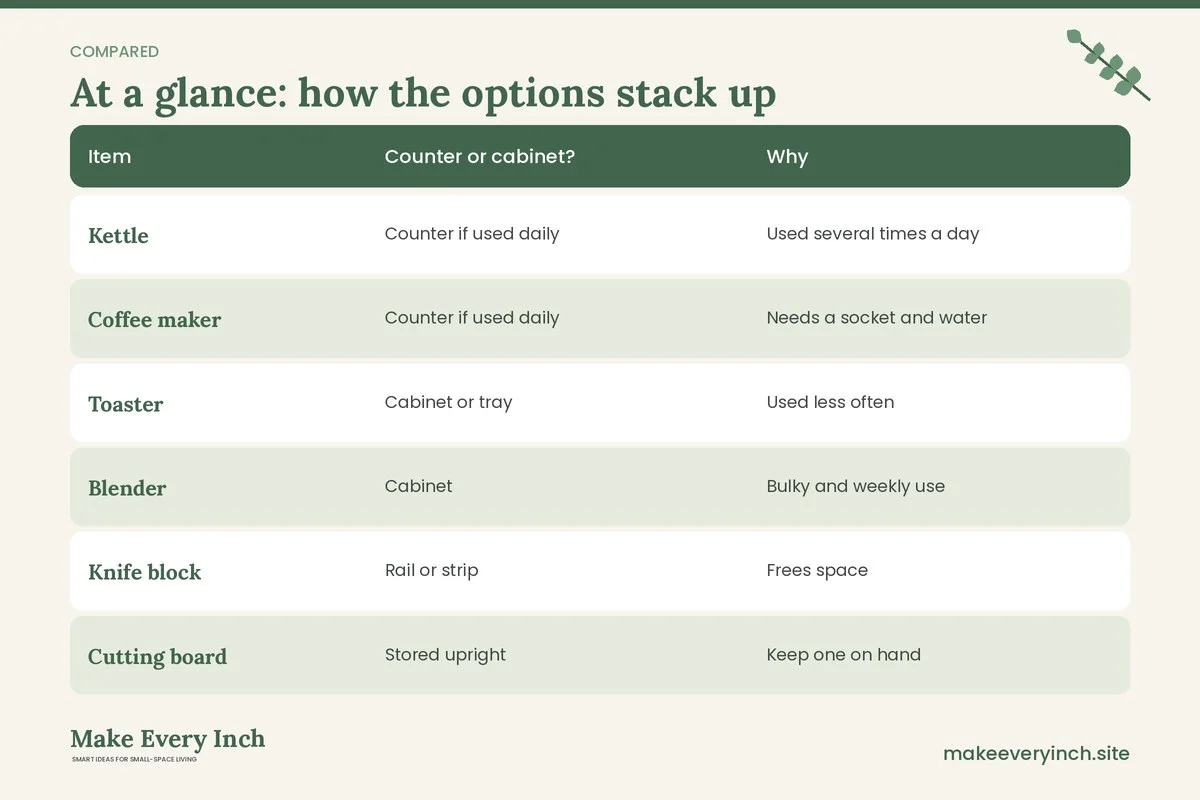
What belongs on the counter, item by item
| Item | Counter or cabinet? | Why |
|---|---|---|
| Kettle | Counter if used daily | Used several times a day |
| Coffee maker | Counter if used daily | Needs a socket and water |
| Toaster | Cabinet or tray | Used less often |
| Blender | Cabinet | Bulky and weekly use |
| Knife block | Rail or strip | Frees space |
| Cutting board | Stored upright | Keep one on hand |
| Oils and salt | Small tray | Grab and go |
| Fruit | Bowl | Keeps produce visible |
| Elsewhere | Not a kitchen item | |
| Dish soap | Sink caddy | Needs to be near the sink |
Counter zones
The prep zone
Keep this area empty. Store the tools you need in the nearest drawer or on a rail. Add a mat to protect the counter and to catch crumbs.
The cooking zone
Keep a tray with oils, salt and spices near the stove, and a trivet and a spoon rest. Do not keep anything flammable within 12 inches of the burners.
The coffee or tea zone
A small tray with the kettle or the coffee maker, mugs and a sugar jar keeps the mess in one place. Use a hook under the cabinet for mugs.
The cleaning zone
Keep the sink caddy, a dish brush and a towel here. Hang a cloth on a hook rather than on the counter.
The serving zone
Keep a clear area for plating and for a tray. If there is no space, use a cart or a table.
Three example counters
A 6 foot counter in a small apartment
Keep the kettle, a tray with oils and a fruit bowl. Hang a rail with five tools and a magnetic strip for knives. Clear a 36 inch prep zone beside the sink. Store the toaster and blender in a cabinet.
A 4 foot counter in a studio
Keep only the coffee maker and a tray. Use a cutting board over the sink and a rolling cart for extra space. Store the rest in a tall shelf. See tiny kitchen ideas.
A 10 foot counter in a family kitchen
Create five zones with a tray for each. Keep a basket for school items and a charging spot outside the kitchen. Use a rail for tools and an appliance garage for the toaster. See kitchen organization ideas.
Counter ideas for specific households
A solo cook
You need a small counter set-up: a kettle, a tray with oils and a cutting board stored upright. Keep the rest of the counter clear so you can chop, plate and eat in the same spot. Use a rail for the three tools you use most and a single drawer for the rest. A one-person kitchen can be as tidy as a hotel room if you keep the daily set small.
A couple who cook together
Plan two clear zones, one at the sink for prep and one near the stove for cooking. Keep a shared tray for oils and spices that can slide between zones. Use a cart as the second prep surface. Agree where the knives go and keep the pass-through clear, so neither of you has to wait.
A family with children
Use a tall shelf or a high cabinet for small appliances and cleaning supplies, and keep a low basket for school lunch items. Keep knives and hot items at the back of the counter and use a hook for bags and keys by the door, not in the kitchen. Wipe often, since crumbs show quickly on a small surface.
A person who bakes
Baking needs a big clear area. Keep the mixer in a cabinet that opens at counter height, and use a pull-out or a cart for ingredients. Store the flour, sugar and sprinkles in labelled containers on a shelf and wipe the surface as you go. Use a large board or a silicone mat as a portable work area that you can take away when you finish.
A renter
Protect the counter with a board and a mat. Use adhesive hooks under the cabinets for mugs and towels, freestanding trays and a cart. Keep the original hardware and keep photos of the counter at move-in. See renter kitchen ideas.
Small tools that keep counters tidy
A few inexpensive items do most of the work. A set of trays in wood or metal groups loose bottles. A rail with hooks gives tools a home. A sink caddy holds the sponge and soap. A fold-up drying mat replaces a bulky rack. A cord clip keeps appliance cords from spilling onto the surface. A small basket catches stray items for the day. A silicone trivet protects the counter and folds away. Buy only the items that solve a problem you can name, and measure the space before you shop.
Why a clear counter matters
A clear counter is easier to wipe, safer for knife work and better for your mood. Visual clutter raises stress, and a counter with a few well-chosen items feels calm. A clear counter also saves time: you do not have to move things before you chop, and you spot spills at once. Food safety improves too, since raw ingredients and cooked food have a clean place to go. For a small kitchen, these benefits are large, and the cost of getting them is mainly the habit of putting things away.
Daily and weekly counter routines
Every night, put away what you used, wipe the counter and reset the trays. Every week, check the items on the counter and remove anything you did not use. Every month, wipe the backsplash, clean under the appliances and review the cabinets. If something keeps returning to the counter, decide whether it deserves a home. A good routine takes only a few minutes and prevents the build-up that makes a small kitchen feel crowded.
Counter materials and care
Different counters need different care. Laminate resists stains but can scratch and burn, so use a cutting board and a trivet. Butcher block needs oil every few months and does not like standing water. Stone such as granite needs sealing, and marble stains easily. Stainless steel shows fingerprints but is hygienic. Quartz resists stains and needs only mild cleaner. Use coasters, mats and trays to protect any surface, and wipe spills quickly. In a rental, use a large board or a film to protect worn counters.
Counter space in kitchens that open to a living room
If the kitchen opens to a living area, the counter is visible from the sofa, so keep it especially tidy. Use closed storage for mail, chargers and small appliances, and keep the counter facing the living room clear of everything but a plant or a bowl. Use the side of the counter facing the room as a bar by adding two stools that tuck under. If the counter has a ledge, keep it free for guests and use the cooking side for the working items. Match the finishes of the trays, the rail and the stools to the living room, so the two spaces feel connected. A tidy open counter makes both rooms feel larger.
How to keep a counter organized for the long term
Counters drift back to clutter unless you keep a few rules. Give every item on the counter a spot, and use a tray or a base so you can see where it belongs. Follow a one-in, one-out rule for appliances and gadgets. Keep a basket in a nearby cabinet for items that do not belong in the kitchen, and empty it each week. Review the counter every season, and remove what you did not use. Share the rules with everyone in the household, and make it easy to follow: label the trays and place a hook for the towel. A counter that works for the whole household stays tidy without nagging.
If a spot on the counter keeps collecting clutter, give that spot a job, such as a tray for keys outside the kitchen, so the habit has a better home.
Counter organization mistakes
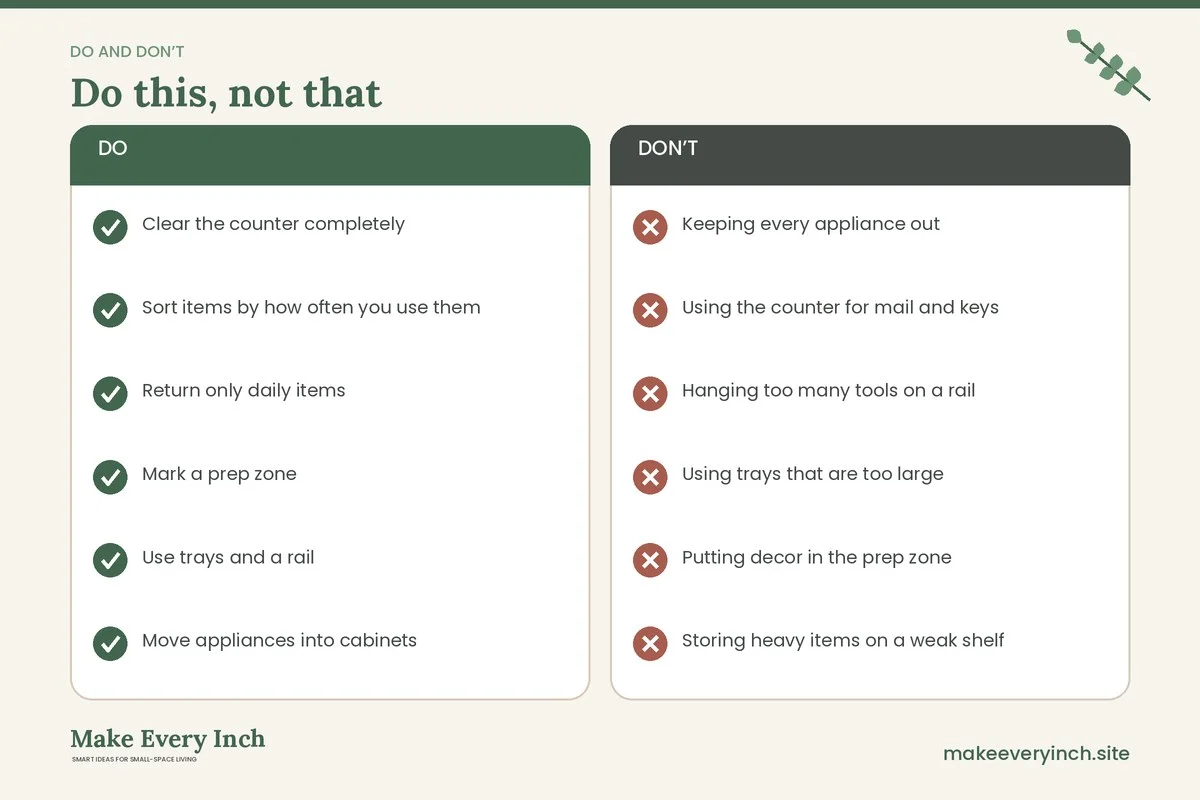
- Keeping every appliance out
- Using the counter for mail and keys
- Hanging too many tools on a rail
- Using trays that are too large
- Putting decor in the prep zone
- Storing heavy items on a weak shelf
- Not wiping the counter daily
- Buying organizers before clearing the counter
A weekly reset for a small counter
Choose one day a week for a ten-minute reset. Clear the counter completely, wipe it down, then put back only the daily items. Return the appliances you do not use daily to a cabinet, empty the dish rack, and check that the cord of each plugged-in item is tidy. A short, regular reset prevents clutter from building up and keeps the counter ready for cooking.
Counter organization checklist
- Clear the counter completely
- Sort items by how often you use them
- Return only daily items
- Mark a prep zone
- Use trays and a rail
- Move appliances into cabinets
- Add a cart or a shelf if needed
- Reset every night
FAQ
How do I organize a small kitchen counter?
Clear it, return only daily items, group them on trays and use a rail and cabinets for the rest.
How much counter space do I need?
At least 24 by 24 inches of clear prep space, and ideally 36 inches beside the sink or the stove.
What should stay on the counter?
Items you use daily, such as a kettle, a coffee maker and a tray of oils. Everything else can go in a cabinet.
How can I add counter space?
Use a cutting board over the sink, a cart, a fold-down shelf or a table.
How do I hide appliances?
Use an appliance garage, a pull-out shelf or a cabinet, and keep cords tidy.
How do I keep the counter clean?
Wipe it nightly, use trays and keep decor to a minimum.
What is the best tray for a counter?
A small tray with a lip, in wood, metal or ceramic, that fits the items and is easy to wipe.
How do I organize a rental counter?
Use freestanding items, adhesive hooks and a protective mat, and avoid permanent changes.
Keep going: Explore our small kitchen ideas, small kitchen storage ideas and small kitchen pantry ideas.
Save this guide for later
Pin the ideas you like to Pinterest so you can come back to them when you plan your space.