15 Small Living Room Storage Ideas IKEA Shoppers Can Plan With Flat-Pack Parts
Quick answer: The best small living room storage ideas IKEA shoppers use are modular and flat-pack: a shallow grid of cube shelves, a low cabinet run under the TV, a wall rail system, a bench with boxes and a tall narrow tower. Measure the wall, choose one grid unit, buy boxes and doors last, and build in stages so you can reshape the system when the room changes.
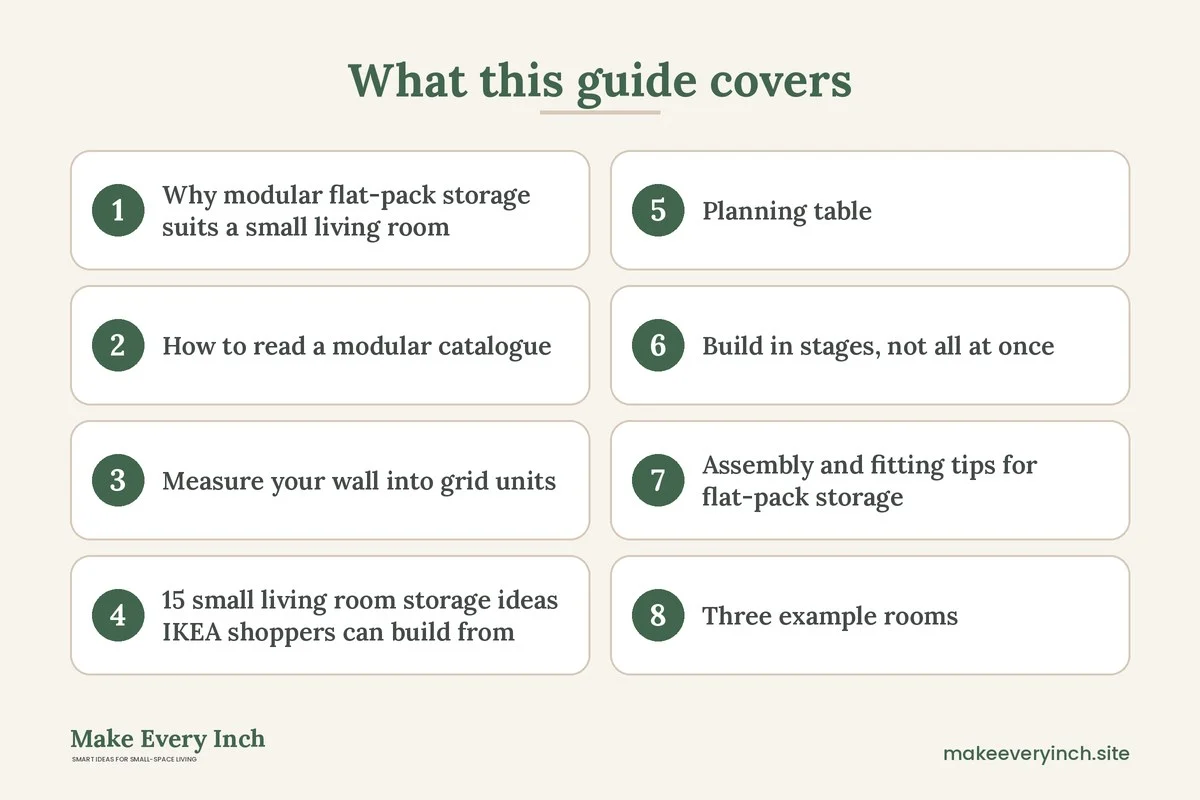
Small living room storage ideas IKEA fans love all share one trick: they treat storage as a set of repeating parts instead of a set of one-off furniture pieces. A flat-pack shelf, cube, cabinet or rail is built on a grid, and the grid lets you plan a whole wall on paper before you spend anything. This guide is written for anyone who shops the big flat-pack stores or the many similar ones, so it avoids product names and prices on purpose. Instead you get the method: how to read a modular catalogue, how to measure a wall into grid units, 15 storage plans with dimensions, a planning table, build and assembly tips, three example rooms and a checklist. For the wider view of the topic, start with our pillar guides on small living room storage ideas and small living room ideas, then come back here for the modular angle.
Why modular flat-pack storage suits a small living room
A small living room usually has too many jobs. It holds the TV, the books, the remotes, the board games, the throws, the shoes that never made it to the hall and often a desk or a toy bin. Custom built-ins solve this, but they cost a lot and they stay when you move. Modular flat-pack storage is the middle road. The parts come in standard widths and depths, the pieces can be added to or removed from, and most of it can be taken apart and reused in the next home.
The standard sizes are the real advantage. Most modular shelving is built around a module of roughly 13 to 15 inches for a single cube, with units made of 2 by 2, 2 by 4, 4 by 4 or 5 by 5 cubes. Cabinets often run 15, 24, 30 or 36 inches wide. When everything shares a few widths, you can line up a cabinet under a shelf, a bench beside a tower and a rail above them, and the edges meet cleanly. A wall that looks planned feels bigger than a wall of mismatched furniture.
Flat-pack also fits the way small homes are entered. The boxes go up an elevator, around a tight stair and through a narrow door. A 6 foot bookcase that would not clear a turn in a hallway can arrive in a flat box the width of your shoulder. Check the pack dimensions and the weight of the heaviest box before you order, and note that some tall units need two people to stand up.
How to read a modular catalogue
Every modular system, from any brand, lists the same few numbers. Learn them once and you can compare any line.
- Width, height and depth. Depth is the number that matters most in a small room. A 9 to 12 inch deep unit is slim and good for books. A 15 inch deep unit takes baskets and boxes. A 18 to 20 inch deep unit takes a TV and a lot of floor.
- Grid unit. Note the cube size, such as 13 or 15 inches, since all doors, inserts and boxes are cut to fit it.
- Load rating. Shelves list a weight limit per shelf. Books are heavy, often 20 to 25 pounds per foot of shelf, so use the strongest shelves for books.
- Anchoring. Tall pieces ship with a wall strap or bracket. Use it, particularly with children or pets in the home.
- Add-ons. Doors, drawers, legs, plinths, inserts and rails are sold separately. This is where a plan gets expensive or flexible, depending on how you buy.
- Pack count. A big wall unit is often three or four boxes. Plan the build in an order that you can finish in a weekend.
Write those numbers on a sheet of paper for each candidate unit. Then compare by cost per cubic foot of closed storage and by how much floor it takes, not by looks alone.
Measure your wall into grid units
Start with the wall, not the shop. Measure the width, the height and any obstruction: a window sill, an outlet, a vent, a light switch and a skirting board. Mark each on a rough sketch.
Now convert the wall into grid units. If you are working with a 15 inch module, a 120 inch wall is 8 units. Subtract a unit for a door or a switch, and the plan becomes 7 units wide. Do the same for height. Most people can reach 72 inches without a stool, so a plan with a main zone to 72 inches and a display zone above is realistic.
Next, set the depth budget. In a room that is 10 to 12 feet wide, a total of 12 to 15 inches of wall depth is comfortable, and 18 inches is the most you should give a single wall. Keep a main path of 30 to 36 inches. If a deeper unit pushes the path under 30 inches, choose a shallower one for that stretch and put the deep one where nobody walks.
Finally, mark door swings and drawer pulls. A cabinet door that opens 90 degrees needs its own width in free floor. A drawer needs 18 inches in front of it to open fully and a person to stand. If the room cannot allow it, pick sliding doors, drawers with soft close or open cubes.
15 small living room storage ideas IKEA shoppers can build from modular parts
Wall-grid plans
1. The cube grid behind the sofa
Use a 2 by 4 or a 2 by 5 cube unit placed on its side behind a floated sofa. At about 15 inches tall and 60 to 75 inches wide, it forms a low room divider that holds baskets at sofa-back height. Fill alternating cubes with boxes and leave the others open for plants and lamps. The sofa gets a defined edge, and the unit holds a surprising amount for a depth of 12 to 15 inches.
2. The low cabinet run under the TV
Pair two or three low cabinets, each 24 to 36 inches wide and 15 to 18 inches deep, under a wall-mounted TV. Closed doors hide consoles and cables, and the top becomes a ledge for lamps. Keep the total height under 20 inches, so the TV centre stays near 42 inches from the floor. For screen wall layouts, see small living room TV wall ideas.
3. The floor-to-ceiling tower
Choose a tall narrow frame at 12 to 15 inches wide, set in a corner or beside a window. A tower with boxes below shoulder height and books above uses wall height that a small room rarely uses. Attach it to the wall at the top. If the room has 8 foot ceilings, add a thin extender on top, so the unit looks built in.
4. The shallow picture-rail shelf
Mount a pair of 4 to 6 inch deep ledges at 54 and 66 inches from the floor. They hold frames, paperbacks and small plants, and they cost almost no floor. This is the right answer for a wall that cannot take a deep unit because of a radiator or a door.
5. The corner stack
Two narrow shelves meeting in an L at a corner give you a 12 inch deep wedge of storage with almost no walking path lost. Add a floor lamp in the angle and you have a reading corner, too. Use the smaller depth on the side that faces the door.
Seat-and-store plans
6. The bench with boxes
A bench 14 to 16 inches deep and 40 to 60 inches wide, with open cubes under the seat, doubles as extra seating. Slide in fabric boxes with handles for throws, game controllers and remotes. Under a window, the bench holds a cushion row and keeps the sill clear.
7. The ottoman with a lid
A lidded storage ottoman 24 to 30 inches wide replaces a coffee table when paired with a tray. Fill it with the things you need weekly, such as extra blankets and board games, and leave the top clear. Check the lid hinge and choose a model whose lid stays open on its own.
8. The sofa with a drawer or a bed base
Flat-pack sofas often come with a storage bed base or chaise. If you pick one, measure the lift height and the open lid clearance against the wall. A sleeper with a storage well can take the guest bedding off a closet shelf.
9. The window seat from cabinets
Place two low cabinets 18 inches deep side by side under a window, and span them with a wood top and a cushion. The result is a built-in look at a fraction of the work. Leave a 1 inch gap at the wall for cables and the radiator.
Rail and rack plans
10. A wall rail system for the odds and ends
A metal or wood rail screwed into studs lets you hang small shelves, hooks and baskets and move them any time. It suits rooms that change often, such as a living room that is also a home office. Keep the rail at 60 inches above the floor for the main row and a second at 24 inches for baskets that children can reach. If you rent, see no-drill storage ideas for renters for options that avoid screws.
11. A rail by the front door
Use a short rail 24 to 36 inches wide with two hooks, a small tray and a mini shelf. It deals with keys, bags and post before they land on the sofa. If the living room is also the entrance, this one move can save more clutter than a big cabinet.
12. Hooks and a shelf above the sofa
A single shelf 6 to 8 inches deep, 54 to 60 inches above the floor, with hooks underneath, holds a few books, a plant and a lamp. Do not place it directly above anyone’s head at the end of a sofa; pick the centre or hang it higher.
Hidden and flexible plans
13. A cabinet with doors on a plinth
Raise a cabinet on legs 4 to 6 inches high, so a robot vacuum can pass beneath, and the floor shows underneath. Visible floor is the quickest way to make storage look lighter. Do the reverse in a rental where you want toes safe: use a closed plinth and put felt feet underneath.
14. Storage inside the media furniture
Choose a media unit with open cable holes and a back panel with cutouts, so wires stay hidden. A combination with two doors and one open cube holds consoles and a speaker. Our guide to hidden storage ideas has more places to tuck things away.
15. A trolley that moves
A slim rolling cart 12 to 16 inches wide can sit beside the sofa during the day as a side table and roll to the wall when you need the floor. Choose one with a lip or a rail, so cups do not slide off. It is the cheapest way to add flexible storage on a trial basis, and it pairs with the ideas in small space storage furniture.
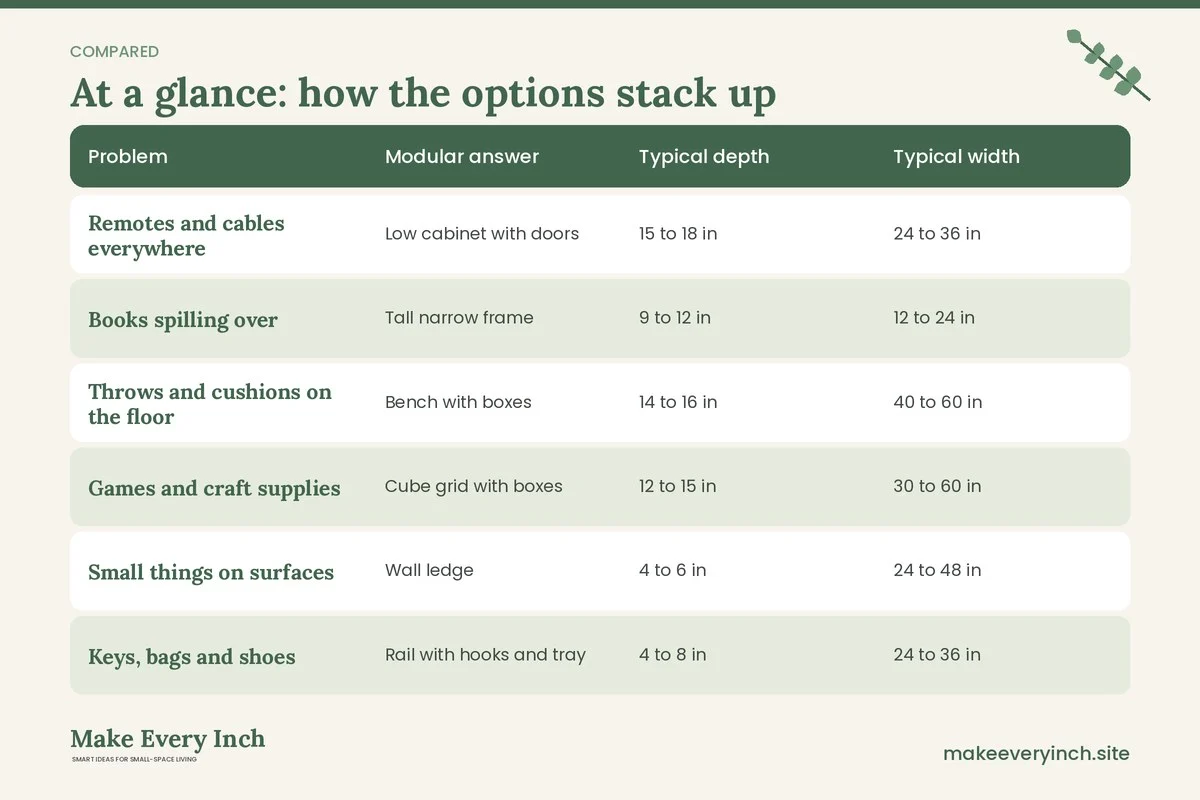
Planning table: matching a modular piece to a problem
| Problem | Modular answer | Typical depth | Typical width | Best location |
|---|---|---|---|---|
| Remotes and cables everywhere | Low cabinet with doors | 15 to 18 in | 24 to 36 in | Under the TV |
| Books spilling over | Tall narrow frame | 9 to 12 in | 12 to 24 in | Corner or window side |
| Throws and cushions on the floor | Bench with boxes | 14 to 16 in | 40 to 60 in | Under a window |
| Games and craft supplies | Cube grid with boxes | 12 to 15 in | 30 to 60 in | Behind the sofa |
| Small things on surfaces | Wall ledge | 4 to 6 in | 24 to 48 in | Above the sofa or desk |
| Keys, bags and shoes | Rail with hooks and tray | 4 to 8 in | 24 to 36 in | By the door |
| Guest bedding | Sofa base with storage | Sofa depth | Sofa width | Sofa spot |
| Toys | Low open cubes with bins | 13 to 15 in | 30 to 60 in | Along a short wall |
Build in stages, not all at once
A common mistake with flat-pack storage is to buy the whole wall in one trip. A staged plan costs the same and gives you a chance to correct errors. Here is a three-stage approach.
Stage 1: the frames
Buy and build only the main frames and shelves. Set them in place, fill them with your own boxes and baskets, and live with them for two weeks. Watch what spills over and which shelf you never use.
Stage 2: the inserts
Add doors, drawers and inserts only where you want to hide things. Doors are often the most expensive part of a unit, and some cubes work better open. Hide the visual noise, such as cables, and leave the pretty things in view.
Stage 3: the details
Finish with felt feet, cable clips, wall anchors, label holders and lighting. A strip of warm light inside a shelf makes a basic unit look finished. For ideas on light, see our small living room lighting ideas.
Assembly and fitting tips for flat-pack storage
Read the instructions through before you open any bag of fittings. Sort the screws and cams into a muffin tin. Build on a rug or a folded box to protect both the floor and the panels, and lay the back panel last if you can, since it keeps the frame square.
Check that every frame is square before you stand it up. Measure the two diagonals of the front. If they match, the frame is square. If not, nudge the corners until they do, then tack the back panel.
Do not skip anchoring. Find a stud with a finder, use a bracket or strap and screw it in. In a rental, ask first and consider freestanding units that are low and deep enough to stay stable. Check the floor too: a thick rug can tilt a tall unit, so pad the low corner with a shim.
Plan for the next move. Keep the manual, the spare fittings and the small hex key in a zip bag taped to the back of a unit. Panels that have been taken apart and rebuilt once can lose their grip, so use wood glue in the dowels on the second build only if you do not plan to move again.
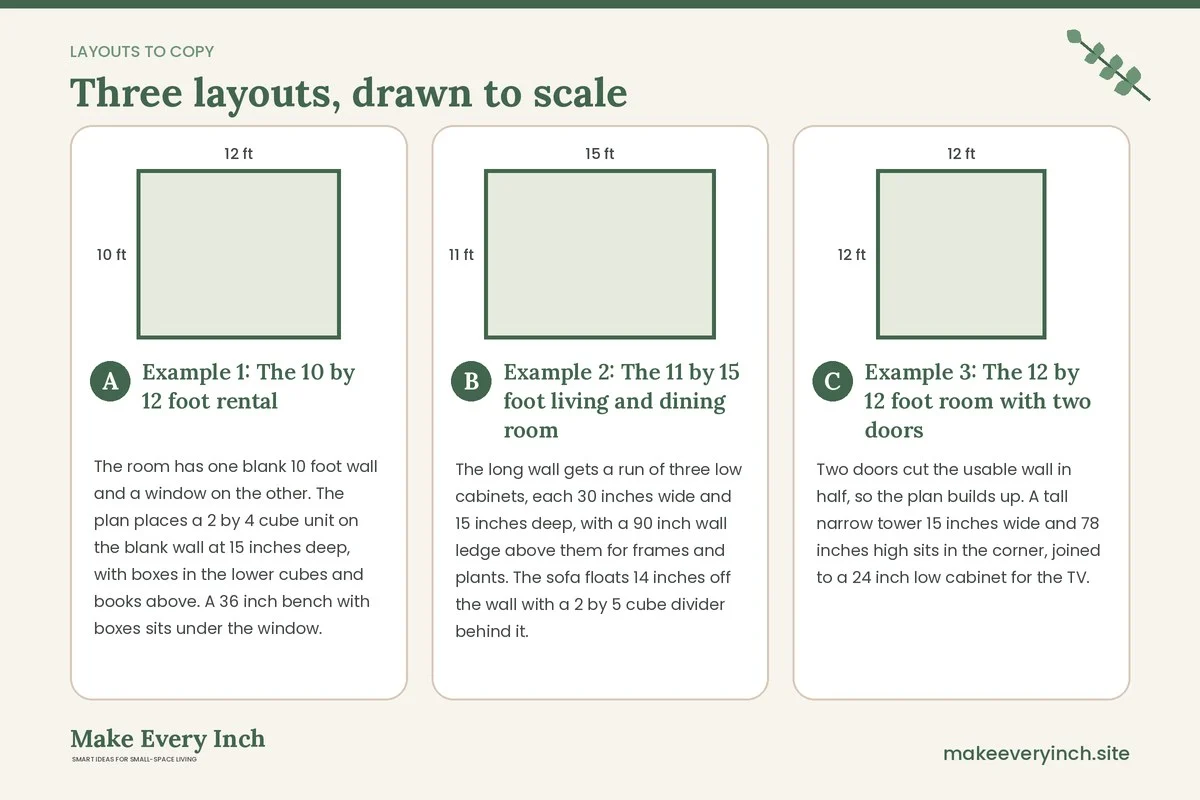
Three example rooms
Example 1: The 10 by 12 foot rental
The room has one blank 10 foot wall and a window on the other. The plan places a 2 by 4 cube unit on the blank wall at 15 inches deep, with boxes in the lower cubes and books above. A 36 inch bench with boxes sits under the window. The TV sits on a wall bracket above a single 30 inch low cabinet. Main path stays at 34 inches, and nothing is screwed in except the tall frame strap. Total footprint on the floor is under 10 square feet.
Example 2: The 11 by 15 foot living and dining room
The long wall gets a run of three low cabinets, each 30 inches wide and 15 inches deep, with a 90 inch wall ledge above them for frames and plants. The sofa floats 14 inches off the wall with a 2 by 5 cube divider behind it. A wall rail by the door holds keys and bags. The cabinets take board games, serving trays and the cables, and the cube divider takes toys and throws. The dining side stays clear.
Example 3: The 12 by 12 foot room with two doors
Two doors cut the usable wall in half, so the plan builds up. A tall narrow tower 15 inches wide and 78 inches high sits in the corner, joined to a 24 inch low cabinet for the TV. A wall rail above the cabinet carries a lamp and two shelves. A storage ottoman replaces the coffee table. The room gains about 20 cubic feet of closed storage without adding a single deep piece.
Colour, finish and light for modular storage
Matching the finish to the walls makes a unit blend in. White on white shrinks the apparent bulk of a tall frame, and a wood grain on a wall that is already warm adds texture without adding visual weight. If the units are black or dark, use them for contrast on a pale wall and keep the contents simple. Mixed finishes are fine if you repeat each in at least two places, such as a wood top on a white bench and a wood ledge above.
Use the contents as a design element. Boxes in two or three matching tones feel calmer than a rainbow of bins. Leave a quarter of every open shelf empty, so the eye can rest. Add one object that is not storage, such as a plant or a framed print, for every three boxes.
Light is the finishing touch. A slim stick-on light strip inside a shelf, or a plug-in lamp on the top, turns a flat unit into a feature. For a ceiling that feels low, see vertical storage ideas for ways to draw the eye upward.
Common mistakes to avoid
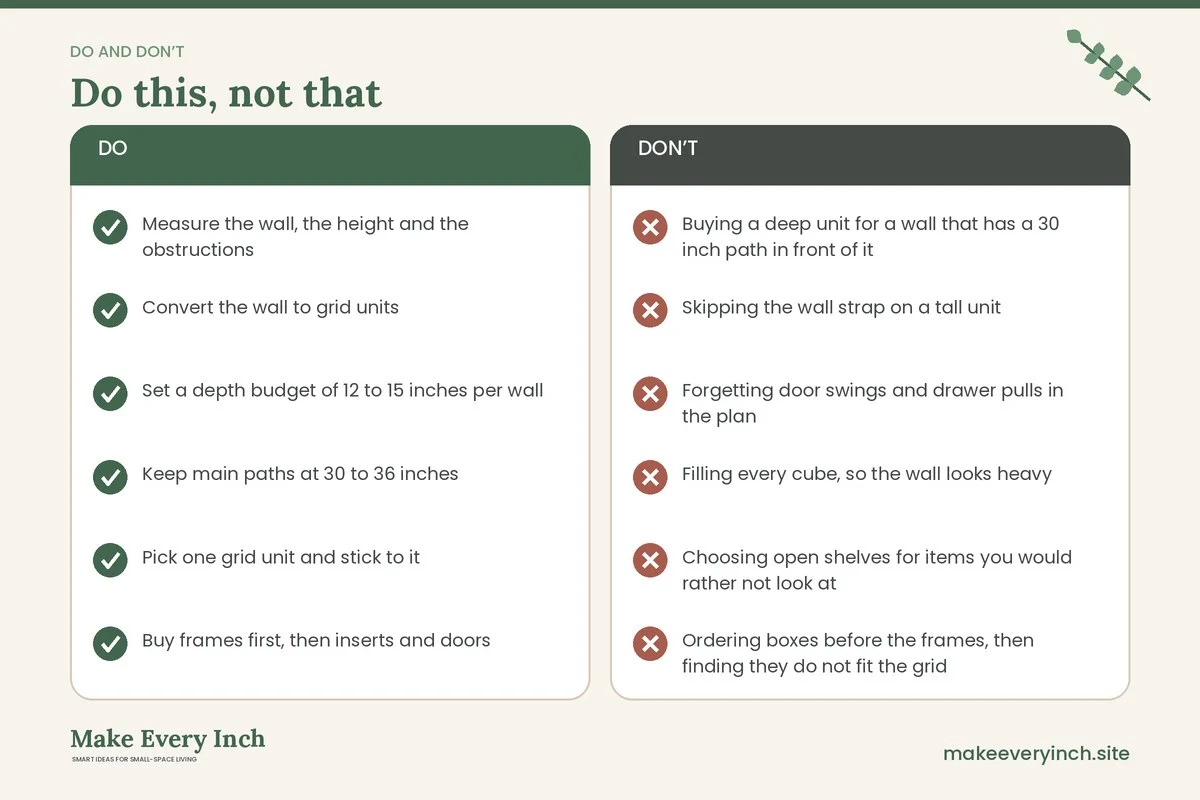
- Buying a deep unit for a wall that has a 30 inch path in front of it
- Skipping the wall strap on a tall unit
- Forgetting door swings and drawer pulls in the plan
- Filling every cube, so the wall looks heavy
- Choosing open shelves for items you would rather not look at
- Ordering boxes before the frames, then finding they do not fit the grid
- Not checking pack weights and stairs before delivery
- Stacking heavy books on the highest shelf
- Mixing too many finishes and sizes in one wall
Modular storage checklist
- Measure the wall, the height and the obstructions
- Convert the wall to grid units
- Set a depth budget of 12 to 15 inches per wall
- Keep main paths at 30 to 36 inches
- Pick one grid unit and stick to it
- Buy frames first, then inserts and doors
- Check pack sizes and weights
- Anchor every tall piece
- Keep a quarter of the shelves empty
- Label boxes with a simple tag
- Store the manual and spare fittings together
- Revisit the plan after two weeks
FAQ
What are the best small living room storage ideas IKEA style for a tiny room?
A shallow cube grid, a low cabinet run under the TV and a tall narrow tower in a corner give the most storage for the least floor. Keep depth to 12 to 15 inches and paths to 30 inches or more.
How deep should living room storage be in a small room?
Choose 9 to 12 inches for books and 13 to 15 inches for boxes. Go to 18 inches only on a wall without a path in front of it.
Is flat-pack storage strong enough for books?
It can be, if you check the load rating per shelf and use the shorter spans for books. Heavy loads sag long shelves over time, so add a centre support or use shorter shelves.
Can I use modular storage in a rental?
Yes. Freestanding units, benches, ottomans and trolleys need no holes. For tall pieces, ask your landlord about anchoring, or use low units instead.
Should I choose open shelves or doors?
Use doors for the messy things, such as cables and games, and open shelves for items you like to see. A mix of both keeps the wall calm.
How do I make flat-pack storage look built in?
Fill gaps to the ceiling with extenders, line up the edges of units, add a trim or a plinth and match the paint of the wall behind the unit.
How do I plan storage for two people sharing a room?
Give each person a column or a set of cubes and use matching boxes. Our guide to small living room storage ideas for couples goes deeper.
Where do I find more budget-friendly options?
See small living room storage ideas on a budget for ways to spread the cost, and our IKEA small space ideas guide for general flat-pack thinking.
Keep going: Keep planning with our small living room storage ideas, cheap storage ideas for apartments and small living room storage ideas for renter-friendly rooms.
Save this guide for later
Pin the ideas you like to Pinterest so you can come back to them when you plan your space.