How to Add Storage to a Small Bathroom, Step by Step
Quick answer: To add storage small bathroom spaces can actually hold, work in order: empty and sort everything, measure the dead zones (behind the door, above the toilet, beside the vanity, inside the shower), choose pieces by depth and by what they hold, then secure and install them safely. Keep shelves shallow, anchor anything tall, keep towels and electrics away from water, and ask permission before drilling in a rental.
If you want to add storage small bathroom layouts rarely have room for, the trick is not buying more furniture. It is finding the unused inches that already exist, matching each one to the right container, and installing it in the right order. Most small bathrooms hold far less than their owners need because the space is planned by accident, with products stacked wherever there is a flat spot. This guide is a process, not a list of products. You will audit what you own, measure the dead zones, work out how deep each addition can be, choose from a comparison table, follow a safe installation sequence, and finish with three worked example bathrooms, a maintenance routine and a checklist. For a wider set of ideas, read our main guide on small bathroom ideas, and for photo-style inspiration browse tiny bathroom storage ideas.
Step 1: Empty the room and sort what you own
Before you add anything, take everything out. Pull every bottle, towel, tool and spare roll out of cabinets, drawers, baskets and the shower, and set it all on a bed or a table. This feels like extra work, but it prevents the most common storage mistake: buying a shelf for items you do not need. Most people discover duplicate products, half-empty bottles, expired items and things that belong in the bedroom or kitchen.
Sort into five piles.
- Daily: items used every morning or evening, such as a toothbrush, face wash and a hairbrush.
- Weekly: items used a few times a week, such as a razor, a mask or nail tools.
- Backups: spare toilet paper, extra soap, cleaning supplies and refills.
- Linens: towels, washcloths and a bath mat.
- Leave: anything expired, empty or not used in months, plus anything that belongs somewhere else.
Count the piles. A useful rule is that daily items need an open, reachable spot, weekly items can sit behind a door or in a drawer, and backups can live higher or farther away. When you know how many of each you have, you will know how much storage to create and what kind. If decluttering is hard, our guide to small apartment decluttering ideas breaks the process into short sessions.
Step 2: Measure the dead zones
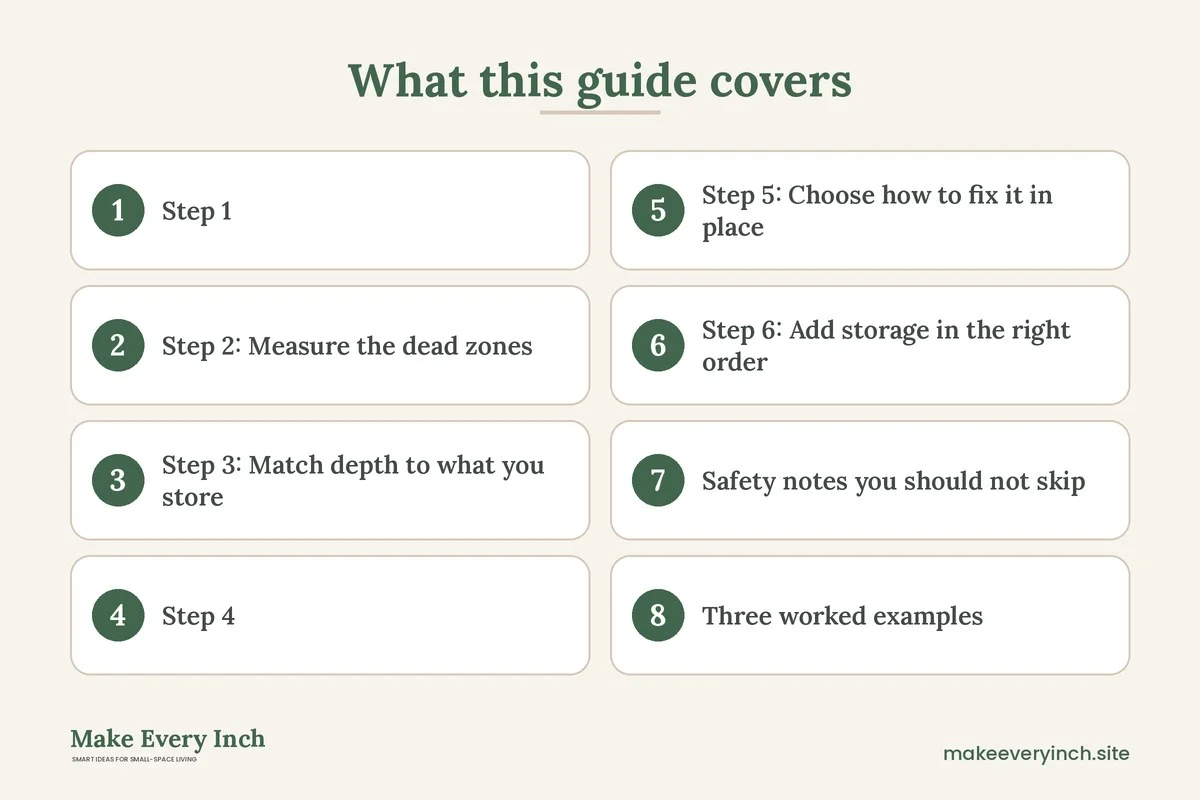
A small bathroom has several places where air is wasted. Measure each one with a tape and write the width, depth and height on a sketch. These are the zones to check, in the order most people find them useful.
Above the toilet
The wall space above the tank is the most common storage spot, but its limits matter. Measure from the top of the tank to the ceiling, and from the wall to the front of the tank lid. Leave 2 to 3 inches above the tank so you can lift the lid, and keep any shelf shallow enough that you do not hit your head when you stand up. In most bathrooms, 6 to 8 inches deep is the maximum. Our guide to the best over-the-toilet storage compares the common styles.
Behind the door
The back of a door is often free. Measure the door width, the clearance between the door and the wall when it opens and the thickness of the door. Slim over-the-door hooks and racks need about a quarter inch of gap at the top edge, so check that the door still closes. If the door swings into a tight space, keep items light and shallow so you do not bump them.
Beside the vanity or toilet
Look for a gap of 6 to 10 inches between the vanity and the wall, or between the toilet and the wall. A rolling cart or slim tower might fit. Measure at the floor and at the widest point, because baseboards and pipes can narrow the gap.
Under the sink
The cabinet under a pedestal sink is missing, and the cabinet under a vanity is usually wasted by pipes. Measure the clear space around the drain, the height from the floor to the pipe and the depth of the cabinet. Use stackable bins or a cabinet organizer that wraps around the trap.
The shower or tub area
Walls inside the shower can hold caddies and corner shelves. Measure the corners and the distance from the shower head to the shelf spots. Keep items away from the spray, so they do not collect water. For tub-specific layouts, see our post on small bathroom ideas with a tub, and for glass-door showers read small bathroom ideas with a walk-in shower.
The ceiling line and the window
Look above the door frame and around the window. A shelf above the door at 7 feet can hold backup rolls and spare towels, and a window sill holds one or two small items. These spots are out of reach, so use them only for things you need rarely.
Step 3: Match depth to what you store
The most important number in bathroom storage is depth, not width. Depth decides whether a piece blocks the path and whether you can see what is on the shelf. Use this guide to match depth to contents.
- 3 to 4 inches deep: toothbrushes, small jars, hair ties and bottles. This is the depth of a wall shelf or a narrow ledge.
- 5 to 6 inches deep: most bottles, rolled washcloths and spare toilet paper. This is the depth of a slim cabinet or a ladder shelf.
- 8 to 10 inches deep: folded hand towels and baskets. This is the depth of a standard over-the-toilet cabinet.
- 12 to 16 inches deep: full bath towels and larger storage. Only add this where the walkway stays at least 24 inches wide.
Clearance rules also protect safety. Most building codes and design guides recommend at least 21 inches of clear floor space in front of a toilet, sink and tub, with more being more comfortable. Treat this as a reference and check what applies where you live. A piece that violates this rule will not just be awkward; it can be a trip hazard.
Step 4: Choose the right storage for each zone
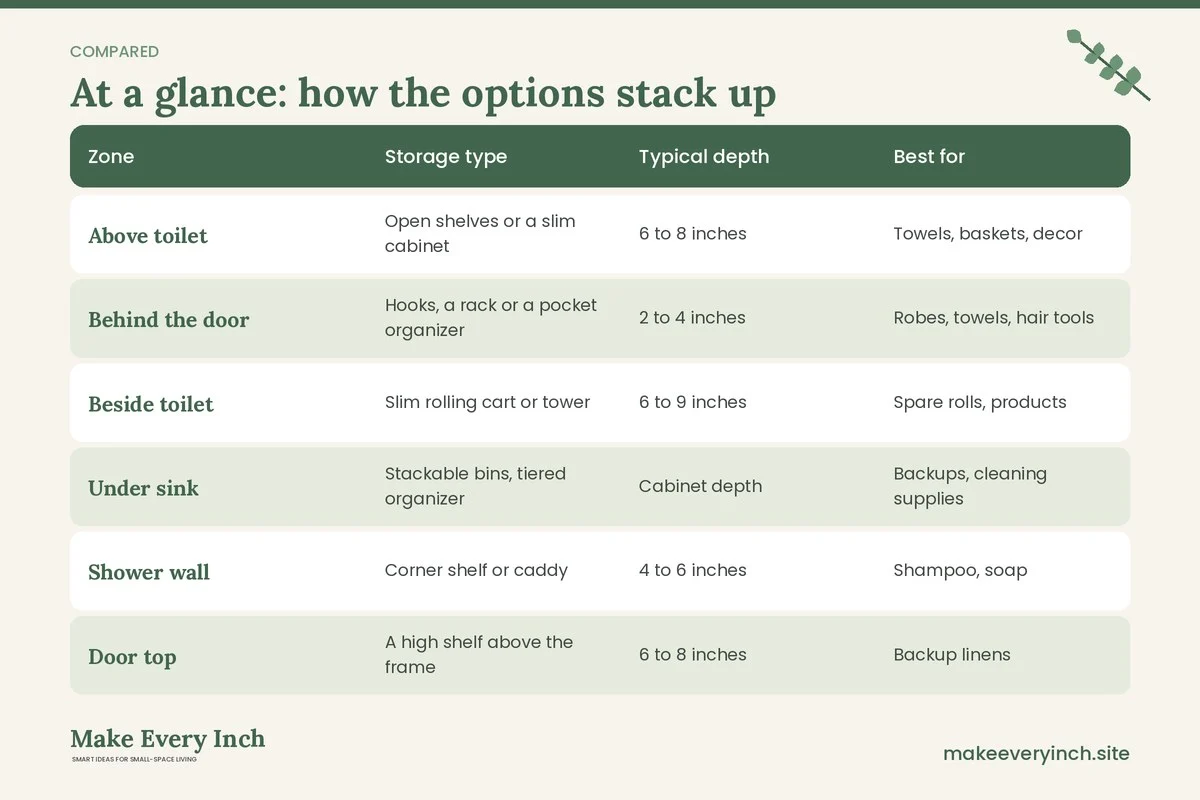
The table below links the zones you measured to common storage types, with notes about when each works. Use it as a filter before you shop.
| Zone | Storage type | Typical depth | Best for | Watch out for |
|---|---|---|---|---|
| Above toilet | Open shelves or a slim cabinet | 6 to 8 inches | Towels, baskets, decor | Tank lid clearance, head height |
| Behind the door | Hooks, a rack or a pocket organizer | 2 to 4 inches | Robes, towels, hair tools | Door closing, hinge side |
| Beside toilet | Slim rolling cart or tower | 6 to 9 inches | Spare rolls, products | Floor clearance, tipping |
| Under sink | Stackable bins, tiered organizer | Cabinet depth | Backups, cleaning supplies | Pipes, moisture |
| Shower wall | Corner shelf or caddy | 4 to 6 inches | Shampoo, soap | Weight limit, water |
| Door top | A high shelf above the frame | 6 to 8 inches | Backup linens | Anchoring, reach |
| Wall beside mirror | Narrow ledge or shelf | 3 to 4 inches | Daily items | Splashes, adhesive hold |
| Window sill | A tray or small plant | 4 to 6 inches | One or two items | Moisture, privacy |
For broader product thinking, see our guides to small bathroom shelving ideas and small bathroom organization ideas, which go deeper on baskets, jars and layouts.
Step 5: Choose how to fix it in place
How a piece attaches matters as much as what it is. Pick one of three approaches.
Freestanding
Freestanding pieces stand on the floor or sit on the toilet tank, and they need no holes. They suit renters and walls with tile. Check the footprint and that the base is stable. Anything tall, such as a tower or an over-the-toilet unit with more than two shelves, can tip. Anchor it to the wall, or choose a design with a low center of gravity. Keep heavy items on the lower shelves, and keep the unit away from where children or pets may climb.
Adhesive and tension
Adhesive hooks and shelves, suction caddies and tension rods avoid drilling. They rely on a clean, dry, smooth surface, so wipe the wall with a gentle cleaner, let it dry fully and check the rated weight. Steam and humidity weaken adhesive over time, so keep loads well under the limit and check the hold every few weeks. Tension rods work between two walls, such as in a shower corner. Do not hang heavy items or anything over a tub where a fall could hurt someone. Our guide on no-drill storage ideas for renters covers the strongest options and how to remove them cleanly.
Drilled and mounted
Mounted shelves hold the most weight. Before you drill, check the lease and get permission in writing if you rent. Locate the studs, and use anchors suited to the wall type, whether drywall, plaster or tile. Check for hidden pipes and wires behind the wall, because bathrooms have plumbing and often electrical cables near the mirror. If you are unsure, hire a professional. Never drill into tile without the right bit and care, since cracked tile lets water into the wall. Our guide on renter-friendly bathroom ideas lists upgrades that need no holes.
Step 6: Add storage in the right order
Installing in the wrong order wastes money. Follow this sequence.
- First, free storage: reorganize what you already have. Use existing cabinets better, put baskets in drawers, and move items that do not belong.
- Second, behind and above: add hooks, a door rack and a high shelf. These use no floor space.
- Third, vertical: add an over-the-toilet unit or a ladder shelf. Anchor it.
- Fourth, under and beside: add bins under the sink and a slim cart beside the toilet or vanity.
- Last, decor: after all the practical storage is in place, add a plant, a tray or a jar of cotton balls on the leftover space.
After each step, live with it for a few days. If the bathroom already feels organized, stop. Many bathrooms need only the first two steps.
Safety notes you should not skip
Bathrooms combine water, electricity and slippery floors, so follow these notes.
- Anchor tall furniture. Any tower, cabinet or tall shelf can tip if a child climbs it or if you pull a drawer open. Anchor it to a stud with the straps or brackets supplied, if the lease allows. If it cannot be anchored, choose a lower piece.
- Keep electrics away from water. Do not place hair dryers, razors or lamps on a shelf above a tub, sink or toilet where they could fall in. Plugs in a bathroom should be on a ground fault circuit interrupter (GFCI) outlet. If the outlet is not GFCI, ask the landlord or a licensed electrician about it, and do not run extension cords across wet floors.
- Respect weight limits. Read the rated weight of every hook, shelf and caddy. Wet towels weigh several times their dry weight.
- Ventilate. Storage that blocks a vent or a window traps moisture, which leads to mold. Leave the fan unobstructed and keep towels from touching the fan grille.
- Store chemicals safely. Cleaners, medicine and sharp razors belong in a closed cabinet, high up or locked if children or pets are in the home.
- Check rental rules. Do not drill, paint or remove fixtures without written permission.
- Use low-VOC finishes. If you repaint a shelf or cabinet, choose a low-VOC paint, ventilate the room and let the finish cure before you load it.
Three worked examples
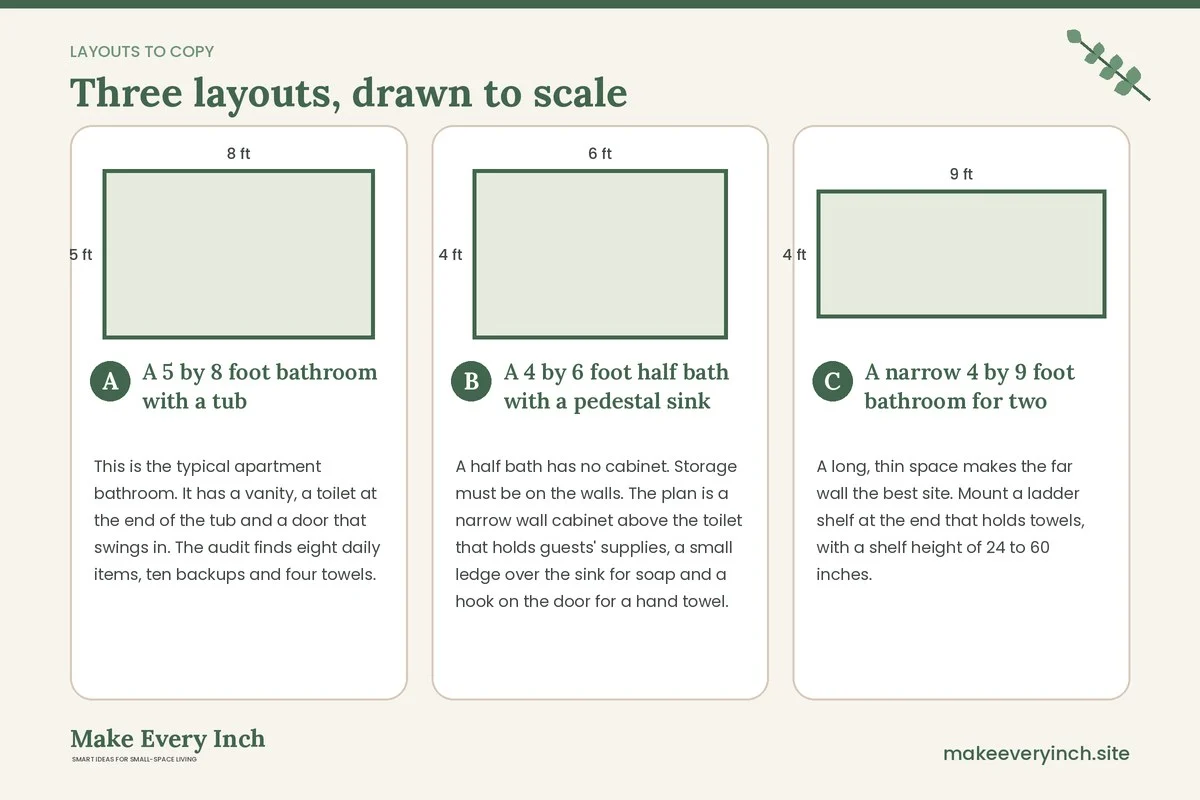
A 5 by 8 foot bathroom with a tub
This is the typical apartment bathroom. It has a vanity, a toilet at the end of the tub and a door that swings in. The audit finds eight daily items, ten backups and four towels. The plan is a slim shelf unit above the toilet at 7 inches deep, two over-the-door hooks, a tiered organizer under the sink and a corner shelf in the tub. Backup rolls go in a basket on the shelf, and the extra towels move to a hall closet. The floor stays clear in front of the toilet, at 24 inches.
A 4 by 6 foot half bath with a pedestal sink
A half bath has no cabinet. Storage must be on the walls. The plan is a narrow wall cabinet above the toilet that holds guests’ supplies, a small ledge over the sink for soap and a hook on the door for a hand towel. A lidded basket on the floor beside the toilet holds spare rolls and a brush. The room keeps a clear 30-inch path from the door to the sink, and nothing sticks out at head height.
A narrow 4 by 9 foot bathroom for two
A long, thin space makes the far wall the best site. Mount a ladder shelf at the end that holds towels, with a shelf height of 24 to 60 inches. Use a wall ledge by the mirror for the daily items of two people, each side labeled with a tray. A narrow rolling cart tucks between the toilet and the wall. Because the room is narrow, keep the depth under 8 inches. For this kind of room, read our guide to narrow bathroom ideas.
Keep it working: a monthly routine
Storage only helps if it stays organized. A short routine stops the bathroom filling up again.
- Weekly: wipe shelves, throw out empty bottles and turn towels.
- Monthly: check adhesive hooks for sagging, test the hold of any shelf and tighten loose screws.
- Every season: review the pile of backups. If you have three of anything, use one before buying another.
- Every six months: repeat the audit for five minutes. Remove what you no longer use.
Label bins if more than one person shares the bathroom. A simple label saves arguments about where things go.
Common mistakes when you add storage
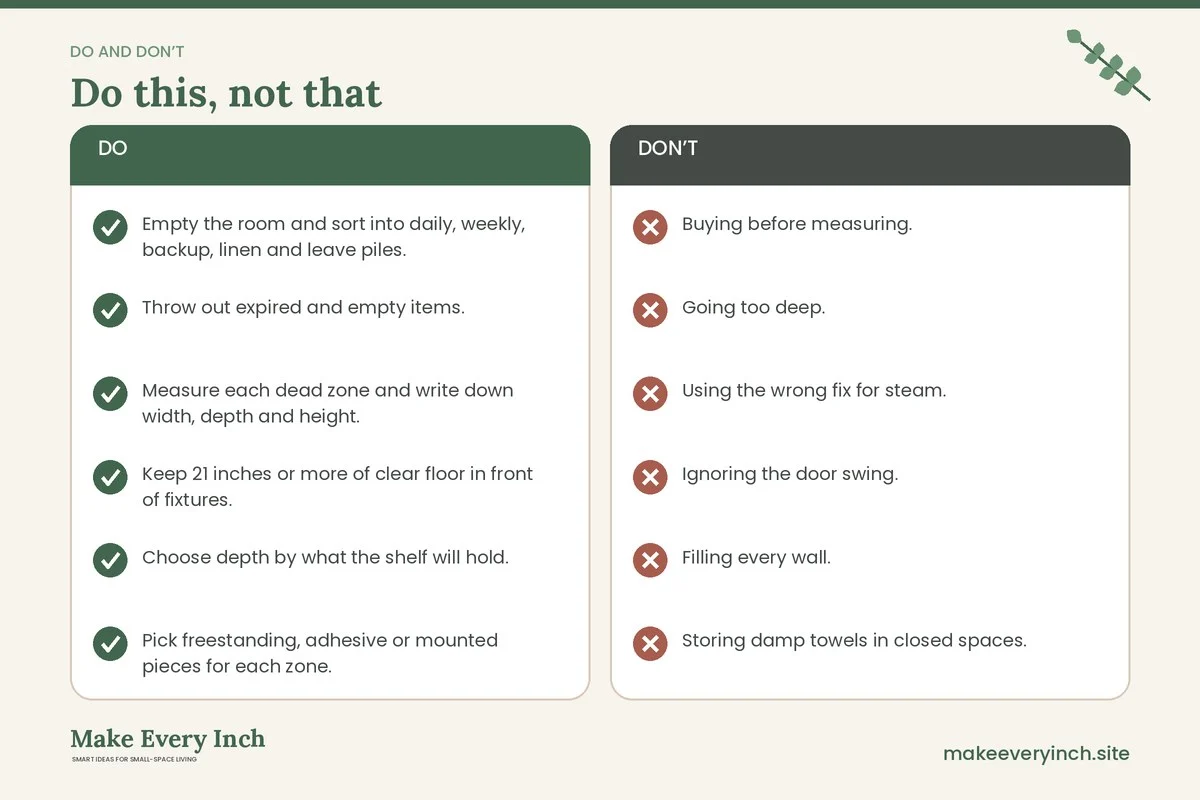
- Buying before measuring. The most common waste is a shelf that is two inches too wide.
- Going too deep. Deep shelves look useful but hide items and block the path.
- Using the wrong fix for steam. Adhesive that works in a bedroom can fail in a steamy bathroom.
- Ignoring the door swing. A rack that stops the door from opening fully is a daily irritation.
- Filling every wall. Leave some blank space so the room does not feel crowded. Our guide to small bathroom ideas that feel spacious explains how visual breathing room works.
- Storing damp towels in closed spaces. Without airflow, mildew follows.
Lighting and finish choices that help storage
Good light makes shelves easier to use, and a light finish makes them feel smaller. Pale shelves against pale walls fade into the wall and read as part of the room. A glossy or wipeable finish cleans easily. Choose materials that tolerate damp, such as sealed wood, metal with a rust-resistant coat, plastic or ceramic. Avoid raw, untreated wood or particleboard in a steamy room, because it swells. For lighting that suits shelves and mirrors, read our post on small bathroom lighting ideas.
Pairing storage with the rest of the room
Storage works best when it fits the room’s overall plan. If your bathroom has no counter space, concentrate on wall and over-door solutions, and see small bathroom ideas with no counter space for more. If the layout feels awkward, our guide to small bathroom layout ideas that work can help you decide whether moving a door swing or a vanity makes sense. If you are choosing a vanity, read small bathroom vanity ideas for options with drawers rather than doors, which give you better access in a tight space.
Checklist: add storage in a small bathroom
- Empty the room and sort into daily, weekly, backup, linen and leave piles.
- Throw out expired and empty items.
- Measure each dead zone and write down width, depth and height.
- Keep 21 inches or more of clear floor in front of fixtures.
- Choose depth by what the shelf will hold.
- Pick freestanding, adhesive or mounted pieces for each zone.
- Check the lease before drilling, and get permission in writing.
- Anchor tall furniture and check weight limits.
- Keep electrics away from water and use GFCI outlets.
- Leave the fan and vents clear.
- Install in order: reorganize, behind and above, vertical, under and beside, decor.
- Review the system once a month.
FAQ
What is the first thing to do to add storage in a small bathroom?
Empty the room and sort what you own. You will often find you need less storage than you thought, and you will know exactly which items need a place.
How deep should bathroom shelves be?
For most small bathrooms, 4 to 8 inches is enough. Go deeper only where there is a wide walkway, because deep shelves hide items and can be a bump hazard.
Can I add storage without drilling?
Yes. Freestanding pieces, tension rods, over-the-door hooks and adhesive hooks avoid holes. Check weight limits and keep humidity in mind, because steam can weaken adhesive.
How do I stop towels from getting damp in storage?
Leave space around them for air, hang them to dry between uses and keep them away from the shower spray. Run the fan during and after showers.
Is it safe to put a shelf above the toilet?
Generally yes if it is securely fixed, not too deep and kept clear of heavy or breakable items. Leave room to lift the tank lid, and do not store items that could fall on someone.
How do I add storage in a rental bathroom?
Start with freestanding and over-the-door pieces, and ask your landlord before drilling or using strong adhesives. Our guide to renter-friendly bathroom upgrades lists more options.
What if my bathroom has no cabinet at all?
Use the walls and the door. A narrow cabinet above the toilet, a ladder shelf and hooks give you a lot of room, and a lidded basket on the floor can hold spare rolls. For linens, see linen storage ideas without a linen closet.
Keep going: Keep going with our small bathroom organization ideas, the companion guide on small bathroom mistakes that make it feel smaller and our small bathroom makeover ideas.
Save this guide for later
Pin the ideas you like to Pinterest so you can come back to them when you plan your space.