Small Kitchen Ideas for Older Homes
Quick answer: The best small kitchen ideas for older homes work with the building instead of against it. Scribe or shim furniture to uneven walls and floors, add outlets through a qualified electrician, use shallow shelves for shallow cabinets, anchor into studs or use proper plaster anchors, improve ventilation, and treat any sanding of old paint as a lead risk until a test says otherwise.
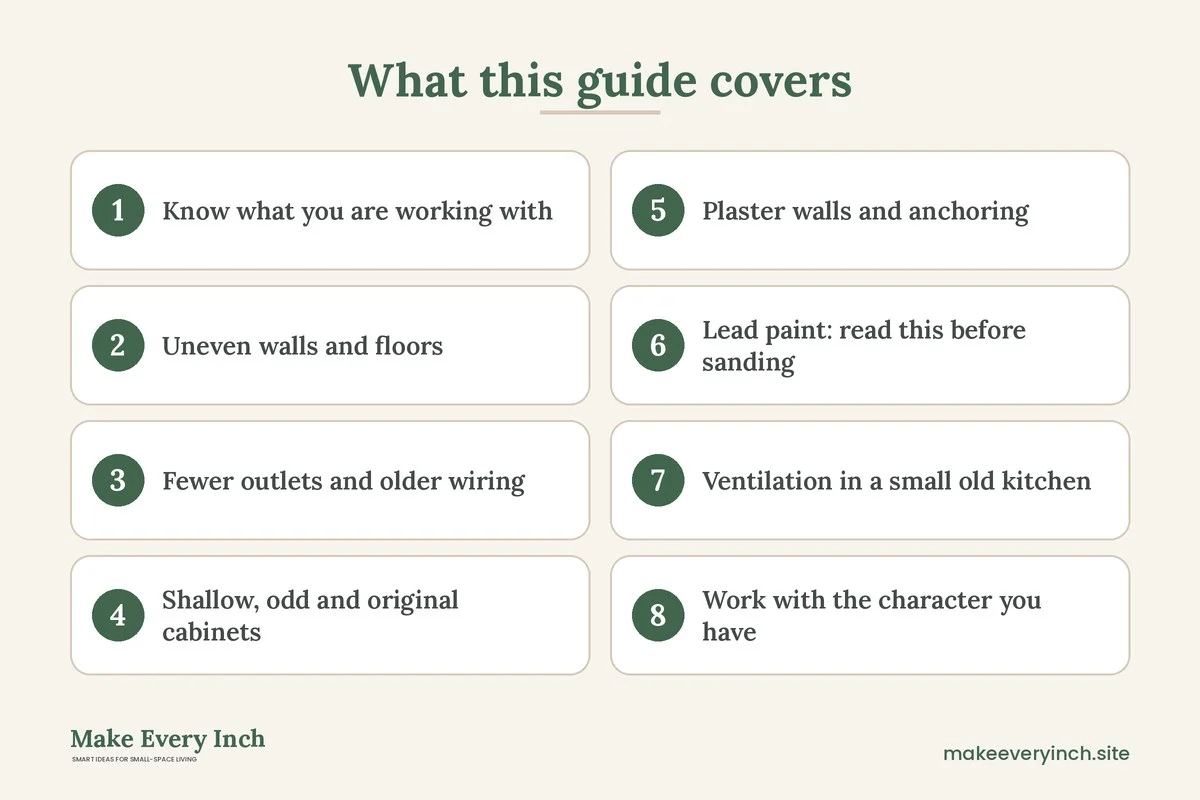
Small kitchen ideas for older homes start with a different set of questions than the ones in a new build. A 1920s galley, a 1950s cottage kitchen or a pre-war apartment kitchen rarely has square corners, plentiful outlets or standard cabinet depths. Walls lean, floors slope toward the drain, and the single outlet over the counter is shared by the kettle, the toaster and the coffee maker. The same houses also have things new kitchens struggle to fake: tall ceilings, deep window sills, solid doors, glass-front cabinets and a patina that makes a small room feel lived in. This guide covers the quirks one by one, with measurements, safety notes, a comparison table, three example kitchens, a pre-project checklist and a FAQ. For the wider picture, start with our main guide to small kitchen ideas, then pair it with the small kitchen storage ideas and small kitchen organization ideas posts.
Know what you are working with
Before buying anything, spend twenty minutes learning the room. Older kitchens vary a great deal, so a plan that works in one house can fail in the next. Bring a tape measure, a four-foot level, a pencil, a notepad and a phone for photos.
Start with the walls. Hold the level against each wall at three heights and note the gap at the top or bottom. A gap of up to one quarter inch over four feet is common and easy to hide. A gap of half an inch or more means you need a plan for filler strips, shims or freestanding furniture that does not depend on a perfect fit.
Next, check the floor. Place the level on the floor along the wall where you want a cart or a cabinet. Slopes of one half inch to one inch over several feet are typical in older houses and often run toward the center or toward the kitchen’s old drain. Mark the high and low points with tape.
Then check the ceiling height and the window. Many older kitchens have ceilings of 8 to 10 feet, which gives you vertical room that newer kitchens often lack. Windows may be deep, single-pane or painted shut, which matters for both light and ventilation.
Finally, look at what is on the walls. Plaster over wood lath behaves differently from drywall, and tile set in a thick mortar bed behaves differently again. Tap gently with a knuckle. A solid, dense sound suggests plaster or masonry, and a hollow, lighter sound suggests drywall. If you are unsure, assume plaster and treat it with care.
Uneven walls and floors
Perfectly square cabinets look wrong against a wall that is out of plumb, because the gap is visible along one edge. There are good ways to deal with it.
Scribe, do not force
Scribing means cutting the edge of a filler strip or panel to follow the wall’s shape. Hold a strip against the wall, set a compass to the widest gap, trace the wall’s line onto the strip and trim to that line. The result sits tight to the wall without caulk-heavy gaps. Many people do this with a thin strip of wood trim, and it works well for the side of a freestanding pantry, a bookcase or a built-in.
Shim freestanding pieces
A tall piece should stand level even when the floor does not. Use hard plastic or wood shims under the low side, check with a level in both directions and trim the visible shim edges flush. Do not stack soft materials under heavy furniture, because they compress over time. Anchor tall pieces to the wall as described in the anchoring section below, since a piece leaning on shims can tip more easily than one on a flat floor.
Choose forgiving shapes
Open shelves, rolling carts and furniture with a visible leg are more forgiving than a built-in box. A cart with locking casters can sit on a sloped floor if you check that the wheel locks hold and that nothing rolls. See our guides to best rolling kitchen carts and small kitchen cart ideas for shopping notes, and read the weight and tip warnings before loading a cart.
Hide gaps with trim and caulk
For gaps under one quarter inch, flexible paintable caulk and a small trim piece usually do the job. For larger gaps, use a trim strip and caulk the thin leftover. A cove or quarter-round piece along the floor hides uneven edges, and a narrow rail along the wall hides the join at the top. Match the finish to the wall color so the line fades.
Level the counter, not the room
If the base cabinets are original, the countertop may be the level reference you care about. A counter that slopes can send a bowl or a pot sliding. Check with a level, and shim the cabinet feet or the countertop where possible. If the slope is large, a thick cutting board with non-slip feet gives you a flat work spot without rebuilding.
Fewer outlets and older wiring
Older kitchens often have one or two outlets over the counter, and some have none beyond a ceiling fixture. Small appliances then sit on cords stretched across the sink. This is both a convenience problem and a safety problem.
What not to do
Do not run extension cords permanently along the counter or through a wall. Do not daisy-chain power strips. Do not plug a heat-producing appliance, such as a kettle, toaster oven or space heater, into a thin power strip. Do not use a cord near the sink if water could reach it. If outlets feel warm, spark or trip often, stop using them and call a licensed electrician.
What to do
Have a qualified electrician inspect the circuit. Kitchens commonly need dedicated circuits for countertop outlets, with protection near water. Codes differ by region and by the year of your house, so ask what the local rules require and what is practical in your wall. An electrician can add outlets, replace worn ones, ground a circuit or install protective outlets where needed. That is not a job for a guess.
Meanwhile, plan your appliance zones around the outlets you have. Put the most-used heat appliances, such as the kettle and toaster, at the outlet with the most counter space. Keep a single charging spot out of the splash zone. Use a surge-protected strip rated for the load only for low-power devices, and plug each heavy appliance directly into the wall.
Light without wiring
If the ceiling fixture is the only light, add lighting that does not need new wiring. Rechargeable under-cabinet strips and plug-in slim lights help with shadows on the counter. See our posts on small kitchen lighting ideas and renter-friendly lighting ideas for options, and keep any cable away from heat and water.
Shallow, odd and original cabinets
Original cabinets can be shallow, narrow or oddly tall. Old wall cabinets may be 8 to 10 inches deep, compared with the 12 inches common today. Base cabinets may have a center post that blocks the opening, or a drawer that is only 3 inches deep. Instead of cursing them, match what you store to what fits.
Measure the inside, not the outside
Measure the usable depth, width and height of each cabinet with the door closed and the inside empty. Note any lip, hinge or shelf support. Write the three numbers on a card and take it shopping. A rack that is 1 inch too deep will stop the door from closing.
Match storage to depth
- 8 to 9 inches deep: spices, small jars, mugs, a single row of plates standing on edge or a slim can rack.
- 10 to 12 inches deep: most dinner plates, bowls in a single stack and standard glassware.
- Narrow base cabinets of 6 to 9 inches: a pull-out for trays, a baking sheet divider or cleaning supplies. A freestanding slide-out unit helps if it fits the width.
- Tall, deep cabinets: a lazy susan or stacking risers to use the height.
Add dividers and risers
Vertical dividers hold baking sheets and cutting boards on edge. Tiered risers let you see the back row. Door-mounted racks can hold lids, foil and cleaning supplies, but check the clearance behind the door first. Our guides to small kitchen cabinet organization ideas and small kitchen drawer organization ideas go deeper on systems.
Consider open and glass-front options
Original glass-front cabinets are an asset. They make the room feel lighter, and they invite you to edit what you display. If a cabinet door is sticking or missing, taking it off and leaving the shelves open is a reversible option, as long as you keep the hinges and the door for the next owner. See our guide to small kitchen ideas with open shelving for display rules.
Keep the pantry cupboard
Many older houses have a built-in pantry cupboard or a deep tall cabinet. Treat it as a feature. Add narrow shelves, a door rack and a small step stool, and you have a pantry that new kitchens do not offer. Our post on small kitchen pantry ideas and the guide to small kitchen ideas with no pantry show how to use the space well.
Plaster walls and anchoring
Plaster walls are hard, brittle and sometimes crumbly. A nail or screw that goes into drywall without trouble can crack plaster or pull out of a weak spot. If you rent, never drill without permission. Check the lease and ask in writing, because a hole in plaster is harder to repair than one in drywall.
Test before you commit
Press a small adhesive hook on a hidden spot and wait a few days. Plaster is often dusty or painted with many coats, so adhesive may fail on a surface that looks fine. Peel slowly and check the paint underneath. For hanging weight beyond a light frame, adhesive is not the right choice.
Anchoring tall furniture
Any bookcase, pantry unit or tall cabinet should be anchored to a wall to reduce the risk of tipping, especially if children or pets are in the home. Find a stud or, in a masonry wall, use the right masonry anchor. In plaster over lath, the anchor needs to reach the wood behind it. A stud finder can be unreliable in plaster, so use it only as a guide and confirm with a small test hole in a spot that will be covered. If you cannot anchor, choose a lower piece, keep heavy items on the bottom shelves and keep the unit out of walkways.
Use the right fixings
For plaster over lath, toggle-type anchors that spread behind the wall hold better than plastic expansion plugs. For solid plaster over masonry, a masonry bit and the matching anchor are typical. Pre-drilling slowly with light pressure reduces cracking. Use the anchor’s weight rating as a ceiling and leave a wide margin. A shelf for spices has different needs from one for cast-iron pans.
Prefer freestanding when in doubt
If you are unsure about the wall, choose freestanding options: a rolling cart, a bakers rack, a tall shelf on the floor with a strap or a rail that hangs from a tension rod. Our guide to renter-friendly shelving and the post on no-drill storage ideas for renters cover choices that leave the plaster alone.
Lead paint: read this before sanding
Houses built before the late 1970s in many countries may contain lead-based paint, and kitchens are often layered with decades of coats. Lead dust is harmful, especially for children and pregnant people. Sanding, scraping or heat-stripping old paint can release dust and fumes.
- Test first. Use an approved test kit or hire a certified professional before you disturb any old paint. A test on one layer does not tell you about the rest, so follow the instructions and ask a professional if you are unsure.
- Do not dry sand or burn old paint. Avoid dry sanding, open-flame torches and high-heat guns on suspect surfaces.
- If the test is positive, consider a certified abatement or renovation professional, especially for deteriorating paint, windows and doors.
- Protect the household. Keep children, pets and pregnant people out of the work area, seal the room with plastic sheeting, wet-wipe surfaces and clean with a HEPA vacuum. Do not use a regular household vacuum.
- For light updates, a thorough clean and a coat of low-VOC primer and paint over sound, intact paint is often safer than removing the old layer. Ask a professional if you are unsure.
- Renters. Tell the landlord about peeling or chipping paint instead of scraping it yourself.
Rules and recommended practices vary by region, so check your local health or housing authority for current guidance.
Ventilation in a small old kitchen
Older kitchens often lack a range hood that vents outdoors, and windows can be stuck or small. Cooking moisture and grease then settle into walls and cabinets, which dulls paint and can encourage mildew.
- Check what you have. A hood that only recirculates air through a filter does not remove moisture. A hood that vents outside does.
- Use the window. If the window opens, cross-ventilate when you boil, fry or run the dishwasher. If it is painted shut, ask a professional before forcing it, because old sashes and glass can break.
- Add a fan carefully. A small window fan or a plug-in exhaust fan helps, but keep cords away from water and heat. Ask an electrician before adding a permanent vent.
- Gas stoves need extra care. If you cook with gas, ventilation matters for air quality, and a carbon monoxide alarm should be installed according to the manufacturer’s directions. Never use a gas oven to heat the room.
- Clean the filters. Grease on a filter or a hood is a fire risk. Wash metal filters regularly according to the manual.
- Wipe and dry. Wipe steam off the window glass and the tile after cooking, and leave the door open to let the room air out.
- Low-VOC finishes. When you repaint, choose low-VOC paint and keep the window open while it cures.
Work with the character you have
An old kitchen is not a fault to hide. It is a feature to frame. The aim is to edit and highlight, not to cover everything in new surfaces.
Keep and clean original features
Tiles, wood floors, beadboard, window sills, hardware and bold cabinet profiles give a kitchen depth. Clean them with the mildest method that works. Test any product on a hidden spot first. Avoid abrasive pads on old finishes, and never use strong chemicals on unknown surfaces.
Choose a color that makes the best of the room
A single warm white or soft pale color on walls and cabinets helps a small room feel larger and covers patchy tones. A deeper accent, such as a dark green or blue on lower cabinets, makes the room feel intentional. Use low-VOC products and ventilate.
Add temporary updates to dated surfaces
If you dislike an old backsplash or countertop and cannot change them, a temporary cover can freshen them up. Peel-and-stick tile works on clean, smooth, sealed surfaces. See temporary backsplash ideas and renter-friendly kitchen upgrades. Test on a small spot, and do not apply adhesives to peeling paint or damaged plaster.
Mix old and new with restraint
Pair a vintage cabinet or wood table with simple, modern storage so the old pieces stand out. Repeat one material, such as wood or black metal, three times around the room so the mix looks planned. Match hardware finishes where you can. Keep surfaces clear so the original details show.
Use the height
Tall ceilings are an advantage. A shelf above the door, a rail high on the wall for pots and a ladder-style rack extend storage upward. Keep heavy things low, and anchor shelves into suitable fixings as described above.
Comparison table: old-house problems and workable fixes
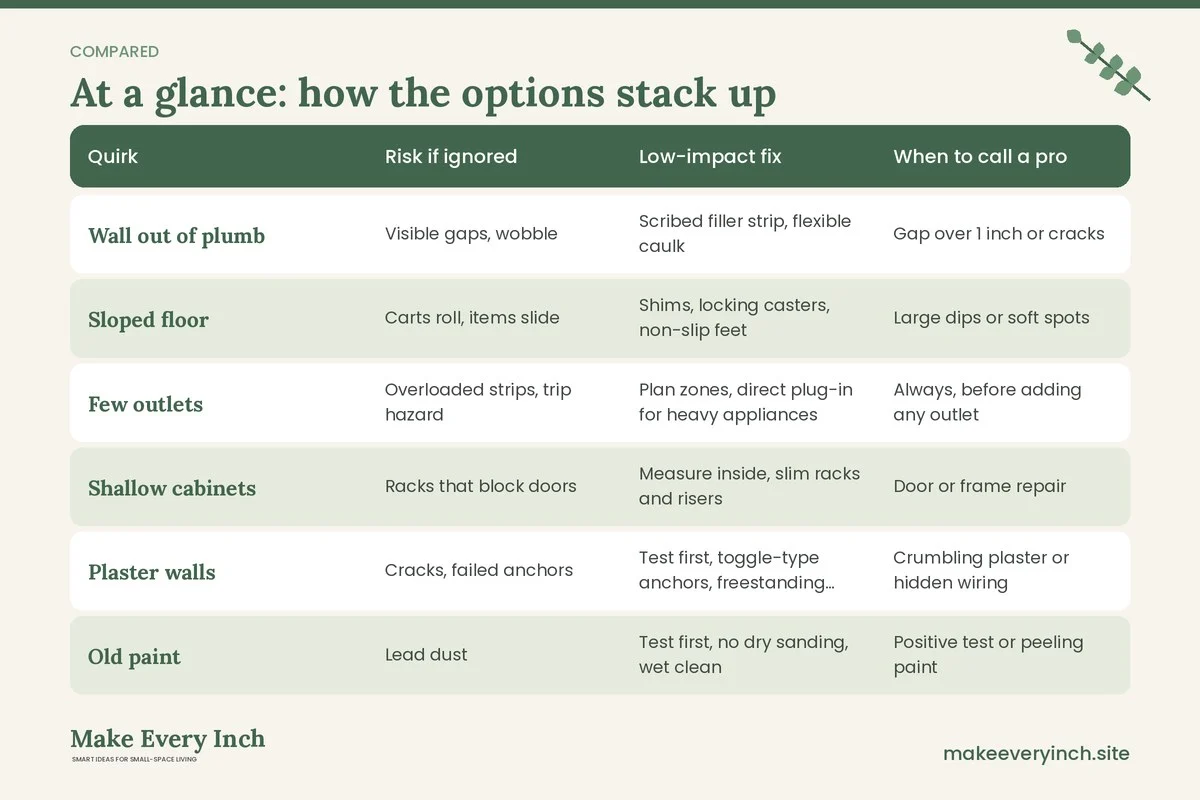
| Quirk | Risk if ignored | Low-impact fix | When to call a pro |
|---|---|---|---|
| Wall out of plumb | Visible gaps, wobble | Scribed filler strip, flexible caulk | Gap over 1 inch or cracks |
| Sloped floor | Carts roll, items slide | Shims, locking casters, non-slip feet | Large dips or soft spots |
| Few outlets | Overloaded strips, trip hazard | Plan zones, direct plug-in for heavy appliances | Always, before adding any outlet |
| Shallow cabinets | Racks that block doors | Measure inside, slim racks and risers | Door or frame repair |
| Plaster walls | Cracks, failed anchors | Test first, toggle-type anchors, freestanding pieces | Crumbling plaster or hidden wiring |
| Old paint | Lead dust | Test first, no dry sanding, wet clean | Positive test or peeling paint |
| Poor ventilation | Grease, mold, poor air | Window use, clean filters, outside-venting hood | Gas appliance or mold |
| Dated finishes | Looks tired | Clean, repaint with low-VOC paint, peel-and-stick | Water damage |
Three example kitchens
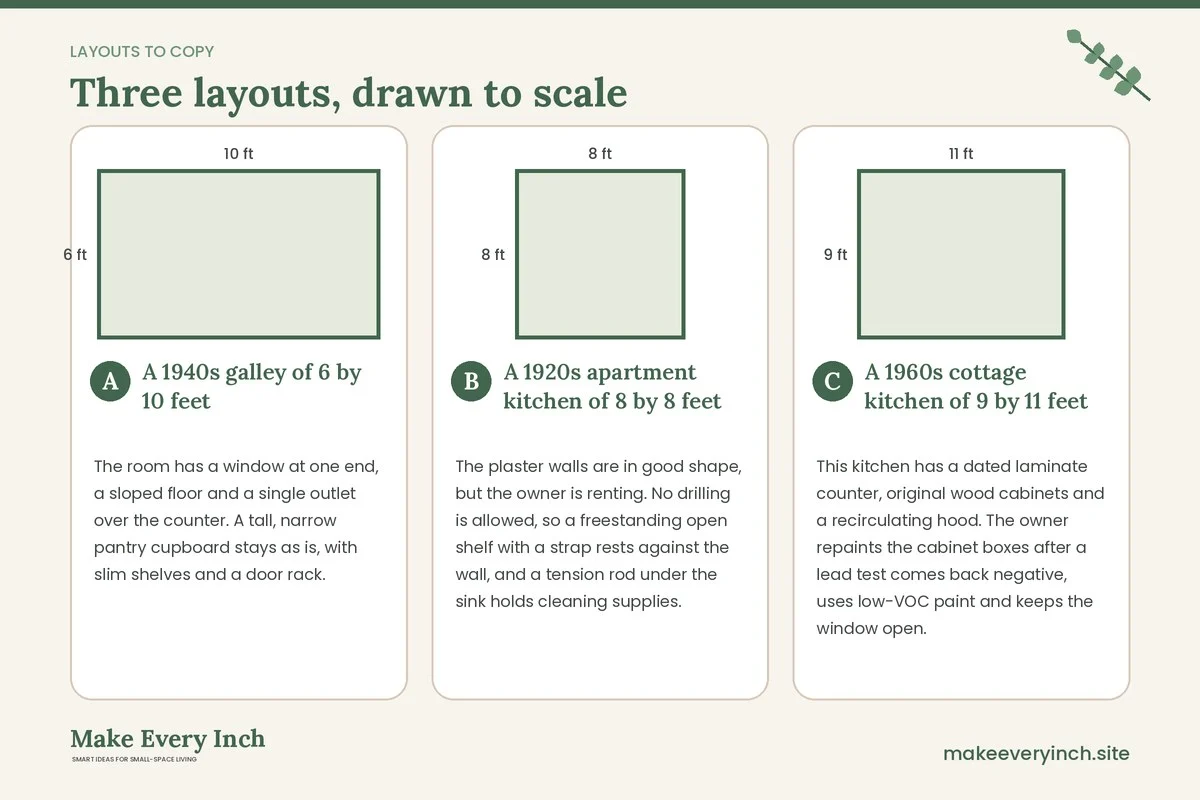
A 1940s galley of 6 by 10 feet
The room has a window at one end, a sloped floor and a single outlet over the counter. A tall, narrow pantry cupboard stays as is, with slim shelves and a door rack. The sloped floor is addressed with shims under a narrow rolling cart, and the cart has locking casters. A rechargeable light strip under the wall cabinet replaces the dim ceiling bulb. The electrician is booked to add a second outlet near the sink. The wall paint is left intact after a test showed lead in the lower layers, and the family cleans with wet wipes instead of sanding. For this layout, see also our guide to galley kitchen ideas.
A 1920s apartment kitchen of 8 by 8 feet
The plaster walls are in good shape, but the owner is renting. No drilling is allowed, so a freestanding open shelf with a strap rests against the wall, and a tension rod under the sink holds cleaning supplies. The wall cabinets are only 9 inches deep, so dinner plates stand on edge in a rack, and glasses live on a slim shelf near the sink. A small drop-leaf table doubles as a prep surface and a spot for two stools. The window is opened during cooking, and a plug-in fan helps when it rains. Peel-and-stick tile covers a stained backsplash after the owner asks in writing. See small apartment kitchen ideas for more.
A 1960s cottage kitchen of 9 by 11 feet
This kitchen has a dated laminate counter, original wood cabinets and a recirculating hood. The owner repaints the cabinet boxes after a lead test comes back negative, uses low-VOC paint and keeps the window open. The old hood is replaced by a professional with one that vents outside. The counter is covered with a thick butcher block piece on the work zone, and the owner adds an island cart with a locking wheel. A new circuit is added by an electrician so the kettle and the toaster no longer share one outlet. The result keeps the wood grain and the shape of the room while giving it better workflow. For layout help, see our post on small kitchen layout ideas for better workflow.
Budget and sequencing
Older kitchens can tempt you to do everything at once. A better order saves money and avoids rework.
- Safety first: electrical checks, lead testing, ventilation, anchoring.
- Structure second: levelling, shimming, filler strips, repairs to plaster or trim.
- Storage third: measure, then buy racks and risers that fit.
- Surface fourth: paint, peel-and-stick tile, hardware.
- Decor last: lighting, plants, baskets, art.
If you are watching spending, our posts on small kitchen ideas on a budget and budget small kitchen makeover show where a small amount goes furthest. Prices vary a great deal by region, so get quotes from licensed professionals for any electrical, plumbing or lead work.
Pre-project checklist
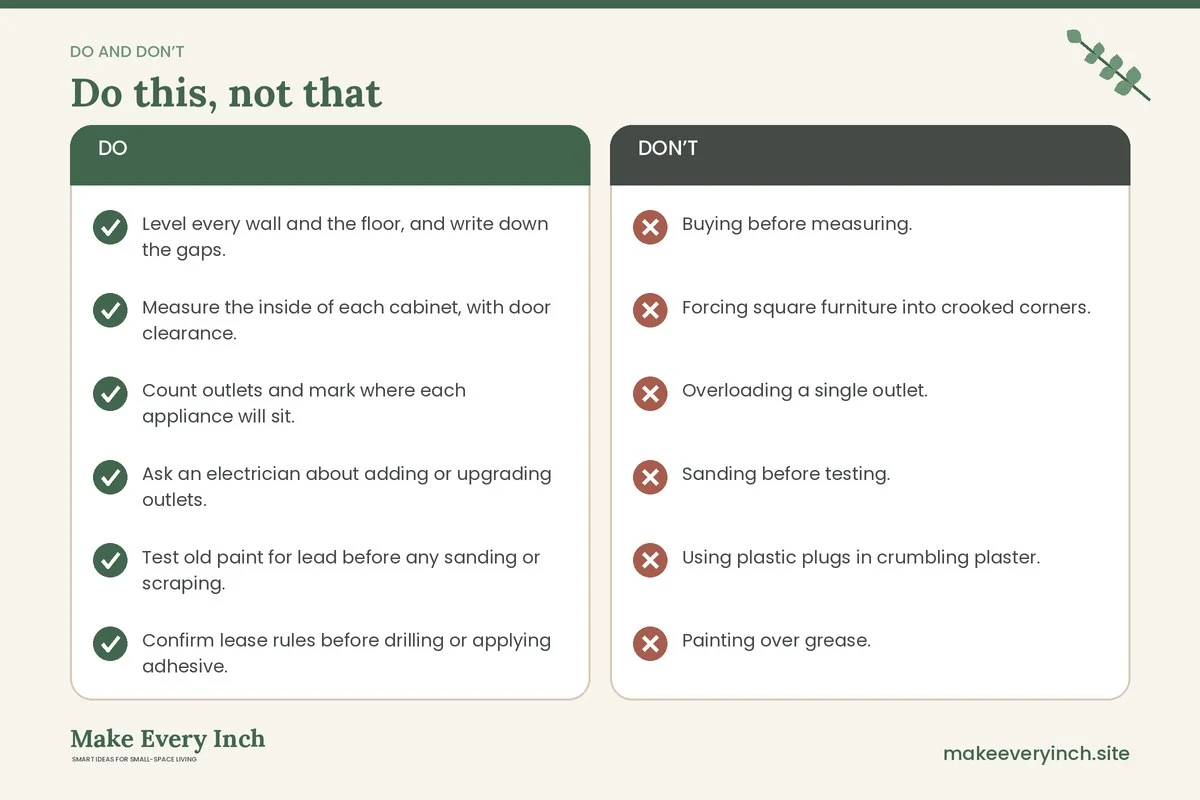
- Level every wall and the floor, and write down the gaps.
- Measure the inside of each cabinet, with door clearance.
- Count outlets and mark where each appliance will sit.
- Ask an electrician about adding or upgrading outlets.
- Test old paint for lead before any sanding or scraping.
- Confirm lease rules before drilling or applying adhesive.
- Identify studs, lath or masonry before anchoring anything.
- Anchor tall furniture to the wall.
- Check that the hood vents outside, or plan window ventilation.
- Install a carbon monoxide alarm if you use gas, as the manufacturer directs.
- Choose low-VOC paint and open windows while it cures.
- Photograph the kitchen before you start.
Mistakes to avoid in an old kitchen
- Buying before measuring. Standard-size racks often fail in shallow cabinets.
- Forcing square furniture into crooked corners. Scribe or choose a freestanding piece.
- Overloading a single outlet. Heat appliances belong on their own safe circuit.
- Sanding before testing. Lead dust is invisible and lasts.
- Using plastic plugs in crumbling plaster. Use the right anchor, or choose freestanding furniture.
- Painting over grease. Clean walls with a mild degreaser first or paint will peel.
- Removing everything old. Part of the appeal of an older kitchen is the original detail.
FAQ
How do I make a small kitchen in an old house feel bigger?
Use light colors, keep counters clear, add under-cabinet light and use the height. Glass-front cabinets and a clear window also help. Keep only what you use on the counter.
Can I add outlets myself?
Adding outlets is work for a qualified electrician, since older wiring may not be grounded or may be overloaded. Ask them about codes in your area.
How do I hang shelves on plaster walls?
Use the correct anchor for plaster over lath or masonry, find a solid fixing point and keep loads light. In a rental, ask permission before drilling, or choose freestanding shelves.
Do I need to test for lead paint?
If the house was built before the late 1970s, treat old paint as suspect until a test or a professional says otherwise. Do not sand, scrape or burn it before testing.
What can I do about uneven floors?
Use shims under furniture, locking casters on carts and non-slip feet on boards. Check with a level, and call a professional if the dip is large or the floor feels soft.
Is peel-and-stick tile safe on old walls?
It sticks best to clean, smooth, sealed surfaces. It should not go on peeling paint, damp plaster or crumbling grout. Test a small area first and check the lease.
Keep going: Keep going with our guides to small kitchen ideas with limited counter space, small kitchen counter organization and small kitchen storage ideas without remodeling.
Save this guide for later
Pin the ideas you like to Pinterest so you can come back to them when you plan your space.