DIY Closet Organization for Small Spaces
Quick answer: DIY closet organization for small spaces works best in this order: empty and edit the closet, measure width, depth and height, then add a second rod or shelf to use the vertical space, hang an organizer on the door, and finish with bins and dividers sized to the shelves. Respect weight limits, fix shelves to studs or rated anchors, and use removable parts if you rent.
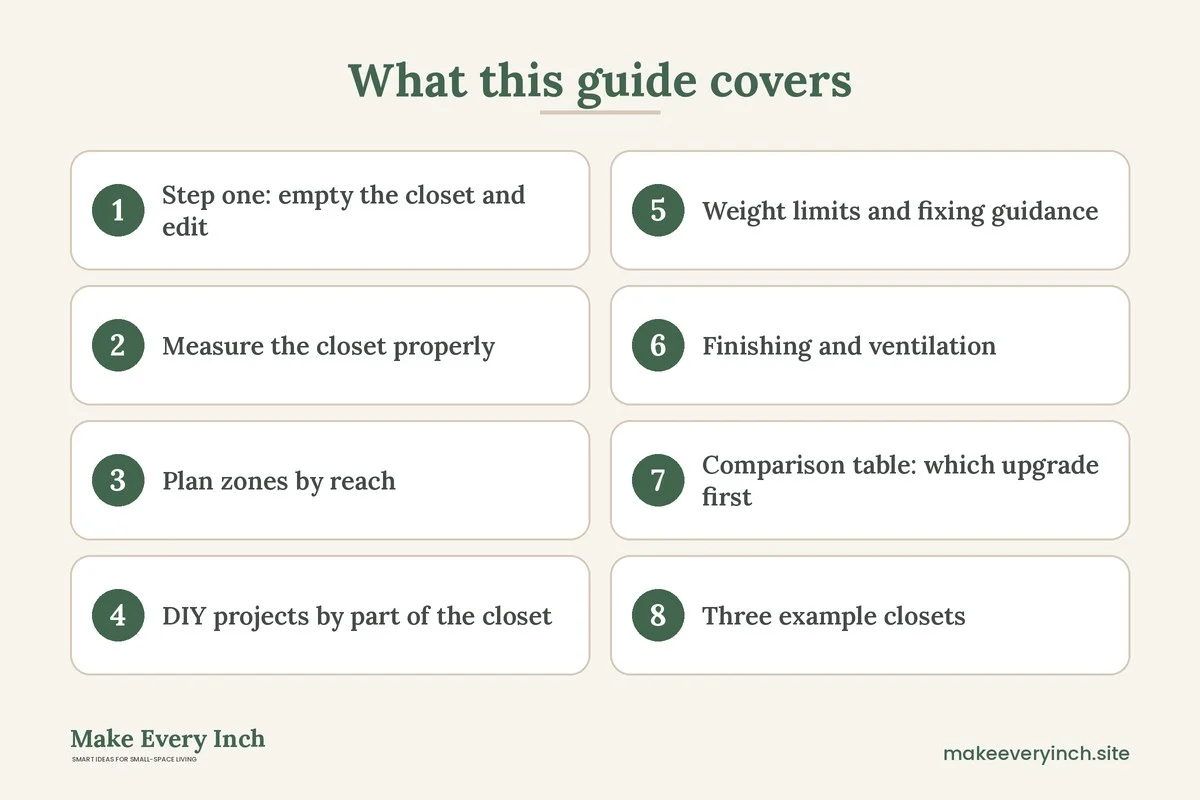
DIY closet organization for small spaces turns a cramped cupboard into a storage system for much less than a custom fit-out. Small closets are usually deep enough to hold a lot but badly arranged: one rod, one shelf and a floor full of shoes. A few well-measured additions can double the usable space. This guide walks through the full process: editing what you own, taking accurate measurements, planning zones, building and fitting rods, shelves, door organizers, bins and dividers, understanding weight limits, three example closets, a comparison table, a maintenance routine and a checklist. For the wider topic, read our pillar on budget small space ideas, our guide to small closet organization ideas and the broader small space organization ideas.
Step one: empty the closet and edit
No organizer helps a closet that holds too much. Take everything out, and sort it into keep, donate, repair and store elsewhere. Be honest about clothes that no longer fit, and about duplicates. As a rough guide, a small reach-in closet works well when the clothes you wear in the current season take up no more than about 70 to 80 percent of the hanging space. The rest of the room lets items breathe and makes putting things away easier.
Next, split what you keep into four groups: hanging items, folded items, accessories and off-season or rarely used items. Count them. A quick count tells you how many inches of rod, how many shelves and how many bins you need. A typical shirt or blouse takes about 1 to 2 inches of rod, a jacket 2 to 3 inches, a coat 3 to 4 inches and a heavy dress 2 to 3 inches. A folded sweater stack of five takes about 12 inches of width and 8 to 10 inches of height.
Measure the closet properly
Measurements decide whether a DIY plan works. Grab a tape measure, a pencil and paper, and record the following.
- Width: measure at the top, middle and bottom of the opening, since walls are rarely perfectly square. Use the smallest figure.
- Depth: measure from the back wall to the door frame. Standard hanging needs about 24 inches of depth, and anything under 20 inches calls for a slim hanger or a side-facing rod.
- Height: measure from floor to ceiling and to the underside of any existing shelf.
- Door opening: record the clear width, since this decides the size of an over-door organizer or any bi-fold constraints.
- Obstacles: note light fittings, pipes, vents, switches and electrical sockets. Keep shelves and bins at a safe distance from lights and vents.
- Wall material: knock on the walls and use a stud finder to locate studs, and note whether the walls are plasterboard (drywall), plaster or masonry.
Draw the closet to scale on graph paper, front view, with each measurement marked. This sketch becomes the plan. Re-measure once more before you cut or buy anything, since small errors compound.
Plan zones by reach
A small closet works best when it is divided by how often you use each part.
- Prime zone (about 30 to 60 inches from the floor): everyday clothes and items you reach for daily.
- Upper zone (60 inches and above): lighter, seasonal or special-occasion items.
- Lower zone (below about 30 inches): shoes, bins and heavier items.
- Door zone: small accessories, belts, scarves and items that fit in pockets.
If you are short, lower the zones accordingly. If you share the closet, assign a side to each person and give each a rod and shelf.
DIY projects by part of the closet
Rods
1. The double rod
Most single-rod closets waste the space below the clothes. A second rod, hung about 36 to 40 inches below the first, gives two levels for shirts, jackets and folded pants. The top rod sits at about 80 inches and the lower at about 40 inches, so shirts clear the lower rod and short items hang comfortably. This is the biggest single gain in a small closet, and it needs only a rod, two end sockets and screws. Long items such as dresses and coats need the full height, so reserve one section for them.
2. A hanging extender
If you rent or cannot drill, a hanging rod that hooks over the main rod adds a second level without any fixings. Treat the load as light, and avoid heavy coats.
3. A tension rod in a narrow gap
A tension rod holds scarves, belts and lightweight clothes. Check it is properly locked, and limit it to a few light items, since pressure rods can slip under weight.
4. A side rod for short items
Where the closet is deep, mount a short rod on the side wall facing the door for belts, ties and bags. It uses space that is otherwise dead.
Shelves
5. A plank shelf above the rod
Many closets have a single shelf at 80 inches. Add a second board above it, 12 to 14 inches higher, for bins of seasonal items. Fix the board on cleats screwed into studs along the side walls, and a bracket in the middle if the board spans more than about 30 inches.
6. Side-wall shelves for folded items
In a closet at least 30 inches wide, a tall column of shelves on one side holds sweaters, jeans and bins. Use boards 12 to 14 inches deep and space them 10 to 12 inches apart. Anchor the column to the wall, as a loaded tall unit can tip if it only stands on the floor.
7. A floor shelf for shoes
A low shelf, 6 to 8 inches high and angled, holds shoes toe-in. Two tiers of shoe shelf with 6 inches between them hold roughly twice as many pairs as the floor alone. For more shoe ideas see our post on small shoe storage ideas.
Doors
8. An over-door organizer
A hanging organizer with pockets suits shoes, scarves, accessories, cleaning supplies or hair tools. Measure the door thickness and the gap between the door and the frame, since a hook that is too wide stops the door closing. Pick a fabric or mesh organizer for a light load, and avoid overfilling, as the door hinges carry the weight.
9. A door rack with hooks
A slim rail on the inside of the door holds bags, belts and robes. Where you can drill, screw a board to the door; if not, use an over-door hook rail. Keep loads light, and make sure nothing sticks out far enough to hit the shelf when the door closes.
10. A mirror on the door
A mirror on the inside of a door saves floor space elsewhere. Use a lightweight mirror and a rated adhesive, or an over-door mirror with no fixings.
Bins, baskets and dividers
11. Bins on shelves
Use lidded or open bins sized to the shelf depth. Label each, and keep bins to a weight you can lift down with one hand, roughly under 15 pounds. Clear bins make contents obvious, and fabric bins fold flat when empty.
12. Shelf dividers
A divider keeps stacks of sweaters from toppling. You can make one from a thin board or a bent piece of metal, or buy ready-made ones. Space dividers at 12 to 14 inches to hold one stack of folded items.
13. Drawer dividers or boxes
If your closet holds a small chest of drawers, use shallow boxes or cardboard cut to size to split drawers into cells for socks, underwear and belts. The fold method (storing clothes upright like files) makes every item visible.
14. Hanging cubes
Fabric hanging shelves hang from the rod and offer three to six cubes for sweaters and accessories. They are light, cheap and removable. Keep loads moderate, since the rod carries the weight.
Weight limits and fixing guidance
A closet rod looks sturdy, but a heavy load can bend it or pull out the fixings. Use these cautious rules.
- Rod span: a standard rod spans about 36 inches before it begins to sag with a full load. For longer spans, add a center support fixed to a stud or to a shelf above.
- Rod material: a wooden dowel of 1.25 inches or a steel tube holds more than a thin metal rod. Pick a rod that does not flex when you press on the center.
- Typical loads: a full rod of winter clothes can weigh a surprising amount, perhaps 40 to 80 pounds or more over a long span, so plan fixings accordingly.
- Fixings: screw rod sockets and shelf cleats into studs wherever you can, and use anchors rated well above the load when you cannot.
- Safety margin: plan to load a fixing to no more than about half its rating.
- Tall units: anchor tall shelf columns to the wall with a bracket.
- Bin weight: keep top-shelf bins light enough to lift down safely, and use a stable step stool.
If you rent, ask before drilling. Where drilling is banned, choose freestanding shelving, hanging organizers, tension rods and over-door products, and keep loads light.
Finishing and ventilation
If you paint or seal wood for shelves, use low-VOC products and ventilate the room. Closets have little airflow, so leave the door open and a window open while the finish dries, and allow it to cure fully before placing clothes or bins inside. Fresh finish can cling to fabric and carry a smell. Sand edges so they do not snag knitwear, and avoid cedar and other strong-smelling woods if anyone in the household is sensitive to scent.
Moisture matters, too. Do not pack a closet tight against an outside wall that feels damp, and leave small gaps for air. A tray of moisture absorber can help in humid climates, and a breathable bag protects clothes better than plastic.
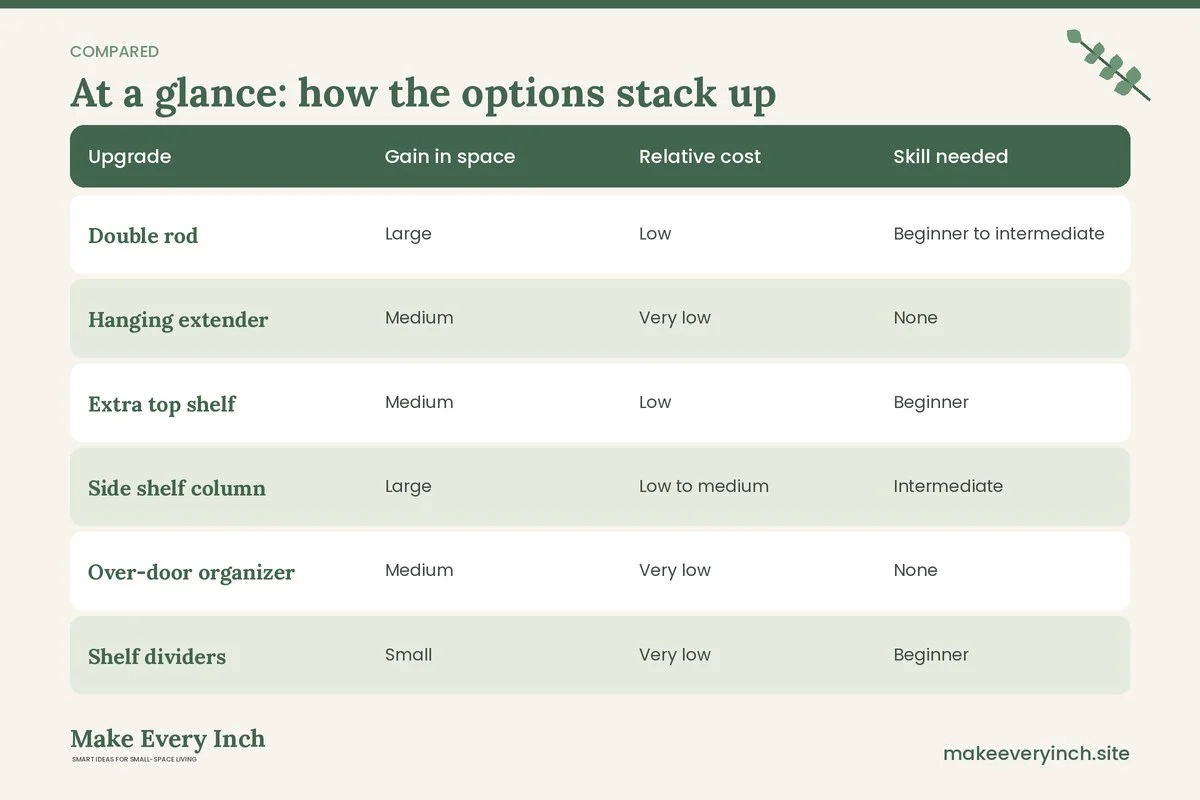
Comparison table: which upgrade first
This table helps you pick upgrades by gain and effort. Costs are relative and vary by region.
| Upgrade | Gain in space | Relative cost | Skill needed | Renter-safe |
|---|---|---|---|---|
| Double rod | Large | Low | Beginner to intermediate | Only with permission |
| Hanging extender | Medium | Very low | None | Yes |
| Extra top shelf | Medium | Low | Beginner | Only with permission |
| Side shelf column | Large | Low to medium | Intermediate | Only with permission |
| Over-door organizer | Medium | Very low | None | Yes |
| Shelf dividers | Small | Very low | Beginner | Yes |
| Shoe tiers | Medium | Low | Beginner | Yes |
| Hanging cubes | Medium | Very low | None | Yes |
| Labelled bins | Medium | Low | None | Yes |
Three example closets
A 4-foot reach-in closet with a single rod
The closet is 48 inches wide, 24 inches deep and 96 inches tall. Install a double rod on the left half, at 80 and 40 inches, for shirts, skirts and pants folded over hangers. On the right half hang a single long rod at 66 inches for dresses and coats. Add an extra shelf above at 84 inches for bins, and a two-tier shoe shelf on the floor. Hang an over-door organizer for scarves and belts. This setup is common in a small bedroom and goes well with our ideas for small bedroom storage.
A 30-inch-wide closet in a rental
You cannot drill, and the door is a standard hollow one. Use a hanging extender on the existing rod, a freestanding shelf unit 12 inches deep on the floor and an over-door organizer for shoes. Fill the top shelf with lidded bins, using no more weight than the shelf can hold. If the closet is shallow, hang clothes sideways on a tension rod. For more, read our guide to organization ideas for renters.
A no-closet bedroom corner
A bedroom without a built-in closet needs a closet made from scratch. Hang a rod from the ceiling or between two wall-fixed uprights where permitted, and add a curtain on a track to hide it. Place a shoe shelf and bins beneath. Fix the uprights to studs and check the rod span. See our post on small bedroom ideas without a closet for layout options.
Maintenance routine
A closet stays organized only if the system is easy to follow.
- One in, one out: when something new arrives, send something out.
- Monthly five-minute reset: straighten stacks, return stray items and check bins.
- Seasonal swap: twice a year move off-season clothes to the high shelves or under the bed. For storage under a bed, see our guide to under-bed storage ideas.
- Matching hangers: slim, uniform hangers can free roughly an extra inch for every few garments and make the closet look calm.
- Label everything: a label on each bin and shelf edge helps everyone return items to the right place.
- Annual check: look at rod sockets, shelf cleats and brackets once a year, and tighten any that are loose.
Entryway and coat closets
Many small homes have a coat closet near the door. The same ideas apply there, but the load is different: boots, bags and wet coats. Use a shelf for hats and gloves, hooks for daily coats, a tray for wet shoes and a basket for umbrellas. Leave air space for damp items to dry. See our post on small coat storage ideas for more.
Common mistakes
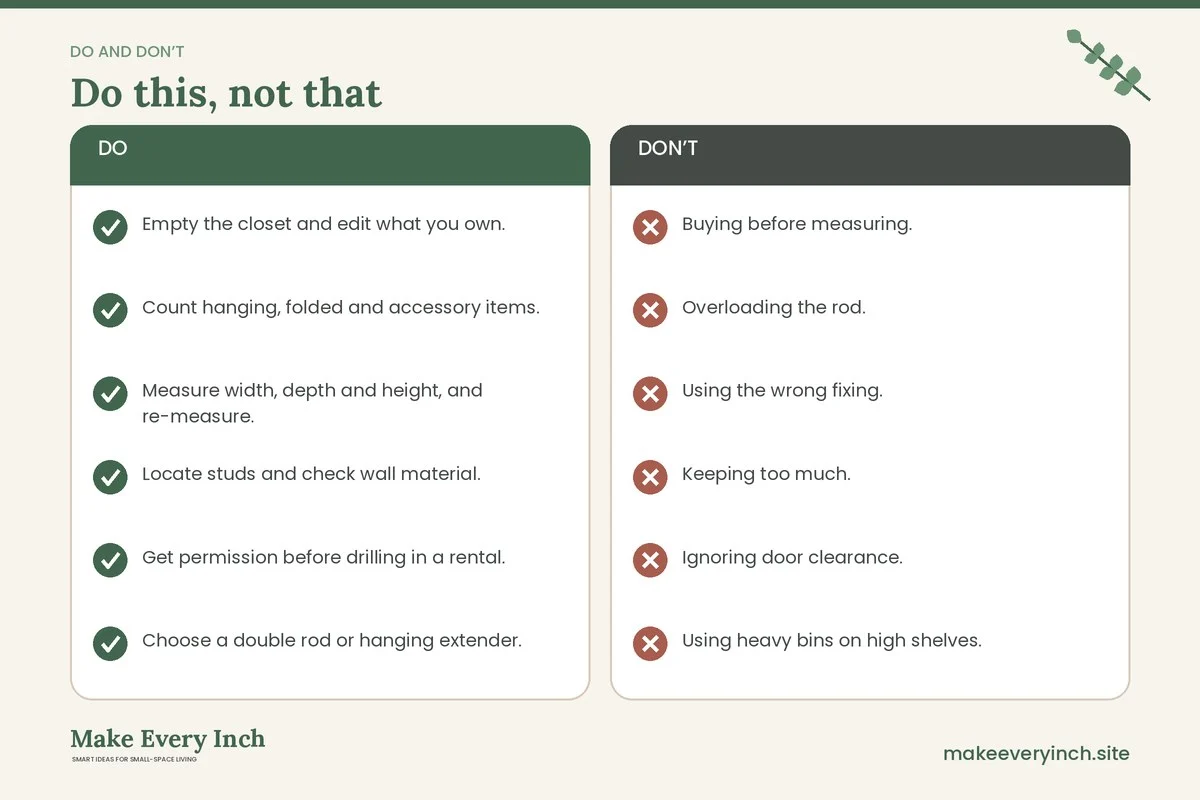
- Buying before measuring. Organizers that do not fit are the most common waste.
- Overloading the rod. A sagging rod is a sign of too much weight or too long a span.
- Using the wrong fixing. Plastic plugs in plasterboard fail under shelf loads.
- Keeping too much. Organizers only help when the volume of items is reasonable.
- Ignoring door clearance. An over-door organizer that stops the door closing is worse than none.
- Using heavy bins on high shelves. Choose light bins and reach with a stool, never a chair.
- Skipping labels. Without them, bins turn into dumps.
A budget approach
You can build this system in stages. Start with the free steps: edit, measure and plan. Next buy the cheapest high-impact items: matching hangers, a second rod or extender and a few bins. Then add shelves and a shoe tier. Last, add finishing touches such as a mirror or labels. Look for second-hand shelving, crates and baskets, and reuse boxes you already have, such as shoeboxes cut down as drawer dividers. For more ideas that stretch a small budget, read our post on cheap storage ideas for apartments, and for wall-mounted builds that complement the closet see DIY wall storage ideas for small spaces.
Closet checklist
- Empty the closet and edit what you own.
- Count hanging, folded and accessory items.
- Measure width, depth and height, and re-measure.
- Locate studs and check wall material.
- Get permission before drilling in a rental.
- Choose a double rod or hanging extender.
- Add a shelf or two, fixed to studs or rated anchors.
- Add an over-door organizer sized to the door.
- Use bins and dividers sized to the shelves.
- Keep rod spans near 36 inches or add a center support.
- Plan to load fixings to about half their rating.
- Anchor tall shelf columns.
- Use low-VOC finish and ventilate while it dries.
- Label bins and set a monthly reset.
FAQ
What is the cheapest way to organize a small closet?
Edit what you own, add matching slim hangers and hang a second rod or an extender. These changes tend to cost little and often deliver the largest gain.
How far apart should a double rod be?
Place the upper rod at about 80 inches and the lower at about 40 inches. That leaves room for shirts and short items on each level, though long garments need a separate full-height section.
How much weight can a closet rod hold?
It depends on the rod, the sockets and the wall. A sturdy rod on well-fixed sockets can hold a heavy load, but a long span sags. Keep spans near 36 inches, add center support and avoid pushing the limits.
Can I organize a closet without drilling?
Yes. Use a hanging extender, tension rods, freestanding shelves, over-door organizers, hanging cubes and bins. These work well in rentals, though they carry lighter loads.
How do I make a closet look bigger?
Use matching hangers, keep colors grouped, add light and a mirror, and leave a little free space. A tidy, edited closet always feels larger.
What should go on the high shelf?
Light, rarely used items such as spare bedding, seasonal clothes and special-occasion bags. Keep bins small enough to lift down with one hand.
Keep going: Keep organizing with our small bedroom ideas on a budget, small home storage ideas for every room and DIY wall storage ideas for small spaces.
Save this guide for later
Pin the ideas you like to Pinterest so you can come back to them when you plan your space.