DIY Wall Storage Ideas for Small Spaces
Quick answer: The best DIY wall storage ideas for small spaces are a plank shelf on brackets, a rail with hooks, a pegboard panel, a crate wall and a ledge for books or spices. Screw into studs whenever you can, use rated anchors where you cannot, keep loads well under the limits of your fixings, and get permission before drilling a rented wall. Most of these builds cost little compared with ready-made units, and a weekend is usually enough.
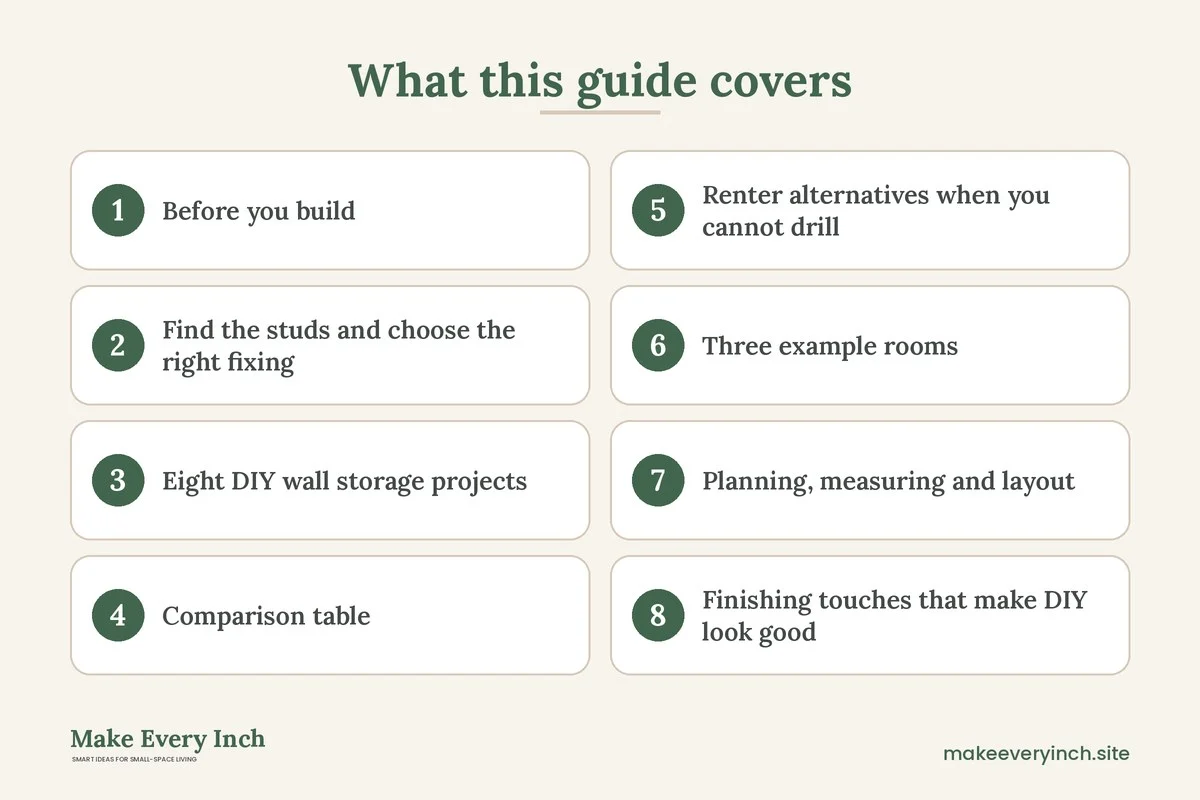
DIY wall storage ideas for small spaces are the cheapest way to gain room without giving up floor. When a floor is full, the wall is the only surface left, and a home-built shelf, rail or panel can be cut to the exact inches you have. This guide is about building, not just buying. It covers the tools and safety basics, how to find studs, how to choose anchors, the load limits to respect, eight projects with steps and measurements, a comparison table, renter alternatives, three example rooms, finishing tips, mistakes and a checklist. If you want the bigger picture on spending less, read our pillar on budget small space ideas and the wider guide to small space organization ideas.
Before you build: safety, tools and permission
A wall shelf feels like a simple project, but a loaded shelf can hold a lot of weight, and a falling one can hurt someone. Start with a short safety routine.
- Ask first. Never drill into a wall you do not own without written permission. If you rent, read the lease and ask the landlord, then use the renter swaps later in this guide if the answer is no.
- Check what is behind the wall. Pipes and cables often run vertically above outlets and switches, and along the lines between them. Avoid drilling directly above or below sockets, and use a stud and cable detector if you have access to one. If you are unsure, hire a professional or choose a no-drill option.
- Wear protection. Safety glasses and a dust mask protect you while drilling and sanding. Tie back long hair and keep cords out of the way.
- Ventilate when finishing. Sand and paint with a window open, and pick low-VOC paint or sealer. Let finishes dry fully before putting items on the shelf, since fresh finish can stick to books and fabric.
- Anchor anything tall. A tall narrow rack or crate tower can tip. Fix it to a stud with a bracket or strap, and place heavy items low.
- Work on a stable surface. Use a sturdy step stool, not a chair, and ask a second person to hold long boards.
A basic tool kit covers every project here: a tape measure, a pencil, a level, a drill with bits, a handsaw or a request that the shop cut your boards, sandpaper, a screwdriver and a stud finder. Borrow or rent what you lack. Many libraries and community workshops lend tools, and a hardware shop will usually make straight cuts for a small fee or none at all.
Find the studs and choose the right fixing
The fixing matters more than the shelf. A good board on a weak fixing fails, and a plain board on a strong fixing lasts for years.
Finding studs
In many homes built with timber or metal framing, studs sit about 16 inches apart from center to center, and some sit at 24 inches. Older and masonry buildings differ. Use a stud finder, and confirm by tapping, since a hollow sound suggests a gap and a solid sound suggests framing. Mark the edges, find the center and drill a very small pilot hole in a spot that the shelf will hide to confirm. Once you find one stud, measure along the wall to find the others.
Choosing anchors where there is no stud
Where the shelf must go between studs, use an anchor that suits the wall type and the load. Hollow plasterboard (drywall) takes toggle or expanding anchors, and masonry takes plugs that suit the drill bit and screw. Read the pack for the rated load, and choose one that is rated well above what you plan to store. A small plastic plug is fine for a light picture frame, but it is not suitable for a shelf of books.
Load limits in plain words
Every fixing has a rated load, and that rating assumes a good wall and correct installation. Treat it as a ceiling, not a target. A cautious rule is to plan for no more than about half the rated load of the fixing. Then add the weight of the shelf itself. Books are heavy: a foot of paperbacks can weigh around 10 to 15 pounds, and a foot of hardbacks more. Cans, jars and cookware add up quickly. If a shelf will hold a collection of heavy items, use studs and brackets, not anchors alone.
Eight DIY wall storage projects
Shelves
1. A plank shelf on brackets
This is the easiest and most useful build. Buy a board of solid wood or a good composite, 6 to 10 inches deep and 24 to 36 inches long. Sand the edges and seal the board with low-VOC finish. Mark the stud centers, hold two metal brackets level beneath the board and screw them into the wall. Place the board on top and fix it from below with short screws. Keep the span between brackets to about 24 to 30 inches for a typical board, since a long unsupported board sags. A shelf at 54 to 60 inches from the floor works as a display shelf, and one at 36 to 42 inches works as a landing spot near a door.
2. A set of floating ledges
A narrow ledge, 3 to 4 inches deep, holds spices, small plants, framed art or paperbacks turned face-out. Cut a strip of board, add a small front lip about half an inch high and fix it into studs with long screws through a hidden cleat. For light loads only, a simple pair of small brackets does the job. Stagger three ledges at 12 inches apart for a display of cookbooks or children’s picture books.
3. A shelf above a door
The wall above a door is almost always empty. A single plank, 8 inches deep, fixed on brackets about 10 to 12 inches above the door frame, holds baskets of off-season items, extra towels or books. Keep the load light, since you need to reach it from a step stool, and store only things you will not need each day.
Rails and hooks
4. A hook rail
Cut a board 3 to 4 inches wide and as long as the wall space allows, sand it and add hooks every 6 to 8 inches. Screw the rail into studs, or into at least two anchors rated for the load. In an entry, hang it at about 60 inches for coats and 40 inches for children. In a bedroom it holds robes and bags. In a kitchen, a rail with S-hooks holds mugs and utensils (for more kitchen-specific ideas, see our post on small kitchen wall storage ideas, which covers a different set of builds).
5. A rail with rungs
A horizontal dowel or length of pipe held on two end brackets creates a rail for towels, scarves, tea towels or hanging pots. Pick a smooth wooden dowel of about 1 to 1.5 inches in diameter, and leave 2 inches of clearance from the wall so hands fit. Anchor each bracket to a stud. Check the dowel does not flex under load, since a thin dowel bends.
Panels
6. A pegboard panel
A sheet of pegboard cut to size, mounted on spacers so the hooks have room behind, becomes a flexible wall for tools, craft supplies, kitchen gear or office bits. Frame it with 1 by 2 inch strips as spacers, paint it and fix it into studs through the frame. Hang light baskets, small shelves and hooks, and move them as your needs change. Keep hooks matched to what they hold. A pegboard handles modest weights, so put heavy tools on a solid shelf instead.
7. A fabric or cork pin panel
A frame of thin timber, stretched fabric and a layer of cork or batting makes a panel for notes, photos and small hanging items. It is lightweight, so a pair of anchors or picture hooks may suffice. It also dampens sound in a small room.
Crates
8. A crate wall
Wooden crates or sturdy storage boxes, screwed to the wall or to each other, make cubbies for shoes, books, toys or plants. Sand rough edges, seal with low-VOC finish, and screw each crate to a stud or to another crate that is fixed to a stud. A grid of six crates, two high and three wide, makes a wall unit about 36 by 24 inches. Keep the stack low and fix it firmly, since a stack of crates can pull away under weight.
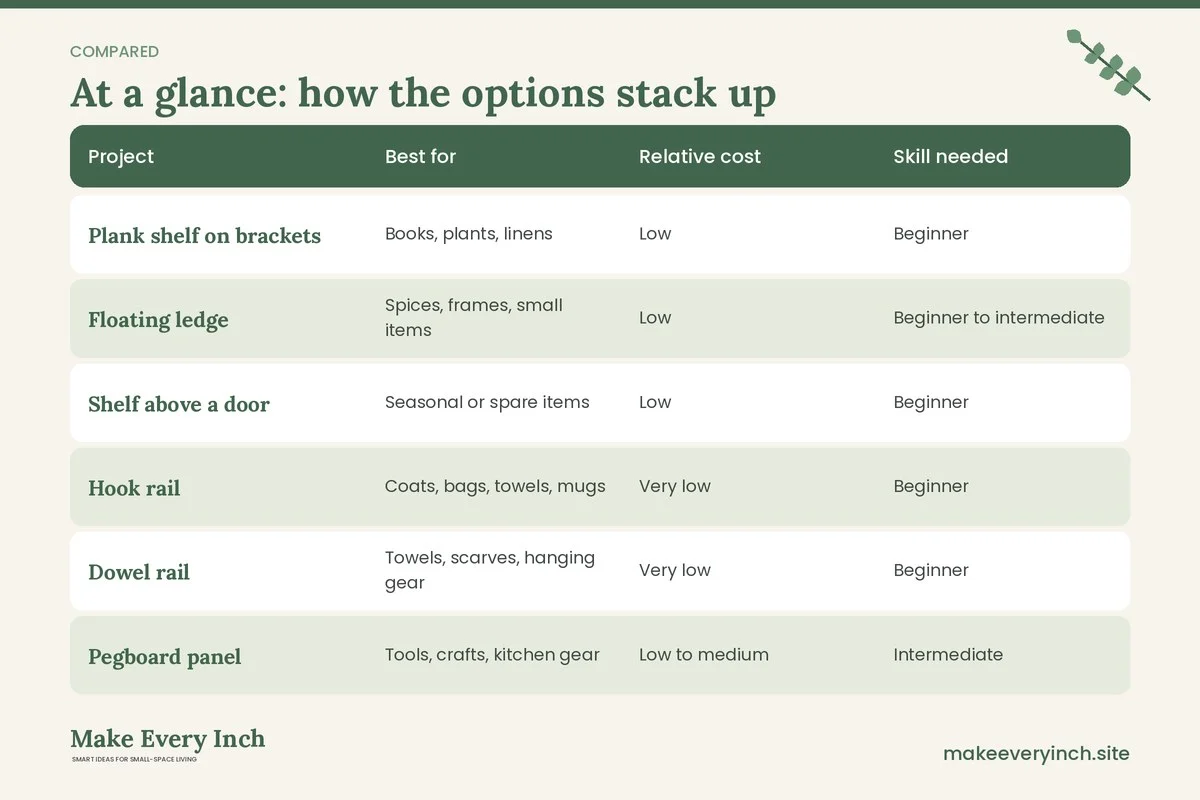
Comparison table: which build suits which job
This table gives relative cost, skill and strength so you can pick the right project. Costs are relative, not exact, and they vary by region and materials.
| Project | Best for | Relative cost | Skill needed | Strength |
|---|---|---|---|---|
| Plank shelf on brackets | Books, plants, linens | Low | Beginner | Strong when on studs |
| Floating ledge | Spices, frames, small items | Low | Beginner to intermediate | Light to medium |
| Shelf above a door | Seasonal or spare items | Low | Beginner | Light |
| Hook rail | Coats, bags, towels, mugs | Very low | Beginner | Medium if on studs |
| Dowel rail | Towels, scarves, hanging gear | Very low | Beginner | Light to medium |
| Pegboard panel | Tools, crafts, kitchen gear | Low to medium | Intermediate | Light to medium |
| Pin panel | Notes, photos, light items | Very low | Beginner | Very light |
| Crate wall | Shoes, toys, plants, books | Low to medium | Beginner | Medium when fixed to studs |
Renter alternatives when you cannot drill
If you rent and cannot drill, you have good options. None of these is as strong as a stud-fixed shelf, so use them for lighter loads and keep a close eye on the weight.
- Leaning shelves. A ladder-style shelf stands on the floor and leans on the wall. Anchor it with a removable strap if the lease allows it, or keep it light and low.
- Tension poles. A floor-to-ceiling pole with shelves or hooks grips by pressure. Check the ceiling is solid, and keep loads light.
- Over-door hooks and racks. These hang from the door edge and hold coats, bags or shoes without any fixing.
- Adhesive hooks and strips. They hold light items such as keys, a lightweight frame or a towel. Follow the weight rating exactly, clean the wall and press firmly. Test a small area first, and remove slowly.
- Furniture-mounted storage. Clip a rail or basket onto a bookcase, a bed frame or a desk edge, so the furniture carries the load.
For a full guide to these techniques, read our posts on no-drill storage ideas for renters and renter-friendly shelving.
Three example rooms
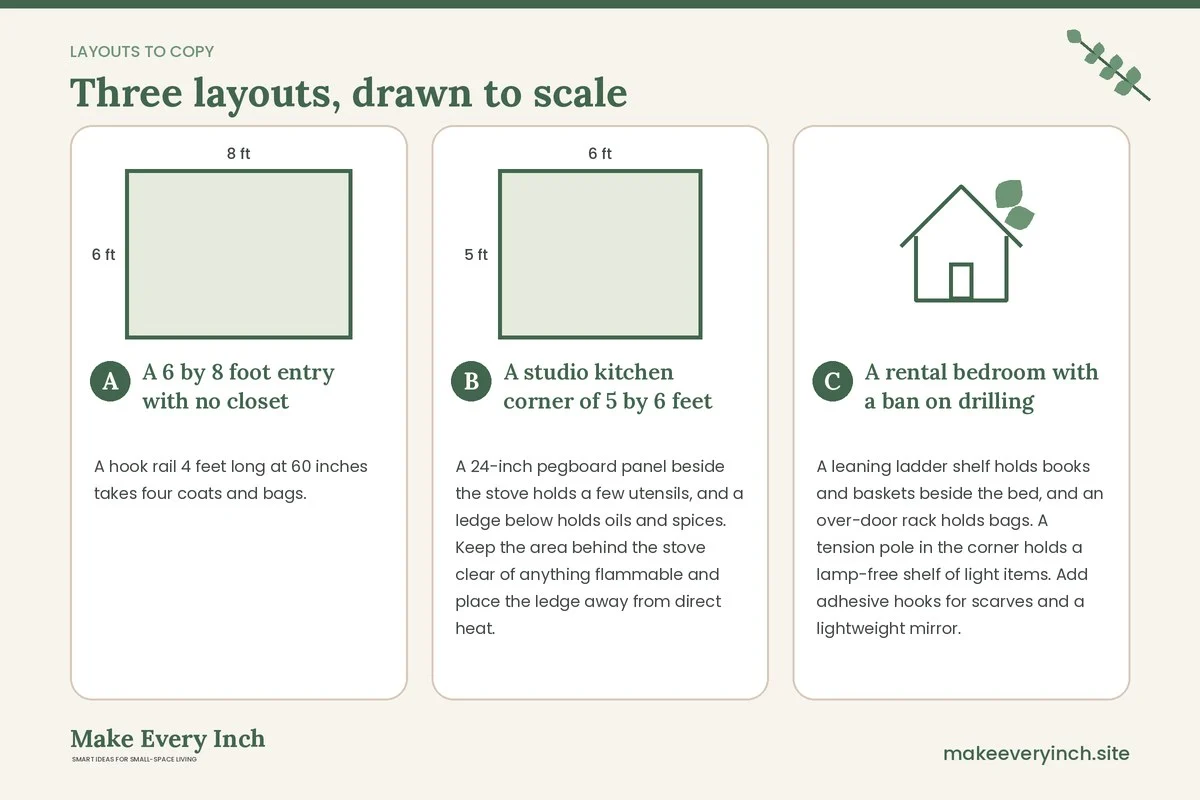
A 6 by 8 foot entry with no closet
A hook rail 4 feet long at 60 inches takes four coats and bags. Beneath it a narrow plank shelf, 8 inches deep, at 18 inches from the floor holds shoes, and a second shelf above the rail at 72 inches holds baskets for hats and gloves. The tall shelf is fixed to two studs. Leave about 30 inches of clear floor so the door can open and people can pass. For more ideas, see our guide to small entryway storage.
A studio kitchen corner of 5 by 6 feet
A 24-inch pegboard panel beside the stove holds a few utensils, and a ledge below holds oils and spices. Keep the area behind the stove clear of anything flammable and place the ledge away from direct heat. One plank shelf at 54 inches holds jars. The countertop stays open for cooking. This plan leaves the same wall space for a build from our guide to vertical storage ideas.
A rental bedroom with a ban on drilling
A leaning ladder shelf holds books and baskets beside the bed, and an over-door rack holds bags. A tension pole in the corner holds a lamp-free shelf of light items. Add adhesive hooks for scarves and a lightweight mirror. Photograph the wall before you start and check the lease. Our post on organization ideas for renters goes deeper into these tricks.
Planning, measuring and layout
Good wall storage starts with measuring. Measure the wall width and height, the door swing, the position of sockets and switches, and the length of your longest item. Sketch the wall on paper to scale, and draw each shelf, rail and panel. Use painter’s tape on the wall to mark the outline and live with it for a day. If it gets in the way of a door or a light switch, move it.
A few rules of thumb help.
- Reach zone: the most-used items belong between about 30 and 60 inches from the floor.
- Shelf spacing: leave 10 to 12 inches between shelves for books and 14 to 16 inches for baskets.
- Clearance from furniture: leave at least 18 inches above a desk or counter for comfortable use, and 24 inches above a bed head.
- Head safety: keep shelf edges out of walkways, or round the corners. A sharp board at head height is a hazard.
- Weight balance: put heavier items on lower shelves and lighter items higher.
Finishing touches that make DIY look good
A DIY shelf looks planned when the finish is neat. Sand every edge and surface to a smooth feel. Use a low-VOC primer and paint or a water-based sealer, and ventilate the room while you work. Match the shelf color to the wall for a quiet look, or contrast with a bold color for a feature. Hide screw heads with plugs or fill them. Use a level at every step, since a shelf that is a few degrees off looks wrong. Label baskets so the items return to the right place.
Common mistakes
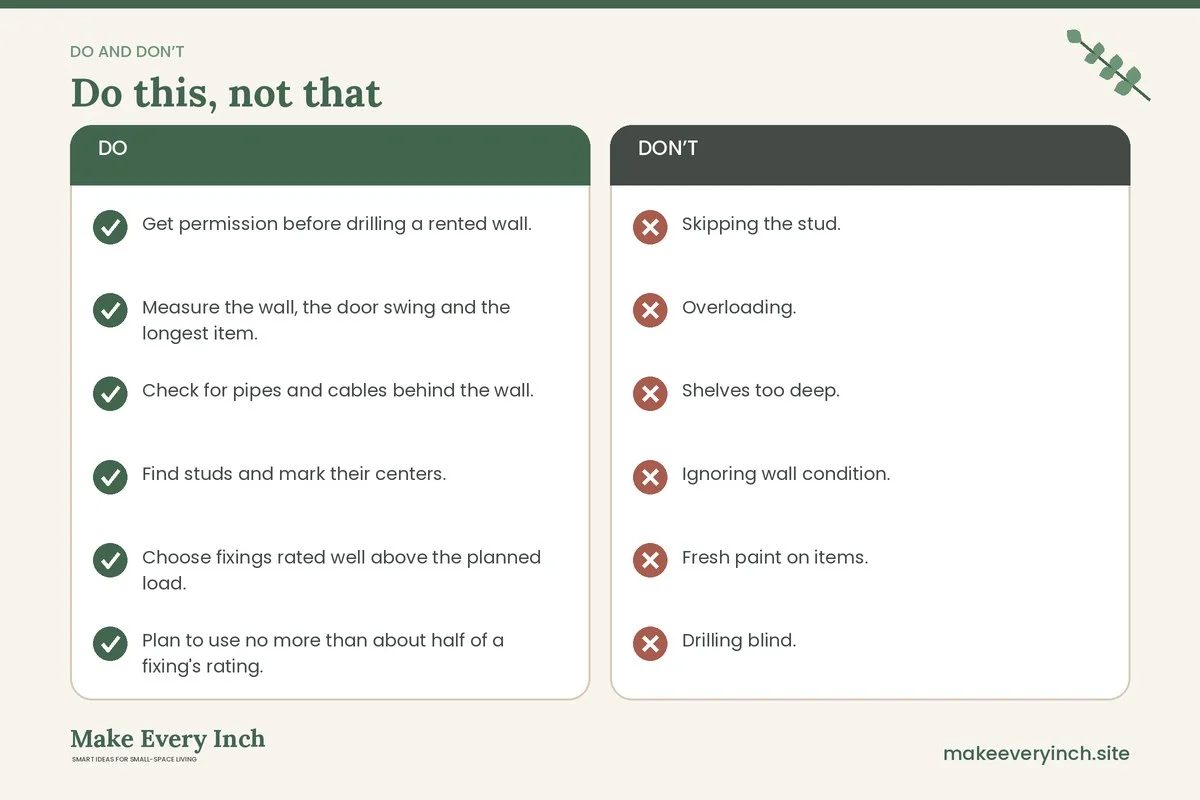
- Skipping the stud. A shelf fixed with small plastic plugs can pull out. Use studs or heavy-duty anchors rated for the load.
- Overloading. Stack only what the fixing can hold, and spread weight across the shelf.
- Shelves too deep. A deep shelf in a narrow room catches heads and shoulders. In a small space, 6 to 8 inches is plenty for most items.
- Ignoring wall condition. Damp, crumbling or old plaster can fail under any fixing.
- Fresh paint on items. Do not load a shelf until the finish has fully cured.
- Drilling blind. Pipes and cables are real hazards. Check, or use a no-drill option.
- Forgetting the lease. A good build is wasted if it costs you your deposit.
A weekend build plan
Saturday morning: measure, sketch and buy materials. Many shops cut boards for you, which saves effort and keeps edges square. Saturday afternoon: sand, seal and let the first coat dry with the window open. Sunday morning: find studs, mark positions and drill pilot holes. Sunday afternoon: mount the brackets and shelf, check with a level, and load the shelf gradually, starting with light items and watching for any movement. If a bracket shifts, take everything off and refit the fixing.
For more projects that fit a small budget, see our guides to cheap storage ideas for apartments and DIY apartment upgrades. If you also need to tame a clothes cupboard, the sister guide on DIY closet organization for small spaces covers rods, shelves and door organizers.
Wall storage checklist
- Get permission before drilling a rented wall.
- Measure the wall, the door swing and the longest item.
- Check for pipes and cables behind the wall.
- Find studs and mark their centers.
- Choose fixings rated well above the planned load.
- Plan to use no more than about half of a fixing’s rating.
- Keep shelf depth to 6 to 10 inches in a small room.
- Round or sand all edges.
- Seal with low-VOC finish and ventilate while it dries.
- Fix tall units to the wall with a bracket or strap.
- Put heavy items low and light items high.
- Check with a level, then load gradually.
- Recheck screws after a month.
FAQ
Are DIY wall storage ideas cheaper than store-bought units?
Often, yes. Basic boards, brackets and hooks tend to cost less than finished furniture, especially when you reuse offcuts or second-hand crates. The savings shrink if you need to buy many new tools, so borrow what you can.
How do I know if a shelf is secure?
Check that the brackets sit level, that screws are in studs or correct anchors, and that nothing moves when you press down firmly on the shelf. Load it gradually and look for gaps at the wall.
Can I hang a shelf on drywall without studs?
You can for light loads, using anchors made for hollow walls and rated well above the load. For books or heavy items, locate studs instead.
What is the best wood for a small shelf?
Solid wood suits visible shelves, and a good composite board suits painted ones. Pick a board thick enough not to sag over your span, and seal it so it resists moisture.
What can I do if my landlord refuses drilling?
Use leaning shelves, tension poles, over-door racks and adhesive hooks with light loads. Our guide to renter-friendly wall decor ideas also shows how to fill a wall without holes.
How often should I recheck my shelves?
Look at them a month after installation, then every few months. Tighten loose screws and remove anything that makes a shelf sag.
Keep going: Keep building with our budget small space ideas, hidden storage ideas and DIY closet organization for small spaces.
Save this guide for later
Pin the ideas you like to Pinterest so you can come back to them when you plan your space.