DIY Desk Ideas for Small Spaces
Quick answer: The best DIY desk ideas for small spaces are a fold-down wall desk, a fixed wall-mounted desk, a shelf desk and a door-on-trestle desk. Aim for a work surface 28 to 30 inches high, at least 20 inches deep, a seat that lets your elbows rest near 90 degrees and a plan for cords. Anchor wall desks to studs, ask permission before drilling, and finish with low-VOC products.
DIY desk ideas for small spaces matter more than ever now that many people work, study or run a side business from a bedroom, a living room corner or a hallway. Ready-made desks often assume you have a spare room. A desk you build yourself can be 20 inches deep, 30 inches wide, fold flat when you finish, or live on a shelf you already own. This guide covers four builds: a fold-down desk, a wall-mounted desk, a shelf desk and a door-on-trestle desk. It also explains ergonomic heights, load limits, cord management, tools and safety, a comparison table, three example rooms and a checklist. For more on the topic, see our budget pillar on budget small space ideas, the broader small space organization ideas and the companion project guide on DIY entryway storage for tiny homes.
Before you build: permission, safety and tools
A desk is a working surface that carries a laptop, a monitor, your forearms and sometimes your weight when you lean on it. That means the fixings matter. Start with the lease. If you rent, never drill into walls without written permission, and ask whether small screw holes are acceptable. If not, choose the freestanding versions in this guide, such as the door-on-trestle desk, or read our guide to no drill storage ideas for renters.
Locate the studs and any hidden services before you drill. Cables often run vertically above and below outlets and switches, and pipes may run behind walls close to bathrooms and kitchens. Use a stud finder that detects live wires, keep 6 to 8 inches away from outlets and switches, and turn off the circuit if you are unsure. If the building is old, ask a professional before sanding or scraping old paint, since it may contain lead.
Anchoring rules for desks:
- Fix any wall-mounted or fold-down desk to studs, or use anchors rated well above the load for the wall type. Plasterboard alone cannot carry a working desk.
- Use at least two fixing points per bracket, and spread the load across the width.
- Test by pressing down firmly and leaning on the surface before you place any equipment on it.
- Tall hutches and monitor shelves above the desk need to be fixed to the wall, in the same way as a bookcase.
- Keep a sturdy chair rated for your weight, and do not use the desk as a step.
Electrical safety and ventilation:
- Never run cords under rugs, through hinges or where they can be pinched by a folding mechanism.
- Use a surge-protected power strip with an on and off switch, and do not chain strips together.
- Keep power bricks off soft furnishings, and leave air gaps so they do not overheat.
- Finish wood in a ventilated room with a window open. Choose low-VOC primer, paint and sealer, and allow the finish to cure before you load the desk.
- Wear safety glasses when cutting or drilling, and a dust mask when sanding, and clamp the work before you cut.
The tool list is short: a tape measure, pencil, level, square, drill and bits, a saw or a cutting service from the store, sandpaper, clamps and a screwdriver. A stud finder is worth having for wall builds.
Ergonomics: get the numbers right first
A desk that hurts your back is worse than no desk. The numbers below suit most adults, though bodies vary, so adjust them to fit you.
- Work surface height: 28 to 30 inches from the floor for most people when seated. Taller people may prefer 30 to 31 inches, and shorter people may prefer 27 to 28 inches, possibly with a footrest.
- Surface depth: 20 to 24 inches for a laptop, and 24 to 30 inches if you use a monitor at a comfortable distance. A shallow 16 to 18 inch desk can work for a laptop with a separate keyboard shelf.
- Surface width: 30 inches is the minimum for a laptop and a notebook. 40 to 48 inches suits a laptop with a second screen.
- Knee clearance: at least 24 inches wide, 18 inches deep and 25 to 27 inches high under the desk, so your legs move freely.
- Elbows: with your upper arms relaxed, your forearms should rest at about 90 degrees and level with the keyboard. If you must shrug your shoulders, the desk is too high.
- Screen height: the top of the screen at or just below eye level, about an arm’s length away. Raise a laptop on a stand and use a separate keyboard.
- Chair: feet flat on the floor, thighs roughly parallel to the floor, lower back supported. A cushion or a footrest can fix small mismatches.
- Light: place the screen at a right angle to the window to avoid glare, and add a desk lamp for evenings.
If you plan to stand at the desk sometimes, a fold-down or wall-mounted desk can sit 36 to 42 inches high for standing. Use an anti-fatigue mat and take breaks to change positions.
Load: how much should a DIY desk carry?
Weight matters because desks fail at joints and fixings, not at the middle of the board. Estimate your load before you choose a design.
- A laptop, notebook and mug is a light load, often under 20 pounds.
- A desktop monitor, keyboard and a few books adds up to a moderate load, often 30 to 50 pounds.
- A printer, a pair of monitors and storage on the desk can reach a heavy load, so use a freestanding design or heavy-duty supports.
Add a safety margin, and design for at least double the expected load. A 3/4 inch plywood top spans about 30 to 36 inches without sagging under a laptop load, and needs a center support at greater widths. Brackets need an advertised rating that exceeds the load, with fixings into studs. For a fold-down desk, hinges and the support arm must carry the whole weight when it is open.
Four DIY desk builds
Build 1: the fold-down wall desk
A fold-down desk hangs flat against the wall when you are not using it and swings open for work. It suits a hallway, a bedroom wall or a living room corner where space is limited.
Dimensions
- Top: 3/4 inch plywood, 30 to 36 inches wide and 18 to 22 inches deep.
- Height when open: 29 inches from the floor to the top.
- Back rail: a 1 by 4 or 1 by 6 board, the same width as the desk, fixed into the studs.
- Supports: folding brackets rated above the load, or a pair of hinged leg frames, or a drop-down arm.
- Hinge: a long piano hinge, or two heavy-duty hinges, between the back rail and the top.
Steps
1. Choose the wall. Find the studs and mark them. Make sure the open desk clears a door swing and still leaves at least 30 inches of space for your chair.
2. Cut the plywood top, sand the faces and edges, and apply a low-VOC finish. Allow it to cure.
3. Fix the back rail to the studs with long screws, checking it with a level. This is the load-bearing part of the build.
4. Attach the hinge to the back rail and to the top. Pre-drill, and use screws that are not longer than the board thickness.
5. Fit the support brackets or leg frame. If you use folding brackets, mount them in the studs or on the same back rail, so the load goes to solid wood.
6. Test the desk with a heavy load, such as a stack of books, before you put equipment on it. Press down on the front edge and listen for flex or noise.
7. Add a small catch or a magnet so the top stays closed when folded up.
Cord plan
Fold-down desks need cords that stay out of the hinge. Run a short cable from a nearby outlet along the wall inside a paintable cable cover, then to a small power strip on the back rail. Use a coiled or loose slack on the cable between the rail and the desk top, so it does not strain when the desk moves. Better still, use a laptop only, and store the charger at the rail. Unplug any equipment before you fold the desk up.
Build 2: the fixed wall-mounted desk
A fixed wall desk is a simple shelf at working height, and it is far sturdier than a fold-down model. It suits a bedroom alcove, a dormer or the space under a window.
Dimensions
- Top: 3/4 inch plywood or a solid pine board, 36 to 48 inches wide and 20 to 24 inches deep.
- Height: 29 inches to the top.
- Supports: heavy-duty shelf brackets under the top, one every 16 inches, which usually matches stud spacing, or a cleat rail fixed along the wall.
- Edge: a small lip or iron-on edge band to stop things from rolling off and to protect the top.
Steps
1. Mark the height of the top on the wall with a level, and find the studs along the line.
2. Fix a cleat, which is a 1 by 3 board, to the wall along the line, with screws into every stud. The cleat takes much of the weight.
3. Fix brackets under the top, aligned with the studs, and screw them into the studs. For a wall with few studs, add a leg at the front corner.
4. Rest the top on the cleat and brackets, and fix it from below with short screws.
5. Check for level, press down, and add the load in stages.
6. Add a second shelf above at 14 to 16 inches over the desk for books and a lamp. Fix it into studs, and keep heavy items near the wall.
A front leg or a pair of slim legs make the desk stronger and cost little. If you want a no-leg look for a clean floor, use more brackets and keep the load modest.
Cord plan
Fix a power strip under the top near the wall, or use a clip-on cable tray. Run cables down a vertical channel to the outlet. A cable grommet, a hole of 2 inches with a cap, at the back of the top lets cords drop neatly. Drill the hole with a hole saw, sand the edges and test the fit before you finish the wood.
Build 3: the shelf desk
A shelf desk uses an existing piece of furniture as a base. It turns a bookcase, a dresser top or a set of cubes into a work surface.
Variations
- A bookcase desk: place a board across two low bookcases of 28 to 29 inches high. The cases form the ends of the desk, and shelves under the top hold storage. The top should be 20 to 24 inches deep and 48 to 60 inches long.
- A dresser desk: clear the top of a dresser at 30 inches and use it as a standing or perch desk. Add a thin board on top if the surface is too small.
- A ladder shelf desk: a leaning ladder shelf holds a board at working height, and the shelf rungs hold books and supplies.
- A cube desk: stack storage cubes into two stacks of 29 inches, and span them with a board.
Steps for the bookcase desk
1. Measure the height of both bookcases and make sure they match. Shim or add feet to level them.
2. Anchor each bookcase to the wall with an anti-tip strap or a small bracket. This is key if the unit is tall or has movable shelves.
3. Cut a top board to span both cases with a 1 inch overhang on each side. Sand and finish it.
4. Fix the top to the cases from below with small L brackets or screws, so it does not slide.
5. Leave a knee space of 24 inches between the cases, or use a single bookcase on one side and a trestle or legs on the other.
Load
Shelf units are designed to hold books, so the shelves can carry a good load, but their sides often rely on thin back panels. Do not lean heavily on a corner if the case is flimsy. A center support under the top board prevents sagging at spans over 36 inches.
Cord plan
Use the back of the bookcase as a cable path. Run cords down behind the cases and through a hole in the back panel, then to a power strip fixed inside one cube. Label each cord with tape.
Build 4: the door-on-trestle desk
A hollow-core or solid door makes a wide desk for little work, and you can take it apart when you move. It needs no drilling into walls, so it suits renters.
Dimensions
- Door: 24 to 30 inches wide and 78 to 80 inches long. Cut it to 48 to 60 inches if the room is tight, or use half a door. Hollow doors are light but weaker, so keep the span short or use solid wood for a larger load.
- Trestles: two sets of legs or sawhorses at 28 to 29 inches high, minus the door thickness, which is about 1 3/8 inch.
- Overhang: 6 to 8 inches at each end for sitting comfort.
Steps
1. Choose a spot against a wall, if possible, so the desk cannot slide, and check that it clears the door.
2. Set the trestles about 6 to 8 inches in from the ends of the door.
3. Rest the door on top, and check the level and stability. Add rubber feet or pads to stop slipping.
4. Add rubber stops or a strip of non-slip mat between the trestle and the door. Fix with clamps or screws if the trestles allow.
5. Seal or paint the door with a low-VOC product. Wait for the full cure time before you use it.
6. For a hollow-core door, do not stand on the desk and avoid heavy point loads at the center.
The trestles can be metal, wood or a pair of sturdy file cabinets. File cabinets give you storage and a fixed height, though check that they are stable.
Cord plan
Tape a power strip under the door at the back edge with removable fixings, or tuck it on a shelf behind the desk. Run cords along the back of the door in a fabric sleeve or with cable clips, then to the outlet. Keep the cords short and avoid a loop that a foot can catch.
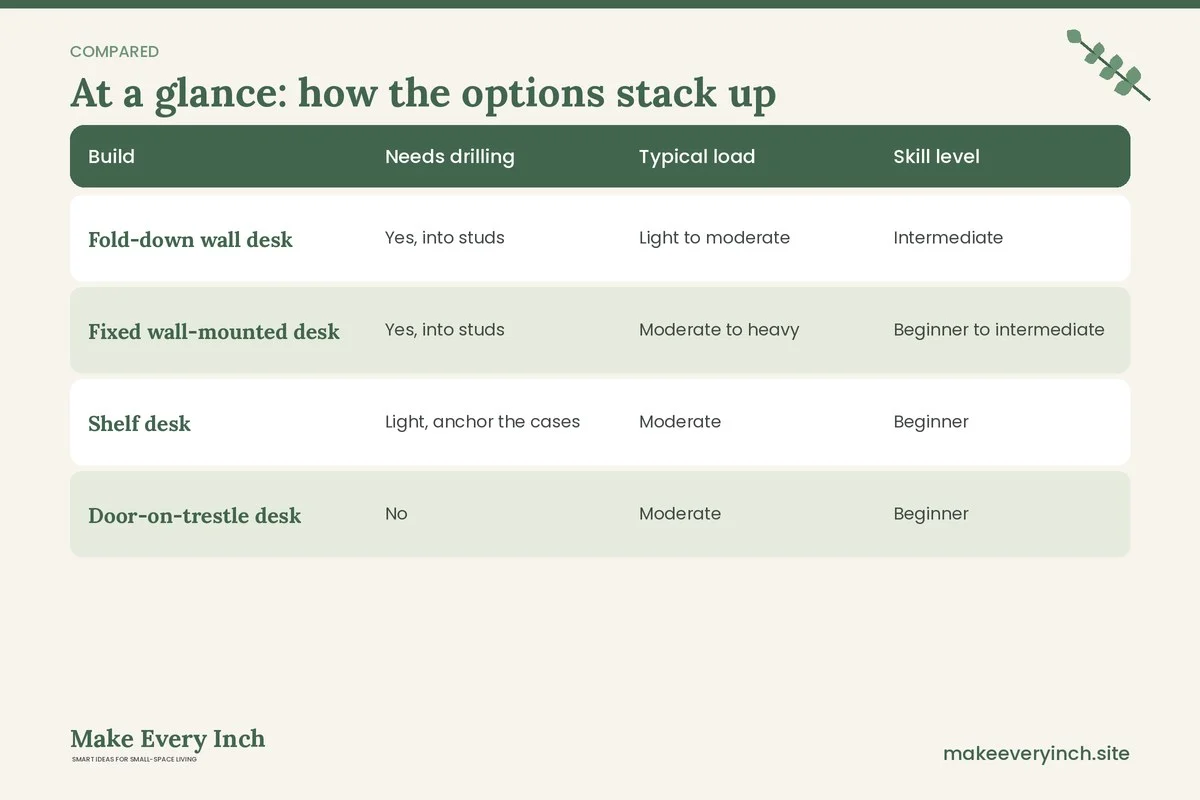
Comparing the four builds
The table helps you pick a build by space, load, skill and drilling.
| Build | Needs drilling | Typical load | Skill level | Best for |
|---|---|---|---|---|
| Fold-down wall desk | Yes, into studs | Light to moderate | Intermediate | Hallways, shared rooms, occasional work |
| Fixed wall-mounted desk | Yes, into studs | Moderate to heavy | Beginner to intermediate | Alcoves, bedrooms, daily work |
| Shelf desk | Light, anchor the cases | Moderate | Beginner | Renters with existing furniture |
| Door-on-trestle desk | No | Moderate | Beginner | Renters, wide work surfaces, moves |
Choose materials wisely
Material choice affects sag, finish and cost. Prices vary, so compare a few suppliers and use relative costs as a guide.
| Material | Relative cost | Strength | Best use | Watch out for |
|---|---|---|---|---|
| Sanded plywood, 3/4 inch | Low to moderate | Strong and stable | Desk tops, shelves | Edges need sanding or edge banding |
| Solid pine board | Low to moderate | Good | Rails, cleats, narrow tops | Warping and knots |
| Hollow-core door | Low | Light, weaker in the middle | Wide tops on trestles | Avoid heavy point loads |
| Solid door | Moderate | Strong, heavy | Wide tops, heavy use | Weight and handling |
| Metal brackets | Low to moderate | Very strong | Fixed wall desks | Check the rating and the fixings |
| Reclaimed boards | Varies | Good if sound | Rustic tops | Check for nails, rot and old finishes |
Plywood is the most forgiving choice. It stays flat, takes screws well and finishes cleanly when the edges are sanded. For a pleasant feel, round the front edge and apply two coats of a water-based clear finish. A laminate sheet or a thin desk mat protects the surface from laptop heat and spills.
Cable management for every build
Cords make a small desk feel messy and can be a safety risk. A simple plan saves time and keeps the room neat.
- Count your devices. A laptop, a lamp, a phone charger and a monitor need four sockets or fewer. Choose a strip with at least that many outlets and a spare.
- Fix the strip. Mount it under the desk or on the wall, never on the floor where it can be stepped on.
- Use cable channels. Paintable cable covers on the wall hide cords from the desk to the outlet. Follow the product limits for the number of cables.
- Add slack at moving parts. Fold-down desks need a loop of extra length, tied loosely, so the cable does not pull when the desk moves.
- Label both ends. A small strip of tape makes it simple to unplug the right cord.
- Keep chargers cool. Do not bury power bricks in cloth or boxes, and give them air.
- Go wireless where it helps. A wireless mouse and keyboard remove two cords.
- Never overload. Check the total power rating of the strip and the devices.
Three example rooms
A bedroom alcove of 5 by 3 feet
The alcove sits beside the wardrobe and gets natural light. A fixed wall desk 40 inches wide and 22 inches deep sits at 29 inches. A cleat and two brackets are fixed into studs. A shelf 15 inches above the desk holds books and a lamp. A power strip clips under the desk, and a cable cover runs to the outlet. The chair slides under the desk when finished. The desk uses 22 inches of depth, and the room keeps a 30-inch walkway.
A living room corner for part-time work
Two or three days a week, one person works from the living room. A fold-down desk 32 inches wide and 20 inches deep hangs on the wall beside the bookcase. When open, it is at 29 inches, with a folding chair that stays in a closet. The laptop and notebook fit, and the desk folds away at night. The cord comes from a power strip fixed to the back rail, and the charger lives in a drawer. This build needs drilling, so the owner checks the lease first, or chooses a shelf desk made from a low bookcase if drilling is not allowed.
A rental studio where drilling is banned
The tenant cannot make any holes. The plan is a hollow-core door cut to 54 inches, resting on two sets of trestle legs set 6 inches in from each end. Rubber pads stop slipping. The desk sits against the wall under a window, and the chair rolls out. A power strip sits on a small shelf behind the desk, with cords bundled in a sleeve. When the lease ends, the door and trestles are lifted away, and the room is exactly as it was. For more renter solutions, see small bedroom desk ideas.
Make the desk comfortable and calm
A desk that is easy to use is a desk that gets used. A few small details matter.
- Lighting: a lamp with a flexible neck, placed on the side opposite your writing hand, avoids shadows. Warm light in the evening is easier on the eyes.
- Seat height: if the chair cannot go low enough, use a footrest. If it cannot go high enough, use a firm cushion.
- Monitor stand: a stack of sturdy books can raise a screen to eye level in a pinch.
- Cable tidy: a small box for cables and chargers keeps the surface clear.
- Storage: a wall shelf above the desk, or a bin on the floor, holds supplies. Our guide to vertical storage ideas shows how to use the wall.
- Ending the day: clear the surface, fold the desk or tidy the corner so the room feels like home again. This simple ritual helps you switch off.
If you prefer to buy rather than build, see our list of best desks for small apartments, and the ideas in small bedroom ideas with a desk.
Common mistakes to avoid
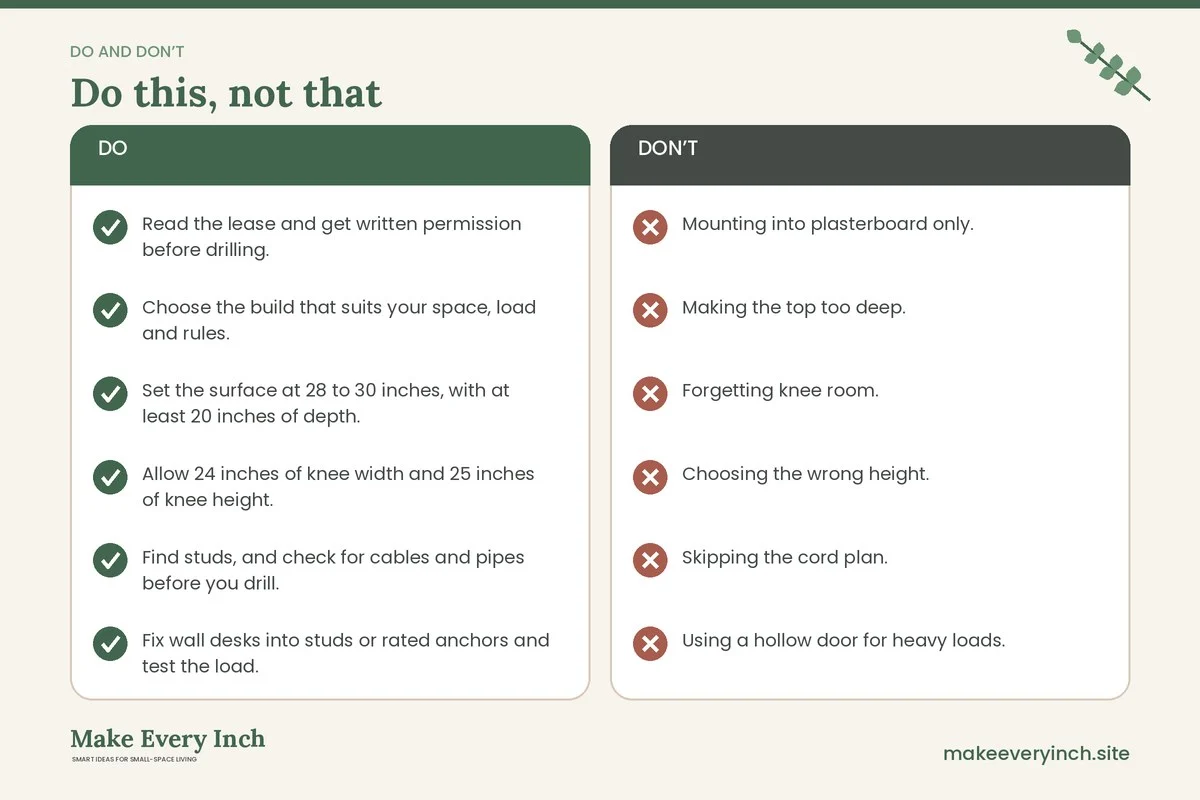
- Mounting into plasterboard only. A desk without stud or rated fixings can pull out of the wall. Test every fixing.
- Making the top too deep. A surface deeper than 24 inches in a tight room cuts into the walkway. Tape the footprint and test.
- Forgetting knee room. Drawers, cross bars and cables under the top can block your legs. Leave 24 inches of width and 25 inches of height.
- Choosing the wrong height. A desk at 32 inches forces you to shrug. Sit and measure from the floor to your elbow before cutting legs.
- Skipping the cord plan. Add a power strip and cable path at the start, not after the desk is built.
- Using a hollow door for heavy loads. It can crush or sag at the center. Use solid wood or add support.
- Unfinished edges. Raw plywood edges splinter and catch clothing. Sand and seal them.
- Using strong-smelling finishes in a closed room. Choose low-VOC products and open a window.
- Overloading the strip. Check the ratings and avoid chaining strips.
Budget and approach
DIY desks can be very economical when you plan the cuts and reuse items. A shelf desk from furniture you already own often costs almost nothing, a door-on-trestle desk is usually low to moderate, and a wall desk with good brackets sits a little higher because of the hardware. Prices vary by region and supplier, so treat these as ranges and compare.
- Ask a store to cut the board to size, which keeps edges clean.
- Buy one good set of brackets or hinges rather than many weak ones.
- Reuse a door, crates or a bookcase if you have one.
- Spend on the parts that carry load, and save on decoration.
- Check second-hand listings for solid wood and metal legs.
For more ways to stretch a small budget, read our guide to cheap storage ideas for apartments and DIY apartment upgrades.
DIY desk checklist
- Read the lease and get written permission before drilling.
- Choose the build that suits your space, load and rules.
- Set the surface at 28 to 30 inches, with at least 20 inches of depth.
- Allow 24 inches of knee width and 25 inches of knee height.
- Find studs, and check for cables and pipes before you drill.
- Fix wall desks into studs or rated anchors and test the load.
- Strap bookcases and hutches to the wall.
- Wear safety glasses and a dust mask, and clamp the work.
- Use low-VOC finishes in a ventilated room, and let them cure.
- Plan the power strip, cable path and slack for moving parts.
- Add a lamp and raise the screen to eye level.
- Test with a heavy load before adding equipment.
- Review after a month and adjust.
FAQ
What is the best DIY desk for a very small room?
A fold-down wall desk is the best for tiny rooms because it disappears when closed. If you cannot drill, a shelf desk made from a low bookcase or a door on trestles works well and can be taken apart.
How high should a DIY desk be?
Most adults are comfortable at 28 to 30 inches. Your elbows should rest near 90 degrees with your shoulders relaxed. Adjust with a footrest or a seat cushion if the desk cannot change.
How deep should a small desk be?
Aim for at least 20 inches for a laptop, and 24 inches or more if you use a monitor. A 16 to 18 inch desk can work with a separate keyboard shelf, though it is tighter.
Can a hollow-core door hold a desk load?
It can hold a light to moderate load when supported at both ends and close to the edges. Avoid heavy point loads in the center and keep the span short. A solid door or a plywood top is stronger.
How do I hide the cords on a wall-mounted desk?
Use a power strip under the desk, a paintable cable cover on the wall and a grommet hole in the top. Leave slack for any moving part, and never run cords through a hinge.
Do I need to anchor a bookcase desk?
Yes. Strap each bookcase to the wall, since a tall unit can tip, and fix the top board to the cases so it cannot slide. See small space storage furniture for sturdy options.
Which finish is safest for indoor desks?
Choose low-VOC or water-based finishes, work with a window open, and let the piece cure before heavy use. Wear a mask when sanding.
Keep going: Keep building with our best desks for small apartments, small bedroom desk ideas and DIY entryway storage for tiny homes.
Save this guide for later
Pin the ideas you like to Pinterest so you can come back to them when you plan your space.