DIY Entryway Storage for Tiny Homes
Quick answer: DIY entryway storage for tiny homes works best as four small builds that share one wall: a hook rail at about 60 inches, a shallow bench at 17 to 18 inches high, a shoe shelf only 8 to 10 inches deep and a slim mail slot or letter box. Use basic hand tools, anchor everything to studs or with rated anchors, ask permission before drilling, and finish with low-VOC products in a ventilated space.
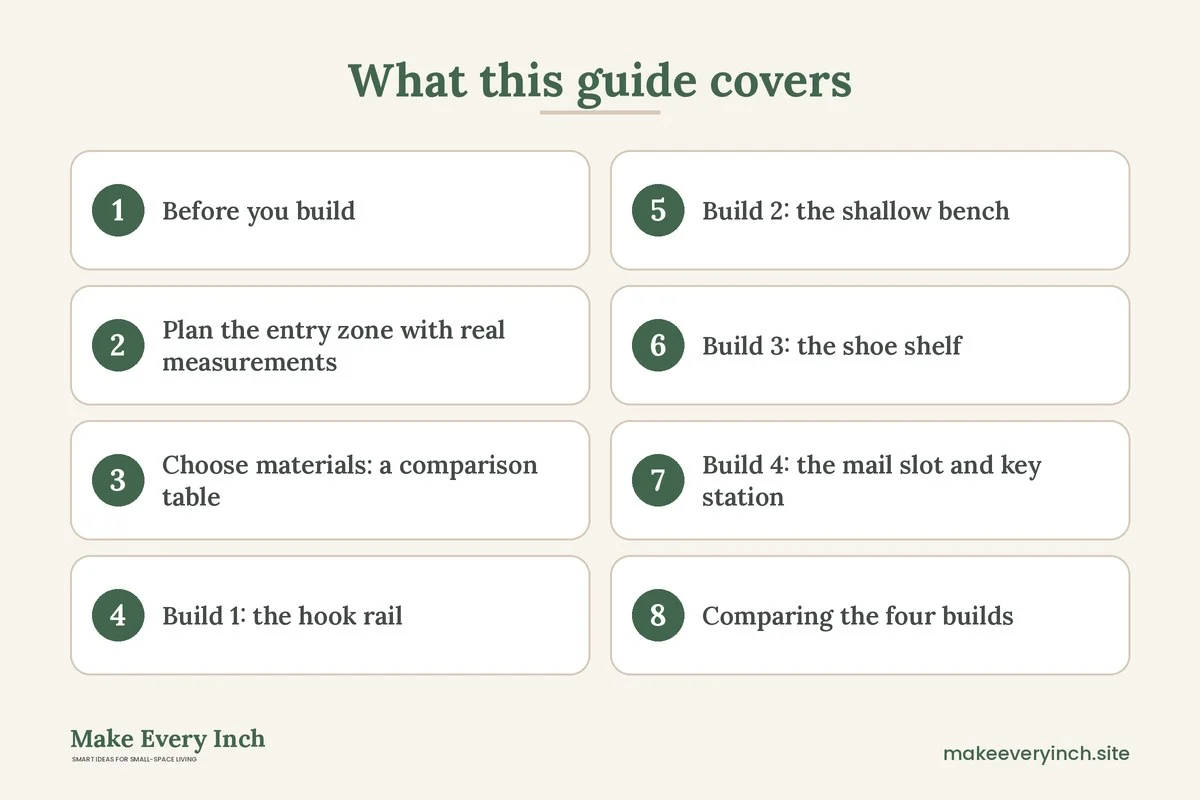
DIY entryway storage for tiny homes is one of the most rewarding weekend projects, because a few square feet of wall can turn a cluttered doorway into a calm landing zone. Ready-made entry furniture is often too deep, too wide or too costly for a hall that is only 36 inches across. Building your own lets you cut each piece to the exact space you have, choose the finish, and spend only on the materials you need. This guide walks through four builds: a hook rail, a bench, a shoe shelf and a mail slot. It covers planning measurements, tools and safety, a materials comparison table, step-by-step builds, three example entryways, a build order, mistakes and a checklist. For wider inspiration, see our main guide on small entryway ideas, the budget pillar on budget small space ideas and the roundup of small space organization ideas. If you also want a desk project, the companion post on DIY desk ideas for small spaces uses many of the same skills.
Before you build: permission, safety and tools
Start with the boring part, because it protects your deposit and your fingers. If you rent, read the lease and never drill into a wall without written permission. Many landlords allow a few screw holes that you fill at move-out, and others ban them entirely. If drilling is not allowed, jump to the no-drill notes later in this guide, or read our guide to no drill storage ideas for renters.
Check what is inside the wall before you drill. Electrical cables often run vertically above and below outlets and switches, and horizontally between them. A cheap stud finder with a live-wire warning helps, but it does not replace common sense. Stay at least 6 to 8 inches away from outlets and switches when drilling, and switch off the circuit if you are unsure. Never drill into a wall near a bathroom or kitchen without knowing where pipes run. If the home is old, or you suspect old paint, ask a professional before sanding anything, because older paint may contain lead.
Anchor anything that holds weight or could tip. A bench that people sit on should be fixed to a stud or to the floor side with a bracket. Wall shelves that hold boots need proper fixings into studs or rated anchors for the wall type. Plasterboard alone holds very little, so choose anchors rated well above the load and spread the weight over at least two points. A tall shoe cabinet needs an anti-tip strap in the same way as a bookcase.
Protect yourself and the room while you work:
- Wear safety glasses when cutting or drilling, and a dust mask when sanding.
- Clamp the workpiece before you cut, and keep both hands behind the blade.
- Work in a ventilated space with a window open, especially when you finish or paint.
- Choose low-VOC paint, primer and sealer where you can, and let finishes cure fully before you load the piece with shoes and coats.
- Keep off-cuts, screws and dust away from pets and children, and sweep or vacuum the floor when you finish.
The tool kit is modest. A tape measure, pencil, level, hand saw or a circular saw if you have one, a drill with a set of bits, a stud finder, a square, sandpaper and a screwdriver cover almost everything here. Many hardware stores will cut boards to length for a small fee or for free, which saves you from needing a saw at all.
Plan the entry zone with real measurements
A tiny entryway is usually a strip of wall beside the door, a short hall, or a corner of a living room. Measure three things before you design anything: the clear wall width, the depth you can spare without blocking the walkway, and the height from floor to ceiling or to the nearest obstacle such as a light switch or a radiator.
Use these numbers as a starting point. They suit most adults and keep the route clear.
- Walkway: keep at least 30 inches clear in front of any built piece, or 24 inches if only one person passes at a time. Doors should open fully without hitting anything.
- Hook rail height: about 60 inches from the floor for adult coats, and 40 to 48 inches for a lower row for children.
- Hook spacing: 5 to 6 inches between single hooks, or 7 to 8 inches for bulky coats.
- Bench height: 17 to 18 inches from the floor to the seat, which is standard for putting on shoes. Choose 15 to 16 inches if the household is mostly children or shorter adults.
- Bench depth: 12 to 15 inches. A seat only 12 inches deep still works for tying laces and costs very little floor space.
- Bench length: 30 to 48 inches for a tiny entry. Anything above 48 inches needs a center support so the top does not sag.
- Shoe shelf depth: 8 to 10 inches fits most adult shoes angled or placed toe to heel. Tilt the shelf slightly if you want to fit more pairs in a narrow depth.
- Shoe shelf spacing: 6 to 7 inches between shelves for flats and sneakers, and 10 to 12 inches for boots or heels.
- Mail slot or letter box: a slot opening of about 10 inches wide and 1 inch high takes standard envelopes, and the box behind it should be at least 4 inches deep.
Tape the footprint of each piece on the wall and floor with painter’s tape. Stand in the doorway with a coat and a bag and run through your normal routine. If you bump into the tape, shrink the piece before you cut a single board.
Choose materials: a comparison table
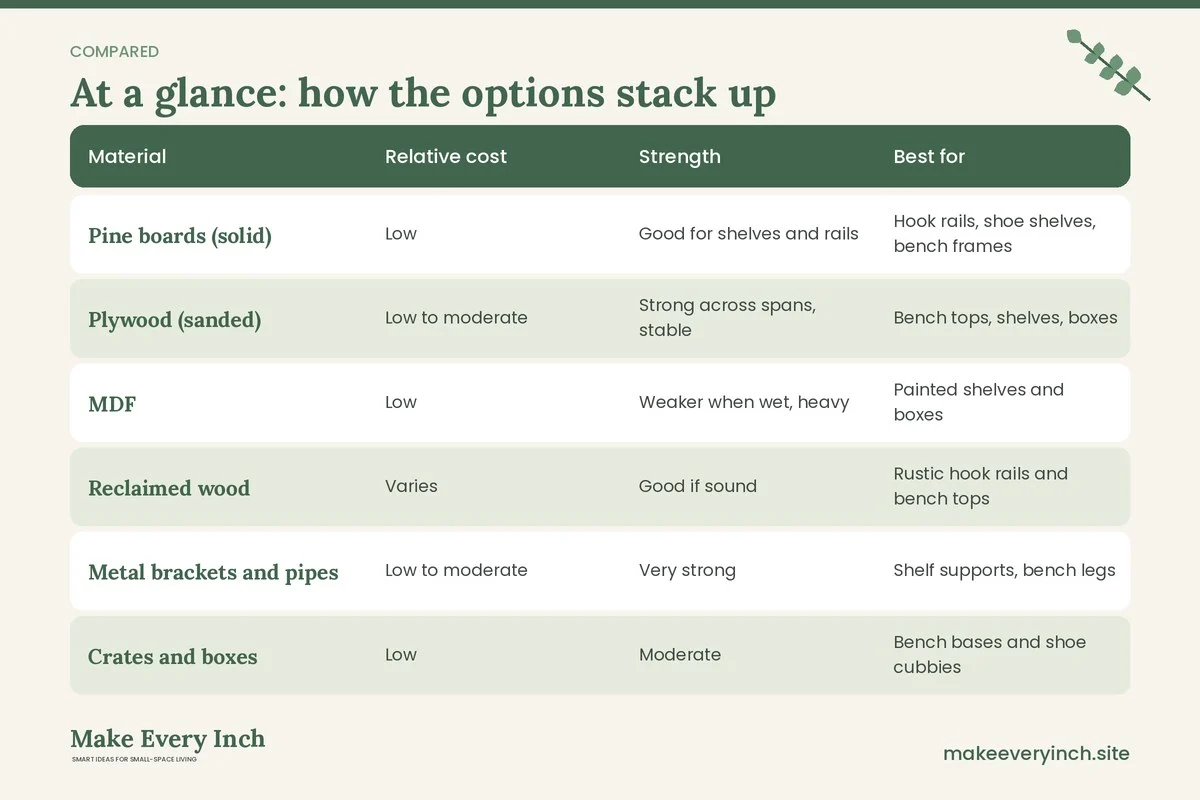
Materials control the cost, the weight and the effort. Use the table to decide before you shop. Costs are relative, and local prices vary a lot, so compare a few suppliers.
| Material | Relative cost | Strength | Best for | Watch out for |
|---|---|---|---|---|
| Pine boards (solid) | Low | Good for shelves and rails | Hook rails, shoe shelves, bench frames | Knots and warping, so choose straight boards |
| Plywood (sanded) | Low to moderate | Strong across spans, stable | Bench tops, shelves, boxes | Exposed edges need sanding or edge banding |
| MDF | Low | Weaker when wet, heavy | Painted shelves and boxes | Swells with moisture and dust is fine, so wear a mask |
| Reclaimed wood | Varies | Good if sound | Rustic hook rails and bench tops | Check for nails, rot and old finishes |
| Metal brackets and pipes | Low to moderate | Very strong | Shelf supports, bench legs | Sharp edges and rust, so file and seal |
| Crates and boxes | Low | Moderate | Bench bases and shoe cubbies | Check each joint and fix the stack together |
Solid pine and sanded plywood are the sweet spot for beginners. Both cut easily, hold screws well and take paint or oil with little prep. Use MDF only for pieces that stay dry and are painted well on every face, edges included.
Build 1: the hook rail
A hook rail is the simplest and highest-impact entryway build, because it moves coats and bags off the floor and chair backs. It also needs the fewest materials.
What you need
- One board, 3/4 inch thick and 3 to 4 inches wide, cut to the length of the wall space. 24 to 36 inches suits a tiny entry.
- Three to six hooks, rated for the weight you plan to hang.
- Screws for the hooks, and screws and anchors for the wall.
- Sandpaper, a primer or sealer, and paint or a clear finish.
Steps
1. Sand the board smooth and round the edges slightly, so bags do not snag.
2. Apply a coat of low-VOC primer or sealer, let it dry, then add one or two coats of paint or finish. Follow the dry times on the label and keep a window open.
3. Mark the hook positions on the board. For three hooks on a 30-inch board, centers at 5, 15 and 25 inches work well. Pre-drill small holes so the wood does not split.
4. Fix the hooks to the board before you hang it. This is easier than working overhead.
5. Find the studs. If two studs fall under the board, drive screws into them through pre-drilled holes. If not, use rated wall anchors at each end and at the center.
6. Hold the board against the wall, check it with a level, and mark the screw points. Drill, then fix the board with the screws. Tighten, check the level again, and test by pulling down firmly.
For renters who cannot drill, a rail can hang from the top of the door on over-the-door hooks, or from a tension rod in an alcove. Adhesive hooks rated for the weight can hold light items such as scarves and tote bags. See small coat storage ideas for more non-fixed options.
Build 2: the shallow bench
A bench gives you a spot to sit and put on shoes, and it also holds storage under or inside the seat. In a tiny home, shallow is better than deep. A depth of 12 to 14 inches is enough for sitting at the edge and keeps the walkway open.
Dimensions for a simple storage bench
- Height: 17 to 18 inches overall.
- Length: 36 inches, or the width of the available wall minus a few inches of breathing room.
- Depth: 13 inches.
- Seat: a sanded plywood or pine top, about 3/4 inch thick.
- Frame: two side panels and one back panel, with an open front for baskets or shoe bins, or a lower shelf set about 4 inches off the floor.
Steps
1. Cut two side panels at 17 1/4 inches high by 12 1/4 inches deep, and a back panel 36 inches wide by 6 inches high to stiffen the frame.
2. Pre-drill and fix the sides to the back using wood glue and screws. Check that the frame is square by measuring both diagonals. They should be equal.
3. For a lower shelf, fix a board between the two sides at about 4 inches from the floor, using screws and glue.
4. Add the top. Let it overhang 1/2 inch at the front and the sides for a clean look. Fix it down with screws from inside the frame, or with pocket screws if you have a jig.
5. Sand all the surfaces, ease the edges, and apply a sealer or paint. Allow time to cure fully before you sit on it or place items on it.
6. Fix the bench to the wall with an L bracket on the back panel into a stud, or into the floor side if the bench will stand against a wall with no stud. This stops it from sliding or tipping when someone sits near the front edge.
A cushion on top makes the seat more comfortable and lets you change the look with a new cover. Choose a cushion with a non-slip base. Baskets under the seat hold gloves, hats and umbrellas and keep the bench looking tidy.
If you cannot build, a salvaged piece can serve the same role. A short chest, a low cabinet or a stack of sturdy crates can become a bench when you add a cushion. See our guide to small space storage furniture for ready-made options.
Build 3: the shoe shelf
Shoes are the largest clutter source in a tiny entry, so a shoe shelf often earns the most space. The key is to keep it narrow. An 8 to 10 inch depth places shoes sideways or angled, and the piece stays almost flat against the wall.
Open shelf version
- Two side boards, 30 to 36 inches high and 9 inches deep.
- Three or four shelves, each 24 to 30 inches wide, spaced about 7 inches apart.
- A back rail or a thin back panel, 1/4 inch thick, to stop the frame from racking.
- A small lip or a rail at the front of each shelf, about 1/2 inch high, so shoes do not slide off if you tilt the shelves.
Steps
1. Mark the shelf heights on both side boards with a pencil and a square, so they match exactly.
2. Pre-drill and screw the shelves to the sides, with glue at each joint. A simple method is to use a scrap board as a spacer to keep the gaps even.
3. Fix the back rail or panel. This is what keeps the piece square.
4. Sand, seal and paint. Put the finished piece in a ventilated spot to cure.
5. Anchor the unit to the wall with an anti-tip strap or a bracket at the top, because a tall narrow piece can tip if a child climbs on it.
Wall-mounted version
A wall-mounted rack frees the floor and makes sweeping easier. Mount a pair of boards at 7 to 8 inches deep, held by sturdy brackets that are screwed into studs. Each shelf can hold a few pairs of light shoes, so keep heavy boots on the floor. Spread the weight over at least two brackets per shelf and check the bracket rating. If you cannot drill, a freestanding ladder-style shelf leaned against the wall works with a strap, or a slim cabinet from the guide to best narrow shoe cabinets may fit better. For rules about how many pairs to keep out, see small shoe storage ideas.
Build 4: the mail slot and key station
Mail is the second largest source of clutter after shoes. A simple slot box stops letters from piling on the bench or shelf.
Wall-mounted letter box
- Use a shallow box 10 to 12 inches wide, 4 to 5 inches deep and 8 to 10 inches high. A plywood box with a slanted front works well.
- Cut a slot 10 inches wide and about 1 inch high in the front, or leave the front open for a more relaxed look.
- Fix a small ledge at the base, 1 inch deep, so letters stay upright.
- Mount the box at about 48 to 54 inches from the floor, close to the door but away from the swing of the door.
Key and parcel add-ons
- A strip of wood with 3 hooks, 6 inches long, handles keys.
- A small tray on the top of the bench takes wallets and phones.
- A magnetic strip fixed under the shelf can hold metal keys.
- A slim hook for a tote bag handles recycling and returns.
A rule helps more than a build. Sort mail at the door, put recycling in the bin, and move only the items that need action to a single spot. Without a rule, even the best slot overflows within a week.
Comparing the four builds
Use this table to decide which build to start with, based on time, skill and effect on the room.
| Build | Skill level | Time to build | Space it needs | Impact on clutter |
|---|---|---|---|---|
| Hook rail | Beginner | One to two hours plus finish drying | 3 to 4 inches of depth | High, clears coats and bags |
| Shallow bench | Beginner to intermediate | One weekend | 12 to 14 inches deep | High, adds seat and storage |
| Shoe shelf | Beginner to intermediate | Half a day plus drying | 8 to 10 inches deep | Very high, clears the floor |
| Mail slot and key station | Beginner | One to two hours | 4 to 5 inches deep | Medium, ends paper piles |
If you have only one weekend and a small budget, build the shoe shelf and the hook rail. They solve the two largest problems and need little material. Add the bench when you have more time, and the mail slot at the end.
Three example entryways
A 36-inch-wide hall inside a studio door
The wall beside the door is 36 inches wide and the clear walkway is 34 inches. A deeper bench is out. The plan is a 30-inch hook rail at 60 inches, a wall-mounted shoe rack of two boards at 8 inches deep and 12 inches from the floor, and a slim mail box above the rack. Total depth is 8 inches. The floor stays clear, shoes sit off the ground, and a doormat tucks under the rack. This arrangement needs wall fixings, so check the lease. If drilling is not allowed, swap the rack for a freestanding two-tier shoe shelf and hang the hooks on the back of the door.
A corner of a one-bedroom living room
There is no entry hall, only an 80-inch stretch of wall between the front door and a sofa. A 36-inch bench at 17 inches high sits against the wall with two baskets beneath. A hook rail with five hooks hangs above it at 60 inches. A shoe shelf of 24 inches wide, 9 inches deep and 30 inches high stands at one end, strapped to the wall. A small mirror above the bench bounces light. The bench doubles as a seat for guests. The whole run needs about 14 inches of depth.
A narrow galley hall in a tiny house
The hall is 32 inches wide, so anything deeper than 8 inches blocks the way. The build is a thin hook rail at 60 inches on one wall and a 7-inch-deep shelf at 40 inches that serves as a shoe ledge for house shoes and a drop spot for keys. Boots stay in a tray on the floor for wet days. A mail slot attaches to the side of the shelf unit. Everything is within arm’s reach and nothing sticks out more than 8 inches.
Finishing: paint, sealer and durability
Entryways take a beating. Wet boots, bags and sticky hands all hit the same surfaces. A good finish makes the difference between a build that lasts years and one that peels in a month.
- Prep: sand with medium grit, then fine grit, and wipe the dust off with a damp cloth.
- Primer: use a primer on bare wood or MDF to stop stains and to help the paint stick.
- Paint: a satin or semi-gloss finish wipes clean more easily than a flat finish. Look for low-VOC or zero-VOC products, and keep the room ventilated while the coat dries.
- Clear coat: a water-based clear sealer protects raw wood on a bench top and is easier to work with than oil-based products. Read the cure time, which can be several days before the surface is fully hard.
- Boot tray: put a waterproof tray or a sheet of washable mat under wet shoes so the shelf bottom stays dry.
- Feet: add felt or rubber pads under the bench legs, so the floor is not scratched and the bench does not slide.
Be careful with rags that have oil-based stains or finishes on them. Spread them flat to dry outside, or soak them in water in a metal container before disposal, because they can heat up as they dry.
Common mistakes to avoid
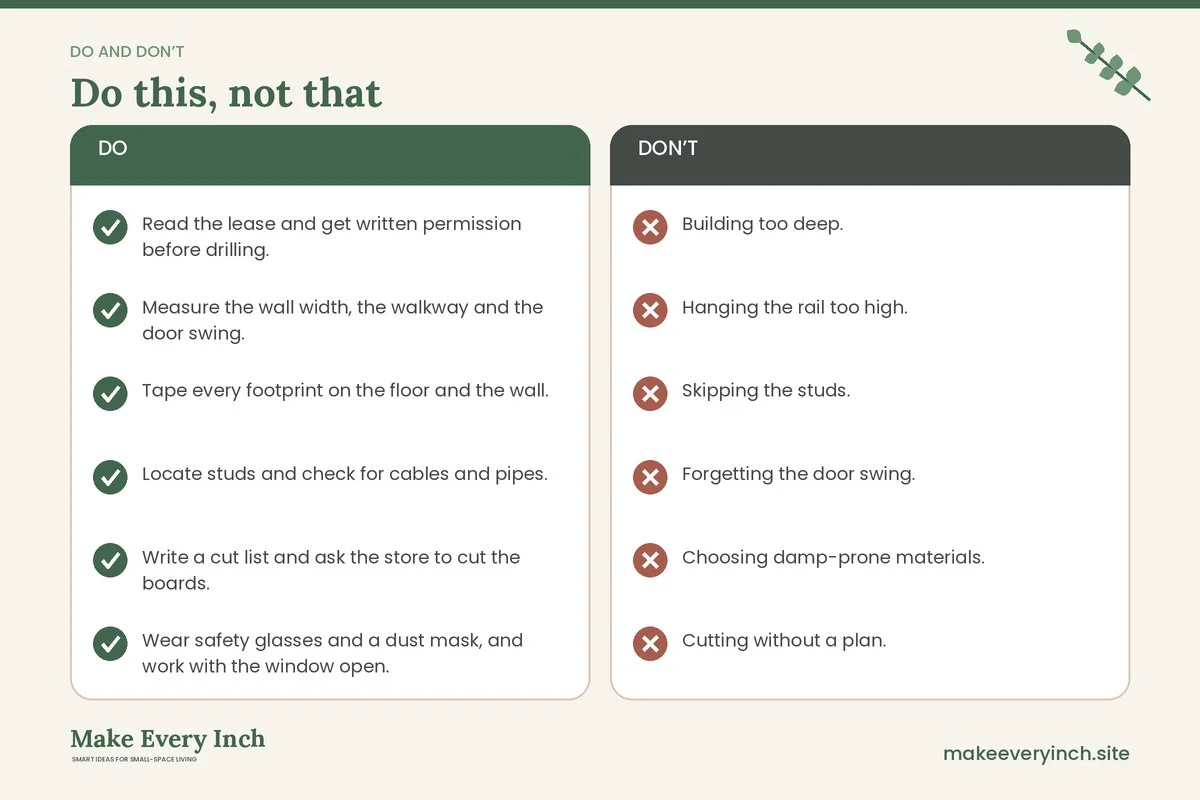
- Building too deep. A bench or shelf of 16 inches or more eats the walkway. Measure twice and tape the footprint first.
- Hanging the rail too high. Hooks above 66 inches are out of reach for many people. Use 60 inches as a base and add a lower row if needed.
- Skipping the studs. Plasterboard alone cannot hold a loaded coat rail or shelf. Use studs or rated anchors, and test the fixing.
- Forgetting the door swing. A beautiful bench is useless if the door hits it. Open the door fully before you mark anything.
- Choosing damp-prone materials. Raw MDF swells when wet boots touch it. Seal every face, or choose plywood or pine.
- Cutting without a plan. Draw a simple cut list with lengths and counts before you buy boards. It stops waste and saves money.
- Leaving finishes uncured. Loading a shelf too soon can mark the paint. Wait for the full cure time on the label.
- Ignoring the load. A single hook may carry far less than a rail with a spread load. Check the rating of every hook and bracket.
Budget and shopping approach
Entryway builds can stay cheap if you plan the cut list and shop smartly. A simple hook rail often costs very little, the shoe shelf is usually a low to moderate spend, and a bench with a plywood top sits slightly higher. Hedged expectations are best, because prices vary widely between regions and suppliers.
- Buy boards in standard lengths and design the pieces to use them fully, so you pay for less waste.
- Ask the store to cut boards for you, which saves time and makes accuracy easier.
- Check salvage yards, community groups and second-hand listings for solid wood, crates and hardware.
- Buy a single decent set of screws and anchors rather than many mixed bags.
- Spend more on the parts that carry load, such as brackets and hooks, and less on decoration.
- Reuse a mirror or a basket you already own instead of buying a new one.
For more ways to stretch a small budget across the whole home, read our cheap storage ideas for apartments and the broader guide on DIY apartment upgrades.
A sensible build order
1. Week one: measure, tape the footprints, check the lease and pick your tools. Buy materials and ask for the cuts.
2. Weekend one: build and finish the hook rail and the shoe shelf. Let them cure while you plan the rest.
3. Weekend two: build the bench, and mount the rail and shelf once the finish is dry.
4. Final hour: add the mail slot, a tray for keys and a mirror. Edit the contents so only what you use daily stays out.
5. After a month: adjust the hook heights and shelf spacing based on how you really use the space.
If you want vertical ideas beyond the entry, our guide to vertical storage ideas shows how to extend the same approach across other rooms, and hidden storage ideas covers ways to tuck bulky items out of sight.
DIY entryway checklist
- Read the lease and get written permission before drilling.
- Measure the wall width, the walkway and the door swing.
- Tape every footprint on the floor and the wall.
- Locate studs and check for cables and pipes.
- Write a cut list and ask the store to cut the boards.
- Wear safety glasses and a dust mask, and work with the window open.
- Use low-VOC primer, paint and sealer, and let each coat dry.
- Hang the hook rail at about 60 inches with hooks rated for the load.
- Build the bench at 17 to 18 inches high and 12 to 14 inches deep.
- Keep shoe shelves 8 to 10 inches deep, and strap tall ones to the wall.
- Anchor to studs or with rated anchors, and test every fixing.
- Fix a mail slot or a tray and set a rule to sort mail at the door.
- Wait for the full cure time before loading the pieces.
- Review after a month and adjust.
FAQ
What is the cheapest DIY entryway storage for a tiny home?
A hook rail is usually the cheapest build. A single board, a few hooks and a coat of paint are enough, and it clears coats and bags from the floor straight away. A simple shoe shelf from pine boards is the next most economical project.
Can I build entryway storage without drilling into the wall?
Yes. Use over-the-door hooks, a freestanding shoe shelf, a tension rod in an alcove and a freestanding bench with a cushion. Adhesive hooks rated for the weight can hold light items. Check the lease, and read no drill storage ideas for renters for more.
How deep should an entryway bench be in a tiny space?
A depth of 12 to 14 inches is enough for sitting and putting on shoes, and it leaves the walkway open. Anything over 16 inches usually blocks the path in a small hall, so tape the footprint and test it before you cut.
How high should I hang the hooks?
Hang adult hooks at about 60 inches from the floor, and add a second row at 40 to 48 inches for children. Space hooks 5 to 8 inches apart so coats do not overlap.
What paint is safest for indoor furniture builds?
Choose low-VOC or zero-VOC paint and primer, work with a window open, and let the piece cure before moving it into a closed room. Wear a mask when sanding, and follow the instructions on the label.
Do I need to anchor a shoe shelf?
Yes, if it is tall or narrow. Use an anti-tip strap or a small bracket into a stud, especially when children or pets are in the home. Wall-mounted racks need proper fixings into studs or rated anchors.
How many pairs of shoes should stay by the door?
Keep only the pairs you wear every week, usually four to six per adult. Store out-of-season shoes elsewhere, for example under the bed, which our guide to small shoe storage ideas explains.
Keep going: Keep building with our small entryway storage ideas, small entryway organization tips and DIY desk ideas for small spaces.
Save this guide for later
Pin the ideas you like to Pinterest so you can come back to them when you plan your space.