How to Double Hanging Space in a Closet
Quick answer: To double hanging space in a closet, fit a second rod below the first. For shirts, jackets and folded pants, set the upper rod about 80 to 84 inches from the floor and the lower rod about 38 to 42 inches, so each zone has roughly 36 to 40 inches of drop. Check the weight rating, anchor into studs or use a no-drill rod that hangs from the existing one, and ask permission before drilling in a rental.
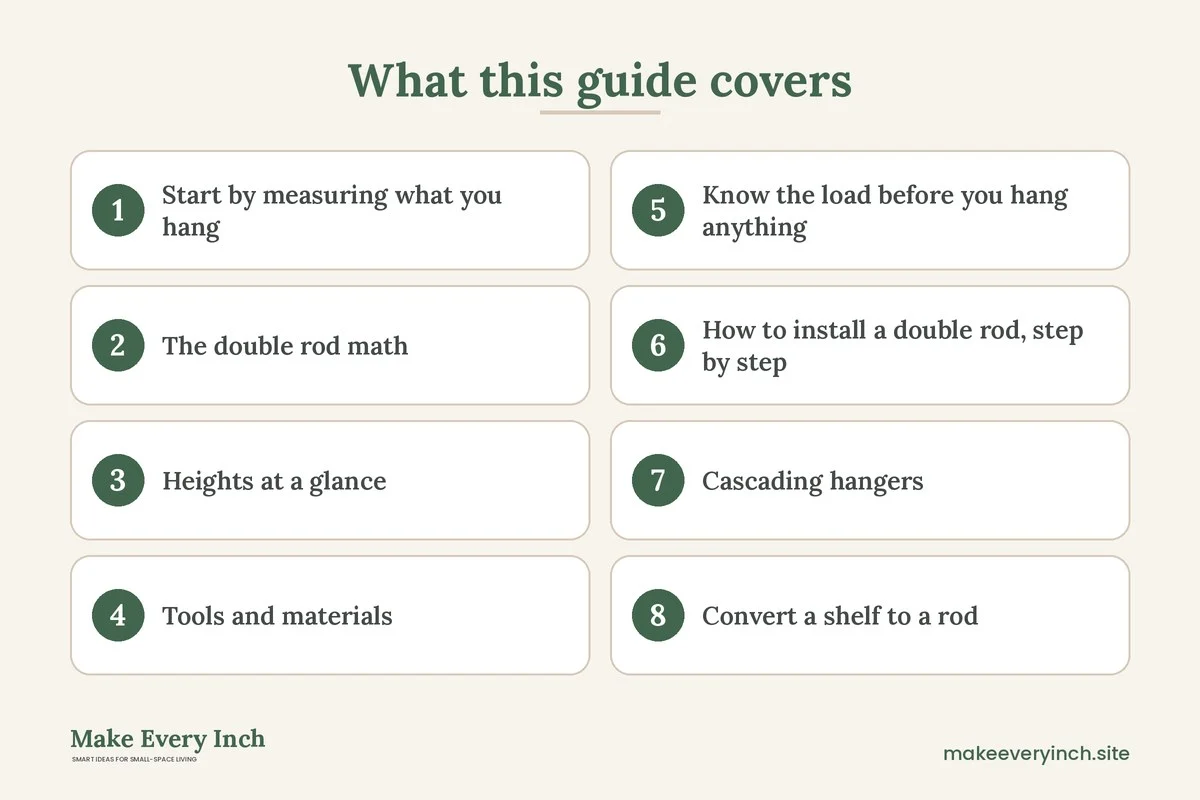
How to double hanging space in a closet is a question of arithmetic first and hardware second. Most closets have one rod set at about 66 to 72 inches, with a lot of dead air below the clothes and a shelf above them that holds very little. Splitting that height into two hanging zones can almost double the number of shirts, jackets, skirts and folded trousers you can hang, as long as the garments are short enough to fit. This guide shows the math for a double rod, the heights that work for different clothes, the tools and materials you need, a step-by-step installation, the load limits to respect, cascading hangers for a no-hardware boost, and ways to turn a shelf into a rod. It also includes three example closets, a comparison table, a checklist and a FAQ. For the bigger picture of small closets, see our pillar guide on small closet ideas, and for the storage side of the same project, read the companion post on closet shelf organization ideas.
Start by measuring what you hang
Doubling does not work for every wardrobe, so begin with a short audit. Take every hanging item out of the closet and sort it into three piles by length. Measure a few typical pieces on their hangers, from the top of the hook to the lowest hem.
- Short items: shirts, blouses, folded trousers, skirts, cropped jackets and kids’ clothes. These usually measure 30 to 40 inches on a hanger. They are the candidates for the double rod.
- Medium items: longer dresses, long cardigans, suit jackets with pants hung full length and some coats. These often measure 40 to 55 inches. They need a single full-height zone or a rod set for them.
- Long items: maxi dresses, gowns, long coats and robes. These measure 55 inches or more and need an uninterrupted drop.
Count how many items fall into each pile. As a rule of thumb, if more than half of what you hang is short, a double rod pays off. If most of your hanging clothes are long, you may be better with one tall zone and one short zone side by side, or with storage upgrades such as the ideas in our guide to small closet organization ideas.
Measure the closet too. You need the interior height, the width of each section, the depth, the position of any existing shelf or rod, and the location of the studs if you plan to screw into the wall. Depth matters because hangers need room to rotate. Most clothes need a rod roughly 12 inches from the back wall, which means a closet at least 22 to 24 inches deep. A shallower closet may need turned hangers or a different plan.
The double rod math
Think of a double rod as two short closets stacked on top of each other. Each one needs the length of the longest garment it holds, plus space for the hanger, plus a little breathing room. Here is the formula:
Zone height = the longest garment on a hanger + 2 to 3 inches of clearance.
Use that for both zones, then add the thickness of the rod and the gap between the zones. For a typical 84-inch (7-foot) closet interior, the numbers work out like this:
- Upper rod: about 80 to 84 inches from the floor. A person of average height can still reach it, and the rod sits under the shelf with about 1.5 to 2 inches to spare.
- Lower rod: about 38 to 42 inches from the floor. That leaves roughly 38 to 42 inches between the lower rod and the floor, enough for shirts and folded trousers, and 38 to 44 inches between the two rods, enough for the upper items to clear the top of the lower items.
- Floor space under the lower rod: about 6 to 12 inches of the zone is usually left for shoes or a low bin.
Check this against your own closet before you buy hardware. If the closet is shorter than 84 inches, subtract and compare. A 78-inch closet may force a smaller lower zone, which works for kids’ clothes and shirts but not for folded trousers. A 96-inch closet gives you extra room, and the surplus is best spent on the upper zone or a shelf above it.
Why the zone heights are not equal
The lower zone is not a mirror of the upper one, because the upper garments hang from a high rod and descend into the space the lower rod occupies. A worked example shows why. Suppose the upper rod is at 82 inches and the shirts on it are 30 inches on the hanger. The hems end at 52 inches from the floor. The lower rod sits at 40 inches, so lower hangers rise roughly 2 to 4 inches above the rod, which puts their top at about 44 inches. The gap between the upper hems and the lower hangers is about 8 inches, a comfortable margin for the hand to slide a hanger in.
If you hang longer items above, the margin shrinks. A 40-inch dress on the upper rod ends at 42 inches, and it collides with the lower hangers at 44. That is why the upper zone is for the shortest garments and the lower zone for slightly longer ones, or the other way around when the lower rod is lowered.
A quick formula you can check with a tape
1. Measure the longest garment you plan to hang on the lower rod, from hook to hem. Call it L1.
2. Set the lower rod height to L1 plus 2 inches, measured from the floor. (Lower items hang down to this level.)
3. Measure the longest garment you plan to hang on the upper rod. Call it L2.
4. The upper rod must be at least the lower rod height plus L2 plus 6 inches, so the hems clear the tops of the lower hangers.
5. If the number is higher than the closet allows, drop the lower rod or limit the garments on the upper rod.
Do the arithmetic before you cut wood or drill, and write the numbers down. If a plan fails on paper, it will fail on the wall.
Heights at a glance
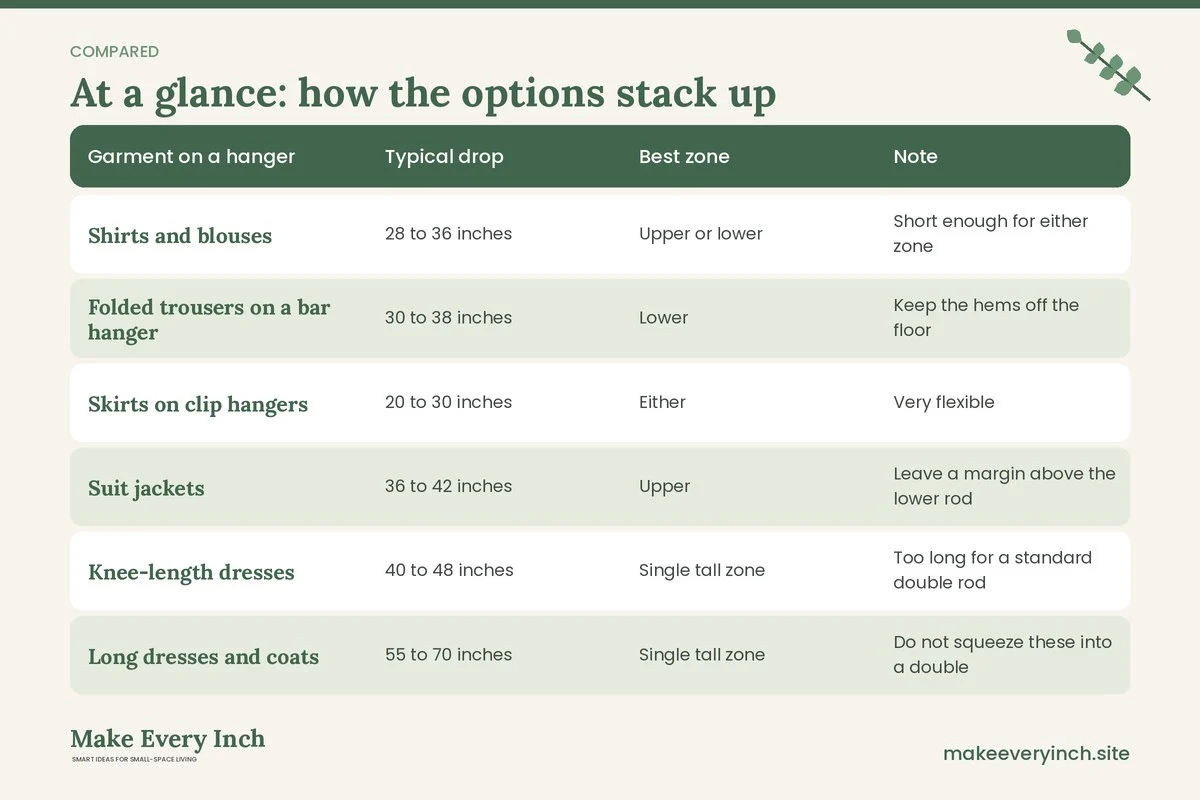
The table below shows approximate zone heights for common garments. Treat the numbers as starting points and compare them with your own measurements.
| Garment on a hanger | Typical drop | Best zone | Note |
|---|---|---|---|
| Shirts and blouses | 28 to 36 inches | Upper or lower | Short enough for either zone |
| Folded trousers on a bar hanger | 30 to 38 inches | Lower | Keep the hems off the floor |
| Skirts on clip hangers | 20 to 30 inches | Either | Very flexible |
| Suit jackets | 36 to 42 inches | Upper | Leave a margin above the lower rod |
| Knee-length dresses | 40 to 48 inches | Single tall zone | Too long for a standard double rod |
| Long dresses and coats | 55 to 70 inches | Single tall zone | Do not squeeze these into a double |
| Kids’ clothes | 18 to 28 inches | Either | A lower rod can serve a child |
Tools and materials
A double rod is a modest project. Gather the following before you start. Tool lists vary with the method, so use only what your chosen option needs.
- A tape measure and a pencil.
- A level, either a short spirit level or a phone app.
- A stud finder, if you plan to screw into studs.
- A drill and the right bits, but only if the lease or the owner allows it.
- A screwdriver for the bracket screws.
- Rod brackets or end supports rated for the weight you expect.
- A closet rod, either wood, metal or a tube.
- A hand saw or tube cutter for trimming the rod to length.
- A step stool, so you can reach the upper bracket safely.
- Optional: a hang-from-the-rod kit, which uses hooks or a frame to hold a second rod from the existing one, with no screws.
If you rent, ask in writing before you screw anything into the wall. Many leases allow small anchors if you fill the holes at move-out, and some do not. Our guides on no-drill storage ideas for renters and renter-friendly shelving ideas without drilling cover alternatives that leave no marks.
Know the load before you hang anything
A rod is a beam, and it sags if you overload it. Clothes are heavier than they look. A wet-weather coat, a wool sweater on a hanger and a pair of jeans can each weigh several pounds. A full rod can carry a surprising total, and the weight adds up on the brackets and the wall.
- Check the rating. The rod and its brackets have a weight limit. Do not exceed it, and do not assume that a rod can carry whatever you hang on it.
- Mind the span. A long rod bends in the middle. For spans over about 36 to 48 inches, add a center support, or use a heavier rod. Sagging rods also lean on the brackets and can pull screws out.
- Mind the anchor. Screws in drywall alone carry much less than screws in a stud. Use the correct anchor or find the studs.
- Load the lower rod lightly. Put the heaviest items, such as coats, on the upper rod nearest the wall support, or on a single tall rod. A tall stack of heavy winter clothes can overload a lower rod hung from the upper one.
- Weigh the dangers. A fall brings down a shelf of items as well as the rod. Check the hardware every few months.
A no-drill rod that hangs from the existing rod is a good option for light garments only. It adds the second rod’s weight to the first one’s load, so check the manufacturer’s limit and the strength of the original rod and its brackets. If the original rod already sags, do not add to it.
How to install a double rod, step by step
This section assumes a standard single-rod closet with a shelf above the rod. Follow the steps in order.
1. Empty the closet and clean it
Take everything out so you can see the walls, find the studs and avoid dust on your clothes. Wipe the walls and the shelf. This is also the best moment to donate whatever you do not wear. A smaller wardrobe makes any rod system work better, and our guide to decluttering rules for small homes gives a simple method.
2. Mark the heights
Use the formula above to choose the upper and lower rod heights. Mark each height on both side walls, and on the back wall if the rod will pass it. Measure from the floor. Check the marks with a level so the rod does not tilt.
3. Find the studs
Run a stud finder along the side walls at the planned heights and mark each stud. Side walls in a closet often have studs at 16-inch or 24-inch spacing. The back wall usually has studs too. If your closet has a wood side panel, screw into that panel and its frame. If you cannot find a stud, use the anchor type recommended for your wall, and keep the load light.
4. Move or remove the existing rod
If the current rod sits at about 66 to 72 inches, take it down and reuse its brackets for the lower rod if they are rated for the weight. Fill the old holes only if you plan to leave them unused, and ask the owner before patching a rental.
5. Install the upper rod
Attach the brackets at the upper mark, about 12 inches from the back wall and under the shelf. Check that the rod fits, that it can rotate or be lifted out, and that it is level. Many closets already have an upper bracket; adjust only if the height is wrong.
6. Install the lower rod
Place the lower brackets at the lower mark, in line with the upper ones when possible. A lower rod about 11 to 12 inches from the back wall leaves hangers room to swing, but keep the lower rod far enough forward of the upper one so the clothes do not rub. Some people stagger the rods by 2 to 3 inches for this reason.
7. Add a center support if needed
If the closet is wider than about 4 feet, add a center support to each rod. A center bracket fixes to the wall behind the rod or to a vertical post. It prevents sag and spreads the load.
8. Load the clothes and test
Hang the lightest items first, then add weight gradually. Watch for sag or any movement at the brackets. If a rod dips, remove clothes and add support before continuing. Sort by length so the long items sit at the end where there is more room, and leave a few inches of margin between hangers so the rod is not packed too tightly.
Cascading hangers: a boost with no hardware
Cascading hangers stack garments vertically on a chain of hooks. A single hanger holds several shirts, one below the other, and the whole stack takes the width of a single hanger. They do not give you a true second rod, but they raise the capacity of the rod you already have and require no drilling.
- Use them for tops, light jackets and blouses that are short enough to cascade without hitting the floor.
- Limit the stack to the weight that the lower hangers and the main hook can carry. Heavy coats do not belong on a cascade.
- Choose slim hangers so the stack stays narrow. Thick hangers eat up the gain.
- Stagger the garments so sleeves and shoulders do not bunch together.
- Do not stack garments on a lower rod that is already close to the floor.
Cascading can help in a rental or a closet where a double rod does not fit. For stacked hanging that also saves floor space, see our guide to vertical storage ideas.
Convert a shelf to a rod
Many closets have a fixed shelf above the rod and nothing else. If you do not use the shelf, you can reclaim the space by converting it to a rod. The idea works in two ways.
Remove the shelf and move the rod up
Take down the shelf, if it is not structural, and raise the rod to about 80 to 84 inches. This frees extra vertical space, but you lose the shelf. Many people keep a shorter shelf above the upper rod, and others move the shelf higher, to the very top of the wall.
Hang a second rod beneath the shelf
If the shelf stays, hang a rod below it and raise the existing rod. The upper rod is now the “shelf rod” and holds short items, while the lower one holds the long items.
Shelf rod and top shelf combined
Keep the top shelf for folded sweaters or boxes, add the upper rod about 12 inches below it, and the lower rod about 40 inches below that. This gives you three storage levels: shelf, upper rod and lower rod. It works best in taller closets of about 96 inches and above.
Whatever you choose, keep the shelf’s weight in mind. A shelf stacked with boxes is heavier than it looks, and our companion post on closet shelf organization ideas shows how to arrange the load.
Compare the main ways to add hanging space
The table below compares approaches on effort, permanence and best use.
| Method | Effort | Drilling | Best for | Watch out for |
|---|---|---|---|---|
| Install a second rod with brackets | Medium | Yes | Closets with mostly short clothes | Load rating and studs |
| Hang-from-the-rod kit | Low | No | Rentals and light garments | Weight on the original rod |
| Cascading hangers | Very low | No | Tops and light jackets | Stack weight and snags |
| Convert shelf to rod | Medium | Sometimes | Closets with an unused shelf | Losing shelf space |
| Freestanding garment rack | Low | No | Rooms with floor space | Stability and tipping |
| Tall single rod with a shelf above | Low | Sometimes | Long clothes | Less hanging capacity |
Three example closets
A 4-foot reach-in closet
A narrow closet with one rod at 68 inches and a shelf at 82. The owner hangs mostly shirts and trousers. The plan: remove the middle rod, install the upper rod at 80 inches and the lower rod at 40. Add a center support on each rod. Put folded trousers on the lower rod and shirts above. The closet holds roughly twice as many shirts and a handful more trousers. A low bin on the floor takes shoes. The two rods plus the old shelf mean nothing tall remains, so the long coat moves to a hook on the door or an outside rack.
A 6-foot reach-in closet shared by two
A wider closet in a bedroom for two. One half holds long dresses and coats, the other holds shirts and trousers. The plan: keep a single tall rod on the left side, and put a double rod on the right. Each person owns one side. The double rod is split in two with a center post so each section is only about 36 inches wide. The post prevents sag and keeps the load balanced. This hybrid layout is often better than doubling the entire closet.
A rental closet with no drilling allowed
A tenant with a landlord who bans anchors. The plan: add a hang-from-the-rod kit rated for the weight, plus cascading hangers for tops. Move heavy coats to a freestanding rack beside the closet, and anchor any tall unit with an approved method. See the ideas in our guide on renter-friendly bedroom storage ideas and small bedroom ideas without a closet for extra options. The tenant gains about a third more hanging space with no marks on the walls, and everything comes out in minutes at move-out.
Safety notes
- Drill only with permission. Ask the owner or landlord before you drill, and photograph the wall first.
- Anchor heavy and tall pieces. A freestanding rack or tall wardrobe can tip, especially with children around. Anchor it to the wall with the correct hardware if permitted.
- Respect weight limits. Stay below the rating of the rod, brackets, anchors and shelf.
- Keep children safe. Keep cords, loose hangers and sharp tools out of reach. Install rods and shelves so that a child cannot pull them down or climb them.
- Think about moth products. Mothballs and many chemical repellents contain substances you should not breathe over long periods. Read and follow the label, keep them away from children and pets, and consider airing out clothes. Cedar blocks are a milder option, though they also need to be refreshed and should not touch fabrics that may stain.
- Ventilate when you paint or seal. If you paint the closet or finish a wood rod, choose a low-VOC product and leave the door open while it dries.
- Take care on the step stool. Use a stable stool and never stand on a chair or a box.
Common mistakes
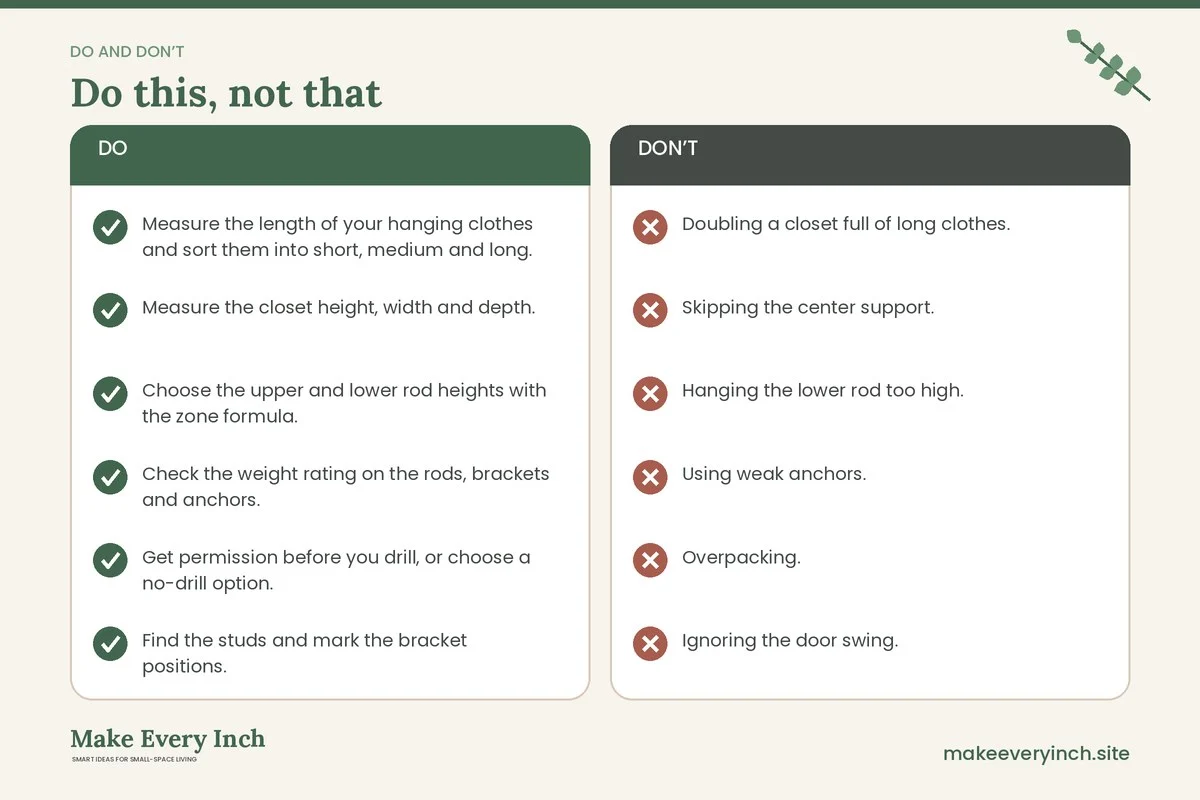
- Doubling a closet full of long clothes. The garments collide, and the system fails.
- Skipping the center support. A long rod will sag under the weight of a season of clothes.
- Hanging the lower rod too high. The upper hems then crush the tops of the lower clothes.
- Using weak anchors. Drywall screws alone cannot carry a loaded rod.
- Overpacking. Clothes jammed together wrinkle and wear. Leave an inch or two between hangers.
- Ignoring the door swing. A rod that sticks out can stop the door from closing.
- Forgetting the floor. Once the lower zone is open, the floor often becomes a dumping ground, so give it shoes or bins with a clear purpose.
Keep the system tidy
A double rod works only if the clothes are in order. Sort by type, then by color, and keep the most used items in the zone nearest eye level. Switch seasonal items to the highest or lowest zone, and store the off-season out of the closet if you can. Use matching hangers, since uniform hangers save inches of rod space and look neater. Review the closet each season, and take out anything you have not worn in a year. For more shelf and bin ideas that complement your rods, see our guides to small bedroom storage ideas and small space organization ideas.
Double hanging checklist
- Measure the length of your hanging clothes and sort them into short, medium and long.
- Measure the closet height, width and depth.
- Choose the upper and lower rod heights with the zone formula.
- Check the weight rating on the rods, brackets and anchors.
- Get permission before you drill, or choose a no-drill option.
- Find the studs and mark the bracket positions.
- Install the upper rod, then the lower rod, then any center supports.
- Load the lightest clothes first and watch for sag.
- Add cascading hangers where a rod is full.
- Set a seasonal review date.
FAQ
How high should the second rod be in a closet?
For short clothes, the lower rod usually sits about 38 to 42 inches from the floor, and the upper rod about 80 to 84 inches. Adjust for the length of your own garments and the height of your closet.
Can I double the hanging space without drilling?
Yes. A hang-from-the-rod kit, cascading hangers and a freestanding rack all add space without screws. Check the weight limit of each and make sure the original rod can carry the extra load.
How much weight can a closet rod hold?
It depends on the rod material, the span, the brackets and the wall. Always follow the rating on the product and add a center support on longer runs. If you are unsure, load lightly and watch for sag.
Will a double rod work for dresses and coats?
Usually not, because they are too long. Keep a single tall zone for them, or use a split layout with a tall section beside a double one.
Do cascading hangers damage clothes?
They can stretch heavy knits if the stack is too long. Use them for light tops and shirts, and fold sweaters instead.
Is it worth doubling a very small closet?
Often yes, if most of your clothes are short. Measure first, because a closet full of long items will not benefit.
Keep going: Keep going with our small closet ideas pillar guide, the companion post on closet shelf organization ideas and our DIY closet organization for small spaces.
Save this guide for later
Pin the ideas you like to Pinterest so you can come back to them when you plan your space.