Small Home Drop Zone Ideas
Quick answer: Small home drop zone ideas work best when you pick the version that matches your wall, not your wish list. A 12 to 18 inch wide wall rail, a single shelf with a tray, a rack on the side of a cabinet or an over-the-door organizer can each hold keys, mail, a bag and a charger. Plan four jobs (land, sort, charge, leave), keep cords and power strips off the floor and away from heat, and never drill without permission.
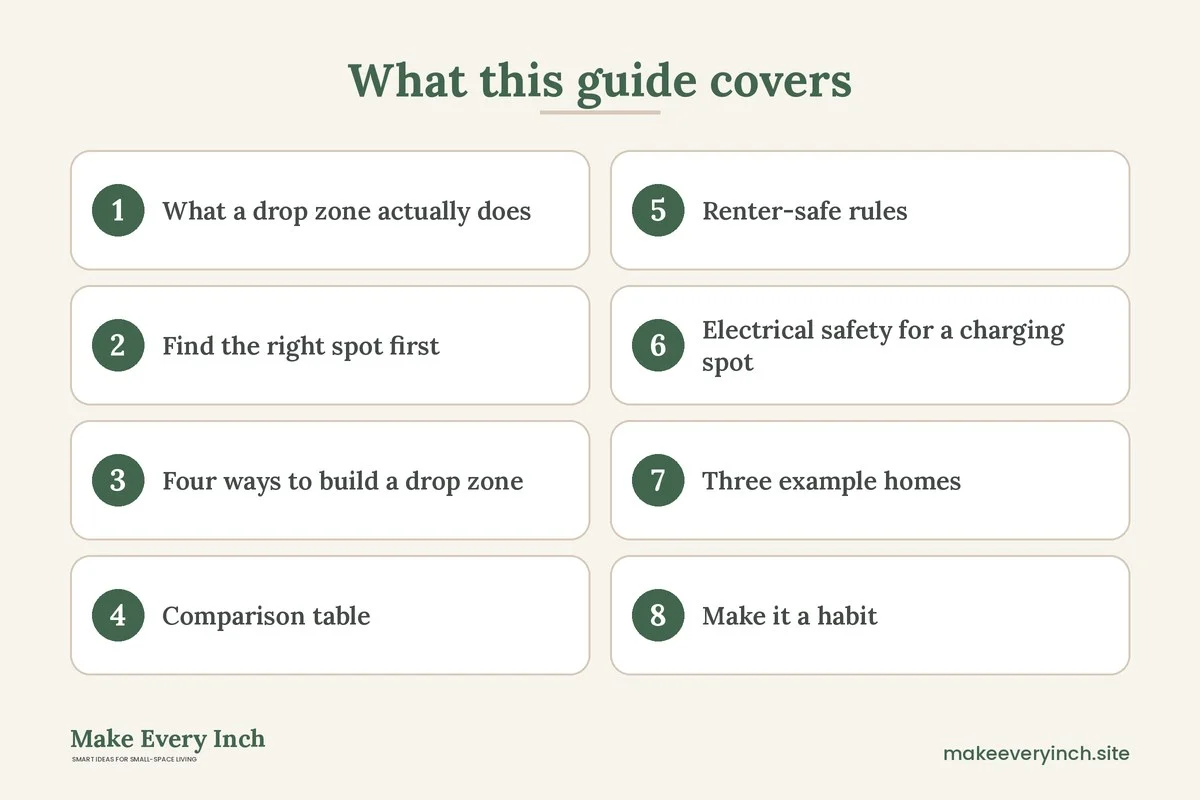
Small home drop zone ideas matter most in the places where there is no entryway at all. A drop zone is the spot where you put down what you carry in: keys, wallet, mail, a bag, sunglasses and a phone that is almost out of battery. In a large home that spot is a mudroom. In a studio or a one-bedroom apartment, it is usually a corner by the door, a stretch of wall in the kitchen or the end of a hallway. Without a plan, those items land on the nearest flat surface, and the kitchen counter becomes the household inbox. This guide is about the home as a whole, not only the front hall. It covers the four jobs a drop zone does, how to measure and choose a spot, four build styles (wall, shelf, cabinet-side and door), a comparison table, renter-safe and electrical safety rules, three example homes, routines and a checklist. For the entry area itself, see our small entryway ideas guide. This post focuses on the small, flexible spot you can add anywhere. For the wider system it belongs to, read our pillar on small space organization ideas.
What a drop zone actually does
A good drop zone handles four jobs in a row, and most failures come from skipping one.
- Land: a place for keys, a wallet and sunglasses within a single arm movement of where you stand when you walk in.
- Sort: a spot where mail and paper pause for a moment, so they do not spread across counters.
- Charge: a safe place to plug in a phone, earbuds or a watch overnight, ideally where you will see it in the morning.
- Leave: a place for the things that must go back out with you, such as a bag, a library book, a package to return or an umbrella.
If your home has no entryway, you can give these jobs to different spots as long as the route between them is short. For example, keys might live on a hook by the door, while the charging spot lives on a shelf in the bedroom. The point is that every item has one predictable landing place. This is different from an entryway plan, which tries to organize the whole arrival space including coats and shoes. A drop zone is smaller, and it can sit in a living room, a kitchen or a hallway.
Find the right spot first
Most people put a drop zone where they think it should go, not where their hands already go. Spend three days noticing where your keys, bag and mail land when you come home. The pattern usually points to the right place. Then run through these questions.
- Where do you stop first? Look for the spot just inside the door where you naturally put a hand out. That is where the key hook or tray belongs.
- Is there a wall within 3 feet of the door? A stretch of 12 to 18 inches is enough for a small rail and one shelf.
- Is there a cabinet, bookcase or fridge side that faces the walking path? The sides of furniture are often wasted space and can hold a hook rack or a slim basket.
- Is there a power outlet nearby? Charging needs one. Note whether the outlet is behind furniture and whether the spot stays dry and ventilated.
- Who else uses the space? Children need lower hooks, around 36 to 42 inches from the floor, while adults are comfortable at 60 to 66 inches.
- Does the door swing into the spot? Keep the zone out of the door’s arc, and leave at least 30 inches of clear walkway.
Mark the chosen area with painter’s tape for a few days. If it feels cramped or you keep bumping into it, move the tape. A drop zone should feel like a convenience, not a hurdle.
Four ways to build a drop zone
Wall versions
1. A single rail with hooks and a ledge
One rail, about 16 to 24 inches long, with three to five hooks holds keys, a bag and a jacket. Add a narrow ledge or a short shelf above it for mail and sunglasses. Place the rail at about 60 inches for adults and the ledge a few inches higher. This is the simplest version because it uses only a little wall.
2. A vertical strip for a very narrow wall
If you have only 8 to 10 inches of wall beside a door frame, a vertical board with hooks stacked in a column works. Place the heaviest hook at the middle, and keep the top hook for items you want to see, such as a set of keys.
3. A pegboard or grid panel
A small grid panel, around 12 by 24 inches, lets you reposition hooks, baskets and a small shelf as your habits change. It suits people who are unsure what they will keep there. Check weight ratings and use anchors appropriate for the wall type.
4. A magnetic or cork strip for mail and keys
A narrow strip lets you clip a single day of mail or hold a set of keys without a hook. It is light and works for small households, though it is not a substitute for a proper tray.
Shelf versions
5. A floating shelf with a tray
A shelf 6 to 8 inches deep and 18 to 24 inches wide carries a shallow tray for keys, a small dish for coins and a basket for mail. A lip along the front keeps items from sliding off. Under the shelf, add two hooks for a bag or a lead.
6. A narrow console
If the floor allows, a console 8 to 10 inches deep can sit against a wall. It holds a lamp, a tray and a basket underneath for shoes or bags. Anchor tall or tippy pieces to the wall using the right fixings, and check for permission before drilling in a rental.
7. A bookcase end as a landing pad
A narrow bookcase placed near the door becomes a drop zone when you give its top shelf to a tray and its second shelf to baskets. Our list of best narrow bookshelves shows shapes that fit tight spots.
8. A wall pocket for mail
A slim wall pocket or letter holder, mounted at hand height, keeps incoming paper vertical and visible. It holds a handful of envelopes and prompts you to sort them. For what to do next with the paper, read our post on small home paper organization ideas.
Cabinet-side versions
9. A hook rack on the side of a cabinet or wardrobe
The side of a wardrobe or tall cabinet that faces the room is a ready-made wall. A slim rack with magnets or adhesive hooks takes keys and a bag. Test adhesive on an inconspicuous spot first, and check the weight rating.
10. A magnetic fridge-side basket
If your fridge is near the door, a magnetic basket on its side can hold keys, a small notebook and a pen. Keep it light, since magnets slip with heavy loads.
11. A bin on the side of the bookcase
A hanging basket or bin clipped to a bookshelf side gives you an extra pocket without using any wall. It suits umbrellas, dog leads and chargers in a tidy pouch.
12. An inside-cabinet landing spot
If you prefer a hidden version, dedicate the first shelf of a cabinet near the door, and put a tray and a small charging dock inside. Leave the door open while you charge and close it when you leave. Ventilation matters, so do not enclose a cord and a power adapter in a tight, sealed space.
Door versions
13. An over-the-door organizer
An over-the-door set of hooks or pockets uses the back of a door and no wall at all. Choose a model that fits the door’s thickness and does not stop the door from closing. Heavy bags can strain the top edge, so keep loads moderate.
14. A door-mounted shelf or tray
A shallow shelf that hangs over the door holds mail, keys and sunglasses. It suits a studio where the door is the only free surface. Make sure the door can still open fully and that nothing hits a wall.
15. A hanging pocket organizer
A fabric pocket organizer holds shoes, scarves, chargers or a few days of mail. Label the pockets so that each household member knows which is theirs. It also works on the inside of a closet door, away from view.
Comparison table: which version suits your space
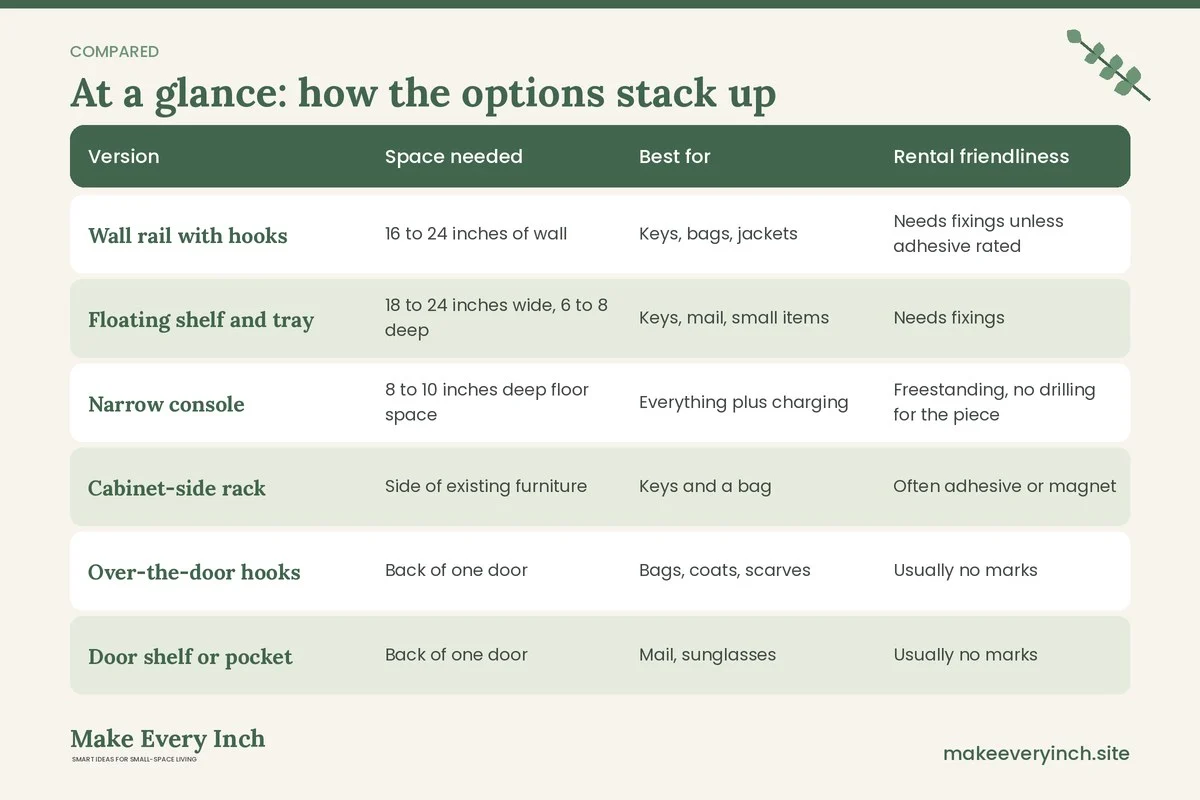
The table below compares the main versions by how much room they need, what they carry and how well they suit a rental. Treat the sizes as starting points, and measure your own space.
| Version | Space needed | Best for | Rental friendliness | Main watch-out |
|---|---|---|---|---|
| Wall rail with hooks | 16 to 24 inches of wall | Keys, bags, jackets | Needs fixings unless adhesive rated | Wall type and weight limit |
| Floating shelf and tray | 18 to 24 inches wide, 6 to 8 deep | Keys, mail, small items | Needs fixings | Do not overload the shelf |
| Narrow console | 8 to 10 inches deep floor space | Everything plus charging | Freestanding, no drilling for the piece | Anchor if tall, keep walkway clear |
| Cabinet-side rack | Side of existing furniture | Keys and a bag | Often adhesive or magnet | Test on finish first |
| Over-the-door hooks | Back of one door | Bags, coats, scarves | Usually no marks | Door thickness and weight |
| Door shelf or pocket | Back of one door | Mail, sunglasses | Usually no marks | Door must still close |
| Pegboard or grid | 12 by 24 inches | Flexible mix | Needs fixings | Plan the layout first |
Renter-safe rules
A drop zone should be easy to remove without leaving a trace. These rules help you protect both the wall and your deposit.
- Read the lease. Find the section on nails, adhesive and fixings. If you cannot tell, ask your landlord in writing before you begin.
- Never drill without permission. Even small holes can be a problem. If you do have permission, use anchors suited to the wall, and check for pipes and cables first.
- Choose freestanding first. A console, a bookcase end, a tray and an over-the-door organizer need no holes. See our list of no-drill storage ideas for renters for more.
- Test adhesive before committing. Stick a small piece in a hidden spot for a few days. Pull slowly and check the paint. Matte or recently painted walls are the most delicate.
- Respect weight ratings. Remember that keys, a bag and a jacket add up, and plan below the stated limit with a margin.
- Photograph the wall beforehand. A dated photo helps if the landlord queries the condition later.
- Keep it modular. Pick a setup you can take to the next home.
For a wider look at living with a lease, read our guide to organization ideas for renters.
Electrical safety for a charging spot
Charging is the part of a drop zone that carries a real risk, so treat it with care. These notes are general, and you should follow the manufacturer’s instructions and local guidance for your home.
- Do not overload an outlet. Plugging many high-draw devices into one outlet or one power strip can overheat it. Check the rating on both the strip and the outlet.
- Do not daisy-chain power strips. Plugging one strip into another is a common cause of overloads.
- Use certified products. Look for a recognized safety mark on chargers, strips and cords, and avoid cords that are frayed, kinked or warm to the touch.
- Keep cords visible and tidy. Do not run them under rugs or through gaps where they get crushed. Do not staple or nail through a cord.
- Keep chargers ventilated. Do not cover a phone or a charger with a cloth, paper or a bag while it charges. Do not charge on a soft bed or sofa.
- Keep liquids away. Keep the charging area away from sinks and pet bowls. A small tray with a lip can contain a spill, but it should not hold water near a cord.
- Unplug damaged equipment. If a cord, a plug or an outlet is hot, discolored or smells like burning, stop using it and have it checked by a qualified person.
- Use a dedicated spot. A single shelf with one strip is easier to manage than several scattered chargers.
- Consider a wireless pad where it fits. It reduces cord clutter, though it still needs a safe power source and ventilation.
If an outlet is far from your landing spot, do not run a long cord across the walkway. It is a trip hazard. Move the charging station to the outlet, and keep the keys and mail where your hands go.
Three example homes
A 450 square foot studio with the door opening onto the main room
The door opens to a 3-foot space beside the kitchen counter. A 20-inch rail with four hooks goes on the 24-inch wall beside the door. A shallow tray sits on top of a narrow cabinet nearby, and a wall pocket holds one day of mail. The charging spot is a shelf on the other side of the bed, because the outlet is near the headboard. The result is that keys, bags and mail land at the door, while the phone charges in the bedroom area. Total footprint: about 2 square feet of wall.
A one-bedroom with a short hallway
The hallway is 36 inches wide with a 30-inch wall on one side. A floating shelf, 7 inches deep and 24 inches wide, goes at the end near the door. A tray holds keys, a small basket holds mail, and a power strip sits under the shelf on a cable-safe mount. Two hooks below the shelf hold bags. The shelf is high enough to clear the door, and the walkway stays at least 30 inches wide. A mirror above the shelf makes the narrow hall feel brighter.
A shared two-person apartment with a tiny kitchen entrance
Two adults share a space beside the fridge. Each person gets a hook and a small bin on the side of a bookcase, labeled with their initials. A shared tray holds spare keys. A mail slot on the wall sorts paper into “ours” and “yours” daily. A charging strip lives on a shelf at the kitchen counter’s end, out of splash range. This arrangement stops the counter from becoming a pile and avoids arguments over whose items are whose.
Make it a habit
A drop zone only works if the routine becomes automatic. Build in a few small habits.
- The first-minute rule: When you walk in, empty your pockets into the tray before you do anything else.
- The daily sort: Take two minutes to sort the mail into a bin, a recycling bag and a “needs action” pile.
- The night plug-in: Plug the phone in at the same time each evening, and put the keys on the hook.
- The weekly reset: Once a week, empty the tray, wipe the shelf and put away anything that does not belong.
- The seasonal swap: Rotate in the umbrella, the gloves or the sun hat as the weather changes. Our guide to small coat storage ideas offers a few ways to handle heavier items.
Mistakes to avoid
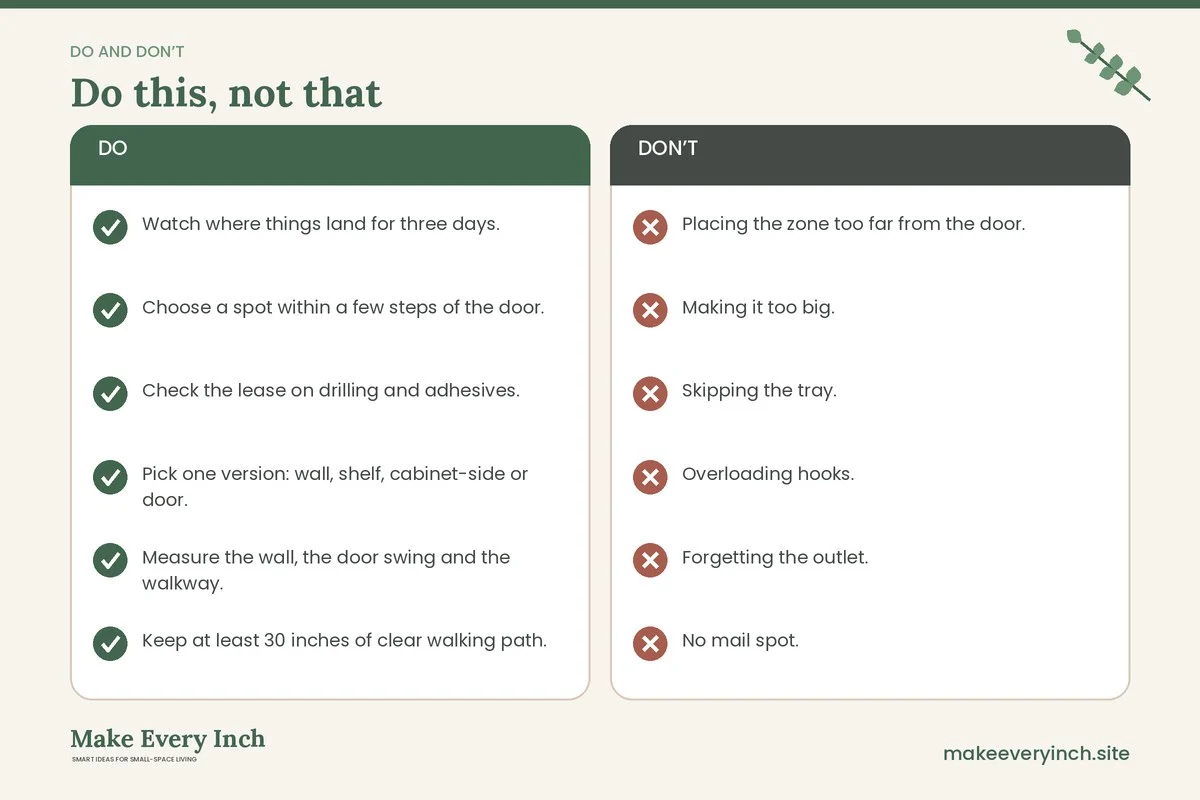
- Placing the zone too far from the door. If it takes more than a few steps, you will use the counter instead.
- Making it too big. A drop zone that holds everything becomes a clutter magnet. Limit it to what you carry daily.
- Skipping the tray. Loose keys and coins slide off a shelf. A shallow tray or dish keeps them contained.
- Overloading hooks. Heavy coats and bags pull rails loose. Spread the weight, and use the right fixings.
- Forgetting the outlet. A charging spot without a safe power source ends in extension cords across the floor.
- No mail spot. Without a mail spot, paper piles up. Add a basket, a slot or a pocket.
- Ignoring the door swing. A shelf that hits the door is a daily annoyance.
Checklist
- Watch where things land for three days.
- Choose a spot within a few steps of the door.
- Check the lease on drilling and adhesives.
- Pick one version: wall, shelf, cabinet-side or door.
- Measure the wall, the door swing and the walkway.
- Keep at least 30 inches of clear walking path.
- Add a tray for keys and a basket or pocket for mail.
- Place hooks at the right height for each user.
- Set up charging at an outlet, with a rated strip if needed.
- Keep cords tidy, visible and out of the walkway.
- Anchor any tall furniture to the wall with permission.
- Plan a first-minute rule and a weekly reset.
FAQ
What is a drop zone in a small home?
It is a designated spot for the things you carry in each day, such as keys, mail, a bag and a charger. In a small home it can be a few square feet of wall, a shelf or the back of a door.
How do I make a drop zone without an entryway?
Choose the first stop inside the door, even if it is in the living room or kitchen. Add a rail or a shelf there, and keep the charging spot near an outlet. A door-mounted organizer works when there is no free wall.
Can I set up a drop zone without drilling?
Yes. Use a freestanding console, a bookcase end, an over-the-door organizer or adhesive hooks rated for the weight. Test the adhesive first and follow the lease. Our post on renter-friendly shelving lists more options.
Is it safe to charge devices in a drop zone?
It can be, if you use certified chargers, do not overload outlets or strips, keep the area ventilated and dry and avoid covering devices while they charge. Replace damaged cords right away, and ask a qualified person if an outlet seems hot or faulty.
How high should I hang the hooks?
Around 60 to 66 inches for adults and 36 to 42 inches for children. Adjust for the tallest and shortest user in the household.
How is a drop zone different from an entryway?
An entryway plan covers the whole arrival area, including coats, shoes and seating. A drop zone is a smaller system for the small items you carry. You can build one without having an entryway at all.
Keep going: Keep going with our small space organization ideas, small entryway organization guide and small kitchen organization ideas.
Save this guide for later
Pin the ideas you like to Pinterest so you can come back to them when you plan your space.