21 Budget Small Kitchen Makeover Ideas Under $300 and Under $1,000
Quick answer: A budget small kitchen makeover starts with the surfaces you see most: cabinet fronts, hardware, the backsplash wall, lighting and the countertop. Under $300 you can paint, swap pulls, add peel-and-stick tile and plug-in lights. Under $1,000 you can add a faucet swap with permission, a floor covering, countertop film and better storage. Never cover heat zones with adhesive material, and leave electrical and plumbing work to licensed pros. Prices vary by store and region.
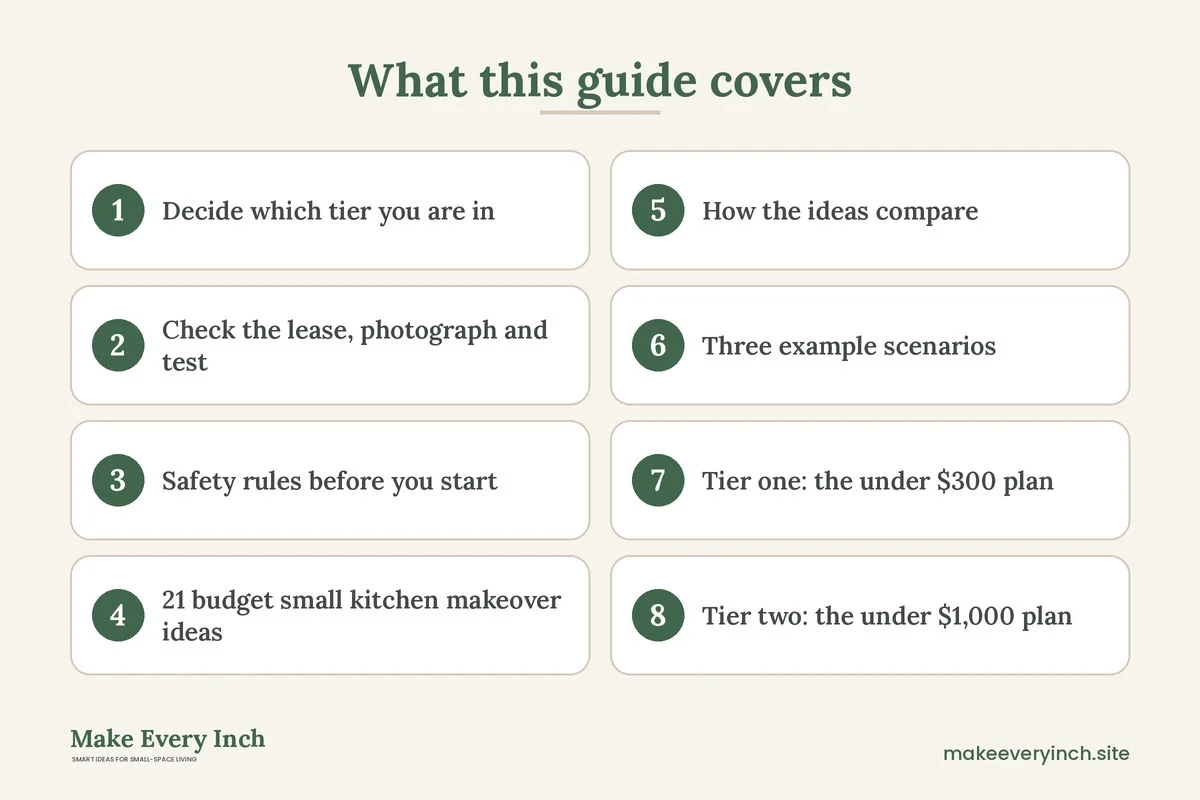
A budget small kitchen makeover is about choosing the few changes that people notice first. In a small kitchen, everything is close to your eyes, so cabinet color, hardware, lighting and the wall behind the counter do most of the visual work. You do not need a gut renovation to make the room feel cleaner, brighter and better organized. This guide lays out two tiers, one under $300 and one under $1,000, with line items you can add up yourself. It also covers 21 ideas, a comparison table, safety rules, a step-by-step method and notes for renters. For wider inspiration, see our small kitchen makeover ideas guide.
Decide which tier you are in
Under $300 is a surface-and-light tier. You change the look with paint, pulls, a backsplash and lighting, and you keep every fixture where it is. Under $1,000 adds a faucet, a floor covering, countertop film or a butcher-block cart, and more storage. The tiers are cumulative, so start at the first and add pieces as money allows.
Prices vary by retailer, region and season, so the figures below are ranges for planning, not quotes. Measure first. Count the cabinet doors and drawers, measure the backsplash wall in square feet, and note the length of the counters and the floor area. Write those numbers beside every item so you can compare cost per square foot.
Check the lease, photograph and test
If you rent, read the lease and ask in writing before painting cabinets, changing a faucet or applying anything with adhesive. Many landlords allow removable changes and refuse permanent ones. Photograph every cabinet, the counters, the backsplash wall, the sink and the floor before you start, and keep the photos.
Test any adhesive product on a hidden spot for a few days. Greasy, textured or damp surfaces hold adhesive poorly, so clean thoroughly first. If your landlord says no to paint, you can still change hardware by keeping the originals in a labeled bag and screwing them back at move-out.
Safety rules before you start
Never cover heat zones with adhesive material
Do not apply peel-and-stick tile, contact paper, vinyl or any adhesive covering near a stove, cooktop, oven vent or any hot appliance. Heat can soften adhesive, curl the material or cause it to burn. Check each product label for its temperature rating and clearance, and keep a safe gap around burners. A metal or tempered glass splash guard that is made for the purpose is a safer choice behind a range.
Electrical and plumbing work needs pros
Do not rewire a light, swap a hardwired fixture, move an outlet or change supply lines yourself. Plug-in and battery lights are fine. Hardwired fixtures, new circuits and anything involving gas or water supply belong to a licensed professional, with your landlord’s permission if you rent.
Ventilate and protect
Open windows when you paint or use solvents, wear a mask and gloves, and keep paint and chemicals away from food. Turn off power at the breaker before you remove a switch plate near a work area, and put it back before you restore power.
21 budget small kitchen makeover ideas
Cabinets and hardware
1. Paint the cabinets
A cabinet and trim enamel in a satin finish can change the whole room. The process is the thing that costs time, not the paint: degrease, sand lightly, prime if the label says so and apply thin coats. A kit with primer and paint often runs about $40 to $120, depending on size.
2. Paint only the lower or only the upper cabinets
Two-tone cabinets look designed and halve the work. Painting uppers a light color and lowers a darker one makes the ceiling look higher. This is a good compromise if you are short on time.
3. Swap the knobs and pulls
New hardware costs about $2 to $8 per piece, and it changes the style at once. Measure the hole spacing on pulls before you order, so the new ones fit the existing holes. Keep the old pieces for move-out.
4. Replace only the doors
If the boxes are sound and the doors are damaged, new doors can be cheaper than new cabinets. Prices vary widely, and a rental will need permission. Measure carefully, and order a sample first.
5. Add removable cabinet liners
Shelf liner protects the surface and refreshes the inside of dusty shelves. Rolls often cost about $8 to $20. Choose a non-adhesive type where you can, so it lifts off cleanly.
Walls and backsplash
6. Peel-and-stick backsplash tile
Peel-and-stick tiles cover a small backsplash for about $2 to $8 per square foot, though products vary. Clean and dry the wall, press firmly and cut with a sharp knife. Keep them well away from the stove and read our guide to temporary backsplash ideas.
7. A glass or metal splash guard behind the stove
This is the safe way to protect the wall behind heat. It is made to withstand cooking temperatures, and it wipes clean. Use only products whose labels say they suit stovetops.
8. A painted wall in a washable finish
A wipeable paint on the walls brightens the kitchen. Choose a satin or semi-gloss finish, since it handles steam better than flat paint. Paint is a landlord decision in a rental, so get approval first.
9. Removable wallpaper on one wall
Use it on the dining side or away from the stove and sink. Pick a vinyl-backed type and test it first. For options and rules, see removable wallpaper ideas.
Lighting
10. Plug-in under-cabinet lights
LED strips or bars give you task lighting on the counter. Plug-in and battery models often cost about $20 to $70. Stick them with the supplied clips, and keep the wire off hot surfaces. For more, see small kitchen lighting ideas.
11. Warm, bright bulbs in the existing fixture
Swap dull or mismatched bulbs for LEDs of the same color temperature. This is the cheapest upgrade in the whole list, often under $15, and it takes minutes. Check the maximum wattage on the fixture before you buy.
12. A plug-in pendant or a lamp
If the ceiling light is poor and you cannot change it, add a plug-in pendant on a hook or a small lamp on the counter. Do not hang anything above a stove.
Counters and floors
13. Countertop film or a cover
Self-adhesive film over a worn laminate counter looks like stone or wood from a distance. It often costs about $20 to $80 for a roll. Apply it only on clean, flat, cool surfaces, and keep hot pots on trivets, since film is not heat proof.
14. A butcher-block cart or an extra work surface
A rolling cart gives you prep space and storage without touching the counter. A basic cart often costs about $80 to $200. See small kitchen cart ideas for sizes and layouts.
15. Peel-and-stick vinyl flooring
Peel-and-stick planks or tiles can cover tired floors for about $1 to $4 per square foot, though prices vary. A kitchen is small, so the total stays low. Check the lease first, since removal can pull up old vinyl.
16. A washable runner
A narrow runner in front of the sink cushions your feet and hides scuffs. Choose a low, flat type with a non-slip backing, and avoid mats that curl, since they are a trip hazard.
Faucet and fixtures
17. A faucet swap, with permission
A new faucet often costs about $60 to $200. Shut off the water supply under the sink before you begin, and keep the original faucet for move-out. If you are not confident with plumbing, hire a plumber, and if you rent, get your landlord to agree in writing.
18. A new sink mat, strainer and soap dispenser
Small sink accessories cost under $30 in total and make the sink look new. Choose matching finishes, such as matte black or brushed nickel, and remove clutter around the basin.
Storage and organization
19. Drawer and cabinet organizers
Dividers, risers and pull-out bins make existing cabinets hold more. A set often costs about $20 to $80. See small kitchen organization ideas for layout ideas.
20. Wall rails, hooks and a magnetic strip
A rail with hooks holds utensils and mugs, and a magnetic strip holds knives off the counter. Use adhesive-mounted types in a rental, and respect the weight rating. For wider ideas, see small kitchen storage ideas.
21. A tension rod and shelf riser under the sink
A tension rod holds spray bottles, and a riser doubles the shelf space. Keep cleaning products sealed and away from food. This costs under $25 and clears a messy cabinet.
How the ideas compare
| Idea | Typical cost range | Visual impact | Renter risk | Time |
|---|---|---|---|---|
| Cabinet paint | $40 to $120 | Very high | High, needs approval | 2 to 3 days |
| New knobs and pulls | $30 to $120 | High | Low | 1 to 2 hours |
| Peel-and-stick backsplash | $30 to $120 | High | Medium | 3 to 5 hours |
| Plug-in under-cabinet lights | $20 to $70 | High | None | 30 minutes |
| Countertop film | $20 to $80 | Medium | Medium | 2 to 4 hours |
| Peel-and-stick floor | $40 to $160 | High | Medium to high | 3 to 6 hours |
| Faucet swap | $60 to $200 | Medium | High, needs permission | 1 to 3 hours |
| Organizers and rails | $20 to $100 | Medium | Low | 1 to 2 hours |
These are rough ranges, and local prices vary.
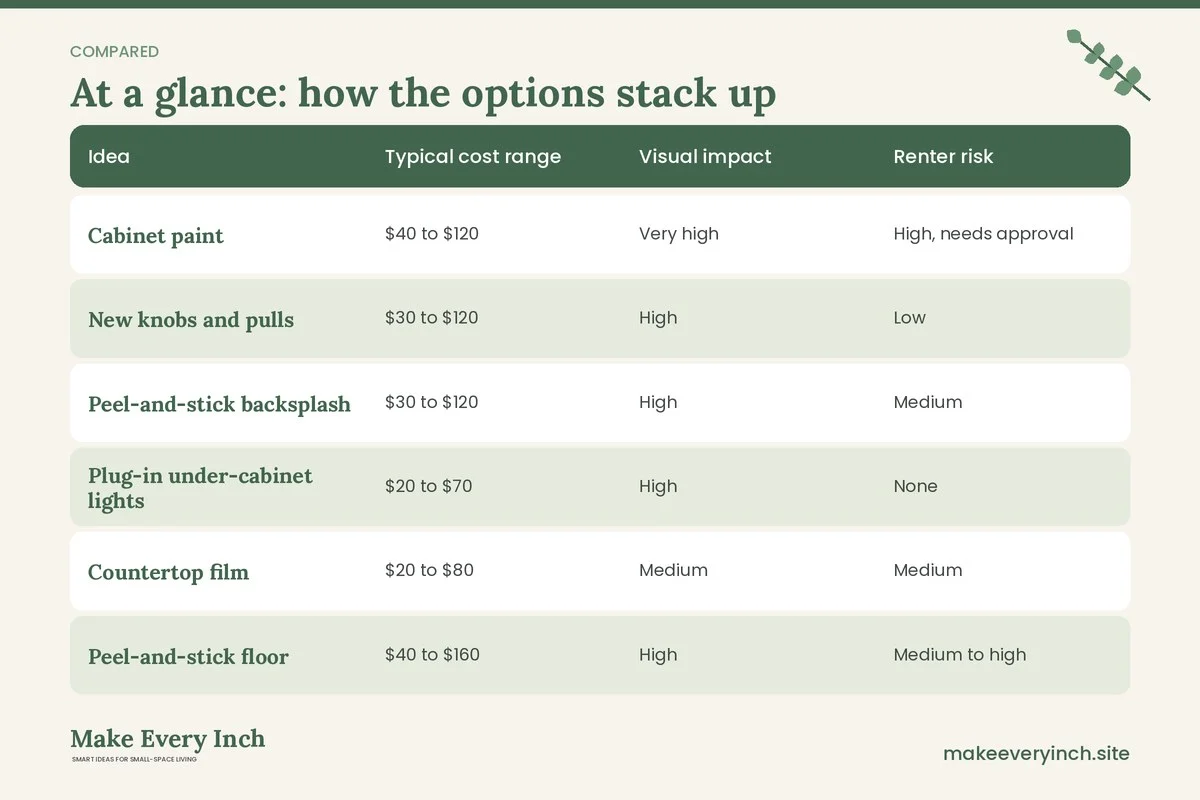
Three example scenarios
The renter with a ban on paint
Use hardware swaps, plug-in lights, a washable runner, drawer organizers and a rail. Keep the old pulls in a bag, and photograph before and after. The result looks fresher and costs under $200.
The owner of a dated galley
Paint the cabinets in a soft color, swap the pulls, add a backsplash on the sink side only and install plug-in lights. Keep the stove wall clear of adhesives. This is the under $300 tier at work, and it fits a narrow room. See galley kitchen ideas for layouts.
The studio kitchenette
Add a cart, a magnetic strip, a floor covering, countertop film and lights, and keep the surfaces light. Everything is removable, and the plan lands near the upper end of the $1,000 tier or well below it, depending on choices.
Tier one: the under $300 plan
This plan assumes you do the work yourself. Cabinet paint and primer cost $70. Twenty knobs or pulls cost $40. Peel-and-stick backsplash tile costs $40. Plug-in under-cabinet lights cost $30. Drawer organizers cost $30, and a roll of liner or contact paper for shelves costs $20. Supplies such as sandpaper, degreaser, brushes, rollers and painter’s tape cost $30. The total is $260, which leaves a $40 buffer for tax or a missing screw.
Tier two: the under $1,000 plan
This plan adds the larger changes. Paint, primer and supplies cost $130, and hardware costs $90. Backsplash tile costs $100, and plug-in lighting costs $60. A faucet costs $130, peel-and-stick vinyl flooring costs $160 and countertop film costs $60. A cart or storage set costs $150, and a runner costs $80. The total is $960, which leaves $40 for fasteners, sealant and any item that costs more than planned. If you do not own a faucet’s tools, add the cost of a plumber, and your total will rise.
Budget guide
Under $100
Knobs, bulbs, a few organizers and a magnetic strip. This tier gives you the best return per dollar if you rent.
About $300
The full surface plan with paint, hardware, backsplash and lights.
Up to $1,000
Add the faucet, floor, countertop film and a cart. For more rental-minded ideas see budget renter upgrades and renter friendly kitchen upgrades.
How to paint cabinets step by step
Step 1. Empty and label
Take the doors off, label each one and its hinges and put the hardware in a bag. Cover the counters and floor with a drop cloth.
Step 2. Clean and degrease
Kitchen cabinets collect cooking grease, which stops paint from sticking. Wash with a degreaser, rinse and let everything dry fully.
Step 3. Sand lightly
Scuff the surface with fine sandpaper, wipe off the dust with a damp cloth and let it dry.
Step 4. Prime if needed
Use a primer that suits the surface, such as a bonding primer for laminate. Follow the label for dry times.
Step 5. Paint in thin coats
Two thin coats look smoother than one thick coat. Use a small roller and a brush for corners, and let each coat dry for the time on the label.
Step 6. Cure before use
Paint feels dry long before it is hard. Wait the time the label recommends before you rehang the doors and load the shelves, to avoid sticking and chips.
How to apply a peel-and-stick backsplash
Clean the wall with a degreaser and let it dry. Measure the area and mark a level starting line, since a crooked first row spoils the rest. Start from the center or the bottom and press each tile firmly from the middle outward. Cut around outlets with a sharp knife after the power is off, and use outlet extenders if needed. Leave a safe gap beside the stove, and finish the edge near the counter with a thin line of caulk if the lease allows. Remove it later by warming the tile with a hair dryer and peeling slowly at a low angle.
Renter notes
Everything here can be returned to its original state if you plan for it. Keep every removed knob, pull and faucet in a labeled bag. Photograph the cabinets, counters and walls before and after. Choose peel-and-stick products that say they are removable, test them first and never use them on damaged paint or near heat. Ask your landlord in writing about paint, flooring and the faucet, and keep the reply. If you are told no, the plug-in lights, organizers, rails, cart, runner and bulbs still improve the room a lot.
Where to save and where to spend
Save on tile, liner and organizers, since cheap versions do the job. Spend on cabinet paint, primer and a good brush, because the finish depends on them. Spend on a quality faucet if you do swap one, since cheap ones leak sooner. Do not spend on appliances at this budget. If the kitchen is mostly storage-starved, also look at cheap storage ideas for apartments.
Mistakes to avoid
- Applying adhesive material near a stove or oven
- Skipping the degreasing step before paint
- Painting over cabinets without sanding or priming
- Buying pulls without measuring hole spacing
- Overloading adhesive rails
- Changing wiring or plumbing without a licensed pro
- Ignoring the lease
- Forgetting to keep the original hardware and faucet

Kitchen makeover checklist
- Read the lease and photograph the kitchen
- Measure doors, drawers, backsplash and floor
- Decide which tier fits your budget
- Test adhesive in a hidden spot
- Keep adhesive away from heat zones
- Degrease before painting or sticking anything
- Label doors and hardware
- Add task lighting
- Organize drawers and cabinets
- Keep old hardware for move-out
- Hire a pro for electrical and plumbing
FAQ
How much does a budget small kitchen makeover cost?
It depends on scope. A surface-and-light plan can land near $300, and a larger plan with a faucet and flooring can stay under $1,000. Prices vary.
What is the cheapest way to update a kitchen?
Swap the hardware and bulbs, clean thoroughly and add plug-in lights. These cost the least and change the look the most.
Can I paint kitchen cabinets without sanding?
Some products claim you can, but light sanding and a primer give better adhesion. Follow the label on the product you choose.
Is peel-and-stick tile safe behind a stove?
No. Keep it away from heat zones, and use a glass or metal splash guard made for stovetops instead.
Can renters change a faucet?
Only with written permission, and you should keep the original for move-out. Hire a plumber if you are unsure.
Does countertop film last?
It can last for a while on light use, but heat, knives and moisture damage it. Use trivets and cutting boards.
Should I do the work myself?
Paint, hardware, tile and organizers are manageable for most people. Electrical and plumbing should be left to licensed professionals.
Where should I start?
Start with lighting and hardware, then paint, then the backsplash. That order gives you visible progress quickly and spreads the cost.
Keep going: Keep going with our guides to small kitchen makeover ideas, small kitchen storage ideas and renter friendly kitchen upgrades.
Save this guide for later
Pin the ideas you like to Pinterest so you can come back to them when you plan your space.