Small Kitchen Upgrades That Cost Very Little
Quick answer: The best small kitchen upgrades that cost very little are new cabinet hardware, plug-in or stick-on under-cabinet lighting, shelf and drawer liners, a careful coat of low-VOC paint, and a few organizers that add shelves inside cabinets. Start with whatever you touch or see most often, check your lease before changing anything fixed, and never drill without permission.
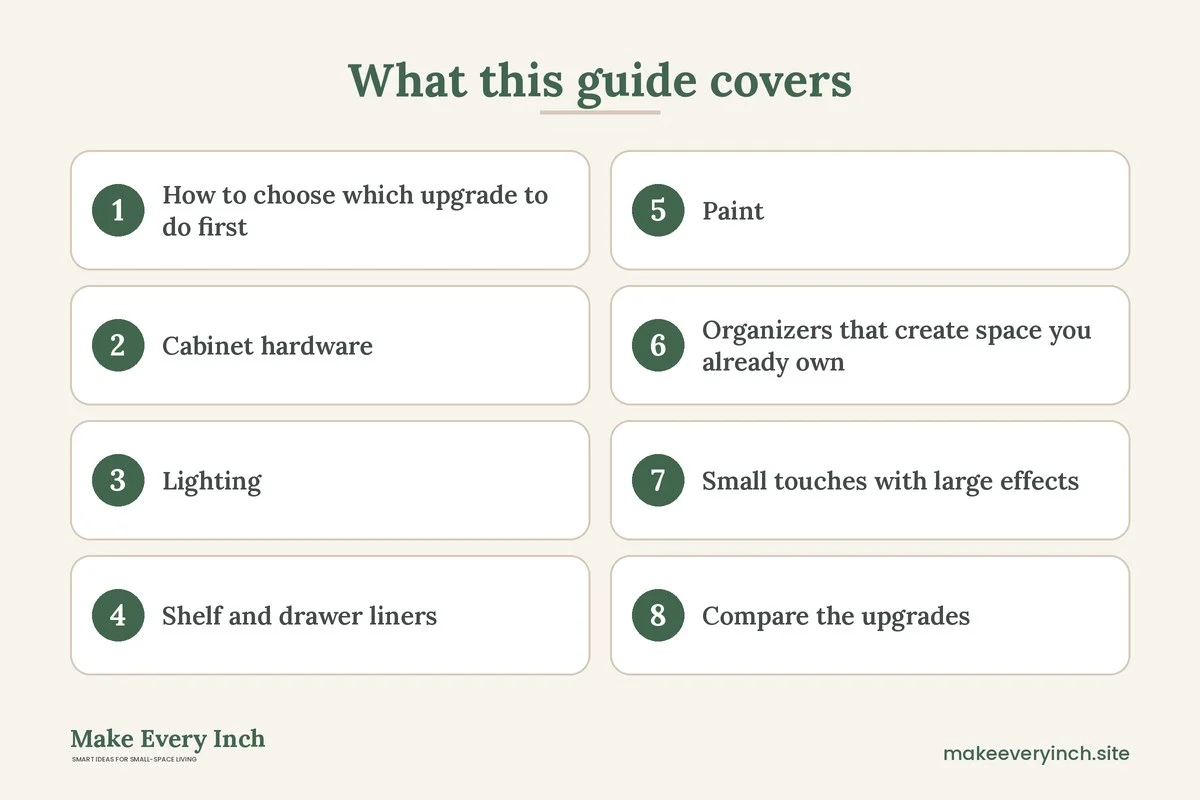
Small kitchen upgrades that cost very little work because a small kitchen is judged by a handful of surfaces and habits. You open the same cabinets, flip the same switch, stand at the same short stretch of counter and look at the same wall every day. Change those few things and the whole room feels different, even when the layout, the cabinets and the appliances stay exactly as they are. This guide covers the upgrades in the order that tends to give the biggest change for the smallest outlay: hardware, light, liners, paint, organizers, and a set of finishing touches. It also covers the safety points that cheap projects often skip, a table that compares each upgrade, three example kitchens, a weekend plan and a checklist. For the wider topic, read our main guide to small kitchen ideas, and for a larger project with a clear budget see budget small kitchen makeover. For the furniture side of a budget home, the companion post on budget friendly furniture ideas for small apartments covers what to buy first.
How to choose which upgrade to do first
Not every upgrade is equal. A useful way to rank them is by how often you notice them, how much effort they take and how easily they can be undone. Hardware is noticed every time you open a door. Lighting is noticed every evening. A liner is noticed only when you open the drawer, but it protects the surface and makes the inside tidier. Paint changes the entire room but takes the most time and the most care.
Ask three questions about each idea. First, will it change something I see or touch daily? Second, can I remove it without damage if I move out or change my mind? Third, does it need tools, permission or ventilation? If an idea gets a yes to the first, a yes to the second and a no to the third, it is a good first project. The ideas that need permission, such as drilling or painting a rental, can wait until you have checked the lease.
Look at the kitchen as a stranger would
Stand in the doorway and take a photograph. Photographs show what you have stopped noticing: a yellowed bulb, a dented handle, a cluttered corner, a mismatch of finishes. List the three things that bother you most. Fix those first, because they will give the greatest sense of change for the effort.
Set a ceiling for the project
Decide what you are willing to spend before you shop, and write it down. Small projects grow by accident, one extra item at a time. A fixed ceiling keeps the project cheap, and it forces choices between, for example, new pulls and new lighting. If you cannot afford both at once, do the one with the most daily impact first.
Cabinet hardware: the smallest change with the biggest effect
Handles and knobs are the jewelry of a kitchen. Replacing them is among the cheapest ways to change how the cabinets look and feel, and it is usually reversible if you keep the originals.
Measure before you shop
Pulls are sold by the distance between the screw holes, called the center-to-center measurement. Measure this on your existing handles, from the center of one screw to the center of the other. Common sizes include about 3 inches and about 3.75 inches, though yours may differ. If you buy the same spacing, the new pulls fit the old holes and there is nothing to drill. If you change the spacing, you will have to fill the old holes and drill new ones, which is a bigger job and not allowed in many rentals.
Choose a style that suits the room
In a small kitchen, slim, simple pulls make the cabinet fronts look cleaner. Bar pulls in a matte finish suit modern cabinets, and small round knobs suit traditional ones. A consistent finish across all doors makes a kitchen look planned. If your faucet and light fixtures are chrome, nickel or black, choose hardware that sits well beside them, though a mix of two finishes can also look deliberate.
Do it safely and neatly
You only need a screwdriver and, for neatness, a piece of tape to keep track of screws. Work one cabinet at a time, so you never lose track of which screw goes where. Hold the door steady with your free hand, because a dropped door can chip. Check the screw length, since screws that are too long can push through the front of a thin door and crack it. Add a short spacer or ask the shop for a different length.
In a rental
Swapping hardware is usually a safe upgrade, since you keep the originals in a labeled bag and put them back before you leave. Mention it in writing if your lease requires you to ask about changes.
Lighting: the upgrade you notice every evening
Small kitchens are often dim. A single ceiling fixture casts shadows from your own body onto the counter, and that makes chopping and reading labels harder. Adding light under the wall cabinets is a top-ranked improvement because it puts light where the work happens.
Under-cabinet lighting options
- Plug-in light bars: these connect to an outlet and mount under the cabinet with clips or adhesive. They need no wiring.
- Battery or rechargeable stick-on lights: these are the easiest choice for renters, though they must be recharged or have their batteries changed.
- Motion-sensor puck lights: these switch on as you approach, which suits a pantry or a dark corner.
- Flexible LED strips: these can follow the underside of a cabinet and often come with a plug-in adapter.
For more on the topic, see our guide to small kitchen lighting ideas and the renter-focused article on renter friendly lighting ideas.
Choose the right color and brightness
Light color is described as a temperature. Warm white lights feel cozy, and cooler white lights feel crisp and bright. For task lighting in a kitchen, many people prefer a neutral white that shows food and surfaces naturally. Look for lights that give a fairly even wash instead of hot spots, and mount them toward the front of the cabinet underside so they light the counter and not the backsplash.
Electrical safety
Buy lighting that carries a recognized safety mark for your country. Plug into a wall outlet and avoid daisy-chaining several power strips. Keep cords away from the stove, the sink and any wet area, and do not run cables across a hot surface. Use cord clips instead of staples, which can damage the insulation. Do not open or modify a fixture’s wiring unless you are qualified to do so, and never replace a hardwired fixture without a licensed electrician or your landlord’s approval. If you see sparks, scorch marks or a burning smell, unplug and stop using the light.
Swap the bulb in the main fixture
If the ceiling fixture uses an old or yellowed bulb, replacing it with a bulb of the right base and wattage rating can improve the room on its own. Check the fixture’s label for the maximum rating before you buy, and make sure the power is off at the switch and the bulb has cooled before you touch it.
Shelf and drawer liners: protection and a fresh look
Liners are among the cheapest changes you can make, and they work on two levels. They protect the surface from scratches, spills and moisture, and they make the inside of a cabinet look clean and chosen.
Types of liner
- Non-slip rubberized liner: it keeps plates and glasses from sliding and cuts noise.
- Adhesive vinyl or contact-style liner: it sticks down and wipes clean, though it can be hard to remove from old or flaking shelves.
- Cork liner: it is soft, quiet and a little textured.
- Fabric or paper liner: it can be washed or replaced and suits dry storage.
- Waterproof mat under the sink: it catches drips and protects the cabinet floor.
How to fit a liner well
Empty the shelf and wipe it with a mild cleaner, then let it dry fully. Measure the shelf and cut the liner about a quarter inch smaller on each side so it lies flat. Cut on a flat surface using a sharp blade and a straight edge, and cut away from your body. For adhesive types, peel a small section at a time and smooth it with a cloth to avoid bubbles. Unstuck loose-lay liners are easier to remove, and they are usually the best choice in a rental.
Where liners help most
Use non-slip liner in a drawer of utensils to stop the rattle, under the sink to catch leaks, and on a shelf of glasses to prevent sliding. Line the bottom of a cutlery tray area so tools sit still. For related ideas, see small kitchen drawer organization ideas.
Paint: a big change when done with care
Paint can transform a small kitchen, but it needs more preparation, ventilation and time than any other upgrade on this list. If you rent, check the lease before you start, since many leases require permission or require you to restore the original color.
What to paint
- Walls: a light, warm color reflects more light and makes a small room feel larger. See small kitchen color ideas that feel bright.
- Cabinet doors: repainting doors and frames changes the whole room, but it takes careful cleaning, sanding, priming and curing time.
- A single accent: a door, an open shelf back or a small wall area gives a lift with less work.
- Old furniture or a cart: painting a small piece is a good first project because it is easy to move to a ventilated place.
Preparation steps
Remove doors and hardware where you can and label them. Clean every surface with a degreaser, because kitchens carry a film of cooking grease that stops paint from sticking. Rinse, dry, then lightly sand glossy surfaces so the paint has something to grip. Fill small holes with filler, sand smooth and wipe away dust. Tape edges carefully, and lay a drop cloth under the work area.
Ventilation and low-VOC choices
Choose a low-VOC or zero-VOC water-based paint, which gives off fewer fumes than older solvent-based types. Open windows, run a fan that blows air outward and avoid painting in a closed room. Take breaks and keep children, pets and people with breathing conditions out of the area while you work and while the paint dries. Wear a mask rated for the product and eye protection when sanding. Follow the label on drying and recoat times, and give cabinets plenty of time to cure before you stack plates on them. If your home was built long ago, old paint may contain lead, so avoid dry sanding and have it tested first. Dispose of rags and leftovers according to local rules, because some oil-soaked rags can heat up and ignite.
A less permanent option
If you cannot paint, consider peel-and-stick tiles or panels for a small area, such as a backsplash. See temporary backsplash ideas and small kitchen backsplash ideas for small spaces.
Organizers that create space you already own
Small kitchens usually do not lack space as much as they waste it. The air above a shelf, the inside of a door and the gap beside the fridge are all unused. Organizers turn those gaps into storage, and they are among the best returns for a small outlay.
Inside the cabinets
- Shelf risers: a simple riser doubles the usable height of a shelf. Use one for plates and another for mugs.
- Door-mounted racks: a rack hung over the door hooks on the door edge with no drilling, and holds lids, spices or cleaning supplies. Check that the door still closes.
- Pull-out baskets and bins: these slide on a shelf and make deep cabinets usable.
- Turntables: a lazy Susan makes corner shelves reachable.
- Tension rods: a rod across the under-sink area holds spray bottles.
On the counter and walls
- A dish rack that folds or drains over the sink, which frees counter area.
- A rail with hooks, if you have permission or can use a strong adhesive hook within its weight limit.
- A magnetic strip, where allowed, for knives and metal tools.
- A tiered stand for fruit or spices.
For more, read small kitchen cabinet organization ideas, small kitchen counter organization and how to organize a small kitchen.
Safety with organizers
Do not overload an over-door rack, and check its stated weight rating. Keep heavy items on lower shelves. Put knives in a block, a sheath or a magnet strip placed out of the reach of children. Mount nothing above a stove where heat and grease can damage it. When using adhesive hooks, clean the surface, press as directed and wait before loading. Never drill into walls, cabinets or tile without permission.
Small touches with large effects
After the main upgrades, a few cheap details finish the kitchen.
- A fresh faucet aerator or sink strainer, which keeps the sink looking cared for.
- A set of matching containers for dry goods, so the shelves look calm.
- A single plant or herb pot on a windowsill, if there is light.
- A cloth or runner to add color and soften the floor, with a non-slip backing.
- A new dish towel and a soap dispenser in the same color family.
- A deep clean of grout, appliances and the range hood filter, which can change how a kitchen looks as much as any purchase.
- Cleaned or replaced cabinet bumpers, to quiet slamming doors.
- An outlet cover or switch plate in a clean finish, installed with the power off at the breaker and the right screwdriver.
Compare the upgrades
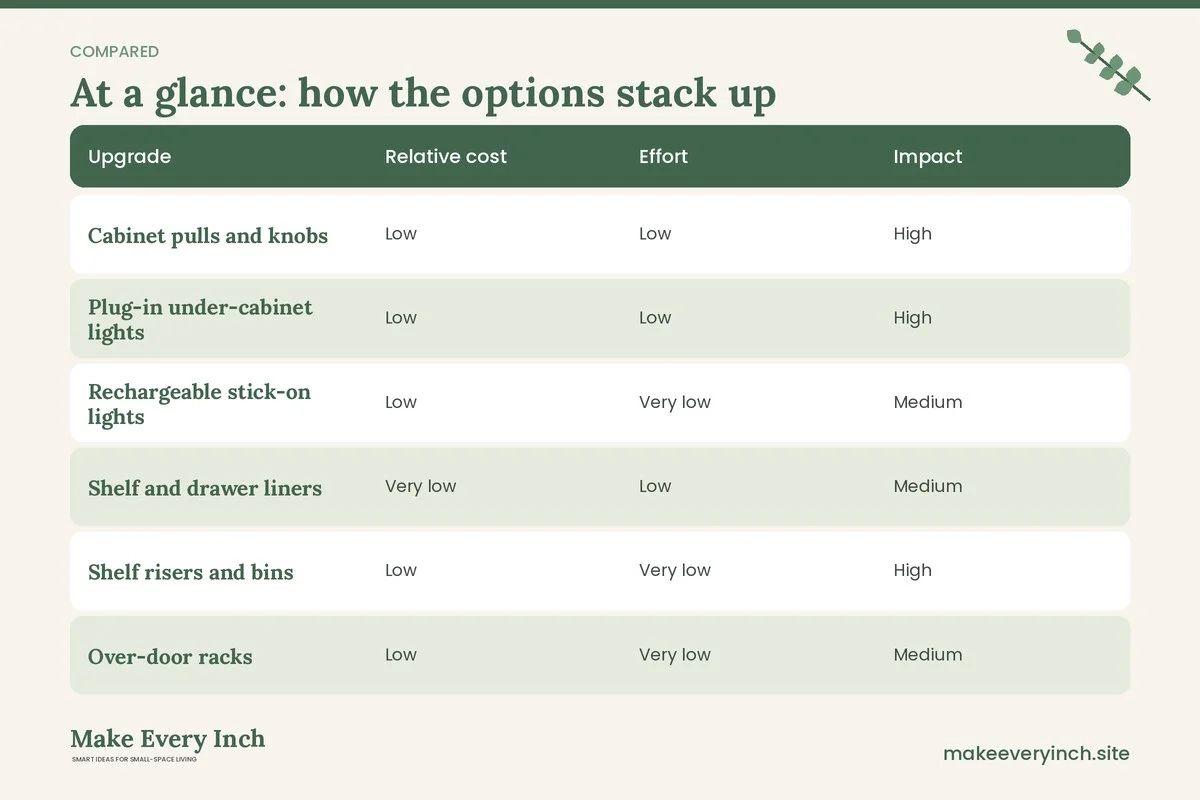
The table gives a general comparison. Cost labels are relative, effort is for a beginner and the notes refer to typical rentals. Your lease and your kitchen may differ.
| Upgrade | Relative cost | Effort | Impact | Removable for renters |
|---|---|---|---|---|
| Cabinet pulls and knobs | Low | Low | High | Yes, if you keep the originals |
| Plug-in under-cabinet lights | Low | Low | High | Yes |
| Rechargeable stick-on lights | Low | Very low | Medium | Yes |
| Shelf and drawer liners | Very low | Low | Medium | Yes, if loose-lay |
| Shelf risers and bins | Low | Very low | High | Yes |
| Over-door racks | Low | Very low | Medium | Yes |
| Wall paint | Low to medium | High | High | Needs permission |
| Cabinet repainting | Medium | Very high | Very high | Usually needs permission |
| Peel-and-stick backsplash | Low to medium | Medium | High | Often, but test first |
| New bulbs in the main fixture | Very low | Very low | Medium | Yes |
| Deep clean | Very low | Medium | Medium | Yes |
Three example kitchens
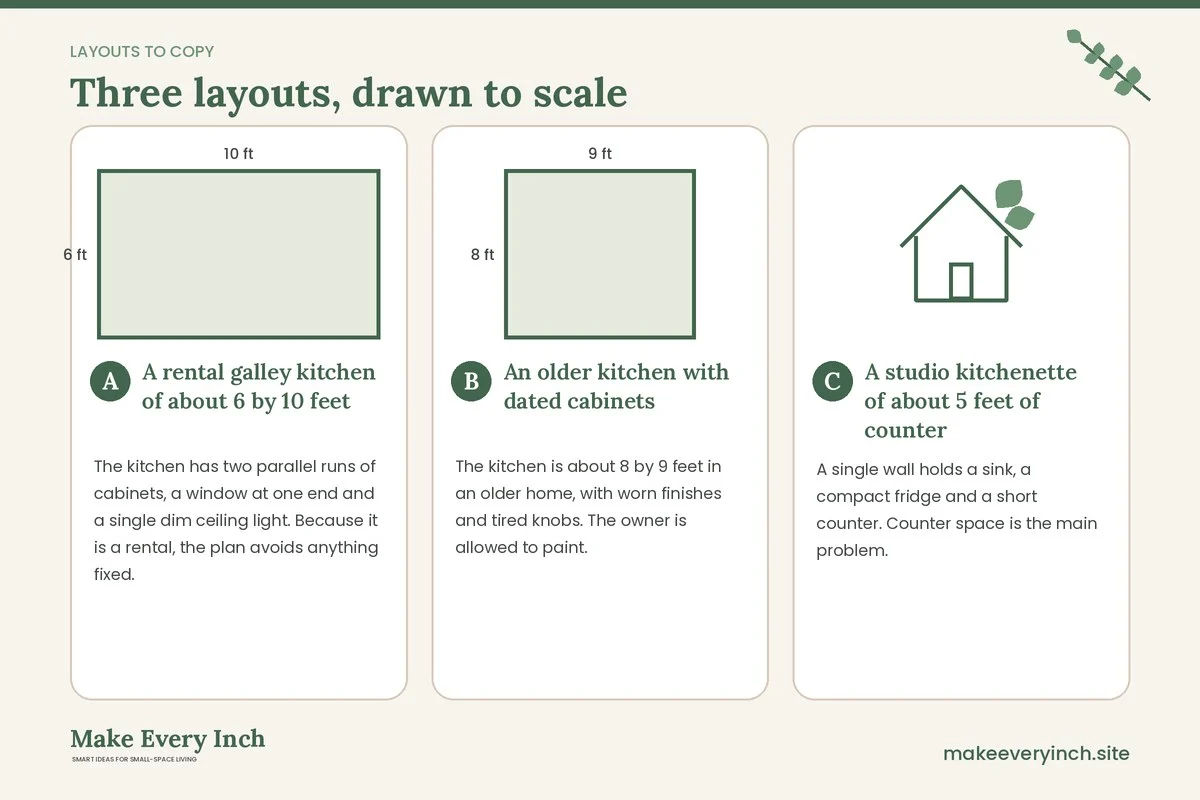
The measurements here are examples. Use them to see how the same budget logic changes with the room.
A rental galley kitchen of about 6 by 10 feet
The kitchen has two parallel runs of cabinets, a window at one end and a single dim ceiling light. Because it is a rental, the plan avoids anything fixed. Start with a plug-in light bar under each wall cabinet, which solves the shadow problem. Swap the hardware for simple bar pulls of the same spacing, and keep the old pulls in a bag. Add loose-lay non-slip liners to the shelves, and put risers in the plate cabinet. A narrow runner with a non-slip backing runs down the middle. See galley kitchen ideas for layout thinking.
An older kitchen with dated cabinets
The kitchen is about 8 by 9 feet in an older home, with worn finishes and tired knobs. The owner is allowed to paint. The plan starts with a thorough degreasing and a low-VOC primer, then two coats of a durable water-based paint on the doors and frames, spread over several days with windows open and a fan running. New pulls in the same hole spacing go on after the paint has fully cured. A pair of rechargeable lights add task lighting, and a few inexpensive organizers finish the job. See small kitchen ideas for older homes.
A studio kitchenette of about 5 feet of counter
A single wall holds a sink, a compact fridge and a short counter. Counter space is the main problem. The plan uses a cutting board that sits over the sink, a rail along the backsplash zone if the landlord allows it, and a rolling cart beside the counter. The lighting is a small plug-in bar. The cabinets get a coat of liner and a few risers. See small kitchen ideas with limited counter space and how to add counter space to a small kitchen.
A weekend plan for a very low outlay
You can do most of these upgrades across two days without special skills.
Saturday morning: clear and clean
Empty the cabinets you plan to change, wipe the shelves and degrease the doors. Take the photograph that you set aside earlier. Sort what you own into keep, donate and discard, and see small kitchen storage mistakes to avoid before you start putting things back.
Saturday afternoon: hardware and liners
Swap the handles, one cabinet at a time. Cut and lay the liners. Return the dishes and mugs to the shelves with risers.
Sunday morning: lights
Install the light bars or stick-on lights. Test them, route the cords out of the way of heat and moisture and use clips to hold them tidy.
Sunday afternoon: finishing touches
Add the runner, the plant, the new towels and any containers. Take a second photograph and compare it with the first. If you plan to paint, add a separate weekend, since the preparation and drying time are longer than the painting itself.
Common mistakes with budget kitchen projects
Buying hardware without measuring
Pulls with the wrong spacing do not fit the old holes. Measure the center-to-center distance first.
Putting cords near heat or water
Cords near the stove, the toaster or the sink are a hazard. Route them away, and use clips to hold them.
Skipping preparation before painting
Grease on a surface causes peeling. Clean, rinse, sand and prime, and your finish will last far longer.
Using strong adhesive on old surfaces
Adhesive can pull paint or veneer off with it. Test in a hidden spot, and read the weight limit.
Choosing a bold color before thinking about light
A dark color in a small, dim kitchen can make it feel like a cave. Add light first, then judge the color.
Buying too many organizers
An organizer that holds nothing is clutter with a better name. Declutter first, then buy only what the remaining items need.
Ignoring the lease
Painting, drilling and fixed lighting can lead to deductions or disputes. Get permission in writing.
Quick safety summary
- Ask your landlord before drilling, painting or replacing fixtures.
- Switch off the power at the breaker before touching any hardwired fixture, and leave wiring to a qualified person.
- Use plug-in lighting with a recognized safety mark, and keep cords away from heat and water.
- Ventilate when painting, use low-VOC products and wear the protective gear the label recommends.
- Do not dry sand old paint that may contain lead.
- Anchor tall organizers and shelves where you have permission, and respect weight limits.
- Keep knives and chemicals out of reach of children.
- Use sharp blades with care, and cut away from your body.
Checklist for a low-cost kitchen upgrade
- I photographed the kitchen and listed the three things that bother me most.
- I set a ceiling for what I will spend.
- I checked my lease for hardware, paint and fixture rules.
- I measured the hole spacing before I bought pulls.
- I chose lights with a recognized safety mark, and I know where the cords will run.
- I have liners cut to fit and a mild cleaner for the shelves.
- I have low-VOC paint, a primer, tape, a mask and a plan for ventilation if I am painting.
- I decluttered before I bought organizers.
- I kept every original part in a labeled bag.
- I took an after photograph to see what changed.
FAQ
What is the cheapest kitchen upgrade with the biggest effect?
New cabinet hardware and better lighting tend to give the largest change for the smallest outlay. Both are noticed daily, and both are usually reversible in a rental.
Can I upgrade a rental kitchen without losing my deposit?
Yes, if you stick to removable options. Plug-in lights, loose-lay liners, shelf risers, over-door racks and swapped hardware with the originals saved are generally safe. Check the lease and ask in writing for anything fixed, such as paint or drilling.
Is it safe to install under-cabinet lighting myself?
Plug-in and rechargeable types are safe for most people when you follow the instructions, use products with a recognized safety mark and route cords away from heat and water. Do not do hardwiring unless you are qualified, and get your landlord’s permission.
Should I paint kitchen cabinets?
Painting can transform a kitchen, but it takes careful cleaning, sanding, priming and curing, plus good ventilation and low-VOC paint. If you rent, you need permission, and you may need to restore the original finish.
How do I find the right size of cabinet pull?
Measure from the center of one screw to the center of the other on your existing handle. Buy a pull with the same spacing so that it fits the old holes without drilling.
Do liners really make a difference?
They protect shelves, quiet clattering dishes and keep items from sliding, and they make the inside of a cabinet look tidy. Loose-lay types are easy to change and good for renters.
How should I order these upgrades?
Start with whatever you touch or see most, often hardware and light. Add liners and organizers next. Leave paint for when you have time, ventilation and permission.
Keep going: Keep going with our small kitchen ideas on a budget, renter friendly kitchen upgrades and budget friendly furniture ideas for small apartments.
Save this guide for later
Pin the ideas you like to Pinterest so you can come back to them when you plan your space.