Studio Apartment Ideas with a Room Divider
Quick answer: The best studio apartment ideas with a room divider start with the job the divider must do: block a view, soften noise, hold storage or simply mark a zone. Choose a height of about 4 to 6 feet for a sleeping nook, an open or semi-open build when light matters, a stable base that cannot tip, and keep at least 30 inches of clear path beside it and a clear route to the door and windows.
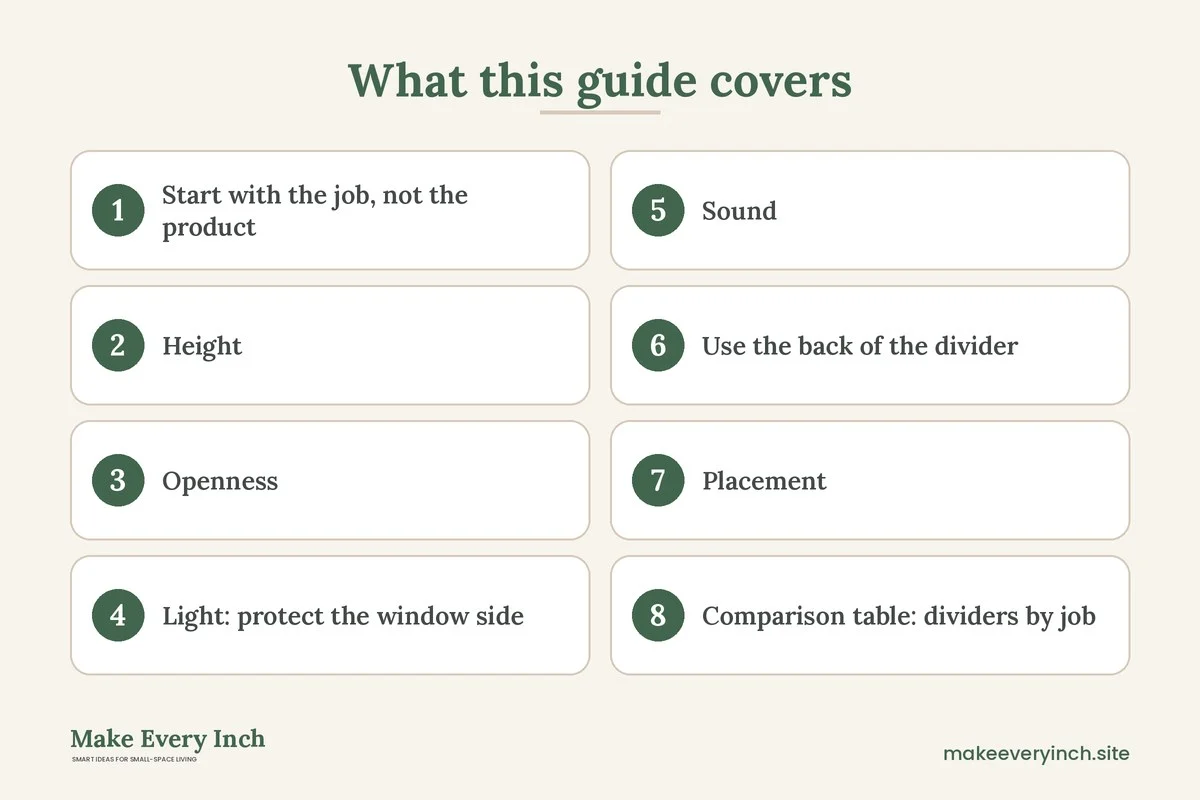
Studio apartment ideas with a room divider usually jump straight to products, but the choice that matters most comes earlier: what should the divider actually do? A divider that hides the bed from the front door is a different object from one that keeps the kitchen smell away from the sofa, and neither is the same as a shelf that doubles as a closet. This guide is about choosing and placing a divider, not building one. It walks through the four decisions that shape every good outcome (height, openness, light and sound), how to use the back of the divider, where it should stand, three example floor plans, a comparison table, the safety rules for one-room living and a checklist. If you want to build your own, see our guide to DIY room divider ideas for studio apartments. If your lease limits what you can fix to walls, read our companion on renter-friendly ways to divide a studio apartment. For the bigger picture, our pillar on studio apartment ideas covers the whole layout.
Start with the job, not the product
Before you measure anything, write down the one or two jobs the divider has to do. Most studio dividers fall into a handful of roles.
- Visual privacy: hide the bed or a desk from the entry or from guests.
- Light control: darken a sleeping area without blocking the window light for the rest of the room.
- Sound softening: reduce echo and the clatter from the kitchen or a video call.
- Storage: hold books, baskets or clothes so the studio needs fewer separate pieces of furniture.
- Zoning only: signal that one area is for sleeping and another for sitting, without really closing anything off.
A divider that tries to do all five usually does none of them well. Pick the main job, let the second job be a bonus, and choose the shape that serves them. A job of privacy asks for solid panels. A job of zoning alone asks for something open. Storage asks for depth and a base that can carry weight. When you know which of these you are solving, the rest of the decisions get much easier.
Height: how tall should a studio divider be
Height is the first thing people get wrong, because they imagine a divider as a wall. In a studio, a wall-height divider rarely works. It shuts out light, makes the room feel smaller and can create a fire-safety problem. Think instead in bands.
Low dividers, about 30 to 42 inches
A low divider, such as a back-to-back sofa with a console, a waist-high shelf or a bench, marks a zone while leaving every sightline open. It suits studios that are narrow or dark, where every bit of light and depth counts. It does not give privacy, but it tells guests and your own brain where the living area ends. Think of it as a line drawn on the floor with furniture.
Mid-height dividers, about 48 to 60 inches
A mid-height divider reaches somewhere between waist and eye level for most adults. Seated on the sofa you see over it, standing at the entry you see the top of it. This is a flexible height for a bed zone: the bed is hidden from a person sitting at the dining table, yet the ceiling and the upper part of the room stay open. Light passes over the top, and the room reads as one space with two corners.
Tall dividers, about 66 to 78 inches
A tall divider blocks sightlines for most people. It gives real privacy to a sleeping nook and can hold a lot of storage. The cost is light and air. A tall solid piece standing across a window wall can leave the far side dim. If you choose tall, make the structure open in part, with slats, cutouts, glass or open cubes, so that some light and some sense of depth pass through.
Ceiling-height or floor-to-ceiling
Floor-to-ceiling systems, such as tension poles with curtains or panels, create the strongest separation. They also increase the stakes: they need a stable ceiling, they can interfere with a smoke detector or sprinkler if placed carelessly, and they affect airflow. Treat them as a special case, check your lease, and keep them clear of any detector, vent or sprinkler head. When in doubt, drop to a lower height.
A simple rule: pick the lowest height that does the job. If hiding a bed from the front door is the goal, stand at the door, find the line of sight to the pillow, and see how high the divider must be to cut it. Often 54 to 66 inches is enough.
Openness: solid, semi-open or see-through
Openness is the second big decision. It controls light, ventilation and how big the room feels.
Solid panels
Solid panels give the most privacy and the most sound control. They also create the most shadow. Use them where light is plentiful, such as a studio with two windows, or on a short stretch only. Pair a solid section with an open one so the whole piece does not become a wall.
Semi-open: slats, lattice, perforated panels
A semi-open divider is often the best compromise for a studio. Slatted wood, lattice, cane-style weave or perforated metal gives a sense of enclosure, because the eye reads many verticals as a barrier, while light and air pass through. These shapes also cast pleasant patterns on the floor. The closer the slats are placed, the more privacy you gain; a gap of about an inch gives a gentle screen, while a gap of three inches reads as a decorative grille.
See-through: open shelving, glass, sheer fabric
Open shelving gives storage and zoning with the greatest light. Sheer curtains give soft privacy at night when the room is lit from inside, though they show silhouettes. Glass or reeded panels give separation with the most light, though they show fingerprints and need a very stable base. A see-through divider helps most when the studio is small and you are worried about feeling boxed in.
A quick test
Place a sheet of cardboard or a bedsheet clipped to a clothes rack where the divider would stand. Walk around the room, check the light at 9 a.m. and at 6 p.m., and note whether the window side feels dim. If it does, go more open. The test costs nothing and prevents an expensive wrong choice.
Light: protect the window side
Studios often have windows on only one wall. That means the divider must either stand parallel to the window wall, in which case it shades whatever is behind it, or stand across the room, in which case it can block light from reaching the back. Both can work if you plan for them.
- Keep the window zone for the main living space. If the divider forms a sleeping nook, put it at the back of the room, so the nook is the dim part and the living area stays bright.
- Run the divider perpendicular to the window, not parallel to it, when you can. A divider at right angles to the glass lets light travel along the room on both sides.
- Use a divider with a gap at the bottom. Light slips under a divider that stands on legs, and the floor looks continuous, which makes the room feel larger.
- Add light on the dark side. A divider that shades the sleeping nook calls for a small lamp, a plug-in sconce or a clip light so the nook is cozy rather than gloomy. See our guide to renter-friendly lighting ideas and the list of best floor lamps for small rooms.
- Use a light finish. Pale wood, white, or a soft neutral reflects light. A very dark divider absorbs it.
A mirror on the living-room side of an open divider can bounce light toward the dim corner, but do not point it directly at the bed, where it can feel odd at night.
Sound: what a divider can and cannot do
A divider will not make a studio quiet. Sound travels through gaps and through the air above, and a studio has hard surfaces that bounce it around. But a divider can reduce echo and mute everyday noise, which is often what matters.
- Mass helps. A thick bookcase full of books absorbs far more than a thin screen.
- Soft surfaces help. Fabric panels, heavy curtains, upholstered headboards and cork absorb sound.
- Gaps hurt. A divider that stops two inches short of the wall lets sound slip past. Seal gaps where you can with felt strips, but never block a vent or a path.
- Rugs and curtains work with the divider. A thick rug on both sides, plus lined curtains at the windows, reduce the echo that makes a one-room space sound loud.
- Set expectations. Use language like “calmer” and “less echo”, not “soundproof”. A divider will not stop a late phone call from carrying across a studio.
If you take video calls, treat the desk zone as the sound zone. A tall bookcase behind your chair, filled with books, softens the background echo for the people on the other end.
Use the back of the divider
Most divider guides talk about the front. In a studio, the back is half the surface and often wasted. A divider has two faces, and each faces a different zone. Give each one a purpose.
Bed side
Keep the bed side calm. A fabric-covered panel, a plain finish or a row of closed baskets works. You can hang a lightweight textile on a free-standing frame, or lean a large piece of art against the divider. Avoid heavy open shelves on the bed side, because they hold objects you may not want near your head at night.
Living side
The living side is the display face. Open cubes with books and plants, a slim console behind the sofa or a row of framed art add interest. If the divider is a bookcase, put the finished, styled side toward the room where you receive guests.
Closed-back vs open-back shelving
Open-back shelving lets light through but shows everything from both sides. A closed back, such as a panel of wood or fabric, gives privacy and hides clutter, but blocks light. A good compromise is half-open: closed in the lower third, which hides baskets and shoes, and open above. Our guide to small space organization ideas shows how to sort what belongs in closed storage.
The back as a work or dining surface
A divider can have a surface. A console behind the sofa works as a desk or a bar at standing height. A long, narrow shelf at the back of a floating sofa can hold a lamp, a plant and a tray for a drink. Keep this surface 10 to 14 inches deep so it does not eat into the walkway.
Placement: where the divider should stand
Placement follows the plan of the room. A good divider fits the room’s natural lines instead of fighting them.
Rules of thumb
- Keep 30 to 36 inches of clear path along the main route, and at least 24 inches on a side path.
- Never block the route to the entry door or to any window that serves as an emergency exit. A divider should leave a clear line to the door from the bed.
- Do not place it in front of a heater, vent, radiator or electrical panel. Leave at least 18 to 36 inches of clearance around heat sources, following the manufacturer’s guidance and local rules.
- Keep the kitchen zone open. A divider close to the stove or oven can collect heat and grease. Leave a safe distance and avoid flammable fabric near a burner.
- Anchor tall pieces. Any divider over about 30 inches tall that is slender or top-heavy should be anchored, or at least weighted and braced. Ask permission before drilling into walls or ceilings.
- Check the floor. Add felt pads or a non-slip layer under legs and feet so the divider does not scratch or slide.
Where to stand it in common studio shapes
- Rectangular studio: divide across the short dimension so each zone gets a share of the window wall, or run the divider along one side to carve out a long, narrow sleeping strip.
- L-shaped studio: the elbow of the L is a natural bed nook. Often you need only a light curtain or a low shelf.
- Square studio: place the divider diagonally in one corner to create a triangular nook, or run it along one third of the width.
- Narrow studio: use low dividers or furniture backs only, so the room does not turn into a corridor.
Use tape first
Mark the divider’s footprint with painter’s tape on the floor and live with the line for two or three days. Walk through it at night with the lights off. If you hit your hip, move it. If you need to turn sideways, move it again.
Comparison table: dividers by job
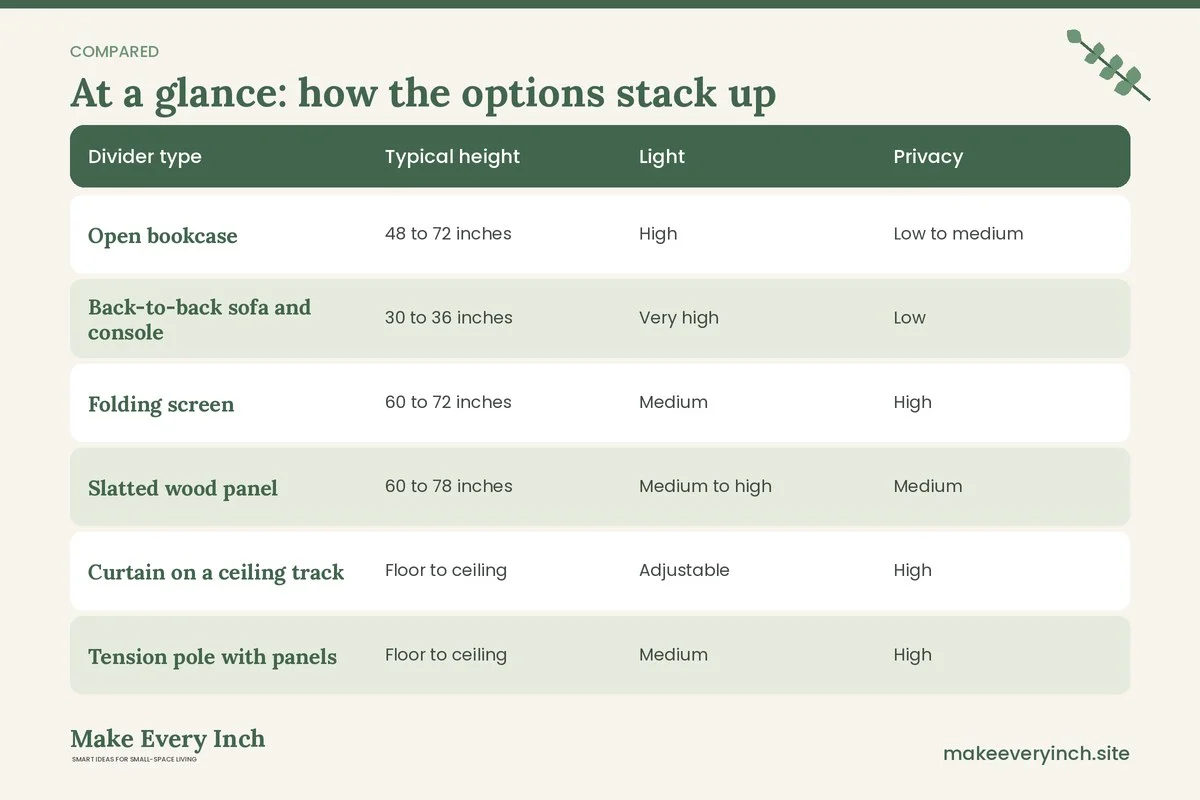
The table below ranks common divider types by what they do best. Treat the descriptions as general guidance, because the results depend on materials and room.
| Divider type | Typical height | Light | Privacy | Sound effect | Storage | |
|---|---|---|---|---|---|---|
| Open bookcase | 48 to 72 inches | High | Low to medium | Moderate with books | High | |
| Back-to-back sofa and console | 30 to 36 inches | Very high | Low | Low | Low to medium | |
| Folding screen | 60 to 72 inches | Medium | High | Low to moderate | None | |
| Slatted wood panel | 60 to 78 inches | Medium to high | Medium | Low | Low | |
| Curtain on a ceiling track | Floor to ceiling | Adjustable | High | Moderate with heavy fabric | None | |
| Tension pole with panels | Floor to ceiling | Medium | High | Moderate | None | |
| Wardrobe or armoire as wall | 60 to 78 inches | Low | Very high | Moderate | Very high | |
| Glass or reeded panel | 60 to 78 inches | Very high | Low to medium | Low | None | |
| Plant shelf | 36 to 60 inches | High | Low | Low | Medium |
If you are choosing between two, choose by the main job, then by the light. Tall solid pieces suit a bright studio, while a dark one needs openness.
Three example studios
A 400 square foot rectangle with one window wall
The window wall sits on the short side. The kitchen is at the entry, and the bed sits at the far end. Place a 54-inch open bookcase across the middle third of the room, perpendicular to the window wall, with the closed baskets on the bed side and books and plants on the living side. Leave a 34-inch gap at the end nearest the wall so the route to the window stays open. Light travels over and through the shelves, the bed is hidden from the entry by the baskets and a tall cabinet, and the living area keeps its sofa and window light. Add a lamp on the bed side and a rug under the sofa.
A 300 square foot studio with an L-shaped corner
The elbow of the L creates a natural alcove, about 6 by 8 feet, that holds a bed. Hang a ceiling-track curtain in a light-filtering fabric across the opening, and keep the track a safe distance from the smoke detector. During the day, pull the curtain to the side so the studio feels like one room. At night, close it for privacy. Because the curtain stays light, the alcove does not feel like a cave. Add a plug-in sconce inside the nook for reading, and route cords along baseboards using the ideas in our post on renter-friendly ways to hide cords.
A narrow 250 square foot studio, 9 feet wide
A narrow room cannot take a tall divider without becoming a hallway. Float the sofa to face the room’s length with a console behind it, about 12 inches deep, and let the sofa back mark the line between living and sleeping. A low console is enough because the bed is at the far end of a long room, and distance does most of the work. Add a slim folding screen, 60 inches tall, that can open at night for dressing and close during the day to hide a hanging rail. Keep a clear 30-inch path along one wall.
Safety notes for one-room living
Dividing a studio changes how people move and how smoke and heat travel. Treat these notes as a minimum, and check your local rules and lease.
- Egress first. Every sleeping zone needs an unobstructed path to the main door and, where a window is an emergency exit, a clear route to it. Do not wall off a bed behind a divider with no way out.
- Smoke and carbon monoxide alarms. Keep alarms uncovered and unobstructed. If you create a sleeping nook, consider whether the alarm in the main room can be heard there, and follow local guidance for placing an extra one.
- Fabric and heat. Keep curtains, screens and fabric dividers away from the stove, heaters and space heaters. Choose flame-resistant or at least non-flammable materials near the kitchen if possible.
- Anchor tall furniture. Bookcases, wardrobes and slender screens can tip. Use anti-tip straps or brackets where permitted, and ask your landlord before drilling. If you cannot drill, place heavy items low, fill the lower shelves first, and use a wide base.
- Electrical. Do not run cords under rugs, across walkways or through gaps where a divider could pinch them. Do not overload power strips. Keep dividers clear of outlets and panels.
- Ventilation. Do not seal off a zone so tightly that air cannot circulate. Leave gaps at the top or bottom, particularly near the kitchen and bathroom. If you treat a wood divider with paint or finish, choose low-VOC products and open a window while it dries.
- Lease and permission. Check the lease before using ceiling hooks, track curtains, tension poles that press on a ceiling, or anything that needs screws. Ask in writing, and never drill without permission.
Styling the divider so it looks intentional
A divider should look like part of the home, not a screen set up in a hurry. A few styling rules help.
- Match the divider to something in the room, such as the wood tone of a table, the color of the curtains or the metal of a lamp.
- Keep the top styled but light. A plant, a lamp or a few books are enough. A divider top piled with objects looks cluttered from both sides.
- Limit open shelves to a third of the surface. Use baskets and boxes for the rest, so the divider reads as calm.
- Repeat the divider’s material elsewhere. A slatted divider pairs with a slatted headboard or a wood frame.
- Light it. A small lamp on a shelf adds depth, and a plug-in light turns the divider into a feature in the evening.
For wall art that can complement a divider, see our guide to renter-friendly wall decor ideas.
Common mistakes
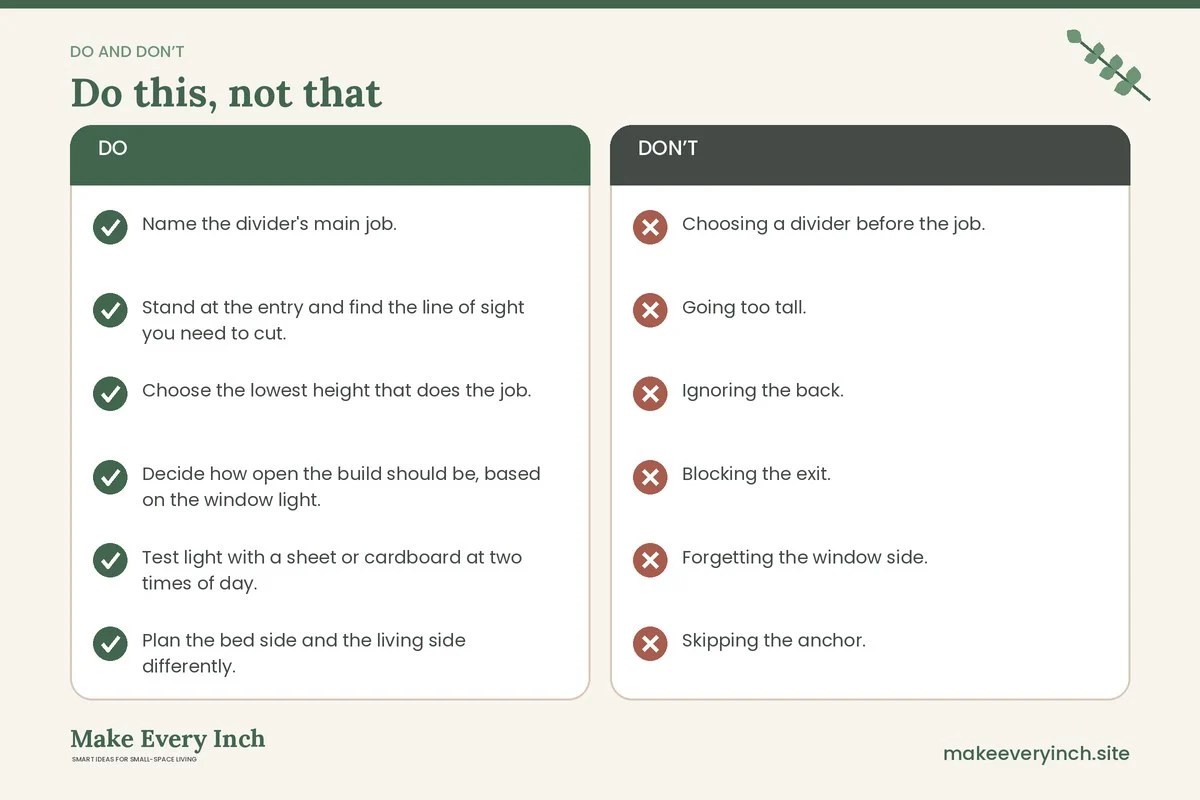
- Choosing a divider before the job. A beautiful screen that does not block the view is not worth keeping.
- Going too tall. A divider taller than needed blocks light and makes the room feel like a maze.
- Ignoring the back. The face you do not see in a showroom is the one you stare at every day.
- Blocking the exit. A bed nook that you must squeeze out of is a hazard.
- Forgetting the window side. A solid divider across the only window dims half the room.
- Skipping the anchor. A tall bookcase that wobbles is a risk, even if it looks light.
- Buying without a tape test. Measure, tape and test before you buy.
Planning checklist
- Name the divider’s main job.
- Stand at the entry and find the line of sight you need to cut.
- Choose the lowest height that does the job.
- Decide how open the build should be, based on the window light.
- Test light with a sheet or cardboard at two times of day.
- Plan the bed side and the living side differently.
- Tape the footprint, and keep 30 to 36 inches of path.
- Keep a clear route from the bed to the door and any emergency window.
- Keep fabric away from the stove and heaters.
- Anchor tall pieces, or weight and brace them, and ask before drilling.
- Keep alarms, vents and panels uncovered.
- Add a lamp to the dim side.
- Check the lease for ceiling hooks, poles or screws.
FAQ
What is the best room divider for a studio apartment?
It depends on the job. An open bookcase is a strong all-rounder, a folding screen gives flexible privacy, and a curtain on a track gives the most adjustable separation. Pick by the job first, and the light second.
How tall should a room divider be in a studio?
For a sleeping nook, about 54 to 66 inches often works, because it blocks sightlines from the main room while leaving light and air above it. Low dividers of 30 to 42 inches suit zoning only, and tall ones suit true privacy.
Will a room divider make my studio feel smaller?
A solid, tall divider can. An open, low or raised-on-legs divider usually keeps the room feeling larger. Place it perpendicular to the window and use pale finishes to protect the light.
Can a room divider block noise?
It can reduce echo and mute some everyday sound, especially if it is heavy and covered in soft materials. It will not make a studio soundproof, so plan on rugs and curtains too.
Is it safe to put a bed behind a divider?
Yes, if the path to the door remains clear, the alarms are uncovered, and the divider does not trap heat or block an emergency window. Never close off a bed with no way out.
Do I need to anchor a bookcase divider?
Yes, if it is tall or slender. Use anti-tip hardware if your lease allows it, and ask permission before drilling. If you cannot, keep the heavy items low and the base wide.
Can I use a room divider in a rental?
Yes. Freestanding screens, bookcases, tension systems with permission and curtains on existing hardware are common. Read our renter-friendly ways to divide a studio apartment for options that leave no marks.
Keep going: Keep planning with our pillar on studio apartment ideas, the companion post on studio apartment decorating ideas and our guide to small apartment living room ideas for studios.
Save this guide for later
Pin the ideas you like to Pinterest so you can come back to them when you plan your space.