Studio Apartment Layout Mistakes to Avoid
Quick answer: The studio apartment layout mistakes to avoid most often are blocking windows, floating furniture badly, owning too many pieces, ignoring traffic paths, skipping zones, oversized furniture, no vertical storage, weak lighting, a bed that dominates the entry, and forgetting safe exits. Fix them by measuring first, keeping 30 to 36 inches for main paths, defining three zones, and removing anything that does not earn its footprint.
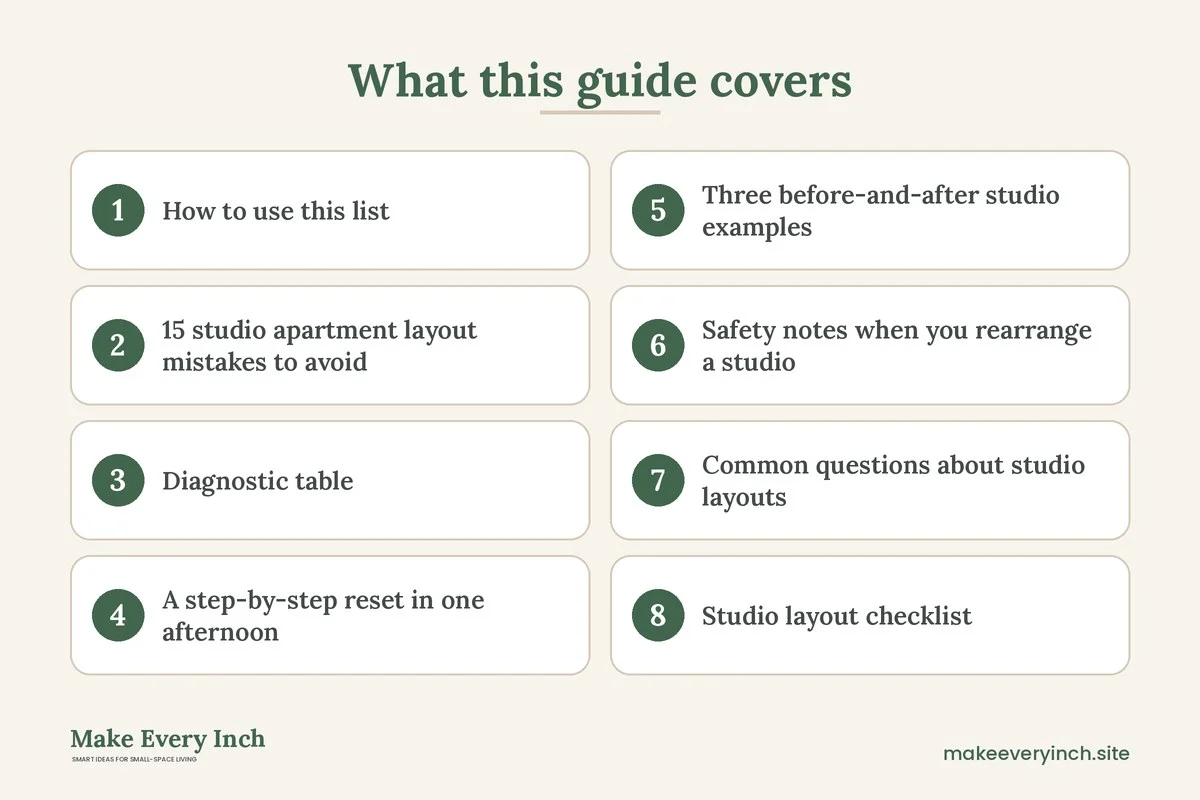
Studio apartment layout mistakes to avoid are rarely about taste. They are about geometry. A studio asks one room to be a bedroom, living room, kitchen, office and entry all at once, so a layout error that would be a small annoyance in a larger home becomes a daily frustration. A sofa that sits six inches too far out blocks the path to the bathroom. A desk in front of the only window cuts off the best light. A rug that is too small makes the zones look random. The good news is that most layout problems are fixable without buying anything new, and most can be fixed in an afternoon with painter’s tape and a tape measure. This guide walks through 15 mistakes with a fix for each, a diagnostic table, a step-by-step reset, three before-and-after examples, safety notes and a checklist. For the full set of ideas, read our pillar guide to studio apartment ideas.
How to use this list
Read the mistakes with your own floor plan in mind. Sketch the room on graph paper, with one square equal to one foot, and mark windows, doors, outlets, radiators and the bathroom door. Then check each mistake against the plan. If you find three or four, do not panic. Most studios have a handful, and fixing two or three of them can change how the whole room feels. Start with the mistakes that affect safety and movement, then move to comfort, then to looks.
A note on numbers: the measurements below are common comfort guidelines, not rules. Your ceiling height, the shape of your room and the way you live all change what feels right. Use them as starting points and adjust.
15 studio apartment layout mistakes to avoid
Mistakes about light, windows and walls
1. Blocking windows with tall furniture
The mistake: A bookcase, wardrobe or high-backed sofa placed in front of a window cuts daylight, makes the room feel smaller and can hide an emergency exit.
The fix: Keep furniture under the window sill height, or leave it open. If a window must host furniture, use something lower than the sill, such as a bench or a low dresser. Hang curtains high and wide so they clear the glass when open. Keep access to any window that doubles as an exit. See renter-friendly window treatment ideas for ways to manage light and privacy without blocking the window.
2. Pushing everything against the walls
The mistake: Lining every piece along the perimeter leaves a dead, empty middle and makes the room look like a waiting room. It also wastes the natural pockets behind and beside furniture.
The fix: Pull the sofa or a bed a few inches from the wall, or float a piece to define a zone. Keep the main path open but allow furniture to divide space. A floating piece needs a purpose, as described in the next mistake.
3. Floating furniture badly
The mistake: Floating a sofa in the middle of the room without a rug, a console or a clear back reads as stranded. The back of the sofa faces the kitchen with cables and clutter visible, and the sofa cuts the room in two without defining either half.
The fix: Float only when the piece has a job. A sofa back can divide living from sleeping, but give it a console behind, 10 to 14 inches deep, to finish the back and hold a lamp. Anchor the group with a rug that is large enough for the front legs of every piece. Leave 30 to 36 inches of walkway on each open side. Our guide to DIY room divider ideas for studio apartments has more options.
4. Ignoring where light and outlets actually are
The mistake: Placing a desk or a reading chair far from outlets and daylight forces long cords across walkways and leaves you working in shadow.
The fix: Map outlets and windows before arranging furniture. Put the desk where it gets side light and an outlet. Never run cords under rugs or across paths, and avoid daisy-chaining power strips. If an outlet is missing, choose a cordless lamp or a cord channel that does not damage walls.
Mistakes about zones and traffic
5. No zones at all
The mistake: When sleeping, working, eating and relaxing all happen in one visual pool, nothing feels finished and the room feels cluttered even when it is tidy.
The fix: Name three to four zones and give each a visual anchor. A rug under the sofa, a shelf behind the bed, a lamp at the desk and a pendant over the table all signal a zone without a wall. Our renter-friendly ways to divide a studio apartment post covers zone tools that need no drilling.
6. Ignoring traffic paths
The mistake: Furniture that sits along the straight line between the door, the bathroom and the kitchen forces you to zigzag every day. The result feels cramped even when the room is large.
The fix: Draw the three busiest routes on your plan: door to bathroom, bed to bathroom, kitchen to sofa. Keep each at 30 to 36 inches where possible, and at least 24 inches for rarely used side paths. Move any piece that interrupts a main route.
7. A bed that greets everyone at the door
The mistake: A bed visible and immediate on entry makes the whole studio feel like a bedroom, and guests walk past your pillows.
The fix: Move the bed to the far corner or an alcove, or partly screen it with a bookcase, a curtain on a ceiling track or a low divider. Keep egress clear. If the bed cannot move, make it look like seating with a bolster and a tailored throw. Our post on studio apartment ideas for a queen bed covers placement for the biggest bed.
8. Putting the sofa too far from everything
The mistake: A sofa pushed to the far wall leaves a gap between seating and tables, so people lean and stretch to set down a drink. The seating area feels disconnected from the rest of the room.
The fix: Bring the seating group close. Side tables should sit 16 to 24 inches from the seat edge. Aim for conversational distance of about 8 feet between facing seats. For layout help, see small apartment living room ideas for studios.
Mistakes about furniture size and quantity
9. Too many pieces
The mistake: A studio holds a limited number of objects before it feels crowded. Each extra chair, side table and shelf reduces open floor, which is what makes a small room feel calm.
The fix: Count the pieces. A useful guideline is one large piece per zone, plus smaller supporting items, and then stop. Make every piece do two jobs: a storage bench, a drop-leaf table, a bed with drawers. Remove duplicates and anything you do not use weekly. See our guide to the best furniture for small apartments.
10. Furniture that is too big
The mistake: A deep sofa, a wide dresser or a large dining table can consume a quarter of the room and leave no room for movement.
The fix: Measure the room and the piece, including depth and swing. Look for sofas around 30 to 36 inches deep, dressers under 18 inches deep and tables that fold or extend. Keep pieces on slim legs so you can see floor underneath. Our guide to best small dining tables covers compact options.
11. Furniture that is too small
The mistake: Surprisingly, tiny furniture can also hurt. A very small rug, a miniature side table and a lone bitty lamp make the room look like a dollhouse and fail to anchor anything.
The fix: Use a few right-sized pieces rather than many tiny ones. A rug that is 5 by 8 feet or larger under the main seating group looks calmer than a collection of small mats. A single larger bookcase beats four little shelves.
12. Sleeping and working in the same spot
The mistake: A desk jammed beside the bed means work follows you into sleep, and a laptop on the duvet is bad for posture and rest.
The fix: Separate the desk from the bed by at least a piece of furniture or a visible boundary. If space is tight, use a fold-down or console desk that clears away at night. See best desks for small apartments for compact options.
Mistakes about storage, light and finishing
13. Ignoring vertical space
The mistake: Storage sits at waist height, so walls and the area above the door stay empty while floors fill up.
The fix: Use tall, narrow shelving, over-door hooks and shelves above the bed or the door. Hang curtain rods higher than the window frame to add height. Anchor any tall piece with the right hardware if your lease allows it. See small space organization ideas and no-drill storage ideas for renters.
14. One harsh overhead light
The mistake: A single ceiling fixture flattens the studio and casts shadows, so the room looks like an office and zones disappear after dark.
The fix: Use three layers of light: ambient, task and accent. Put a lamp in each zone, such as a reading lamp at the bed, a task light at the desk and a soft glow at the sofa. Warm bulbs around 2700 kelvin feel calmer. Plug-in sconces and clip lights avoid rewiring. See renter-friendly lighting ideas.
15. No drop zone at the door
The mistake: Keys, shoes, bags and mail land on the nearest flat surface, which is often the kitchen counter or the bed.
The fix: Set up a tiny entry station with hooks, a shelf or tray and a shoe mat. Even 12 inches of wall is enough. Our guide to small home drop zone ideas shows how to make one in almost no space.
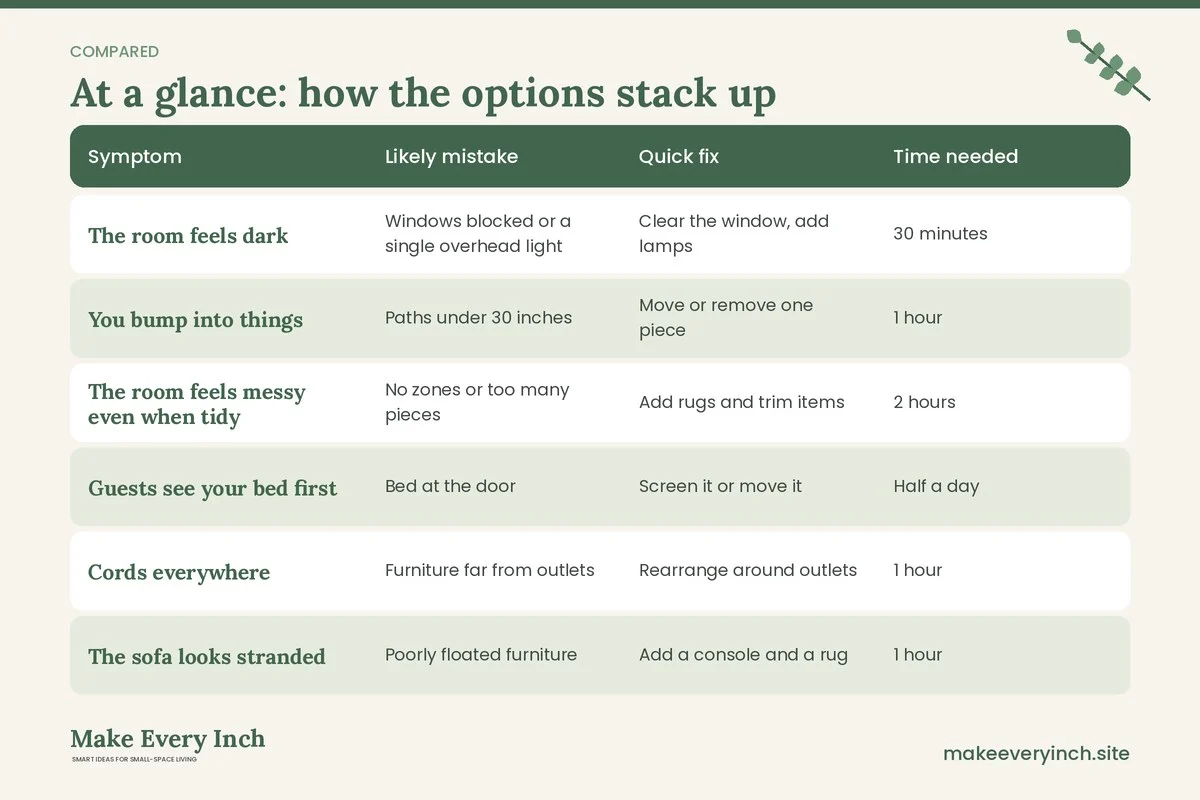
Diagnostic table: symptom, likely mistake, quick fix
| Symptom | Likely mistake | Quick fix | Time needed |
|---|---|---|---|
| The room feels dark | Windows blocked or a single overhead light | Clear the window, add lamps | 30 minutes |
| You bump into things | Paths under 30 inches | Move or remove one piece | 1 hour |
| The room feels messy even when tidy | No zones or too many pieces | Add rugs and trim items | 2 hours |
| Guests see your bed first | Bed at the door | Screen it or move it | Half a day |
| Cords everywhere | Furniture far from outlets | Rearrange around outlets | 1 hour |
| The sofa looks stranded | Poorly floated furniture | Add a console and a rug | 1 hour |
| You never use the desk | Desk beside the bed | Separate work from sleep | 1 hour |
| Surfaces fill with clutter | No drop zone or storage | Add hooks and a tray | 30 minutes |
A step-by-step reset in one afternoon
You can fix most layout problems without buying a thing. Try this sequence.
1. Empty the room in your head. Draw the shell on graph paper: walls, windows, doors, outlets, radiators. Mark which window might act as an exit.
2. Mark the fixed points. Note where the kitchen, bathroom door and entry are. These cannot move.
3. Draw the three main paths. Door to bathroom, bed to bathroom and kitchen to sofa. Keep them 30 to 36 inches wide where possible.
4. Name your zones. Sleep, sit, work and eat are the typical four. If space is tight, let two share a zone, such as eating and working at one table.
5. Cut paper templates. Make cutouts of each large piece at scale. Slide them on the plan until the paths and zones work.
6. Tape the plan on the floor. Use painter’s tape to mark furniture footprints and walk the room for a day.
7. Move the heavy pieces last. Use furniture sliders and a helper. Lift, do not drag, if you want to protect floors and your back.
8. Add light and rugs. Place lamps and rugs to confirm each zone.
9. Trim. Remove or relocate anything that still blocks a path.
10. Live with it for a week. Adjust, then stop moving things.
Three before-and-after studio examples
A 400 square foot studio with a sofa in front of the window
Before: The sofa sat against the window wall because it seemed natural. It blocked the sill, cut light and left the room’s center empty. A desk jammed beside the bed occupied the other wall.
After: The sofa moved to the interior wall, facing the window, with a narrow console behind it. The window sill is clear, and daylight reaches the whole room. The desk now sits at the side of the window where it gets light, and the bed is set into the far corner. The main path, 36 inches wide, runs from door to bathroom with nothing in the way.
A 300 square foot studio with too many pieces
Before: A loveseat, two chairs, a coffee table, two side tables, a dresser, a bookcase and a tall wardrobe filled the room. Every path was 20 inches wide.
After: The owner removed the chairs and the coffee table, and replaced the side tables with one stool. A bed with drawers replaced the dresser. The tall wardrobe was anchored to the wall with the landlord’s permission. Paths grew to 30 inches and the room felt larger without changing the square footage.
A 450 square foot studio with no zones
Before: Everything floated in the middle. The bed, sofa and table sat on the same floor with no rugs, and the lighting came from one ceiling fixture.
After: A large rug now sits under the sofa group, and a smaller one sits beside the bed. A bookcase divides the sleeping zone, with open shelves so light passes through. Three lamps replaced the ceiling light at night. The result is a studio that reads as three rooms in one.
Safety notes when you rearrange a studio
- Egress: Keep a clear route to the main door and to any window that serves as an emergency exit. Do not block it with a divider, a curtain or a bookcase.
- Anchoring: Tall furniture, such as bookcases and wardrobes, can tip. Anchor with appropriate hardware where your lease permits. If you cannot drill, use lower pieces or place heavy items low.
- Electrical: Do not overload outlets or power strips. Avoid running cords under rugs or across walkways. Keep cords away from heat sources and check them for damage.
- Ventilation: Do not block vents, radiators or air returns. A divider that traps air in the sleeping zone can make it stuffy, so leave gaps.
- Paint and finishes: If you paint zones, ask permission first, choose low-VOC products and ventilate until dry.
- Lease: Never drill, mount or alter fixtures without written permission. Choose freestanding or tension-based options when in doubt.
- Moving furniture: Ask for help with heavy items and protect floors.
Common questions about studio layouts
Many readers ask the same things after reading a list like this one. A short answer to each follows.
What is the biggest studio layout mistake?
Ignoring how you move through the room. A layout that looks good in a photo but forces you to squeeze past furniture every day will never feel right. Fix the paths first, then style.
How many zones should a studio have?
Three or four is typical: sleep, sit, work and eat. Smaller studios can combine two, such as eating and working at one table.
Should I float furniture in a studio?
Only when the piece defines a zone and has a finished back. Floating without a purpose wastes space.
Is it OK to put the bed near the door?
Sometimes, if that is the only option, but screen it or style it as seating, and keep a clear path to the exit. A bed deep in the room usually feels calmer.
How much walking space do I need?
Roughly 30 to 36 inches for main routes and 24 inches for minor ones, though your room and needs can change this.
Can a rug really help a studio layout?
Yes. A rug sized for the front legs of the seating group anchors a zone and makes the room look planned. Choose one that lies flat so it is not a tripping hazard.
Studio layout checklist
- Draw the room to scale with windows, doors and outlets.
- Mark the exit route and keep it clear.
- Draw the three main paths and keep them 30 to 36 inches wide.
- Name three or four zones.
- Keep furniture off windows or below the sill.
- Float only pieces with a job and a finished back.
- Count the pieces and cut duplicates.
- Check that each large piece fits with room to open and swing.
- Add a rug under each main group.
- Use at least three light sources.
- Set up a drop zone at the entry.
- Anchor tall furniture when permitted.
- Check cords, power strips and vents.
- Live with the plan for a week before changing it.
Keep going: Keep going with our pillar guide to studio apartment ideas, the companion post on studio apartment ideas for a queen bed and our small apartment living room ideas.
Save this guide for later
Pin the ideas you like to Pinterest so you can come back to them when you plan your space.