12 Temporary Backsplash Ideas for Rental Kitchens That Peel Clean
Quick answer: The best temporary backsplash rental kitchens plans match the material to the zone. Use a wipeable panel or sheet behind the sink, a metal or glass sheet behind the stove at a safe distance, and a light peel-and-stick covering on the rest of the wall. Get written permission, test a hidden patch first, keep everything away from open flames and heating elements, and photograph the wall before and after.
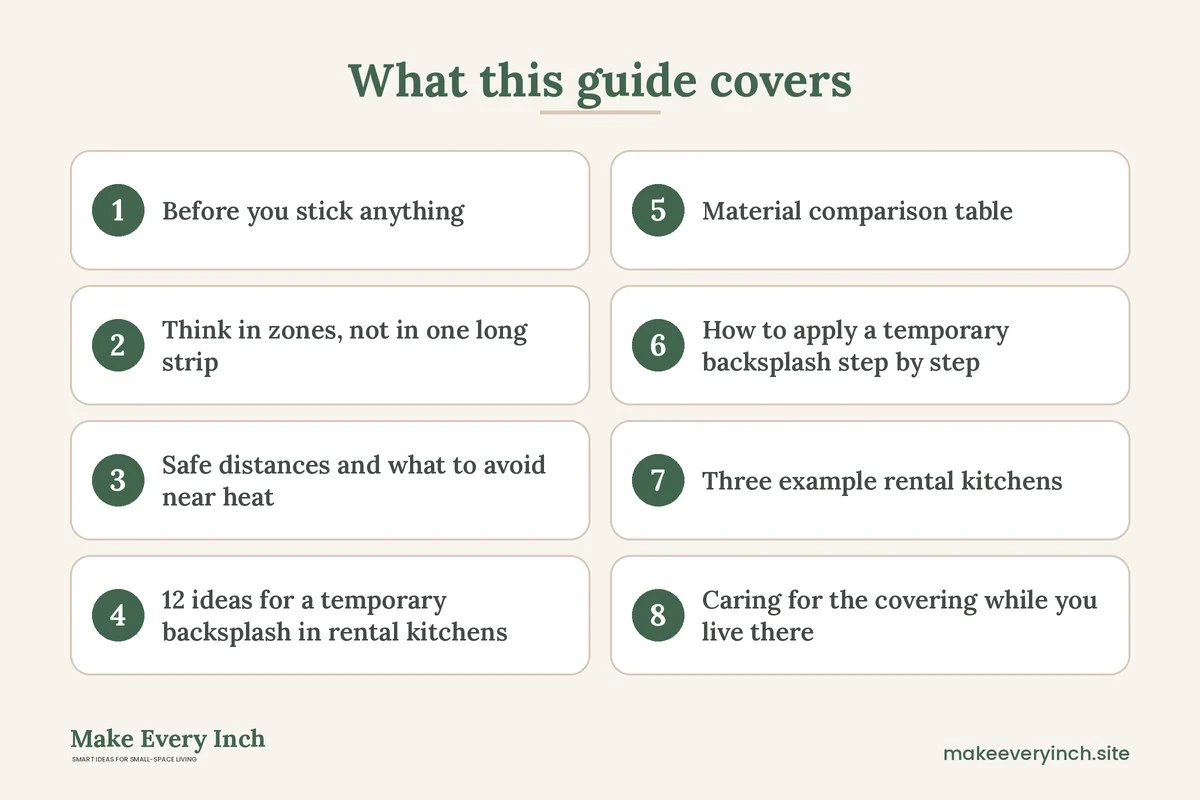
A temporary backsplash rental kitchens can live with has to do three jobs at once: protect the wall from splashes, look good enough that you enjoy cooking there, and come off on moving day without taking paint or plaster with it. This guide takes a different route from a simple list of pretty tiles. It sorts the strip of wall behind your counters into zones, shows what each zone really needs, and gives you 12 removable ideas, a material comparison table, three example kitchens, an application routine and a move-out plan. For a broader overview of the topic, see our main post on temporary backsplash ideas, the wider renter friendly apartment decorating ideas pillar, and the sister post on removable wallpaper ideas for small rooms.
Before you stick anything: lease, wall and permission
A temporary backsplash is only temporary if the wall underneath cooperates. Three checks come before any shopping.
Read the lease and ask in writing
Some leases forbid anything adhered to a wall, and others allow it as long as the wall is returned in its original condition. Send your landlord or property manager a short message that describes what you want to put up, where, and how you will remove it. Keep the reply. If the answer is no, do not argue; use one of the freestanding ideas below, such as a leaning panel or a rail with hanging tools. Never drill, cut or glue into tile, drywall or cabinetry without permission. Our guide to security deposit safe apartment upgrades explains how to document the work so the deposit stays safe.
Identify the wall surface
Walk along the backsplash zone and note what is there. It may be bare painted drywall, glossy paint, old tile, a thin laminate panel or a mix. Each behaves differently.
- Flat, well-cured paint: the easiest surface for adhesive products. Matte and textured paint grip less evenly, and fresh paint that has not cured for a few weeks can peel off when the product is removed.
- Glossy or oil-based paint: adhesives tend to hold strongly here, so test a hidden patch and plan a slow, warm removal.
- Existing tile: most peel-and-stick products can sit over tile if the grout lines are shallow, but deep grout shows through. Thick grout lines may need a rigid panel instead.
- Textured walls: bumpy plaster and orange peel finishes leave air gaps. Lightweight sheets may bubble or lift, and a rigid panel held by a rail is often more reliable.
- Damaged or powdery paint: adhesive can pull this off. Choose a freestanding option.
Test a hidden patch
Pick a spot behind the fridge or inside a cabinet-side corner. Apply a small piece of the product, leave it for a week, then remove it slowly with gentle warmth. If paint comes off, the product is not safe for your wall. This one-week test costs nothing and prevents most deposit disputes.
Think in zones, not in one long strip
Most backsplash advice treats the wall as one surface. In a real kitchen it is three or four separate problem areas with different demands.
- Sink zone: water splashes daily, so the covering must tolerate moisture and be sealed at the edges. Keep the counter edge sealed with a thin bead of removable caulk or a trim strip so water does not run behind the sheet.
- Cooking zone: the strip behind the stove sees grease and heat. Only use materials rated for heat, stay well back from burners, and keep paper, fabric and thin plastic away from flames and hot elements.
- Prep zone: the stretch between the sink and the stove takes small splashes and a lot of cleaning with a cloth. A smooth, wipeable finish matters more than heat resistance.
- Outlets and switches: these need careful handling. Never cover an outlet, and turn off the circuit before taking a cover plate off. If you are unsure, leave electrical work to a qualified person and cut the covering around the plates.
A good plan puts the hardest-working material only where it is needed. That keeps the cost of effort and money down and makes removal simpler, because the heavy-duty piece is a single panel rather than a whole wall of glue.
Safe distances and what to avoid near heat
The stove is the one place where a temporary covering can create a real hazard. Follow these rules, and read the stove and product instructions for exact clearances.
- Do not put paper, vinyl, fabric or thin plastic sheets directly behind a gas flame or an electric element. Many of them soften, warp or catch fire.
- Check the stove manual for the clearance it recommends between the burners and any wall material, and keep the covering outside that distance unless the product is specifically made for heat.
- For the stove zone, a metal sheet or a tempered glass panel is the usual choice, because both tolerate heat better than adhesive vinyl. Hold them away from the wall or fit them as the manufacturer directs.
- Keep a range hood or fan running while cooking so heat and steam do not build up behind the covering.
- Do not cover vents, filters, gas pipework or the back of the range.
- If any piece curls, bubbles or discolors near the stove, remove it at once.
If your stove sits tight against the wall and there is only a few inches of exposed backsplash, it is often better to leave that section bare and wipeable than to risk an unsuitable covering.
12 ideas for a temporary backsplash in rental kitchens
Sheets and films
1. Peel-and-stick tile sheets for the prep zone
Thin printed sheets look like tile, from subway to patterned designs. They suit the stretch between the sink and the stove where splashes are small and heat is low. Clean the wall first, start at a level line, press out air with a soft tool and seal the top edge with a thin trim strip. Keep them away from the stove zone unless the product states it is heat rated.
2. Gel-textured tiles for a raised look
Soft gel tiles give a 3D effect that mimics real glazed tile. They are thicker than flat sheets, so they hide minor wall flaws better. They are best used in a limited area such as a window ledge or a short counter run, and removal needs patience and low heat.
3. A self-adhesive metal sheet behind the stove
A thin metal sheet with an adhesive back works as a wipeable cover for the stove strip when it is rated for heat. Follow the clearances in the product instructions and the stove manual. If the instructions do not say the product tolerates the heat of a stove, do not use it there.
4. Removable contact-style covering for a plain wipeable wall
A smooth self-adhesive vinyl in a single color or a stone pattern gives you a clean, continuous surface. It has fewer seams than tile sheets, so there is less grout-like line to collect grease. It suits the prep and sink zones.
Panels and rigid covers
5. A tempered glass or acrylic panel held by a rail
A single panel behind the sink or the stove is the cleanest solution. Instead of glue, a rail or a pair of hanging clips can hold it, which means no adhesive touches the wall. Only install this if the landlord allows fixings, and have the panel cut to size by a supplier who can make safe edges. A tempered or heat-treated glass panel is much safer near heat than ordinary glass, and a heavy panel needs a secure support.
6. Thin sheet panels cut to fit
A thin wipeable panel such as a laminate or plastic sheet can be cut to the size of the backsplash and held with adhesive strips rated for the weight. It gives a flatter finish than film and suits uneven or lightly textured walls. Check the weight limits of the strips, and never hang a heavy panel on strips alone.
7. A leaning or hanging tray panel
If you cannot attach anything, lean a large wooden or metal tray behind the sink. It protects the wall from splashes and doubles as a place to stand a soap dish. It will not seal the edge, so wipe the wall behind it weekly and keep it away from the stove.
No-glue ideas
8. A rail with hooks and a washable cloth panel
A rail with hooks lets you hang cooking tools and a small removable cloth or vinyl panel behind them. The panel is easy to wash, and the rail is the only thing that touches the wall. Mount a rail only with permission, or hang the rail from a tension rod between cabinets. See our guide to renter friendly kitchen storage ideas for rail layouts that avoid drilling.
9. A fabric or oilcloth sheet with magnets on a metal strip
If you already have a magnetic strip or a steel panel, a wipeable oilcloth sheet can hang from it with magnets. This works in a small area away from heat and water, such as the wall behind a coffee station.
10. A tension-rod window cover that doubles as a splash screen
A tension rod across a window niche or between two cabinets can hold a small wipeable curtain. Pulled across, it protects a sink corner from splashes. Pushed aside, it reveals the window. Check that the rod does not stress the frame.
Paint and wipeable finishes
11. A washable paint patch, only with permission
If your landlord allows a small paint change, a washable semi-gloss finish gives a wipeable surface. Choose a low-VOC paint, ventilate the room while it dries, and return the wall to its original color on move-out if the lease requires it. Our post on small kitchen color ideas that feel bright can help you pick a shade that works with your cabinets.
12. A mix: one sheet, one panel, one paint stripe
You do not need one material for the whole wall. Use a heat-rated panel behind the stove, a wipeable sheet at the prep area, and a painted or plain section elsewhere. Mixing keeps the effort low and makes each part easy to remove.
Material comparison table
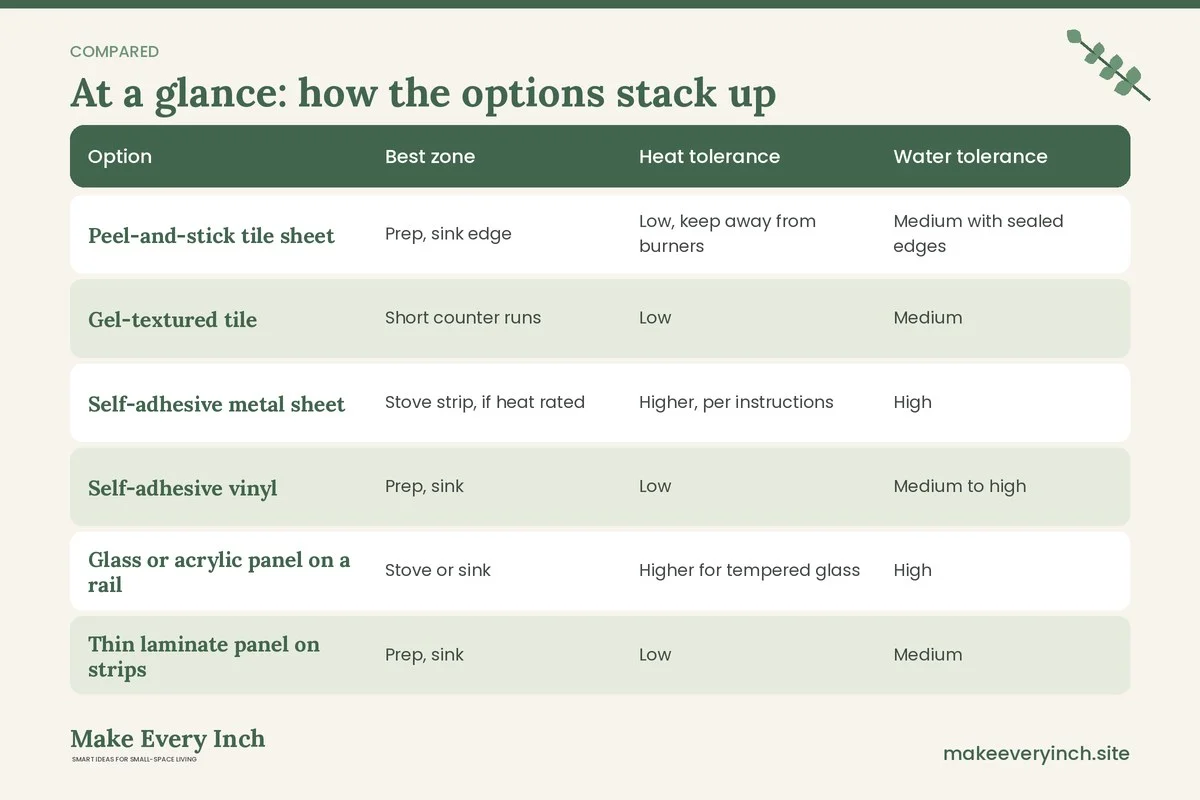
The table below summarizes where each option works best. It is a general guide, so always follow the instructions of the specific product you choose.
| Option | Best zone | Heat tolerance | Water tolerance | Removal effort |
|---|---|---|---|---|
| Peel-and-stick tile sheet | Prep, sink edge | Low, keep away from burners | Medium with sealed edges | Medium, use gentle warmth |
| Gel-textured tile | Short counter runs | Low | Medium | Medium to high |
| Self-adhesive metal sheet | Stove strip, if heat rated | Higher, per instructions | High | Medium |
| Self-adhesive vinyl | Prep, sink | Low | Medium to high | Low to medium |
| Glass or acrylic panel on a rail | Stove or sink | Higher for tempered glass | High | Low, needs fixings |
| Thin laminate panel on strips | Prep, sink | Low | Medium | Low if strips are removed slowly |
| Leaning tray | Sink | Not for heat | Medium | None |
| Rail with cloth panel | Prep | Low | Medium | None to low |
| Washable paint patch | Any, with permission | Medium | High | Needs repaint |
How to apply a temporary backsplash step by step
A tidy install is a big part of whether the product comes off cleanly. Take your time and work in daylight.
1. Photograph the wall. Take clear photos of the whole backsplash zone, including corners and outlets, and keep them with the date.
2. Clean the surface. Remove grease with a mild degreaser, rinse with a damp cloth and let the wall dry fully. Grease is the number one reason sheets lift.
3. Measure and mark a level line. Use a spirit level or a long straight edge and a pencil mark. The first row sets the look of the whole wall.
4. Dry fit. Hold the sheets in place without peeling the backing so you can plan around outlets, windows and corners.
5. Switch off power at outlets. Remove cover plates only if you are comfortable, otherwise cut the sheet around the plate. Do not cover an outlet or let a sheet touch a live terminal.
6. Peel and press from the center. Peel a few inches of backing at a time and press out air with a soft tool. Work from the middle outward.
7. Trim carefully. Use a sharp craft knife and a straight edge, and cut away from your body. Protect the counter with a board.
8. Seal the edges. Where the covering meets the counter or sink, use a thin bead of removable caulk or a trim strip so water cannot get behind the sheet.
9. Let it settle. Avoid heavy splashing and steam for a day so the adhesive can grip.
10. Photograph the finished job. Keep a record of the finished wall for your records.
Three example rental kitchens
A galley kitchen with one long wall
In a narrow galley the backsplash zone is a long strip, and the eye runs along it. Use a single wipeable vinyl in a light color along the whole prep zone to make it feel longer, then put a metal or tempered glass panel behind the stove only if the landlord allows fixings. Add a rail with a few hooks beside the sink for towels and tools. For layout ideas, see our guide to galley kitchen ideas.
A studio kitchenette with a short counter
A studio kitchenette often has about three or four feet of counter and a wall that is visible from the sofa. Here the backsplash is part of the room’s decor. Choose a pattern that echoes the room, apply it to the area between the counter and the upper shelf, and leave the stove strip bare. A leaning tray behind the sink adds protection without any adhesive. You can also bring in ideas from our renter friendly kitchen upgrades post.
An older kitchen with textured walls
Textured plaster rarely accepts thin sheets, so use rigid panels. Cut thin panels to fit behind the sink and prep area, attach them with strips rated for their weight, and use a rail across the wall for the stove strip with a glass panel if the lease allows. If none of that is possible, a washable paint patch or a free-standing tray is the realistic choice. Our guide to small kitchen ideas for older homes covers the quirks of such walls.
Caring for the covering while you live there
- Wipe splashes the same day. Use a soft cloth and a mild cleaner, and avoid harsh scrubbing that scratches the surface.
- Avoid steam bursts. Use the range hood or open a window when boiling, so the adhesive does not soften.
- Check the edges monthly. Press down any lifting corner at once and reseal the edge near the sink.
- Keep sprays off the seams. Spray the cloth, not the wall, so liquid does not run behind the covering.
- Watch for heat marks. If a section near the stove looks warped or discolored, take it down.
- Keep small parts away from children and pets. Offcuts and trim pieces can be a choking hazard, and cords or hanging cloth near a stove are a risk.
The move-out plan: removing it cleanly
The way you remove a temporary backsplash matters more than the way you put it up.
1. Gather your tools. A hair dryer on a low setting, a plastic scraper, a soft cloth and a mild adhesive remover that is safe for painted walls.
2. Warm the edge. Heat a corner gently for 20 to 30 seconds. Warmth softens the adhesive and lowers the chance of paint coming off.
3. Peel slowly at a low angle. Pull the sheet back along the wall, not outward, so the adhesive releases instead of tugging the paint.
4. Work in small sections. Warm, peel and repeat. Do not rush the last corner.
5. Clean the residue. Wipe leftover adhesive with a cloth and a small amount of a mild remover, then wash the wall with warm soapy water.
6. Compare with your photos. If anything has changed, discuss it with your landlord before you hand over the keys.
7. Dispose of materials properly. Check local rules for glass, metal and plastic.
If a patch of paint does lift, stop and tell your landlord rather than trying to fix it in secret. A small honest repair is usually easier to settle than a hidden one.
Common mistakes to avoid
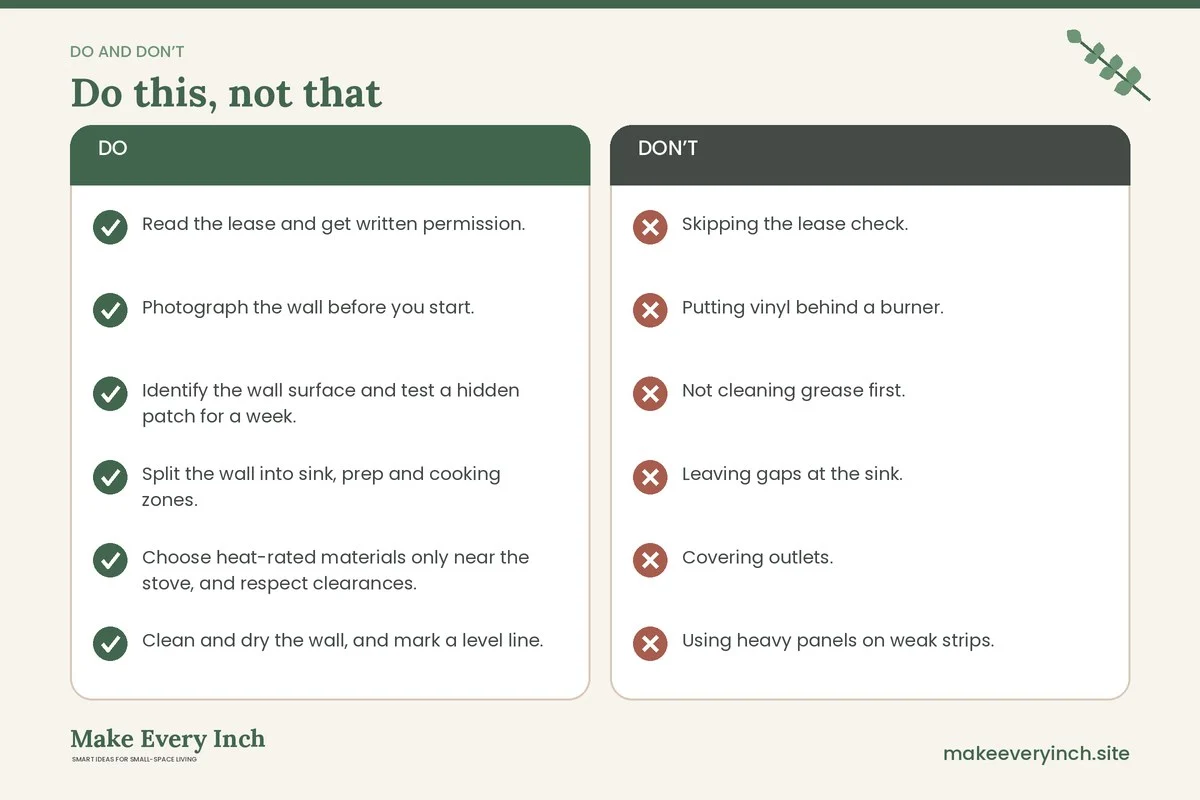
- Skipping the lease check. An unapproved change can cost more than the materials.
- Putting vinyl behind a burner. Heat is the one risk that is serious. Respect clearances.
- Not cleaning grease first. Adhesive will not hold on a greasy wall.
- Leaving gaps at the sink. Water behind the sheet loosens it and can lead to mold.
- Covering outlets. Always keep outlets accessible and cut around them.
- Using heavy panels on weak strips. Check the weight limit and use support if the panel is heavy.
- Rushing removal. Cold, fast peeling is the main cause of wall damage.
Quick checklist
- Read the lease and get written permission.
- Photograph the wall before you start.
- Identify the wall surface and test a hidden patch for a week.
- Split the wall into sink, prep and cooking zones.
- Choose heat-rated materials only near the stove, and respect clearances.
- Clean and dry the wall, and mark a level line.
- Seal the edge at the sink with removable caulk or a trim strip.
- Keep outlets accessible and covers uncovered.
- Ventilate while cooking.
- Plan your removal with a hair dryer and a plastic scraper.
- Take after photos on move-out.
FAQ
Can I put a temporary backsplash behind my stove?
Only with a material that is made for heat, and only at a distance that follows the stove manual and the product instructions. A metal sheet or tempered glass panel is the usual choice. Do not put vinyl or paper directly behind burners.
Will a peel-and-stick backsplash damage my walls?
It can, especially on fresh, matte, powdery or damaged paint. A one-week hidden patch test and slow, warm removal reduce the risk a great deal.
How long does a temporary backsplash last?
It depends on the wall, humidity, heat and cleaning habits. Many last for the length of a lease if the surface is clean and the edges are sealed, but results vary, so check the corners regularly.
Can I use a temporary backsplash over existing tile?
Often yes, if the grout lines are shallow. Deep grout may show through a thin sheet, so a thicker gel tile or a rigid panel can look better.
What is the best option if I cannot stick anything to the wall?
Use a freestanding tray, a rail hung from a tension rod, or a cloth panel on magnets. These keep the wall untouched and are easy to take with you.
Is it safe to cut around outlets?
Switch off the power at the breaker before you remove a cover plate, never cover the outlet, and ask a qualified person if you are unsure. Many people simply cut the sheet around the plate and leave it in place.
Keep going: Keep planning with our renter friendly kitchen storage ideas, removable wallpaper ideas and small kitchen makeover ideas.
Save this guide for later
Pin the ideas you like to Pinterest so you can come back to them when you plan your space.