Renter Friendly Kitchen Storage Ideas
Quick answer: The best renter friendly kitchen storage ideas work in layers: add shelves inside cabinets, hang rails from the cabinet doors and rod from the cabinet edges, stack on the counter, use a freestanding rack or cart where the floor allows, and keep anything that touches the wall on adhesive or tension hardware that the lease allows. Check the lease, photograph the kitchen first, keep weight modest and never use adhesive near a stove or sink.
Renter friendly kitchen storage ideas have one job: give you more places to put things without changing anything your landlord owns. A rental kitchen usually arrives with a fixed number of cabinets, a fixed number of drawers and a counter that was sized for a showroom rather than for a real person who owns a skillet and a rice cooker. You cannot add a cabinet, and you probably cannot drill into the tile. What you can do is use the space you already pay for more carefully. This guide covers storage only, from the lease check through the cabinet interior, the counter, the walls, the floor and the pantry. It includes a risk table, three example kitchens, a seasonal reset, a checklist and a FAQ. If you want upgrades that change how the kitchen looks, such as lighting, hardware and surfaces, read our separate guide to renter-friendly kitchen upgrades. For the wider approach to decorating a rental, see the hub guide on renter-friendly apartment decorating ideas.
Start with the lease and a condition record
Kitchens are the room where damage claims are most common, because grease, steam and heat all affect adhesives and finishes. Read the lease for anything about fixtures, hardware, adhesives, and alterations to cabinets and walls. If the wording is vague, ask the landlord or property manager in writing and keep the reply. A short message is enough. Describe what you plan to use, such as removable hooks, a tension rod or a freestanding rack, and ask whether that is acceptable.
Then document the kitchen before you touch anything. Take photos of every cabinet interior, the inside faces of the doors, the undersides of the upper cabinets, the backsplash, the counter edges and the floor. Include a date stamp if your phone allows it, and store the photos somewhere you can find them at move-out. Look closely at any existing damage, such as chipped laminate, peeling edges or old screw holes, and photograph those too. Existing marks that are recorded cannot be blamed on you later, and this one habit protects your deposit better than any product.
Finally, learn what the surfaces are. Painted wood, laminate, thermofoil, glossy melamine and ceramic tile all react differently to adhesive. Thermofoil can peel when it gets warm, and old paint can lift with the tape. Test any adhesive on the inside of a cabinet door or another hidden spot, leave it for several days and remove it slowly. If it takes any finish with it, choose a freestanding option for that surface.
The storage layers of a rental kitchen
It helps to think in layers rather than in products. Each layer has its own limits, and the best kitchens use every layer a little instead of overloading one.
- Inside the cabinet: shelf risers, stackable bins, turntables, and rails on the back of the door.
- Cabinet edges and undersides: tension or clip-on items, such as a cup hook rail on the underside of an upper cabinet, if the lease allows light adhesive.
- The counter: vertical stacking, trays, risers and a few well-chosen containers.
- The wall: adhesive rails and hooks on tile or sealed surfaces, or a tension pole between the counter and the ceiling.
- The floor: a rack, cart or narrow shelf that stands on its own.
- The gaps: the side of the fridge, the top of the cabinets, the back of the door and the space below the sink.
Work from the inside out. Fix the cabinet interiors first, because they cost the least risk and give the biggest gain. Then move to the counter. Add wall and floor items last, when you know what is still homeless.
22 renter friendly kitchen storage ideas
Inside the cabinets
1. Shelf risers for plates and bowls
Most cabinet shelves have too much vertical air between one shelf and the next. A freestanding riser lifts the back row of plates so you can see and reach every layer. Measure the interior height first, and leave at least one inch of clearance above the top item so you can lift it out.
2. Stackable bins for loose items
Bins turn a pile of packets and spice jars into labeled drawers that slide out. Pick open-front bins for shallow cabinets and handled bins for deep ones. A bin you can pull out whole is easier to manage than a stack you have to dig through.
3. A turntable for the corner or the pantry shelf
A turntable makes a deep corner reachable. Measure the diameter against the door opening, not only the interior, so the turntable passes through. Keep heavy jars near the center so the plate does not tip when it spins.
4. An over-the-door rack inside the cabinet
Hooks that hang over the inside of a cabinet door use the door thickness as the anchor. Before you buy, check that the door can still close with the rack on. Some doors have a lip or a thin gap, and a rack that is too thick will prevent the hinges from closing correctly or scrape the finish.
5. A rail on the back of the cabinet door
If the lease allows light adhesive on cabinet interiors, a small rail can hold spice jars, foil and wrap boxes, or lids. Keep the load low. Doors flex, and a heavy rail will make them sag on the hinges.
6. Pull-out baskets on the base shelf
A freestanding basket on a slide-friendly liner gives you a drawer in a cabinet that does not have one. Choose a basket with a low front edge, and avoid liners that grip the finish too tightly.
The sink cabinet and the awkward corners
7. A two-tier organizer around the pipes
The cabinet under the sink is full of pipes and dead space. A two-tier organizer with cutouts or a U-shaped shelf wraps around the plumbing and doubles the surface. Keep cleaning products off the lowest shelf if children or pets live with you, and never store anything that could leak directly on bare wood.
8. A tension rod for spray bottles
A tension rod across the cabinet interior lets spray bottles hang by their triggers. This frees the floor of the cabinet for tall items. Keep the weight light, so the rod does not slip, and check it every few weeks.
9. A drip tray beneath the sink
A shallow tray catches small leaks and keeps the cabinet floor clean. It also makes the sink area easier to wipe at move-out. Use a tray that sits flat without adhesive.
On the counter and above it
10. Vertical storage for pans and boards
Cutting boards, baking sheets and pan lids stand upright in a tall rack instead of stacking in a drawer. A rack that sits on the counter or inside a cabinet takes a few inches of width and frees a whole shelf.
11. A riser shelf for the counter edge
A two-level riser holds daily items, such as oil, salt and a few jars, above a tray. It also creates a visual zone that tells you where cooking begins. Keep it away from the stove and from heat sources.
12. A tray as a boundary
A shallow tray under the oil, salt and soap keeps spills and drips contained. A tray also makes the counter look tidier, even when the items on top are the same. For more ideas that organize the counter surface, see our guide to small kitchen counter organization.
13. Under-cabinet hooks for mugs, if permitted
Some leases allow small adhesive hooks under the upper cabinets. Use hooks rated well above the weight of a mug, clean the surface and let the adhesive set as the directions state. If the cabinet is laminate or thermofoil, test first. Skip this idea if the lease says no.
14. A paper-towel stand that sits on the counter
A stand with a weighted base replaces the wall-mounted holder and moves with you. It also keeps the roll off the wall, which means one less tile to protect.
On the walls without drilling
15. An adhesive rail on the backsplash
A rail with hooks holds ladles, a small whisk or a pot holder. Use it on a smooth, sealed surface only. Textured tile, grout lines and porous finishes do not hold adhesive well. Keep the rail well away from the stove, where heat and grease soften the bond.
16. A tension pole from counter to ceiling
A floor-to-ceiling tension pole with shelves or baskets works in a corner. Check the ceiling type first. A textured or popcorn ceiling can crumble, and some ceilings are not strong enough to hold the tension. Test the pole with only a light load, and never use it near a heat source. Because it presses on the ceiling, mention it to the landlord if the lease is strict.
17. A magnetic strip on a metal surface
A magnetic strip can hold knives and metal tools if you fix it to a metal side panel or the fridge with a method the lease allows. Do not hang a strip over a stove, and never place a sharp blade where a child or a guest can reach it. If you cannot stick the strip anywhere safe, use a knife block instead.
On the floor and in the gaps
18. A narrow rolling cart beside the fridge
A cart that is 6 to 10 inches wide slides into the gap between the fridge and the wall. It holds oils, cans and bags, and pulls out when you need it. Lock the wheels once it is in place. For a wider look at carts, see our guide to the best rolling kitchen carts.
19. A freestanding shelf or baker’s rack
A narrow rack or shelf stands on the floor and holds small appliances and bulk goods. Keep the rack out of the main walkway, which should stay at least 36 inches wide for one cook. Anchor a tall rack if it can tip, and see the safety section below.
20. The top of the fridge and the cabinets
The space above the cabinets suits items you use rarely, such as serving platters and holiday cookware. Keep the load light, and keep anything fragile out of reach. The space above the fridge needs ventilation, so do not block the vents or pack it tight.
21. A door-back rack on the pantry or broom closet
If you have a pantry door or a closet door in the kitchen, an over-the-door rack gives you another wall of storage. See our guide to small kitchen pantry ideas and, if you have no pantry at all, the guide to small kitchen ideas with no pantry.
22. A drawer divider system
Adjustable drawer dividers stop the utensil pile from mixing with the foil and the peeler. The dividers hold their place without adhesive. For a full plan, see our guide to small kitchen drawer organization ideas.
Risk and removal table
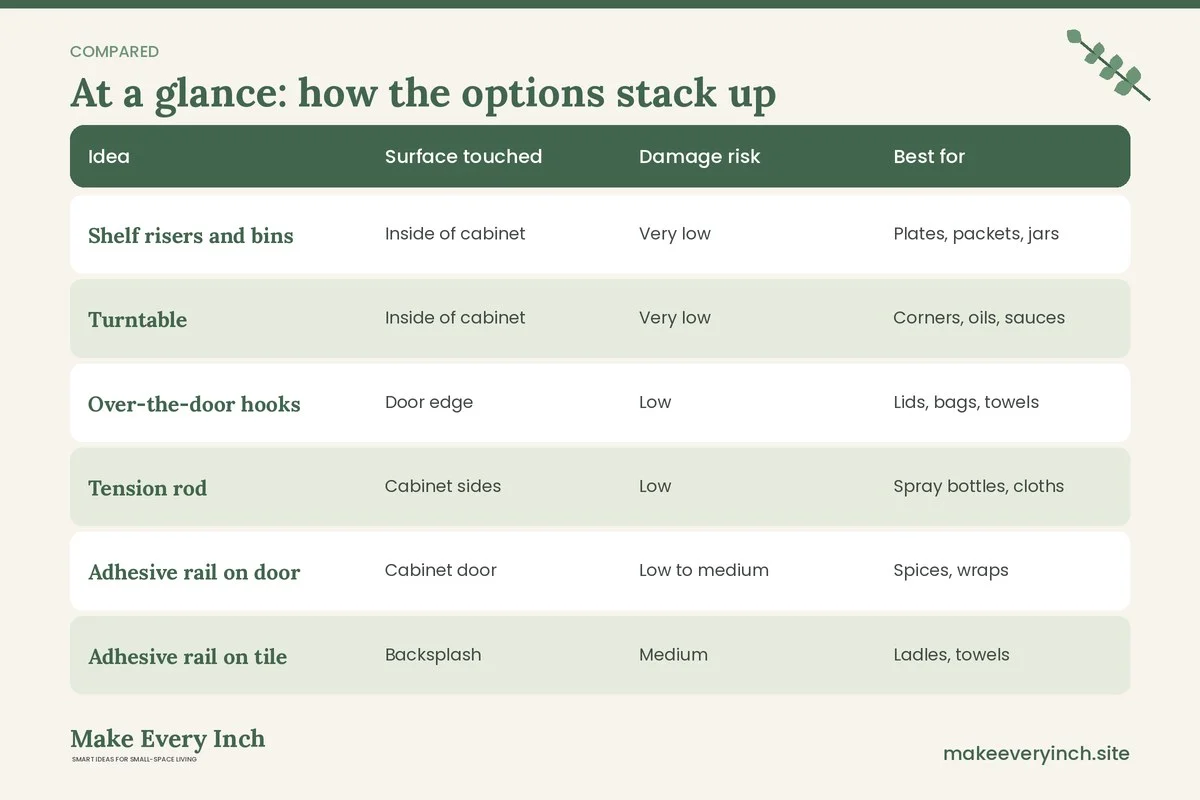
Not every idea carries the same risk to the finish, the deposit or your safety. Use this table to decide what to try first.
| Idea | Surface touched | Damage risk | Best for | Notes |
|---|---|---|---|---|
| Shelf risers and bins | Inside of cabinet | Very low | Plates, packets, jars | Nothing attaches to the cabinet |
| Turntable | Inside of cabinet | Very low | Corners, oils, sauces | Check door opening |
| Over-the-door hooks | Door edge | Low | Lids, bags, towels | Check the door closes fully |
| Tension rod | Cabinet sides | Low | Spray bottles, cloths | Light loads only |
| Adhesive rail on door | Cabinet door | Low to medium | Spices, wraps | Test on a hidden spot first |
| Adhesive rail on tile | Backsplash | Medium | Ladles, towels | Smooth, sealed surface only |
| Under-cabinet hooks | Cabinet underside | Medium | Mugs | Skip on laminate that peels |
| Tension pole | Floor and ceiling | Medium | Baskets in a corner | Check the ceiling type |
| Magnetic strip | Metal panel | Low to medium | Knives, tools | Keep out of children’s reach |
| Freestanding rack or cart | Floor only | Very low | Appliances, bulk goods | Anchor tall racks |
Three example kitchens
A galley kitchen of 7 by 10 feet
A galley kitchen has two walls and almost no floor, so keep the walkway clear. Put shelf risers and stackable bins in every cabinet first. Add a rail of hooks to the inside of a cabinet door for lids. Use a narrow cart in the gap beside the fridge, locked in place, and stand the cutting boards upright in a counter rack. Leave the floor otherwise empty. For layout questions in this shape, read our guide to galley kitchen ideas.
A studio kitchen along one wall
A studio kitchen sits on one wall of the main room, and everything you store is visible from the sofa. Choose closed storage first: bins in the cabinets and a basket with a lid on the counter. Use a freestanding shelf on the side wall, anchored if it is tall, for the items you cannot hide. Pick containers in one or two colors to keep the wall calm. Keep the counter nearly clear, so the kitchen looks like part of the room rather than a work zone.
A cramped older kitchen with few cabinets
An older rental may have only two or three base cabinets and no upper cabinets. Use a baker’s rack or a narrow shelf for pots and appliances, and an over-the-door rack on the pantry or closet. Use a tension rod under the sink for bottles. Rotate seasonal items into boxes under the bed or in a hall closet, and keep only daily items in the kitchen. See our guide to small kitchen ideas for older homes for the layout side of this problem.
Weight, heat and moisture limits
A kitchen is a hard place for adhesive and tension. Heat softens glue, steam collects on the tile, and grease creates a film that stops anything from sticking. Treat these as the main limits.
- Weight: follow the rating printed on the packaging, and use only a portion of it, because a rating assumes a clean surface and a straight pull.
- Heat: keep adhesive items well away from the stove, the oven and the toaster. Do not store plastics or paper close to a heat source.
- Moisture: avoid adhesive directly over the sink or a dishwasher vent, where steam is constant.
- Grease: wipe the surface with a degreasing cleaner and let it dry fully before applying anything.
- Cure time: most adhesives need time to set before they carry weight. Follow the instructions.
- Check regularly: look at everything once a month. If a rail has shifted or a corner has lifted, remove it before it falls.
Safety notes
A few kitchen rules matter more than any storage plan.
- Tall furniture: anchor tall racks and shelves to the wall only if the lease allows and you have written permission. If you cannot anchor, choose low, wide units with a stable base, and place heavier items at the bottom.
- Never drill without permission. Even a single screw into a stud or a cabinet counts as an alteration under many leases.
- Electrical: keep cords and plugs off wet surfaces and away from the sink. Do not run a cord through a cabinet door or under a rug. Do not overload an outlet or a power strip with appliances.
- Fire: keep paper, fabric and plastic containers away from the stove. Leave the space around the oven and the range hood clear.
- Chemicals: store cleaning products out of reach of children and pets, and never in the same bin as food. Do not mix products.
- Knives: store them where nobody can grab the blade by accident.
- Ventilation: keep the range hood and any fridge vents unblocked.
A seasonal reset
Storage fails slowly. Items drift, packets expire and bins fill up. A short reset four times a year keeps the system working.
- Take everything out of one cabinet at a time, wipe the shelf and put back only what you use.
- Check the dates on dry goods and spices, and recycle empty containers.
- Move seasonal tools, such as an ice cream maker or a roasting pan, to a labeled box in a closet or under the bed.
- Look at every adhesive item and tension rod. Replace any that have slipped.
- Review the counter. If something has been there for a month without being used, put it away.
For more on keeping a system tidy over time, see our guide to how to organize a small kitchen.
Mistakes to avoid
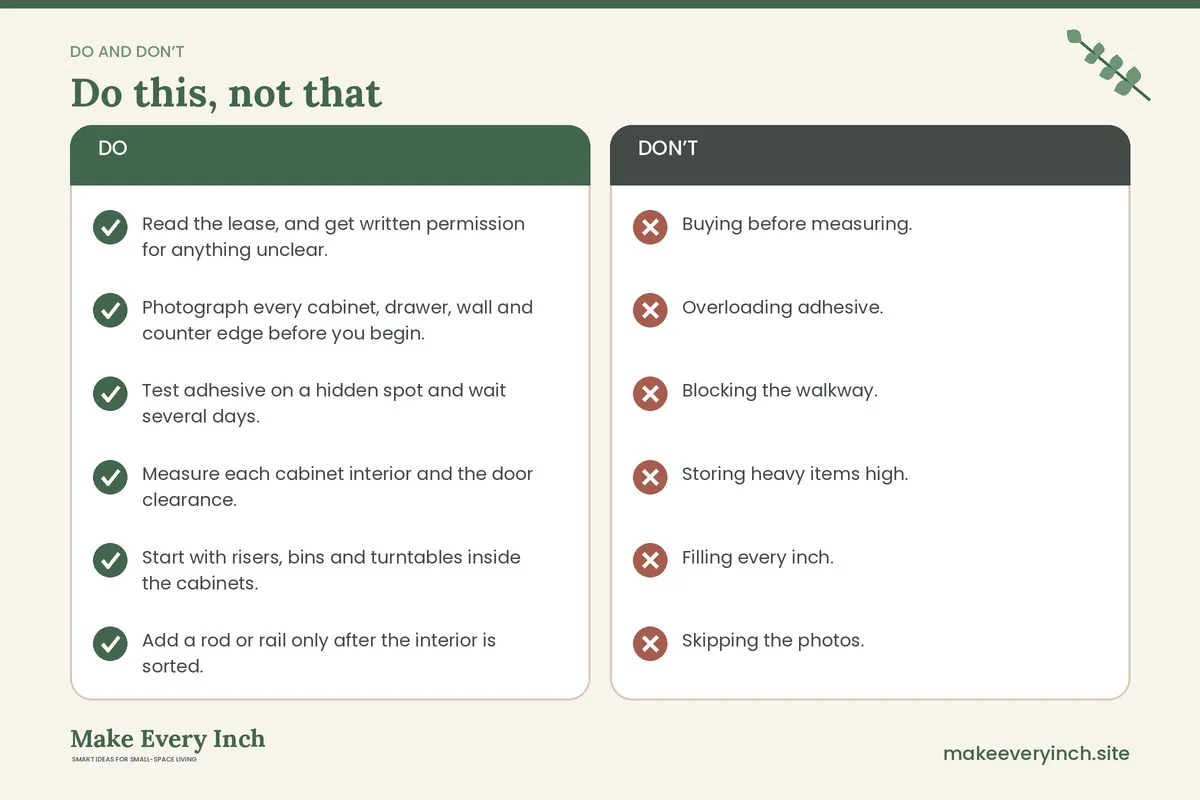
- Buying before measuring. Measure the interior height, width and depth of each cabinet, and the door clearance, before you buy any organizer.
- Overloading adhesive. A rated hook is not a shelf. Keep loads light and spread them out.
- Blocking the walkway. A cart or rack in a narrow kitchen that leaves less than 36 inches of floor becomes a hazard.
- Storing heavy items high. Put heavy pots at waist height or below, and light items above.
- Filling every inch. A cabinet packed to the door is hard to use and harder to clean. Leave a little air.
- Skipping the photos. Take them before you start and again at move-out.
- Ignoring the lease. A rule that bans adhesive hooks applies even to the ones sold as damage-free.
For a wider list of errors, see our guide to small kitchen storage mistakes to avoid.
Moving out without losing your deposit
When the lease ends, reverse the process slowly. Peel adhesive strips by stretching them parallel to the wall, which releases the bond. If a residue remains, warm it gently with a hair dryer and wipe it with a mild cleaner that is safe for the surface. Remove tension rods and poles, and look for scuffs on the ceiling and the cabinet sides. Wipe every shelf and drawer. Compare the kitchen to your original photos, and take a second set. If the landlord does a walkthrough, bring the first set of photos with you. Keep both sets until the deposit has been returned.
Renter’s kitchen storage checklist
- Read the lease, and get written permission for anything unclear.
- Photograph every cabinet, drawer, wall and counter edge before you begin.
- Test adhesive on a hidden spot and wait several days.
- Measure each cabinet interior and the door clearance.
- Start with risers, bins and turntables inside the cabinets.
- Add a rod or rail only after the interior is sorted.
- Keep adhesive away from the stove, the sink and steam.
- Keep the walkway at least 36 inches wide.
- Put heavy items low and light items high.
- Anchor tall furniture only with permission, otherwise choose low units.
- Keep cords, chemicals and blades out of danger.
- Reset the kitchen each season.
- Photograph the kitchen again before you move out.
FAQ
Can I add storage to a rental kitchen without drilling?
Yes. Shelf risers, bins, turntables, over-the-door racks, tension rods, freestanding racks and carts all work without a drill. Light adhesive hooks may be an option where the lease allows them. Always check the lease and ask permission first.
What is the safest way to store more in kitchen cabinets?
The safest way is to use items that attach to nothing: risers, bins, turntables and baskets. They put no force on the finish, and you can remove them in a minute. Test any adhesive on a hidden spot before you use it.
Will adhesive hooks damage cabinet doors?
They can on some finishes, such as thermofoil, old paint or peeling laminate. Test on the inside of a door and leave it for several days. Remove it slowly by stretching the strip along the surface. If anything lifts, switch to a freestanding option.
How much weight can I put on a tension rod?
Check the rating on the packaging, and use well below it. A rod holds light items, such as cloths and spray bottles, but not heavy pots. A rod in a wide span holds less than one in a narrow span.
Where do I store small appliances in a tiny rental kitchen?
Choose one appliance for the counter, and store the rest on a freestanding rack, on a low shelf in a closet or in a labeled box under the bed. See our guide to small kitchen appliances worth the space for help choosing.
How do I fix a kitchen with no pantry?
Dedicate one cabinet or one freestanding shelf to dry goods, use matching containers and keep a short list of what you have. Our guide to small kitchen ideas with no pantry, linked above, has more detail.
Keep going: Keep going with our guide to no-drill storage ideas for renters, the full list of small kitchen storage ideas and the sibling guide to renter-friendly bedroom storage ideas.
Save this guide for later
Pin the ideas you like to Pinterest so you can come back to them when you plan your space.