Studio Apartment Ideas on a Budget
Quick answer: The smartest studio apartment ideas on a budget follow a spend order: start with free changes (rearranging, decluttering, using what you own), then low-cost fixes for light, storage and zoning, then thrifted and DIY pieces, and only then buy new items you cannot find any other way. Measure first, define sleep, living and work zones, and spend the most on the thing you touch every day, usually the bed or the seat you use most.
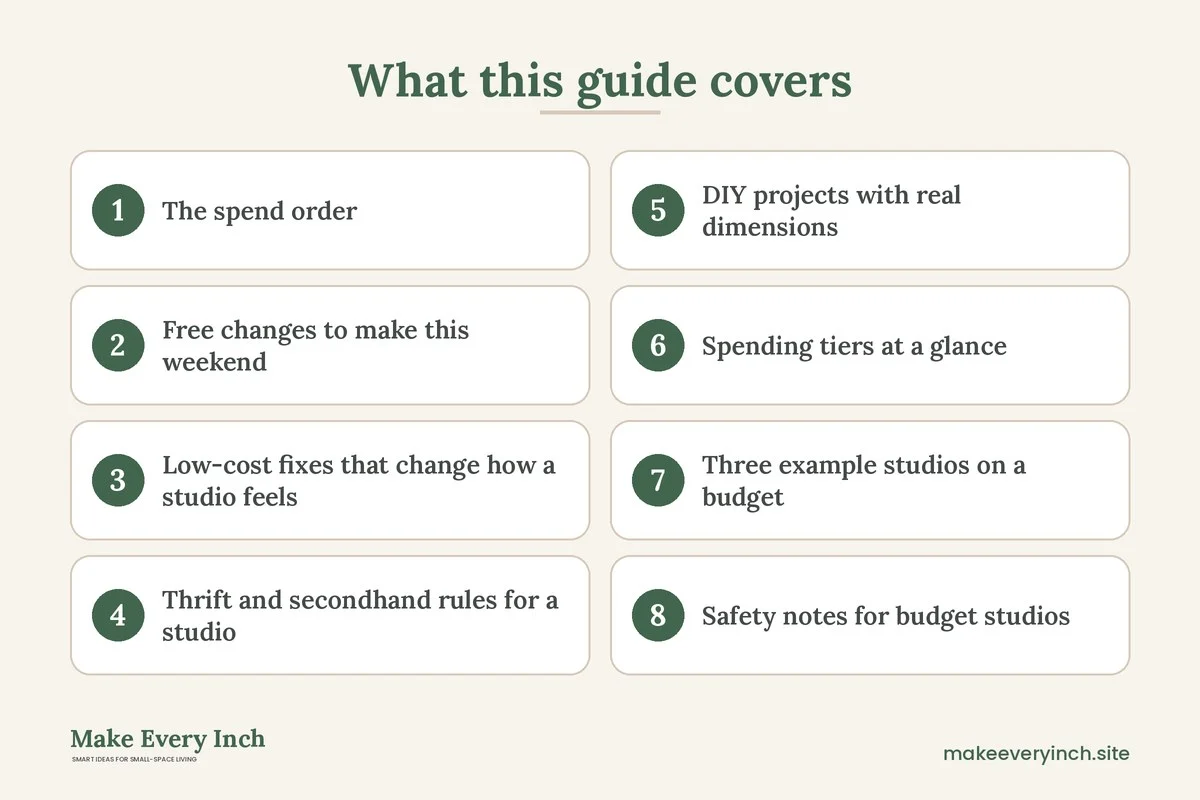
Studio apartment ideas on a budget work best when you treat money as the last tool you reach for, not the first. A studio is one room doing the work of four, so most problems come from layout and clutter rather than from missing furniture. This guide gives you a spend order you can follow step by step, a list of free changes to make this weekend, low-cost fixes that make the room feel bigger, thrift shopping rules, DIY projects with real dimensions, a tier table, three example studios, safety notes and a checklist. For the full overview, start with our main guide to studio apartment ideas, then pair this post with our broader budget small space ideas and the companion read on studio apartment ideas for renters.
The spend order: what to pay for first, and what to leave for last
The most common budget mistake in a studio is buying in the order you notice problems. The bare wall bothers you, so you buy art. The room feels dark, so you buy a lamp. The bed has no home, so you buy a headboard. Six small purchases later, the floor is still crowded and the layout still does not work. A spend order stops that drift by putting the cheap, high-impact steps first and the commitments last.
Step 1: Free changes (week one)
Before you open a shopping app, make every change that costs nothing. Empty the room of anything you do not use. Move the bed, the sofa and the table through at least two different layouts. Take the doors off a closet if the lease allows and the doors block the swing. Group like items in one place. Many studios feel 20 percent larger after this step alone, because the problem was never the square footage. It was the invisible clutter and the first layout you tried.
Step 2: Low-cost fixes for light, storage and zoning (weeks two to four)
Now spend small amounts on the things that change how the room works. These usually include better bulbs, a lamp or two, a curtain rod set high, a few hooks, a pair of bins, a rug to define the living zone and a cheap shelf unit. These items work together. A rug and a lamp turn a corner into a sitting area, and a shelf unit and a curtain turn another corner into a sleep area. Keep this tier in mind: each item should solve a named problem, such as “no place to put keys” or “the bed is visible from the door.”
Step 3: Thrift and secondhand (month two)
Once the zones are clear, you know exactly what furniture you need and what size it should be. That is the right moment to shop secondhand with a tape measure and a list. A list prevents the classic thrift mistake: bringing home a bargain that does not fit the plan. More on thrift rules below.
Step 4: DIY upgrades (month two to three)
Use DIY for pieces that are expensive to buy in the exact shape you need. A fabric-covered screen, a rail for pans, a bench with a lid, a headboard shelf or a floating-style desk made from a plank and sturdy brackets often costs far less than a ready-made version. Choose DIY projects that match your skill level and your lease, and read the safety notes before you build anything that bears weight.
Step 5: Buy new, last, and only the essentials
Buy new when the item touches your body every day or has a safety role: a mattress, a good chair, a smoke alarm, a surge-protected power strip, an anchored tall unit. These are the pieces where cutting corners costs more later. Everything else can wait. A studio that is working well at step 4 rarely needs much from step 5.
Free changes to make this weekend
These ideas need only time and a clear head. Do them in this order, because each one makes the next easier.
Edit before you arrange
Pull everything out of one area at a time, such as the closet, the kitchen drawers or the space under the bed. Sort into keep, give away, sell and discard. If you have not used an item in a year and it is not seasonal or sentimental, it probably does not belong in a studio. Every cubic foot you clear is a cubic foot you do not have to buy storage for.
Test three layouts on paper
Measure the room and draw it at a scale of one square per foot on graph paper or a free app. Cut out rectangles for the bed, sofa, table and shelf units. Try three layouts: bed along the longest wall, bed in a corner, and bed against the wall farthest from the entry. Keep a clear path of at least 30 to 36 inches from the entry to the main areas, and 24 inches on the sides of the bed where possible. Choose the layout that keeps the sleep area farthest from the door and the kitchen.
Move furniture off the walls that block light
Anything taller than a seated person’s eye level should stay away from the window wall. A tall shelf in front of a window makes the whole room feel dim. Put the low items on the window side and the taller ones on the opposite wall.
Use what you already own in new roles
A sturdy suitcase is a coffee table with storage. A stack of hardcover books on a tray becomes a nightstand. A ladder leaning against a wall is a blanket rack, and a dining chair can serve as a bedside table. Try this before you buy a single item.
Reset the vertical space
Most studios waste the top third of the room. Move items you rarely use to the top shelf and bring everyday items to between knee and shoulder height. Store out-of-season clothing in flat bins under the bed, and keep the bed clear of anything you will need daily.
Clear the windowsills and the floor
Open surfaces by the window and along the baseboards give the eye long unbroken lines, and the eye reads those lines as space. Keep only one or two objects on the sill. Put cords in a bundle with a clip so they do not trail across the floor. For more on that, see our post on renter-friendly ways to hide cords.
Low-cost fixes that change how a studio feels
These items usually cost little compared with furniture, and each one handles a specific problem. Prices vary by region and season, so check local listings before you plan.
Light: layers instead of one overhead fixture
A single ceiling light flattens a studio and makes it feel like a rented box. Aim for three layers: a task light at the desk or kitchen counter, a lamp near the sofa and a soft glow near the bed. Warm bulbs around 2700 kelvin feel calm, and a cooler bulb near a work area keeps you alert. Plug-in lamps and clip lights work with no wiring. Read our guide to renter-friendly lighting ideas for more options that avoid hardwiring.
Color: fewer colors, repeated
A studio looks calmer when the palette is limited. Choose a base of two or three colors and repeat them across the bedding, curtains, rug and cushions. Repetition ties the zones together so the room reads as one space instead of four. If you plan to paint, check your lease first, use low-VOC paint, and keep windows open while it dries so the room is well ventilated.
Curtains hung high and wide
Mount the rod a few inches below the ceiling and let it extend beyond the window frame by 6 to 10 inches on each side. The curtain pulls the eye upward and lets the glass show fully. Choose a light, simple fabric that lets daylight through. Our guide to renter-friendly window treatment ideas shows how to do this with tension rods and adhesive hooks.
A rug that defines the living zone
An area rug marks where the living zone starts and ends. A size around 5 by 8 feet suits many studios, with the front legs of the sofa on it. A rug needs a non-slip pad so it does not move or bunch. Without a rug, the sofa and table float and the whole room feels like a hallway.
Mirrors placed for light, not for decoration
A mirror opposite a window bounces daylight deeper into the room. Hang or lean one at a height where it reflects the sky or a bright wall, not the clutter by the door. A leaning floor mirror needs to be anchored or secured so it cannot tip, especially if there are children or pets.
Hooks, rails and bins
Removable adhesive hooks and over-the-door racks hold coats, bags and towels without drilling. Use clear labeled bins for the shelves, and let each bin hold one category. For more ideas, see our guide to cheap storage ideas for apartments.
Thrift and secondhand rules for a studio
Thrifting is where a studio budget stretches the furthest, but only if you have rules. The goal is to bring home useful, right-sized pieces, not good deals.
- Bring the tape measure and a written list. Include the maximum width, depth and height of each piece, and the width of your door and hallway.
- Check stability first. Wobbly legs, loose joints and uneven drawers are fixable only if you enjoy repair projects. If you do not, walk away.
- Test every drawer and door. They should open fully without sticking, and the runners should not grind.
- Smell the piece. Smoke, mildew and pet odors are very hard to remove from upholstery and unfinished wood. If you smell them in the shop, assume they will be in your studio.
- Inspect upholstery for pests. Look along seams, under cushions and at the underside of the frame. Skip any sofa or mattress that shows signs of bugs.
- Skip secondhand mattresses. Spend here, not there. A mattress touches you for about a third of your life.
- Choose solid wood and metal over thin particleboard. Solid pieces survive moves, and light pieces fall apart.
- Look for narrow depth. In a studio, a 12 to 16 inch deep shelf or console is far more useful than a deep one.
- Think of the finish as separate from the structure. A sound piece with a worn finish can be cleaned, sanded and refinished in a ventilated space.
- Be ready to walk away. If a piece breaks any of the rules above, it is not a bargain.
Where to look
Community listing apps, charity shops, estate sales, garage sales, moving-day giveaways and building notice boards all carry small furniture. Search in the weeks when many leases end, because people often sell furniture they cannot take with them. Check the listing photos for the scale of the room in the background, and ask for exact dimensions before you drive anywhere.
Which pieces suit thrift best
Solid wood side tables, stools, dining chairs, small desks, mirrors, trays, lamps, baskets, trunks and bookcases are usually safe thrift choices. Pieces that need specific sizing, such as a sofa, may take longer to find, so measure and be patient.
DIY projects with real dimensions
A studio benefits from custom-fit pieces, and DIY gets you close to custom at low cost. These projects suit beginners. Read the lease first, and never drill into walls without permission.
A fabric-covered folding screen
Hinge three wood panels, each about 16 to 18 inches wide and 60 to 66 inches tall, with strong hinges. Stretch fabric over each panel and staple it at the back. The finished screen is about 4 to 5 feet wide and can hide the bed or a clutter corner. It is light, folds flat and leaves no marks on the walls. Make sure it is stable enough not to tip, and keep it away from heaters and candles. For more ideas, take a look at our guide to DIY room divider ideas for studio apartments.
A bench with a lid for shoes and blankets
Build a box about 36 inches long, 14 inches deep and 18 inches tall from plywood, then hinge a lid with a safety support so it cannot slam on fingers. Add a cushion on top. The bench works as seating at the table, storage at the foot of the bed or a shoe station by the door.
A plank desk on a wall rail or a pair of trestles
A plank of 48 by 20 inches on two solid trestles or a pair of filing cabinets makes a desk. If you choose a wall-mounted version, only mount it after you have permission and have found studs. A freestanding setup is safer for a renter because nothing needs to be drilled, and a plank can be turned into a dining ledge at night.
A headboard shelf
Fix a shelf unit about 8 inches deep to the back of the bed frame, or use a narrow bookcase placed behind the head of the bed. It holds a lamp, a book and a glass of water, and it replaces two nightstands. Check that nothing heavy sits where it could fall onto the sleeper.
A rail for the kitchen wall
A tension rod or an adhesive-mounted rail can carry hooks for pans and utensils. Check the rated load and keep heavy items low. This frees the counter, which in a studio kitchen is its most precious surface. See our DIY storage ideas for small homes for more projects.
Painted or wrapped furniture
A tired dresser or table can look new with sanding, a primer and low-VOC paint. Work near an open window and let each coat dry fully before you add the next. For a no-paint option, peel-and-stick covering suits flat surfaces.
Spending tiers at a glance
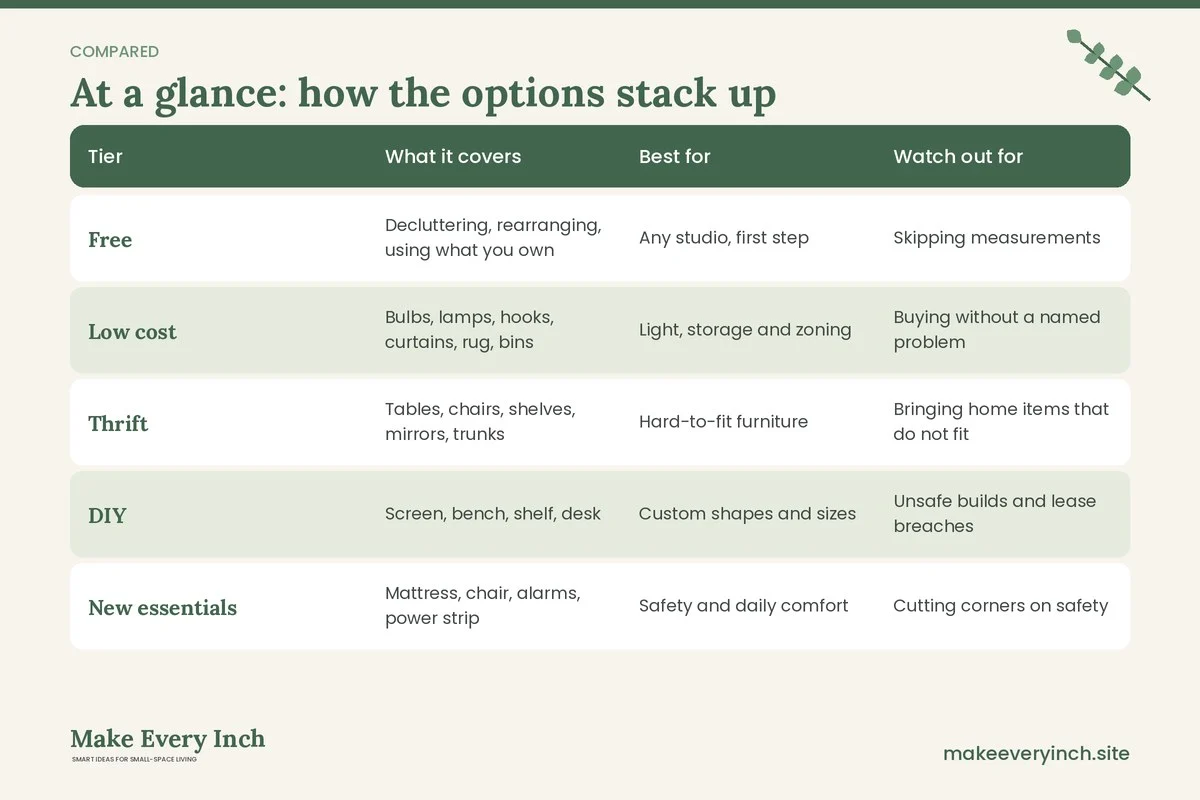
The table below compares four spending tiers and shows what each is best for. Costs depend on your region, so use the tiers as relative guides, not as quotes.
| Tier | What it covers | Best for | Watch out for |
|---|---|---|---|
| Free | Decluttering, rearranging, using what you own | Any studio, first step | Skipping measurements |
| Low cost | Bulbs, lamps, hooks, curtains, rug, bins | Light, storage and zoning | Buying without a named problem |
| Thrift | Tables, chairs, shelves, mirrors, trunks | Hard-to-fit furniture | Bringing home items that do not fit |
| DIY | Screen, bench, shelf, desk | Custom shapes and sizes | Unsafe builds and lease breaches |
| New essentials | Mattress, chair, alarms, power strip | Safety and daily comfort | Cutting corners on safety |
Three example studios on a budget
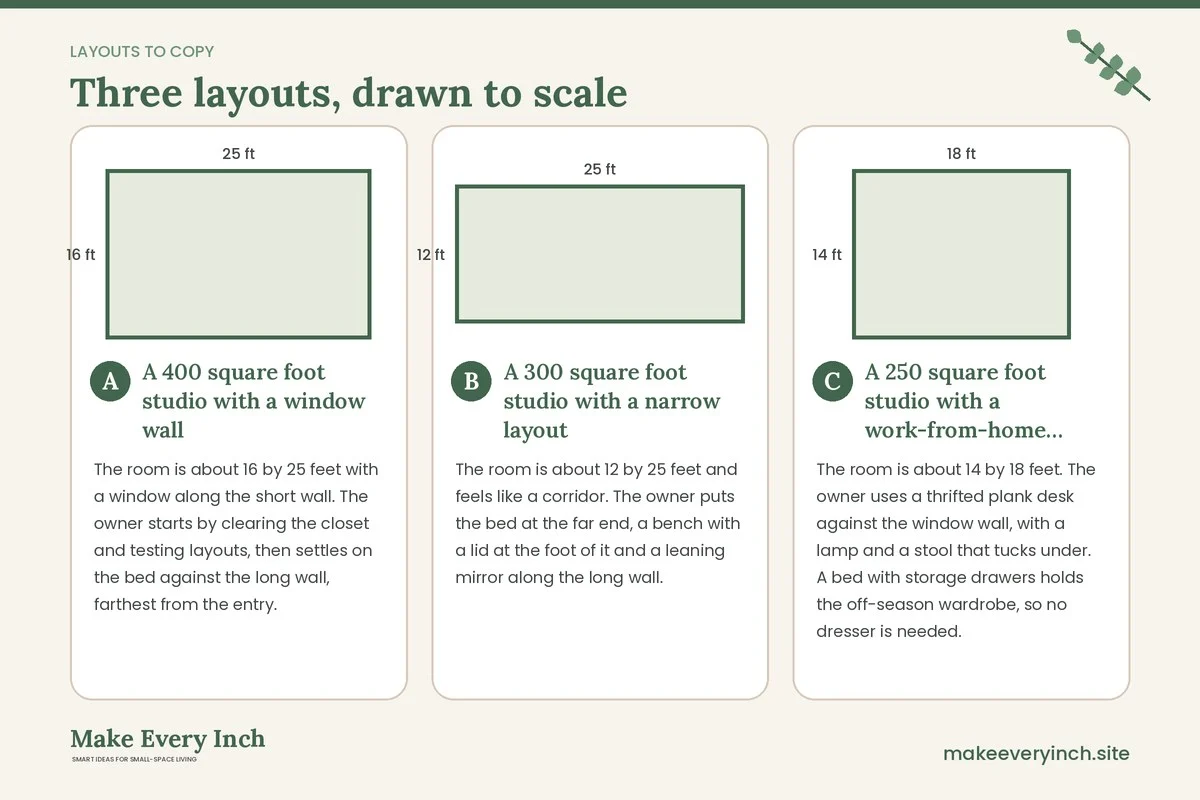
A 400 square foot studio with a window wall
The room is about 16 by 25 feet with a window along the short wall. The owner starts by clearing the closet and testing layouts, then settles on the bed against the long wall, farthest from the entry. A thrifted bookcase about 30 inches wide stands at the foot of the bed as a low divider, with the open side facing the living zone. A rug under the sofa marks the living area, and a plug-in lamp warms the corner. Total new spending goes to a mattress topper and a few bulbs, and the rest comes from existing and secondhand pieces.
A 300 square foot studio with a narrow layout
The room is about 12 by 25 feet and feels like a corridor. The owner puts the bed at the far end, a bench with a lid at the foot of it and a leaning mirror along the long wall. A fabric-covered screen made from three panels hides the sleep area when needed. A pair of tension-rod curtains hang from the ceiling line and run the full width of the window. The path from the entry to the window stays at 36 inches, so the room reads as one stretch.
A 250 square foot studio with a work-from-home corner
The room is about 14 by 18 feet. The owner uses a thrifted plank desk against the window wall, with a lamp and a stool that tucks under. A bed with storage drawers holds the off-season wardrobe, so no dresser is needed. A narrow shelf unit separates the desk from the bed and carries books and a plant. At the end of the day, the laptop goes into a basket and the desk becomes a dining spot. Compare the options in our guide to best beds with storage.
Safety notes for budget studios
Saving money should never mean saving on safety. A studio puts sleeping, cooking and electrical equipment very close together, so these points deserve attention.
- Keep exits clear. Whatever divider you use, do not block the path to the door or a window that serves as an emergency exit. Keep dividers short enough or light enough to move in seconds.
- Anchor tall furniture. Bookcases, wardrobes and tall shelves should be anchored to the wall with proper restraints. If you rent, ask permission first, and use anti-tip straps designed for the purpose. A lower piece is safer if you cannot anchor.
- Respect electrical limits. Do not daisy-chain power strips or overload an outlet. Use surge-protected strips rated for the load, keep cords out of walkways and never run a cord under a rug.
- Keep heat away from fabric. Screens, curtains and bedding should stay clear of heaters, stoves and candles.
- Ventilate when you paint or refinish. Use low-VOC products, open windows, and let items cure before you bring them into the sleeping zone.
- Never drill without permission. Check the lease for rules about holes, paint and fixtures. When in doubt, ask your landlord in writing, and use adhesive or freestanding options.
- Keep smoke alarms working. In a studio, a smoke alarm is not a place to save. Test it monthly.
Mistakes that waste a studio budget
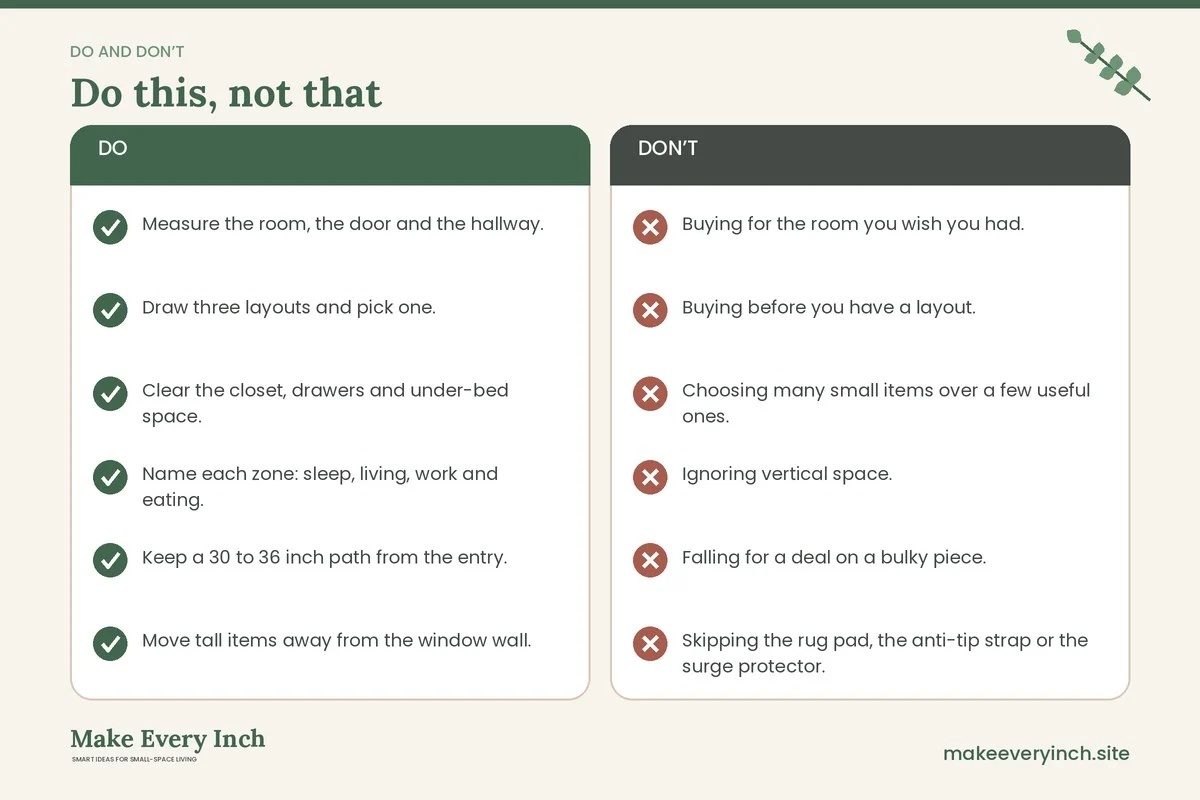
- Buying for the room you wish you had. Measure the real space and furnish that one.
- Buying before you have a layout. A purchase without a plan usually ends up in the wrong place.
- Choosing many small items over a few useful ones. Clutter of decor makes a small room look smaller.
- Ignoring vertical space. Wall height is free storage if you use it safely.
- Falling for a deal on a bulky piece. A cheap sofa that takes a third of the room costs more than it saves.
- Skipping the rug pad, the anti-tip strap or the surge protector. These small items protect the bigger ones.
- Leaving the sleep area open to the front door. A visual break matters, and a screen or shelf is enough.
A sample budget plan by month
Break the work into months so the spending feels light and the room improves at each step. This is a plan, not a price list, so adjust it to your situation.
- Month one: declutter, test layouts, rearrange, move furniture off the window wall and set up the path from the entry.
- Month two: add bulbs, one or two lamps, curtains, a rug and a few hooks. Start your thrift list.
- Month three: buy the thrifted pieces that match the list, and start one DIY project.
- Month four: finish the DIY project, add wall decor and plants, and review what still bothers you.
- Month five and beyond: buy new essentials only if a real need appears. Let the room settle before you add more.
Checklist
- Measure the room, the door and the hallway.
- Draw three layouts and pick one.
- Clear the closet, drawers and under-bed space.
- Name each zone: sleep, living, work and eating.
- Keep a 30 to 36 inch path from the entry.
- Move tall items away from the window wall.
- Add layered, warm lighting.
- Hang curtains high and wide.
- Place a rug under the living zone with a pad.
- Write a thrift list with sizes.
- Choose one DIY project to start.
- Check the lease before drilling or painting.
- Anchor tall furniture, or choose lower pieces.
- Test the smoke alarm.
FAQ
What should I buy first for a budget studio?
Buy nothing first. Declutter and rearrange, then add lighting and a rug. If you must buy one item, choose the one you use every day, such as a mattress or a comfortable seat.
How do I make a studio feel bigger without spending much?
Clear the floor, keep furniture low near the window, hang curtains high, add a mirror opposite the light and repeat a limited palette. Keep a clear path from the entry.
How can I divide a studio cheaply?
A bookcase, a fabric-covered screen or a curtain on a ceiling-mounted or tension rod can separate zones. Keep exits clear and anchor anything tall. For more ideas, read our guide to renter-friendly ways to divide a studio apartment.
Is thrifting furniture safe for a small apartment?
It can be, if you inspect for pests, odors and stability. Skip secondhand mattresses and upholstered pieces with any sign of infestation.
What are the best DIY projects for a studio?
A folding screen, a lidded bench, a plank desk and a headboard shelf are good starts. Choose projects that match your skills, and avoid drilling without permission.
How much should I plan to spend?
That depends on your region, your starting furniture and your goals. Use the spend order, set a limit for each step and pause between steps to see what the room still needs.
Keep going: Keep planning with our small space organization ideas, small apartment living room ideas for studios and budget renter upgrades.
Save this guide for later
Pin the ideas you like to Pinterest so you can come back to them when you plan your space.