Renter Friendly Cabinet Organization Ideas for Kitchens and Baths
Quick answer: Renter Friendly cabinet organization means adding shelves, bins, racks and liners that sit inside the cabinet without screws or permanent glue. Measure the inside width, depth and height first, group items by how often you use them, keep heavy things low, and store chemicals out of reach of children and pets.
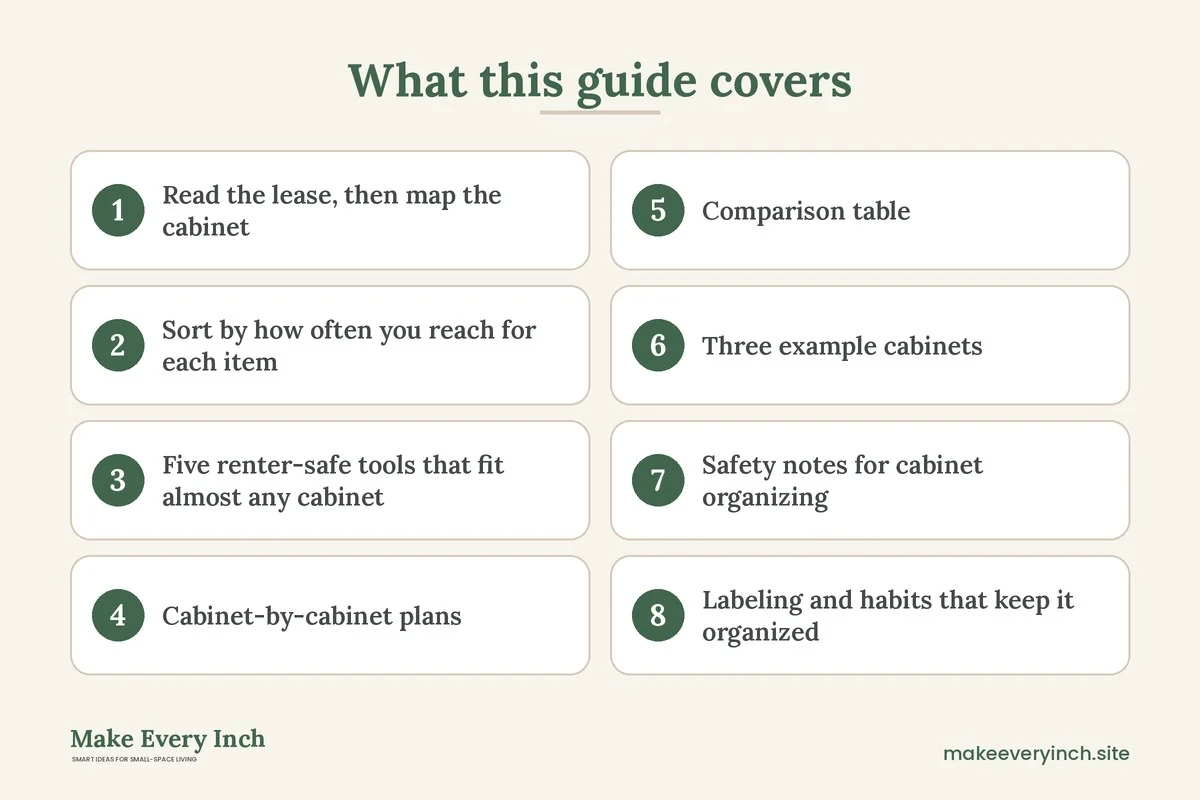
Renter Friendly cabinet organization starts with a different question from the one most guides ask. Instead of asking what to buy, ask what the cabinet can hold, how the door and hinges limit you and what you can put in that will leave no mark when you move out. Rental cabinets are often shallow, oddly sized and fixed in place, and the lease may forbid drilling, painting or gluing. The good news is that most of the gain comes from adding height and sliding access, and both can be done with freestanding parts. This guide covers how to measure a cabinet, the five tools that fit nearly any rental, a cabinet-by-cabinet plan for kitchen, bath and bedroom storage, a comparison table, three example cabinets, safety notes and a checklist. For the wider topic, see our main guide to renter-friendly apartment decorating ideas, the practical post on organization ideas for renters and the kitchen-focused guide to small kitchen cabinet organization ideas.
Read the lease, then map the cabinet
Before you add anything, read the lease and any move-in checklist. Look for rules about adhesive, screws, shelf liners and changes to fixtures. Some landlords allow removable liners and bins but ban screws, and others allow small holes that you repair at move-out. When in doubt, ask in writing. Photograph the inside of each cabinet before you start, since the pictures protect your deposit and show what the cabinet looked like on day one.
Then map the cabinet. A cabinet is a box with a door, and four measurements decide what fits. Write them on a card and keep it in your phone.
- Inside width: measure at the narrowest point, which is often at the door frame or the face frame, not the back. A face frame can reduce the opening by an inch or more on each side.
- Inside depth: measure from the door frame to the back wall. Base cabinets are often 20 to 24 inches deep, upper cabinets often 12 to 14 inches and bathroom vanities frequently 16 to 21 inches.
- Inside height: measure to the underside of any fixed shelf, and to the top. Upper cabinets commonly have a clear height of 30 inches or more, split across one to three shelves.
- Door clearance: open the door fully and check what the hinge, the door-mounted pull or the door itself hits. Hinges on some cabinets stick out and block wide organizers.
Also note what is already in the cabinet that cannot move. Pipes, a drain, a water shutoff valve and a power outlet inside the cabinet restrict what can sit where. Keep a clear path to any shutoff valve, because in an emergency you need to reach it fast.
Sort by how often you reach for each item
The best organizer cannot fix a cabinet that holds the wrong things. Pull everything out of one cabinet at a time, wipe it and sort into four groups.
- Daily: items you reach for every day, such as plates, mugs, a cooking oil, a favorite pan or a hair dryer. These belong at hand height, between about 30 and 60 inches from the floor.
- Weekly: items for regular but not constant use, such as a mixing bowl, a rice cooker, spare towels or cleaning sprays. These can sit lower or higher.
- Seasonal: holiday dishes, a slow cooker you use in winter or beach towels. Send these to the top shelf or to another room.
- Out: broken lids, chipped plates, expired items and duplicates. Donate or recycle them. Our guide to decluttering rules for small homes gives simple rules for deciding.
This step often frees 20 to 30 percent of a cabinet before you add a single organizer. Keep heavy items low. A stack of cast iron on an upper shelf is a risk if a shelf fails or the door swings open. The top shelf should hold light things, like paper goods or spare baskets.
Five renter-safe tools that fit almost any cabinet
You do not need a long shopping list. Five types of organizer solve most problems, and each can be removed without a trace.
1. Stackable shelves and risers
A small shelf riser doubles the usable height of a deep shelf. Put a riser at the back, and the stack behind it becomes visible. Choose a riser with a stable base and check its weight rating before you load it with plates. In an upper cabinet, a single-tier riser holds mugs in two rows. For taller gaps, a two-tier unit adds a shelf where you had one. Make sure the unit is at least half an inch shorter than the gap, so it slides in and out.
2. Pull-out bins and drawers that sit on the shelf
A bin on a runner glides forward so you can reach the back. Look for freestanding versions that need no screws, and which sit on the shelf with a non-slip base. These work best in base cabinets, where depth is the problem. Keep the weight modest, since the shelf under it must carry the load of the bin and its contents.
3. Door-hung racks
An over-the-door rack hooks over the top edge of the door and holds spices, foil, bags or cleaning tools. Check that the door can still close, since the rack adds depth, and the shelves inside may now hit it. Measure the clearance between the door and the first shelf. Leave at least an inch of space. A rack that is too thick cracks the door or blocks the shelf.
4. Tension rods and wire dividers
A tension rod across the cabinet holds spray bottles by their necks or hangs cleaning cloths. A second rod, set vertically, holds baking sheets and cutting boards on edge. Test the rod by pulling down firmly, and choose a diameter and length suited to the width. Rods can slip in cabinets with a smooth finish, so wipe the surface and consider a thin non-slip strip at each end.
5. Non-adhesive liners
A grippy, non-adhesive liner keeps bins from sliding and protects the shelf. Cut it to the shelf size, lay it flat and trim the corners. A liner also catches spills and crumbs, and you can lift it out for washing. Avoid adhesive-backed liners in a rental unless the lease allows them, since they can pull off paint or finish and leave a sticky residue.
Cabinet-by-cabinet plans
Each cabinet has a different job. Use the plan below that matches the cabinet you want to fix.
Upper kitchen cabinets: use the vertical gap
Upper cabinets are shallow, usually 12 to 14 inches, and high, so only the front row is easy to reach. Put the items you use daily at the front of the shelf and at eye level. Add a riser so mugs and glasses sit in two rows. Use a cup hook rack only if it is a type that clips on the shelf, and not one that screws in. Store the lightest items on the top shelf and keep anything you need to hold with both hands off the highest shelf.
A common mistake is to buy a tall organizer that leaves no room to reach in. Leave at least 2 inches between the top of the organizer and the shelf above, so you can lift items out without scraping the knuckles.
Base cabinets: use the depth
A base cabinet is deep and low, so the back disappears. Use a sliding bin or a lazy tray to bring things forward. Put pots and pans in a vertical rack, with the lids on the door or in a lid holder. A sliding organizer should be sized to the width, with room for the door to close. Put heavy cookware in the lowest position and group it by use, such as frying pans together and sauce pans together.
The corner cabinet: reach the dead zone
Corners are hard because the opening is smaller than the inside. A lazy susan that sits on the shelf turns the dead corner into a usable one. Choose a turntable with a lip, so bottles do not slide off. Keep light, frequently used items on the turntable and heavy or rarely used ones in the front.
Under the sink: manage plumbing and moisture
The under-sink cabinet is the trickiest because of pipes, a drain and often a garbage disposal. Use a two-tier organizer that straddles the plumbing, and a small caddy for sprays. Keep a clear path to the shutoff valves. A liner that catches drips is useful, and so is a quick check for leaks every month. Do not block the access panel to a disposal, and do not store anything on the pipes. If the cabinet is damp, run a small tray to catch moisture and wipe it often.
Child and pet safety matters most here. Cleaning products and detergents should be in a locked or latched cabinet, or on a high shelf, not under the sink if small children live with you. A child-safety latch that attaches without screws is available for some doors, and you should check the lease before using adhesive on the cabinet face.
Bathroom vanity: separate wet from dry
A vanity is damp and busy. Use stackable bins to separate towels, toiletries and cleaning supplies. Put a shallow tray under the sink basin if there is space, and use waterproof liners. A small caddy keeps a hair tool in one place. Do not store a plugged-in hair tool in or near the sink, and never place electrical items where they can fall into water. In a bathroom, outlets near a sink should have a GFCI, which trips if there is a fault. If your bathroom has no GFCI outlet, report it to your landlord. For more ideas, read our guide to small bathroom organization ideas.
Bedroom and closet-style cabinets: fold and file
A bedroom cabinet is usually a dresser, a wardrobe or a nightstand. Use dividers to file folded clothes upright, so you see everything at a glance. A tension rod makes a second hanging level for short items. For more on this, read renter-friendly bedroom storage ideas.
Pantry cabinet: a plan for dry goods
A tall pantry cabinet should be split into zones: baking, breakfast, cans, snacks and backup. Decant only what makes sense, and keep original labels for any food that needs an expiry date or allergy information. Use clear bins with handles and a label on the front. For more, read small kitchen pantry ideas.
Comparison table: which tool for which cabinet
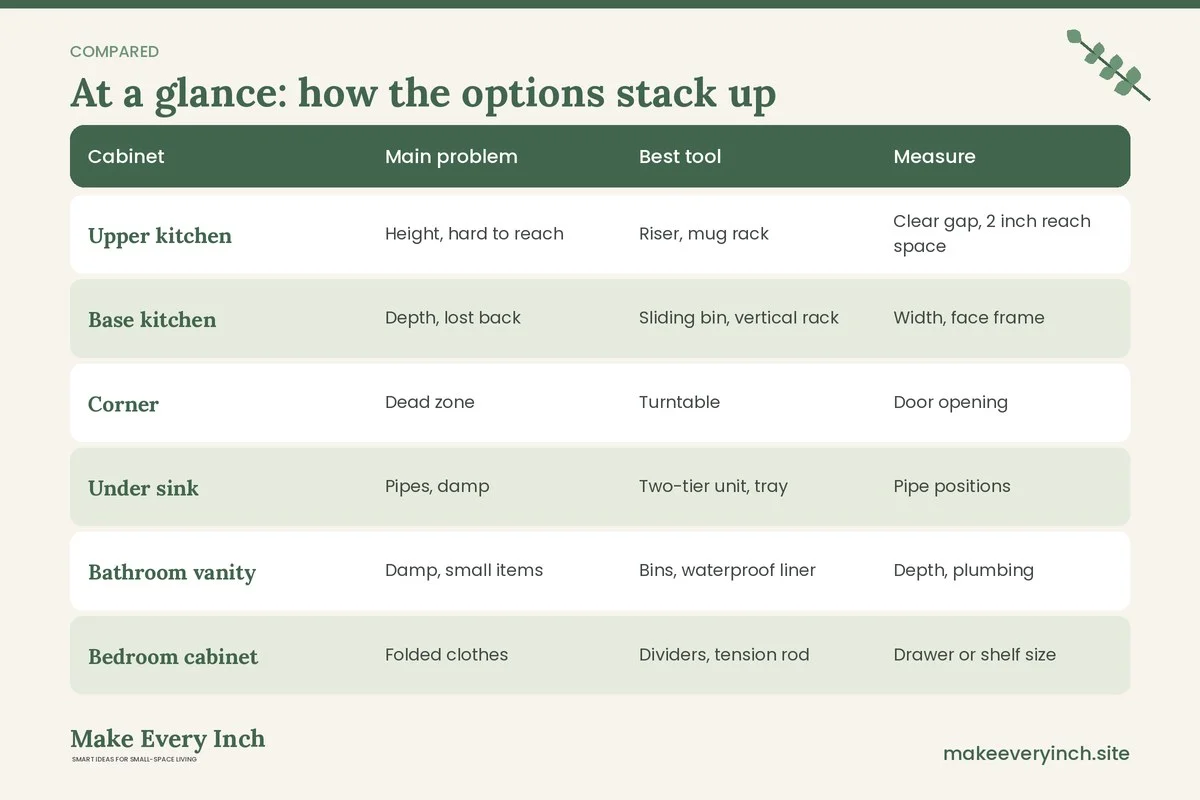
The table below pairs each cabinet type with the tools that suit it. Always measure first.
| Cabinet | Main problem | Best tool | Measure | Caution |
|---|---|---|---|---|
| Upper kitchen | Height, hard to reach | Riser, mug rack | Clear gap, 2 inch reach space | Keep heavy items low |
| Base kitchen | Depth, lost back | Sliding bin, vertical rack | Width, face frame | Weight on shelf |
| Corner | Dead zone | Turntable | Door opening | Spills, tip risk |
| Under sink | Pipes, damp | Two-tier unit, tray | Pipe positions | Shutoff access, child safety |
| Bathroom vanity | Damp, small items | Bins, waterproof liner | Depth, plumbing | No cords near water |
| Bedroom cabinet | Folded clothes | Dividers, tension rod | Drawer or shelf size | Anchor tall units |
| Pantry | Expiry, mess | Clear bins, labels | Shelf depth | Pests, spills |
| Appliance cabinet | Cords, heat | Shelf, cable clip | Outlet and ventilation | Heat, airflow |
Three example cabinets
These are example plans with typical sizes. Replace the numbers with your own.
A 24-inch base cabinet with pots and pans
Before. A base cabinet, 24 inches wide and 22 inches deep, holds a heap of pots, pans and lids. The back is hard to reach, and the lids slide around.
Plan. Remove everything and wipe the cabinet. Place a non-adhesive liner on the floor of the cabinet. Install a freestanding vertical rack on the left to hold two baking sheets and a cutting board on edge. On the right, place a sliding bin that holds the three pans you use most. Put the stockpot and lid at the back. Hang the lids on an over-the-door rack, or stand them in a small caddy.
After. The three daily pans are at the front, the stockpot is at the back and the door still closes, because the rack and the bin leave an inch of clearance. Nothing was drilled or glued.
A 30-inch upper cabinet with dishes
Before. An upper cabinet 30 inches wide and 12 inches deep has two shelves, 14 inches apart. Plates are stacked in tall piles that wobble, and glasses stand in a single line at the front.
Plan. Add a single-tier riser on the lower shelf for plates, so the plates stand in two rows. Put mugs on a half-width riser at the left of the upper shelf. Store glasses in a row at the front and put party glasses behind them. Keep a 2-inch gap above each organizer. Move the heavy serving dish to a lower cabinet.
After. The daily plates and glasses are in front at eye level, and the heavier dishes are low. The top shelf holds light paper goods.
An 18-inch bathroom vanity under the sink
Before. A small vanity holds towels, spare toilet paper, cleaning spray and a basket of toiletries in a stack. The pipe takes up the center.
Plan. Use a two-tier organizer that straddles the pipe, with a caddy on the lower level for cleaning products and a basket on the upper level for toiletries. Place a waterproof liner beneath and a tray at the front to catch drips. Roll the towels and store them in a bin on top of the toilet tank or on a shelf. Add a child-safety latch with the landlord’s permission, or move cleaning products to a high shelf.
After. Everything has a position, the pipe is clear and the shutoff valve is within reach. For related bathroom storage, see renter-friendly bathroom ideas.
Safety notes for cabinet organizing
Cabinets hold more risk than they appear to, and a renter should add safety steps to the plan.
- Respect weight limits. Every shelf, riser and rack has a maximum load. Spread heavy items across more than one organizer, and keep the heaviest items on the lowest shelf. Cabinet shelves in some rentals are thin and bow under weight.
- Protect children and pets. Cleaning products, laundry pods, medicines and sharp tools should be stored where children and pets cannot reach them. Use a latch or a high shelf. Keep these items in their original containers, with labels intact.
- Keep chemicals apart. Do not store bleach and ammonia-based cleaners together. Keep sprays upright in a caddy and do not decant them into unlabeled bottles.
- Keep ventilation clear. Never block vents in an appliance cabinet. Heat from a toaster oven, a rice cooker or a fridge needs space to escape. Leave the gap that the appliance manual recommends.
- Avoid cords in damp places. In a bathroom or under a sink, do not keep plugged-in tools or extension cords. Use outlets with a GFCI near water. Report any outlet that looks damaged or loose to your landlord.
- Keep the water shutoff clear. Never wall off the valve under a sink. You need quick access if there is a leak.
- Anchor tall units. A tall cabinet, wardrobe or bookcase that is taller than it is deep should be anchored to the wall, with permission in a rental. Otherwise, choose a lower unit.
- Never drill without permission. If you need screws, ask in writing and photograph the result. Otherwise, use adhesive-free solutions.
- Use low-VOC products. If you freshen up the inside of a cabinet with paint, choose a low-VOC paint, ventilate the room and let it dry fully before loading it. Check the lease before painting.
- Watch the adhesive. If the lease allows adhesive hooks, check their weight rating, apply them to clean, dry surfaces and avoid using them in places that get steam.
Labeling and habits that keep it organized
A tidy cabinet slips back into chaos unless people know where things go. Add a label to the front edge of each bin, using a removable label or a strip of paper tape. Choose names that anyone can understand, such as “baking”, “snacks” or “spare towels”. Keep a rule that each bin is only as large as the group it holds. Once a month, take two minutes to open each cabinet, remove anything out of place and wipe spills. Once a season, review the seasonal group and rotate it. A short checking routine keeps a rental cabinet orderly for years. For more on lasting systems, see small home organization that actually lasts.
How to move the system when your lease ends
One of the best things about renter friendly organizers is that they move. Before you pack, take a photo of each cabinet, then lift out the organizers and liners. Wipe the cabinet and check for marks. Compare the cabinet with your move-in photos, and fix any small marks with a damp cloth. Pack the organizers in a box with the dimensions written on the lid, so you can check them against the next cabinet. Choose adjustable pieces, such as an expandable riser or a tension rod, because the next cabinet will not be the same size.
Mistakes to avoid
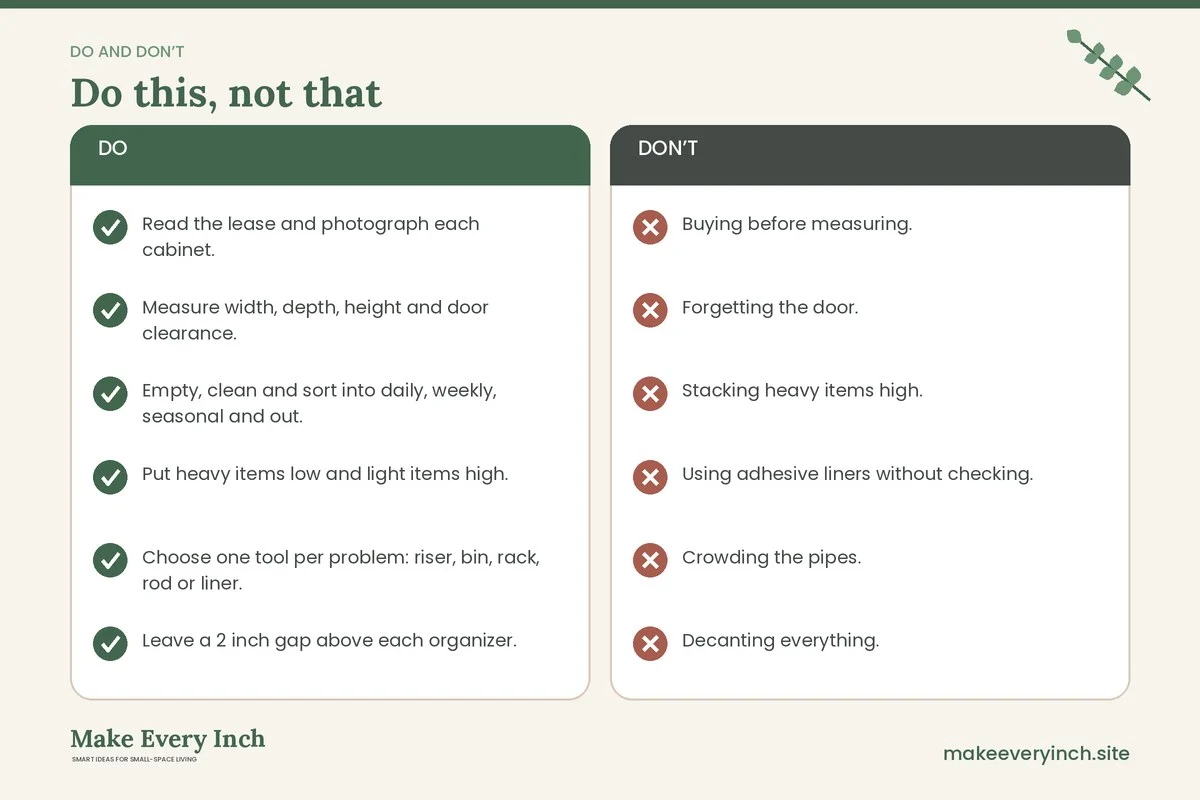
- Buying before measuring. The most common mistake. Measure the narrowest part of the opening.
- Forgetting the door. A rack that blocks the door leaves a cabinet you cannot close.
- Stacking heavy items high. Heavy things on upper shelves are a hazard.
- Using adhesive liners without checking. They can damage finishes.
- Crowding the pipes. Keep room for access and ventilation.
- Decanting everything. Transferring food can lose expiry information, so keep labels.
- Skipping the declutter. Organizers cannot fix an overfull cabinet.
Checklist
- Read the lease and photograph each cabinet.
- Measure width, depth, height and door clearance.
- Empty, clean and sort into daily, weekly, seasonal and out.
- Put heavy items low and light items high.
- Choose one tool per problem: riser, bin, rack, rod or liner.
- Leave a 2 inch gap above each organizer.
- Keep shutoff valves and vents clear.
- Store chemicals, medicines and sharp tools out of reach of children and pets.
- Anchor tall units, and ask before drilling.
- Label bins and plan a monthly two-minute check.
- Photograph the cabinet again before you move out.
FAQ
What is the easiest renter friendly cabinet organization upgrade?
A set of risers and a non-slip liner. They need no tools, add visible shelf space and come out cleanly.
Can I add shelves to a rental cabinet without drilling?
Yes. Freestanding shelves, risers and stackable units sit on the existing shelf. Always check the load rating and leave room for the door.
How do I organize a cabinet with pipes?
Use a two-tier organizer that straddles the pipes, keep the shutoff valves clear and add a tray to catch drips. Check for leaks regularly and tell the landlord about any problem.
Are adhesive hooks safe inside cabinets?
They can be, on clean, dry, smooth surfaces and within their weight rating. Avoid steamy areas, and check the lease and the finish first.
How do I make a tiny cabinet hold more?
Edit first, then add height with a riser, use the door with a slim rack and group like items in bins. Our guide to renter-friendly kitchen storage ideas has more ways to gain room.
How can I child-proof a cabinet in a rental?
Use removable latches if the lease allows them, or store hazards on a high shelf. Keep all products in their original containers.
Keep going: Keep building your system with no-drill storage ideas for renters, small kitchen drawer organization ideas and renter-friendly kitchen upgrades.
Save this guide for later
Pin the ideas you like to Pinterest so you can come back to them when you plan your space.