Small Kitchen Ideas with No Pantry: 15 Places to Put Your Food
Quick answer: The best small kitchen ideas with no pantry split your food into zones and give each zone a real home: one cabinet for daily dry goods, a shelf or cart for bulk and backups, a door or wall rack for spices and small packets, and a cool, dark spot elsewhere for oils and bulk staples. Decant only what you open often, keep a 14-day working supply in the kitchen and store the rest where space is cheaper.
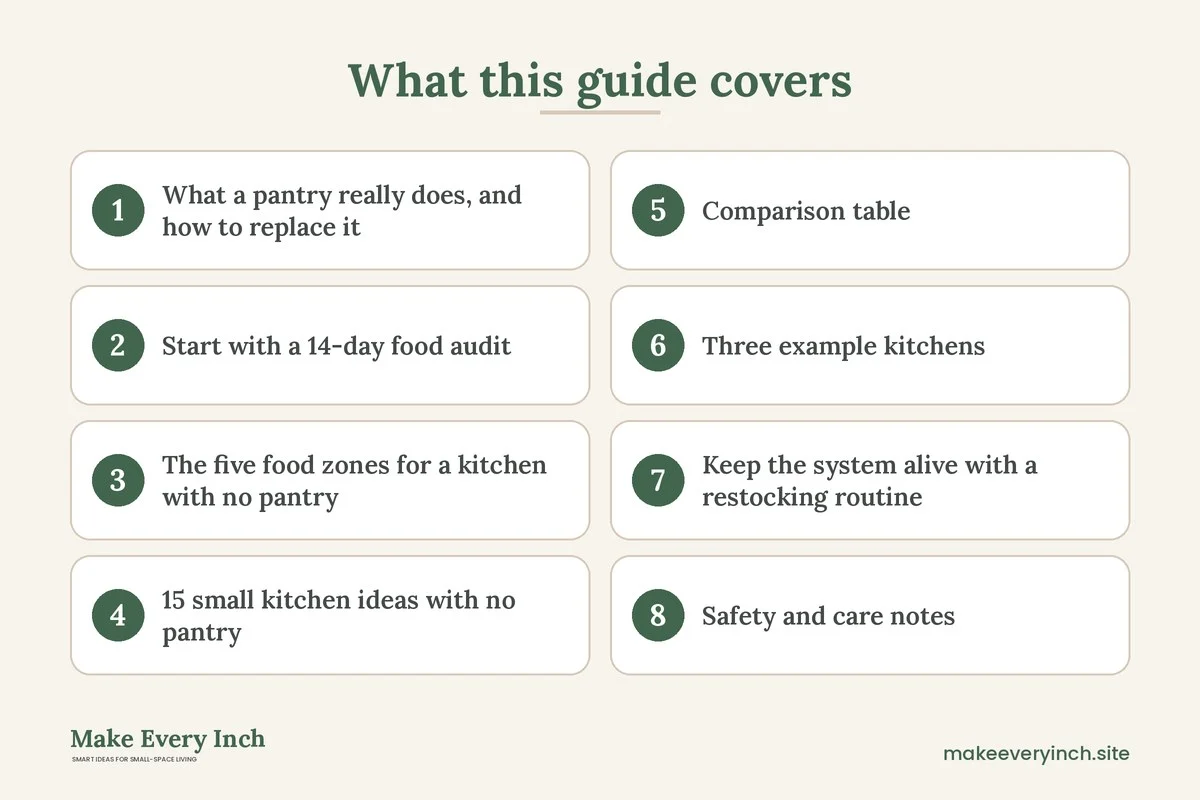
Small kitchen ideas with no pantry usually start with the same moment of frustration. You come home with groceries, open the cabinets and realize there is no obvious place for the pasta, the cereal, the canned tomatoes or the bag of flour. In a kitchen with a dedicated pantry, food has a place by default. Without one, it ends up on the counter, on top of the fridge or in a pile in the corner. This guide treats the missing pantry as a design problem you can solve with zones, measurements and a few habits. It covers how to audit what you really store, how to divide a cabinet into food zones, 15 specific ideas, a comparison table, three example kitchens, a restocking routine, safety notes and a checklist. If you want the full-size version of the topic, start with our main guide to small kitchen ideas. This post is different from our guide to small kitchen pantry ideas, which helps you improve a pantry you already have, because here we assume you have no pantry at all and must create the function from other parts of the room.
What a pantry really does, and how to replace it
A pantry is not just a closet. It does four jobs, and once you see them separately, you can replace each one without building anything.
- It holds the working supply. These are the things you reach for every day, such as cereal, rice, pasta, coffee, tea and snacks.
- It holds the backup supply. These are extra cans, a second bag of flour, spare jars and the bulk items you bought on sale.
- It keeps food cool, dry and dark. Heat, light and humidity shorten the life of oils, flour, nuts and spices.
- It keeps food visible. A good pantry lets you see what you have, so you do not buy a fourth jar of paprika.
A kitchen with no pantry can do all four jobs if you assign each one to a different place. The working supply goes in the most convenient cabinet. The backup supply goes in a shelf, a cart or a spot outside the kitchen. Cool, dark storage goes in the cabinet furthest from the stove and the dishwasher. Visibility comes from clear containers, labels and a rule that nothing hides behind anything else. Think of it as a distributed pantry rather than a single room.
Start with a 14-day food audit
Before you buy a single bin, measure what you have. A guess based on a good kitchen in a magazine will lead you to buy containers that do not fit. A short audit takes about 30 minutes and saves money.
Step 1: Empty and sort
Take every dry or shelf-stable item out of the cabinets, drawers and any boxes in the corner. Put them on a table or the floor and sort them into groups: grains and pasta, baking supplies, canned goods, breakfast foods, snacks, oils and sauces, drinks, spices, and everything else. Check dates and throw away what is expired or stale. Most people discover duplicates at this step.
Step 2: Count and measure
For each group, count the items and measure the tallest one. Note the cans and jars that are taller than 7 inches, because they decide shelf height. Note the cereal boxes, which are usually 11 to 13 inches tall and 2 to 3 inches deep. This number is the most important one in the whole project, because cabinet shelves are often set at a spacing that wastes vertical space around tall boxes.
Step 3: Split by speed
Mark each group as a daily, weekly or backup item. Daily items are what you use at least four times a week. Weekly items are things like baking supplies and canned beans. Backup items are anything you keep in reserve. Daily items go at eye level, weekly items go one shelf above or below and backup items go in the least convenient spot you have.
Step 4: Measure your cabinets
Measure the inside width, depth and height of each cabinet, and the clear height between shelves. Write the numbers down. A standard upper cabinet is often 12 inches deep and 30 to 42 inches tall, and a standard base cabinet is often 24 inches deep. Your numbers may differ, so do not rely on these as facts for your kitchen. Count how many fixed shelf holes you have, so you know whether the shelves can move.
The five food zones for a kitchen with no pantry
Once you know what you have, give each group a zone. Zones are better than a single area, because they follow how you cook and where the heat and moisture are.
Zone 1: The daily cabinet
Choose the cabinet closest to where you prep food and nearest to the stove. This is your daily cabinet. Keep one row of grains, one row of pasta, one row of canned tomatoes and beans, the cooking oils you use every day and the salt and pepper you use all the time. Do not put anything here that you use less than once a week.
Zone 2: The breakfast and snack cabinet
Cereals, oats, coffee, tea and snacks belong near the kettle and the coffee machine, not near the stove. A cabinet above the kettle works if it is not above a heat source. Put a tray or a shallow bin on the shelf for snack packets, so a child or a partner can pull out the whole tray and put it back.
Zone 3: The baking and backup zone
Flour, sugar, baking powder, cocoa and bulk items live in a less convenient spot. A top shelf, a high cabinet, a cart in a corner or a closet in another room works. Check the weight, because a 5-pound bag of flour and a few jars add up fast, so keep heavy items low and light items high.
Zone 4: The cool, dark zone
Oils, nuts, whole grain flours, seeds and some spices last longer when stored away from heat and light. The cabinet next to the stove or above the oven is the worst spot. The best choices are a lower cabinet on the opposite side of the room from the stove, a shelf in a closet or a drawer in a cool part of the home.
Zone 5: The spice and small-packet zone
Spices, seasoning packets, gravy mixes and small sachets are the items that disappear in a deep cabinet. Give them a door rack, a wall rail or a shallow drawer, so every item is visible at once. A separate zone prevents small things from burying the large ones.
15 small kitchen ideas with no pantry
Idea group 1: Make the cabinets work harder
1. Add shelf risers inside the cabinet
A wire riser or a small stepped shelf doubles the usable surface inside a tall cabinet. Cans on the lower level and jars on the upper level become visible at once. Measure the clear height first, and leave about 1 inch above the tallest item so you can lift things out without tilting them.
2. Use turntables in corner cabinets
A corner cabinet is the place where food goes to be forgotten. A turntable brings the back items to the front with a single spin. Pick a size that leaves about half an inch of clearance around the edge, so jars do not catch on the cabinet frame. Keep sauces, oils and bottles here, since they are the items least likely to topple.
3. Store like with like in clear bins
Clear bins with handles work as pull-out drawers on a shelf. Label one bin for pasta, one for baking, one for snacks and one for packets. When you need the baking supplies, you pull one bin out and see everything at once. Choose bins that are about 2 inches narrower than the shelf depth, so you can reach around them.
4. Turn a base cabinet into a drawer system
If you have a deep lower cabinet, slide-out drawers or sturdy bins on rails turn it into a pull-out pantry. Check whether your lease or your landlord allows installing hardware inside the cabinet. If drilling is a problem, use freestanding, tension-based or stackable bins that slide on a shelf and need no screws.
5. Add an under-shelf basket
A hanging basket clips on to the underside of a shelf and adds a new level for bags of snacks, bread rolls or packets. It uses the dead air between two shelves. Make sure the shelf can hold the added weight, and do not exceed the maker’s rating.
Idea group 2: Add storage you can move
6. A slim rolling cart beside the fridge
A narrow cart, about 6 to 9 inches wide, fits into the gap between the fridge and the wall or counter. It holds cans, jars and bottles on three or four tiers, and rolls out for loading. It is one of the most common ways to replace a pantry in a small kitchen, and we compare options in our guide to the best rolling kitchen carts. Choose one with locking wheels and a lip on each shelf.
7. A cart that doubles as a prep surface
A wider cart, about 15 to 20 inches deep, provides a wooden top for chopping and shelves beneath for flour, grains and oils. This works as both pantry and extra counter. For layouts and ideas, see our post on small kitchen cart ideas.
8. A freestanding shelving unit in a nearby corner
If your kitchen opens into a dining area, a narrow bookcase or a shelving unit works as a pantry cabinet. Fix it to the wall with the anti-tip hardware that came with it, because a loaded shelf can tip. If you rent, ask before drilling, or choose a heavy, low unit with a wide base. Our guide to renter-friendly shelving shows ideas that work without damage.
9. A bakers rack or a metal shelf near the entry
A metal rack with four or five tiers can hold a week’s groceries. Use baskets on the lower tiers for heavy items and place the lighter packets above. The open shelves invite clutter, so use bins or labels to keep it neat.
Idea group 3: Use doors and walls
10. A rack on the back of a cabinet door
A door rack holds spices, packets and small cans. Check that the door can hold the weight and that the rack clears the shelves inside. Measure the depth of the shelf and subtract the depth of the rack, plus 1/2 inch so the door closes fully. Over-the-door racks that hook on the top edge need no screws, which suits renters, although they can scratch the paint, so add a thin felt pad.
11. A wall rail with small shelves
A rail with hooks and small shelves holds spice jars, small bottles and a few packets. Mount it between the counter and the upper cabinet, or beside the stove if the space is not too hot. If your lease does not allow drilling, use a rail that hangs on a tension pole or sticks on with removable adhesive and a weight limit well above the load. See our post on no-drill storage ideas for renters.
12. Use the side of the fridge
Magnetic spice tins or a narrow magnetic shelf on the side of a fridge (if it is steel) take advantage of an unused surface. Keep these light and use tins that are sealed.
Idea group 4: Look beyond the kitchen
13. A backup shelf in a hall closet
Bulk items, paper goods and extra cans can live in a hall closet or a bedroom closet. Label a bin “kitchen backup” and refill the kitchen from it once a week. This approach frees up the kitchen for daily items and costs very little. For more ideas about closets, see our guide to hidden storage ideas.
14. Under-bed or under-sofa storage for sealed goods
A flat, lidded bin under a bed can hold unopened cans and bottled drinks, as long as the room is cool and dry. Avoid anything that spoils at room temperature, and avoid rooms that get hot in summer. More options are in our guide to under-bed storage ideas.
15. Decant only the items you open often
Pour cereal, rice, pasta and flour into airtight containers when you open the package. Stackable, square containers use space better than round ones. Keep the original box or cut out the cooking instructions and the best-before date and tape them to the container. Do not decant rarely used items, since the effort and the containers cost more than they save.
Comparison table: where each food belongs
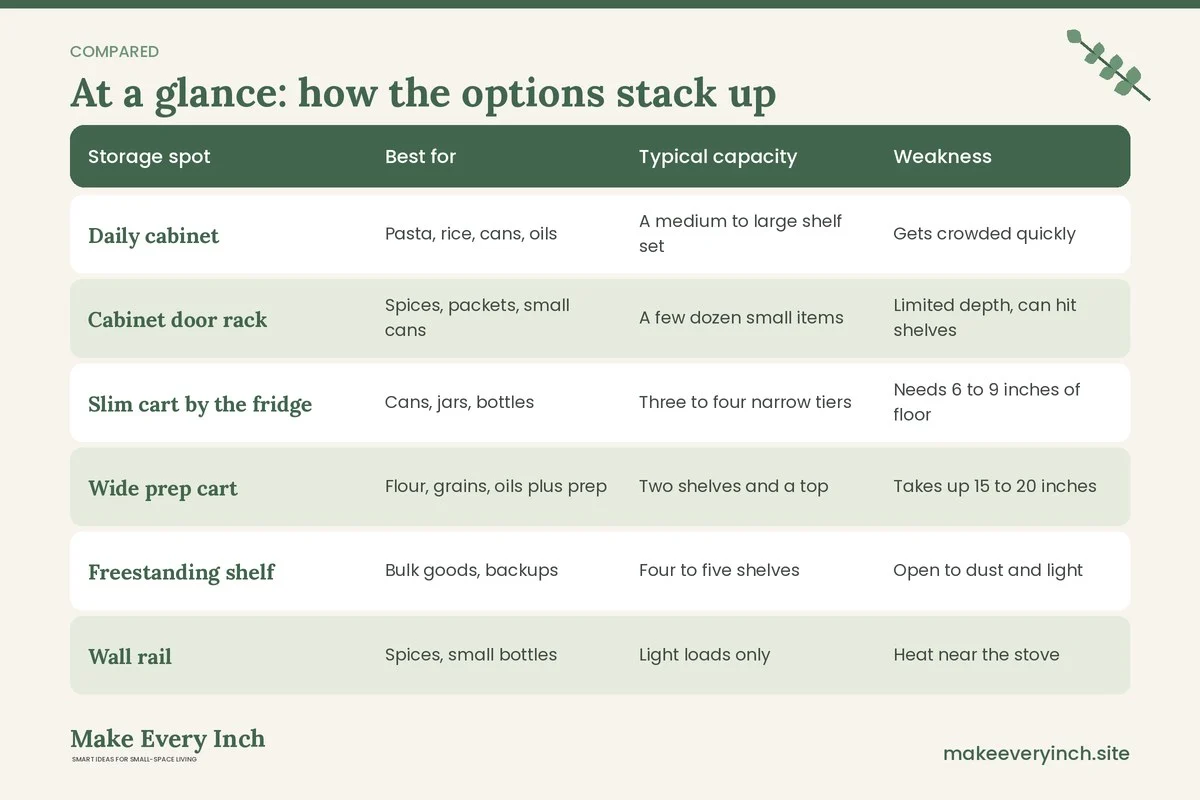
The table below compares the main storage choices for a kitchen with no pantry, so you can match each type of food to the best home.
| Storage spot | Best for | Typical capacity | Weakness | Safety or care note |
|---|---|---|---|---|
| Daily cabinet | Pasta, rice, cans, oils | A medium to large shelf set | Gets crowded quickly | Keep heavy items on lower shelves |
| Cabinet door rack | Spices, packets, small cans | A few dozen small items | Limited depth, can hit shelves | Check clearance before buying |
| Slim cart by the fridge | Cans, jars, bottles | Three to four narrow tiers | Needs 6 to 9 inches of floor | Lock the wheels, avoid tall bottles on top |
| Wide prep cart | Flour, grains, oils plus prep | Two shelves and a top | Takes up 15 to 20 inches | Keep away from the stove heat |
| Freestanding shelf | Bulk goods, backups | Four to five shelves | Open to dust and light | Anchor to the wall |
| Wall rail | Spices, small bottles | Light loads only | Heat near the stove | Stay within the weight rating |
| Hall closet bin | Backup stock, paper goods | A bin or two | Away from the kitchen | Keep dry and away from pests |
| Under-bed lidded bin | Sealed cans, drinks | A few flat bins | Hard to reach | Cool and dry rooms only |
Three example kitchens
A galley kitchen of 8 by 10 feet with eight cabinets
A galley kitchen has two walls of cabinets and a narrow walkway. Here the daily cabinet is the one above the counter nearest the stove, the breakfast cabinet sits above the kettle and the cool zone is the lowest cabinet on the far wall. A slim cart, 8 inches wide, fills the gap at the end of the run and takes the cans and bottles. A rack on the back of the door beside the fridge holds spices and packets. The backup stock goes in a bin in the hall closet. The walkway stays at 36 inches, which is comfortable for one cook. For more on this layout, see our guide to galley kitchen ideas.
A studio apartment kitchen along one wall
A studio kitchen has a single run of cabinets, often 6 to 8 feet long, with few upper cabinets. In this case the missing pantry is the main problem. Use one upper cabinet for daily dry goods, a shelf above the fridge for backups (and use a bin so nothing slides off), and a freestanding shelf at the end of the run as a cool zone. A bakers rack by the entrance holds the weekly groceries in baskets. Decant only cereal, rice and pasta. If you rent, the anchoring and the drill rules matter here, so ask before you fix anything. Our small apartment kitchen ideas guide has more studio plans.
An L-shaped kitchen with a blind corner
An L-shaped kitchen often has a dead corner. Install a turntable in the corner cabinet for oils and sauces. Put a pull-out bin system in the base cabinet next to it for baking and snacks. A narrow cart sits at the open end of the L and takes the bulk goods. A wall rail above the stove side holds the spices, away from direct heat. Backup stock lives in a lidded bin in the closet. The result is that every food group has a home and nothing hides in the corner.
Keep the system alive with a restocking routine
Storage systems fail when habits fail. A simple routine keeps a pantry-free kitchen working.
- The unpack rule: when you bring groceries home, place new items behind older ones, and move the older ones forward. This is called first in, first out.
- The weekly 10-minute check: once a week, look at each zone and note what is low. Write a list. Avoid buying more than a zone can hold.
- The monthly sweep: once a month, check dates, wipe shelves and move the backup bin to the front if it has been forgotten.
- The one-in, one-out rule: a new product enters a zone only when an old one leaves. This prevents the slow growth that fills every cabinet.
- The label habit: use a label with the purchase date on bulk goods. A label is one of the cheapest ways to reduce waste.
Safety and care notes
A kitchen without a pantry often means storing food in places that were designed for something else, so a few safety points matter.
- Anchor tall furniture. A freestanding shelf or a tall rack loaded with food can tip, especially if a child pulls on it. Use the anti-tip hardware that comes with the unit, and ask your landlord before you drill into the wall.
- Mind the weight. Cans and jars are heavy. A shelf that looks sturdy may have a low rating. Keep heavy items low and follow the maker’s limit.
- Keep heat and steam away. Do not store flour, oils, spices or chocolate above the stove, above the oven or beside the dishwasher vent, because heat shortens their life.
- Protect from pests. Use sealed containers for flour, grains and sugar, and wipe shelves regularly. Check stored goods in a closet for signs of pests, and throw away anything that is open or damaged.
- Do not overload a door. A door rack adds weight to the hinges. Keep it light and watch for sagging.
- Check electrical items. If a cart sits near an outlet, do not run cords across the walkway, and keep appliances such as a toaster away from paper goods.
- Never drill without permission. In a rental, ask your landlord before fixing anything to a wall or a cabinet. Use freestanding, tension-based or adhesive options with a safe weight rating otherwise.
Common mistakes in a kitchen with no pantry
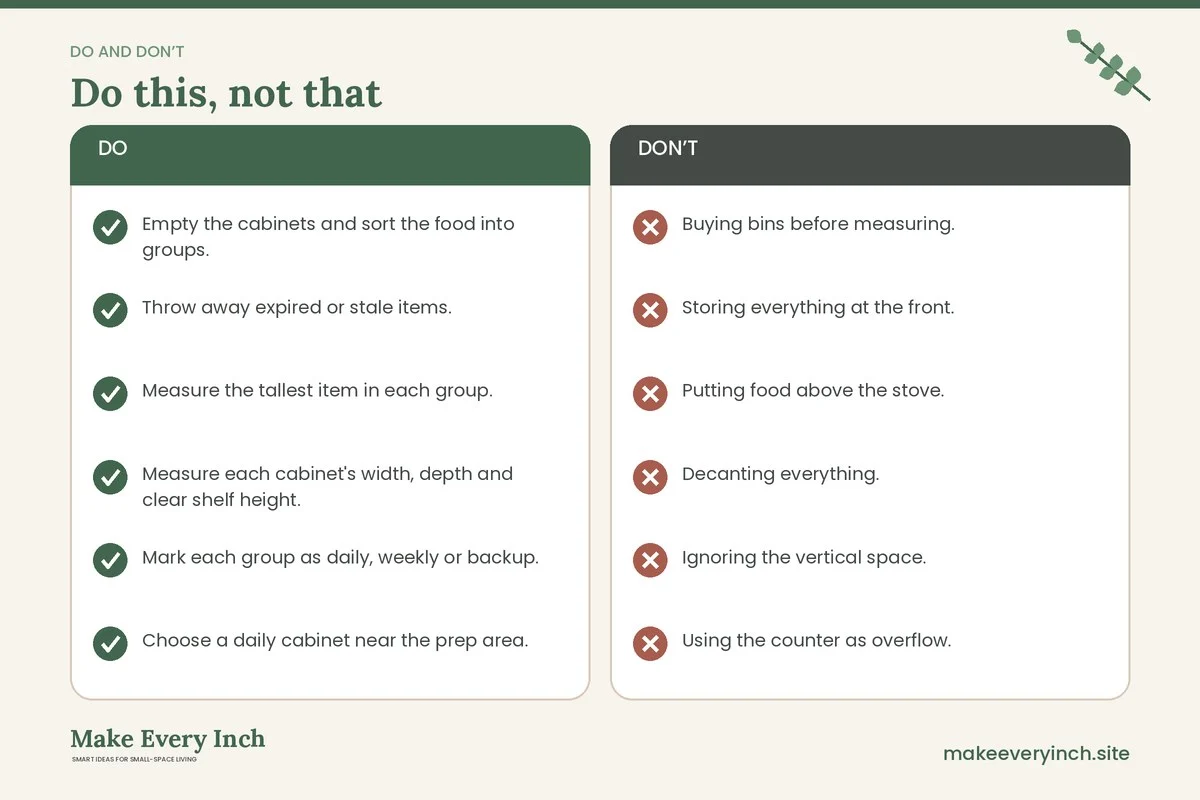
- Buying bins before measuring. The wrong size wastes the space it was meant to save.
- Storing everything at the front. Deep cabinets hide items. Use bins that pull out so the back is reachable.
- Putting food above the stove. Heat and steam ruin dry goods faster than almost anything else.
- Decanting everything. Containers cost money and time. Decant only what you open often.
- Ignoring the vertical space. The top of the fridge and the area above the upper cabinets are often unused. Use them for light, sealed items only.
- Using the counter as overflow. Once one bag lives on the counter, others follow. Give every item a zone instead.
- Keeping too much stock. A small kitchen supports a working supply of about two weeks. Anything beyond that belongs in a backup spot or does not need to be bought.
A simple budget approach
You can build a no-pantry system in stages and spend little. Start with what you own, such as shoeboxes, baskets and jars. In the first week, reorganize the cabinets and add labels. In the second week, add one piece of vertical storage, such as a door rack or a tiered riser. In the third week, add a cart or a shelf if the cabinets are still full. Second-hand shops and online marketplaces sometimes carry shelving and carts at low cost, though you should check stability before buying. Avoid buying a full matching set before you know your needs.
Quick checklist
- Empty the cabinets and sort the food into groups.
- Throw away expired or stale items.
- Measure the tallest item in each group.
- Measure each cabinet’s width, depth and clear shelf height.
- Mark each group as daily, weekly or backup.
- Choose a daily cabinet near the prep area.
- Put breakfast items near the kettle, away from the stove.
- Keep oils and flour away from heat.
- Add a door rack or a wall rail for spices and packets.
- Add a slim cart or a freestanding shelf for bulk goods.
- Anchor tall furniture and ask before drilling.
- Decant only the foods you open often.
- Label dates on bulk goods.
- Set a weekly 10-minute check.
FAQ
Where do I store dry goods if I have no pantry?
Use a daily cabinet near the prep area for your working supply, a cart or a shelf for bulk goods and a closet bin for backups. Split the food by how often you use it, and keep heat-sensitive foods away from the stove.
How much food should a small kitchen hold?
A working supply of about two weeks is a good aim. More than that tends to hide at the back of cabinets and expire. Keep any extra stock in a backup bin outside the kitchen.
What is the best pantry substitute for a rental?
A slim rolling cart or a freestanding shelf needs no drilling and moves with you. Door racks that hook over the door are another option, but check that they do not scratch the paint. For more ideas, read our list of renter-friendly kitchen upgrades.
Can I store food on top of the fridge?
You can store light, sealed items there, but the top of the fridge can be warm, so avoid oils, chocolate and anything heat sensitive. Use a bin so nothing slides off, and keep the space clear of dust.
Is it worth decanting dry goods?
For items you open often, such as rice, pasta, cereal and flour, airtight containers keep food fresh and let you see how much remains. For rarely used items, the original package is fine.
How do I stop pests in a kitchen without a pantry?
Use sealed containers for grains, flour and sugar, wipe shelves, and check backup stock regularly. Discard anything that is open or damaged. If you have a recurring problem, speak to your landlord or a pest professional.
How do I organize without losing counter space?
Keep the counter clear by putting daily items in the nearest cabinet and bulk items in a cart. For counter strategies, see our guide to small kitchen counter organization.
Keep going: Keep planning with our small kitchen ideas pillar guide, our small kitchen storage ideas and our small kitchen organization ideas.
Save this guide for later
Pin the ideas you like to Pinterest so you can come back to them when you plan your space.