15 Small Laundry Room Ideas on a Budget That Work
Quick answer: To set up a small laundry room on budget, spend first on safety and function, then on storage, then on looks. Clear space around the machines, check the dryer vent, add one shelf or rod above the machines, use a rolling cart in any gap and finish with paint or a curtain. Read your appliance manuals for clearance, and never block vents or hide a shutoff valve.
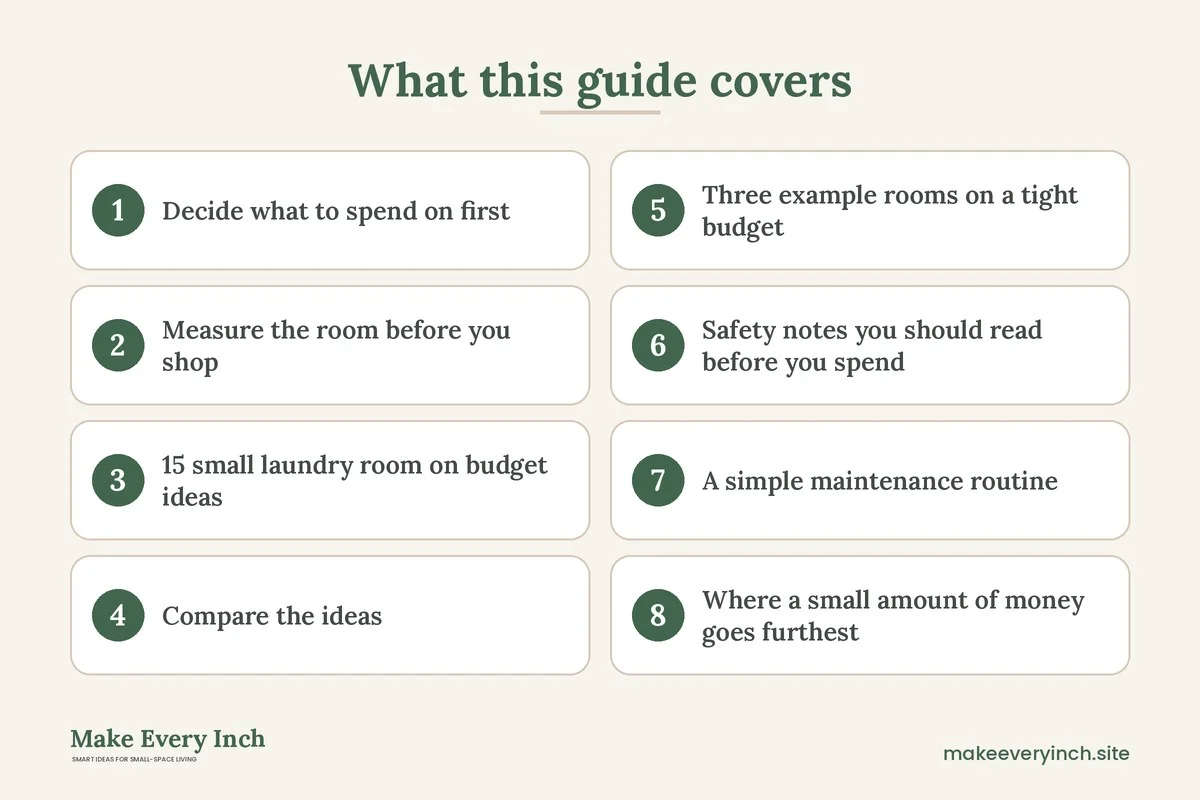
A small laundry room on budget is a different project from a dream laundry room. You are not choosing the finish on a countertop or ordering custom cabinets. You are working with a closet, a hallway nook or a corner of a bathroom, a washer and dryer that already sit where they sit, and a limited amount to spend. The good news is that laundry spaces are mostly about a few simple jobs: holding supplies, hanging damp clothes, folding, and keeping the machines safe. Each of those jobs has a cheap answer. This guide shows how to decide what to spend on first, how to measure the room, 15 ideas ordered from nearly free to a little more involved, a table that compares them, three example rooms, a safety section you should read before you buy anything, a maintenance routine and a checklist. For the full picture of the topic, read our main guide to small laundry room ideas, and if you rent, the companion post on small laundry room ideas for renters.
Decide what to spend on first
A budget works best when it has an order. In a laundry space the order is not the same as in a living room, because there are real safety issues here. Heat, lint, water and chemicals all live in the same few square feet. Spend in this order, and stop when the money runs out.
- Safety and function first. This means clear space around the dryer, a vent that is connected and in good shape, a cleaned lint trap, hoses that are not kinked, and a shutoff you can reach. Most of this costs little or nothing, and it is the part you should never skip.
- Storage second. Add a place for detergent, stain removers, a hamper and a drying spot. This is where cheap shelves, hooks, rods and carts earn their keep.
- Comfort third. Light, a folding surface and a way to hide clutter make the space easier to use. A better bulb or a plug-in light often does more than a new finish.
- Looks last. Paint, a curtain, a rug and a few baskets make the room feel finished. They are the easiest things to add later, so they are the first to cut.
If you are working on the whole home, our guide to budget small space ideas explains how to spread a limited amount across several rooms. For the room-by-room view, see how to organize a small home room by room.
Measure the room before you shop
Almost every wasted purchase in a laundry space comes from a wrong measurement. Spend ten minutes with a tape measure and a notebook before you buy anything.
- Width and depth of each machine. Write down the front width and the depth, including any hose or vent connections at the back. The gap behind a dryer is usually needed for the vent duct, so do not count it as free space.
- Clearance around the dryer. Appliance manuals usually list the minimum space at the sides, back and top. Many give figures that run from about 1 inch at the sides to 4 or more inches at the back, but the exact numbers vary by model, so read yours.
- Door swing. Front-load doors swing out and may hit a wall or a cart. Top-load lids need headroom. Open each one fully and measure how far it travels.
- Space above. Measure from the top of the machines to the ceiling, and note any pipes, vents, light fixtures or sprinkler heads. A shelf usually needs 12 to 18 inches of clearance above the machine tops to allow lids to open and to reach the shelf comfortably.
- Walkway. Leave at least 24 to 30 inches in front of the machines so you can load and unload. If a door opens into the space, check that it still clears.
- Dead zones. Look at the sides of the machines, the back of the door and any gap between the machine and the wall. These are the places for the thinnest storage.
Draw a simple sketch with these numbers. Mark where the outlets, the water valves and the vent are. A sketch takes the guesswork out of every idea below.
15 small laundry room on budget ideas
Nearly free fixes
1. Clear and reset the room
Remove everything that does not belong in the laundry space. Move old products, loose hangers and broken items out. The room often looks twice as large once the floor and the machine tops are empty. Sort what is left into categories: washing, stain treatment, drying, ironing and cleaning.
2. Use what you already own
Jars, shoe boxes, a spare basket, a mug rack and a dish tray all work in a laundry space. A glass jar holds clothespins, a basket holds dryer sheets, and a tray under the sink keeps drips off the shelf. Look through the house before you shop.
3. Clean the lint path
Empty the lint trap after every load, and wipe the trap and the housing occasionally. Check the vent duct for crushed sections or loose joints. Lint buildup is a known fire risk, so this free task is the most valuable one on the list. If you cannot reach the duct, or you see signs of a blockage, ask a qualified person to inspect it.
4. Make one clear zone for dirty and one for clean
A laundry space works better when laundry moves in one direction. Pick one spot for dirty clothes, one for the machines and one for folding. Even in a closet, a hamper on the left and a shelf on the right makes the flow clear.
Low-cost storage
5. A single shelf above the machines
One sturdy shelf above the washer holds detergent, softener and a basket. Choose a shelf that is rated for the load, and leave room for the washer lid. If you can fix it to a stud with permission, do so. Heavy bottles are pulling downward all the time, and an anchored shelf is safer than one resting on weak fasteners. Never mount a shelf directly above a dryer vent or in the path of hot exhaust.
6. A tension rod for hanging
A tension rod across a niche or between two walls gives you a drying bar without any drilling. Use it for shirts on hangers and delicates. Keep the load light, and keep the rod away from the dryer exhaust and any heat source. See our guide to no drill storage ideas for renters for more ways to use tension.
7. Over-the-door hooks and racks
The back of the laundry door is usually empty. A hook rack holds an ironing board, a lint brush and a bag of clothes pins. An over-the-door shoe organizer holds small bottles, stain sticks and rags. Check that the door can still close and that the hardware does not scrape the paint.
8. A narrow rolling cart in the gap
A slim cart that fits the gap between the washer and the wall gives you three tiers of storage for a small cost. Wheels let you pull it out to clean behind it. Lock the wheels when it is in place, and do not wedge it so tightly that it blocks the dryer’s airflow or the shutoff valve.
9. A basket system
Three baskets can replace a sorting station: one for lights, one for darks and one for items that need special care. Slim, stackable baskets save floor area. A hamper with a handle also doubles as the carrier to the machine.
10. A folding board that sits over the machines
A flat board or a countertop sized to the top of the machines creates a folding surface. It must be stable, and it must not cover vents or the control panel. Do not place heavy objects on top of a machine that vibrates, and remove the board before running a cycle if the machine shakes. Check your manual before using the top of a washer or dryer as a work surface.
Cheap finishing touches
11. A fresh coat of paint
Paint is one of the best value changes in a small room. Choose a light color that reflects light, and a finish that wipes clean. Use low-VOC paint when you can, and open a window or run a fan while you work and while it cures. If you rent, ask the landlord before painting. See our colors that make small rooms look bigger post for palette ideas.
12. A curtain instead of a door
If the machines sit in a niche or a hallway nook, a simple curtain on a tension rod hides them for a small cost. Keep the fabric well clear of the dryer’s vent and heat, and choose a fabric that you can wash. Pull the curtain fully aside whenever the dryer runs.
13. A bright bulb or plug-in light
Dim laundry rooms make stains hard to see. Replace the bulb with a brighter one in a suitable wattage for the fixture, or add a plug-in or battery light under a shelf. Do not exceed the rating on the fixture.
14. A mat, a rug and a floor wipe
A washable mat in front of the machines protects the floor and gives your feet a softer spot. Choose a mat with a non-slip backing. Keep the floor around the washer clear and dry, and check regularly for drips.
15. Labels on everything
Labels cost very little and keep the room tidy. Mark the baskets, the shelves and the containers. When someone else in the home does a load, they will put things back in the right place.
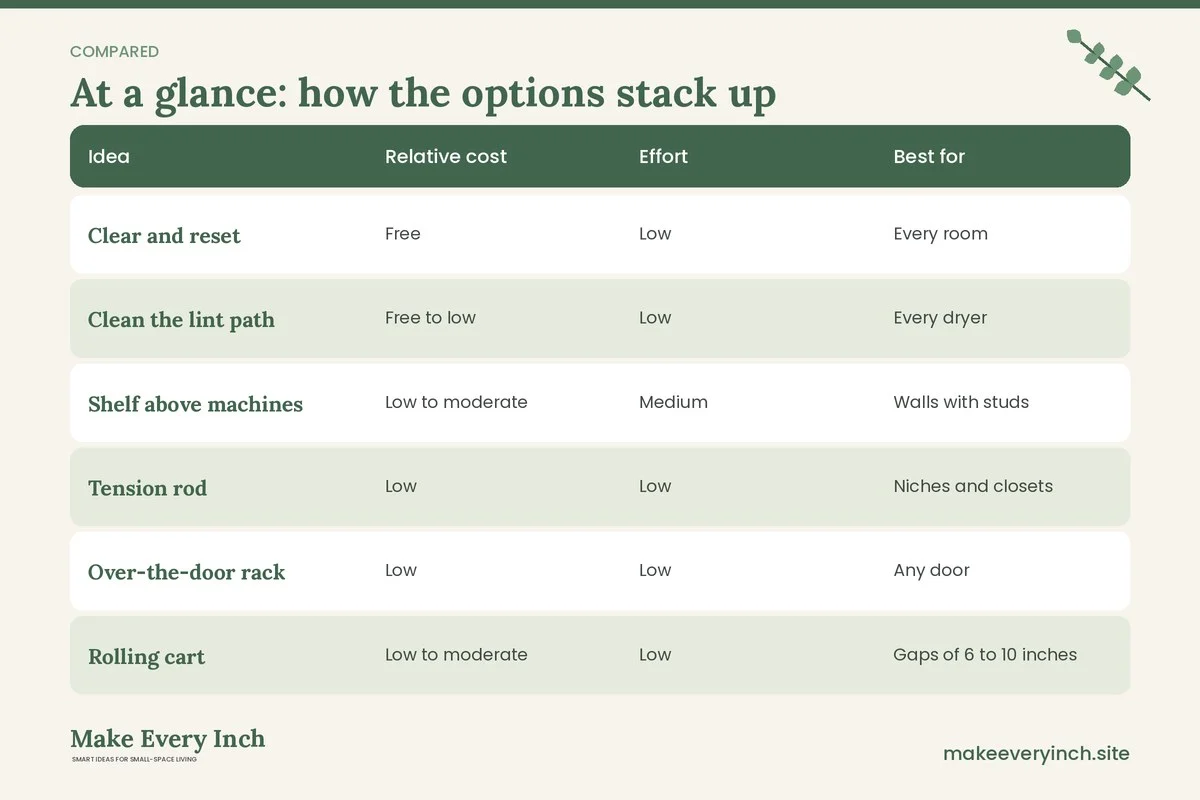
Compare the ideas: cost level, effort and risk
The table below groups the ideas by how much they cost, how hard they are and what to watch for. Cost levels are relative, since prices change by region and store.
| Idea | Relative cost | Effort | Best for | Watch for |
|---|---|---|---|---|
| Clear and reset | Free | Low | Every room | Do not pile things back on the machines |
| Clean the lint path | Free to low | Low | Every dryer | Call a professional if you see a blockage |
| Shelf above machines | Low to moderate | Medium | Walls with studs | Anchor it and respect weight limits |
| Tension rod | Low | Low | Niches and closets | Keep away from heat and exhaust |
| Over-the-door rack | Low | Low | Any door | Door must still close |
| Rolling cart | Low to moderate | Low | Gaps of 6 to 10 inches | Keep vents and valves clear |
| Folding board | Low to moderate | Low | Front-load pairs | Vibration and stability |
| Paint | Low to moderate | Medium | Walls you can change | Ventilation and lease permission |
| Curtain | Low | Low | Open niches | Keep fabric away from the dryer |
| Light | Low | Low | Dark corners | Stay within fixture ratings |
| Mat | Low | Low | Wet floors | Non-slip backing |
Three example rooms on a tight budget
A hallway closet with a stacked pair
In a closet that is about 30 inches wide, a stacked washer and dryer fill nearly all the width. The budget plan is to leave the machines alone and use the door and the side walls. Put an over-the-door rack on the inside of the closet door for detergent and stain sticks. Add a tension rod above the machines for hanging items if the manual allows enough clearance. Keep a narrow hamper just outside the closet. The most important task is leaving the closet door open or louvered while the dryer runs, because a closed closet can trap heat and moisture. Check the manual for the required ventilation opening before you run the dryer in an enclosed space. Stacked units are heavy and can vibrate, so do not add shelves that rest on the machines.
A bathroom corner with side-by-side machines
In a bathroom that is about 6 by 8 feet, machines sit beside the tub. The budget plan is to protect the area from water and humidity. Keep a washable mat in front, and add one shelf on the wall above the machines. Because a bathroom has water close by, any outlet nearby should have ground-fault protection (a GFCI). If you are not sure, ask an electrician. Run the exhaust fan during and after use to reduce moisture. See small bathroom ideas and small bathroom storage ideas for tight spaces for other ways to use the same room.
A kitchen alcove
In a kitchen alcove of about 5 feet wide, a washer sits beside the pantry. The budget plan is to use the vertical space and to keep the kitchen looking calm. Hang a curtain on a tension rod to hide the machine when you are not using it. Add a slim rolling cart beside it for detergent and a basket for stained items. Keep the cart off the floor drain and away from the water supply. For more kitchen ideas, see our guides on small kitchen ideas and small kitchen storage ideas without remodeling.
Safety notes you should read before you spend
A cheap setup should still be a safe one. The following points apply to almost every laundry space. Treat them as general guidance, and follow your appliance manuals and local rules.
- Clearance around the dryer. Keep the space around the dryer open. Do not stack baskets, towels or chemicals against the back or sides. Check the manual for the required gaps.
- Lint and fire risk. Clean the lint trap after each load. Check the vent duct for crushed or sagging sections. A clogged vent traps heat, so ask a professional to clean or inspect it if you have any doubts.
- Venting rules. A dryer must usually vent to the outside, and the duct material and length are often regulated. Do not vent into a closet, an attic or a crawl space. If you are not sure what your home needs, ask the landlord, the building manager or a licensed professional.
- Water leaks and shutoff valves. Know where the shutoff valves for the washer are, and leave them accessible. Check the hoses for bulges, cracks or drips, and replace them if they look worn. A small tray or a mat under the machine helps you spot leaks early.
- GFCI protection near water. Outlets close to sinks and washers are often required to have ground-fault protection. Do not use extension cords as a long-term solution, and do not plug heaters or space lights into a damp area. If an outlet looks scorched or loose, stop using it.
- Weight and vibration. Stacked units are heavy. Never place a shelf, a board or a basket of laundry on a machine that shakes. Avoid storing heavy items above the machines unless the shelf is anchored properly.
- Anchor your shelves. Fix tall or loaded shelves to wall studs with the right hardware, and only when you have permission. Never drill into a wall without checking the lease.
- Chemicals. Store detergents, bleach and stain removers on a high or locked shelf away from children and pets. Keep them in their original labeled containers. Never mix cleaning products, especially bleach with ammonia or acids, because dangerous gases can form.
- Paint and ventilation. If you paint, choose low-VOC products and ventilate the room.
A simple maintenance routine
A budget room stays good when it is easy to keep up. Build a few habits into the week.
- After every load: empty the lint trap, wipe the door gasket on a front-loader, and leave the door ajar so the drum can air out.
- Weekly: wipe the machine tops, shake out the mat, and check the floor for drips or damp spots.
- Monthly: clean the detergent drawer, look at the hoses and check that the vent is still connected at both ends.
- Every few months: pull the dryer out carefully, vacuum behind it and inspect the duct. Turn off the power before you move it, and ask for help with heavy machines.
For more on keeping the space tidy, our post on small laundry room organization covers storage zones in more depth, and small home organization ideas that actually last explains how to keep systems working.
Where a small amount of money goes furthest
If you can only afford one or two upgrades, pick from this short list.
- A reliable shelf. It turns dead wall into storage.
- A hamper with a handle. It cuts carrying trips and keeps clothes off the floor.
- A better light. It makes the space feel larger and helps you see stains.
- A drying rod. It keeps damp clothes off chairs and doors.
- A mat. It protects the floor and makes the room feel finished.
Skip decorative items until the working parts are in place. A pretty room that has no place for detergent will not stay pretty for long.
Mistakes to avoid on a budget
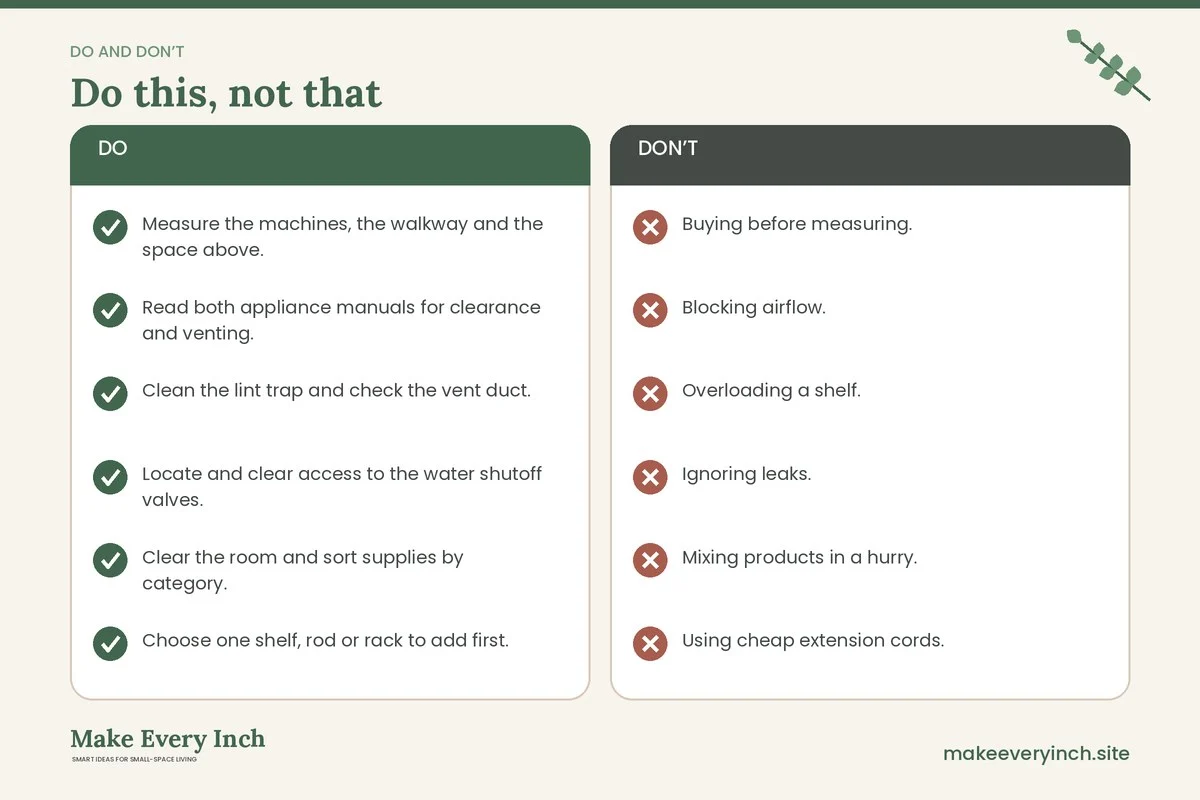
- Buying before measuring. A cart that is half an inch too wide is a return trip.
- Blocking airflow. Baskets and curtains near the dryer are a fire risk and cause overheating.
- Overloading a shelf. Liquid detergent is heavy. Check the load rating.
- Ignoring leaks. A slow drip costs more than any shelf. Fix it early.
- Mixing products in a hurry. Keep cleaners in their own containers and never combine them.
- Using cheap extension cords. Laundry machines draw a lot of power. Plug them directly into a suitable outlet.
- Painting without ventilation. Fumes linger in a small room, so open a window or run a fan.
Budget laundry checklist
- Measure the machines, the walkway and the space above.
- Read both appliance manuals for clearance and venting.
- Clean the lint trap and check the vent duct.
- Locate and clear access to the water shutoff valves.
- Clear the room and sort supplies by category.
- Choose one shelf, rod or rack to add first.
- Anchor any shelf to studs, with permission.
- Store chemicals high, labeled and out of reach of children and pets.
- Add a hamper and a folding spot.
- Brighten the light within fixture ratings.
- Add a mat with a non-slip backing.
- Set a weekly wipe-down and a monthly hose check.
FAQ
How do I set up a small laundry room on budget without remodeling?
Start with the free steps: clear the room, clean the lint path and measure. Then add a single shelf, a rod or a cart. These changes need no remodeling and can be done in an afternoon. Our small kitchen ideas on a budget post shows the same low-cost approach in another room.
What is the cheapest way to add storage?
Use the back of the door, the wall above the machines and any gap beside them. Over-the-door racks, a tension rod and a slim cart cost little and need little or no drilling.
Can I put a shelf directly above a dryer?
Often yes, but check your manual and keep the shelf out of the exhaust path. Leave enough room for the lid and for heat and moisture to escape. Do not store flammable items there.
How do I hide a washer and dryer cheaply?
A curtain on a tension rod or a folding screen works for a niche. Keep fabric well away from the dryer vent, and open it whenever the dryer runs.
Is it safe to store detergent on a low shelf?
Not if children or pets can reach it. Keep chemicals high, in their original containers, and never mix products.
How often should I check the dryer vent?
Look at the lint trap every load and inspect the duct a few times a year. If drying times grow longer or the room feels hot and smells of burning, stop using the dryer and ask a professional to check it.
Keep going: Keep going with our small laundry room ideas for renters, the small closet ideas guide and our small entryway ideas.
Save this guide for later
Pin the ideas you like to Pinterest so you can come back to them when you plan your space.