Small Kitchen Ideas on a Budget
Quick answer: The smartest small kitchen ideas on a budget follow a spend-order: start with free fixes (declutter, reorganize, clean, reposition), then spend small amounts on light and storage, then a little more on surfaces, and save big purchases for last. Most kitchens gain the most from the first two stages. Costs vary widely by region and store, so treat any range as a rough planning guide, not a promise.
Small kitchen ideas on a budget work best when you decide the order of spending before you spend anything. Most people do the opposite. They fall for a tile sample or a pretty rack, buy it, then discover that the real problem was a dark corner or a counter covered in things they never use. In a small kitchen every purchase has to earn its footprint, so the sequence matters as much as the amount. This guide gives you a spend-order for a small kitchen, from free fixes to the last upgrades worth saving for. It includes hedged cost ranges, a priority table, three example kitchens at different budget levels, a plan for spending in stages, safety notes and a checklist. For the wider view of kitchens in tight spaces, start with our small kitchen ideas pillar. If you want a project-style plan that moves through a full makeover, read the companion post on a budget small kitchen makeover, and for the storage side, see our guide to small kitchen storage ideas and small kitchen organization ideas.
The spend-order in one view
The idea is simple. Do the things that cost nothing first, because they reveal what you actually need. Then spend where a small amount changes how the kitchen works every day. Then spend on looks. Last, if you still want to, spend on big-ticket items.
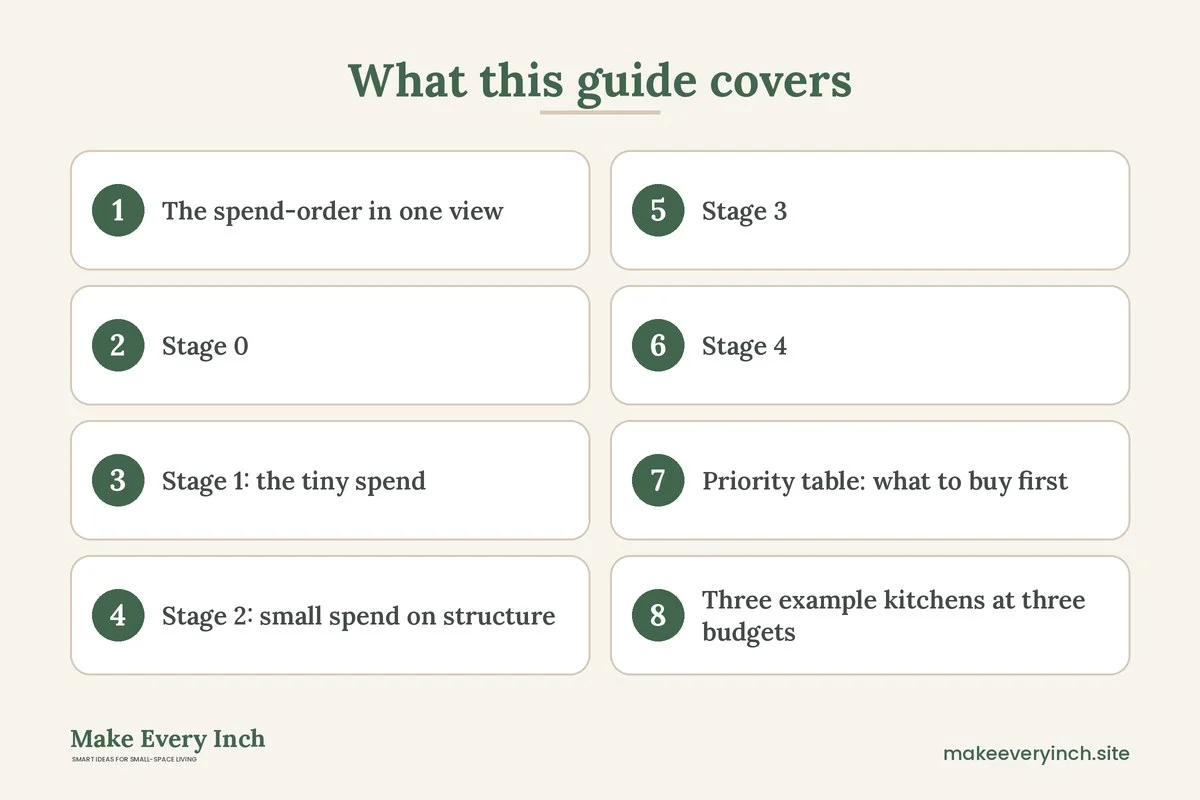
1. Stage 0: free. Declutter, clean, rearrange, reposition and adjust habits.
2. Stage 1: tiny spend. Light, hooks, risers, dividers and basic cleaning supplies.
3. Stage 2: small spend. Storage furniture, a cart, shelving and removable finishes.
4. Stage 3: medium spend. Paint, hardware, a faucet or lighting upgrade, and a good rug or mat.
5. Stage 4: large spend. Cabinets, counters, appliances and flooring, if ever.
Skipping ahead is how budgets get blown. A new backsplash will not make a cluttered counter feel bigger, and a new cart will not help if the cabinets are full of expired food. Most small kitchens improve by 70 percent or more in the first two stages, before any real money is spent.
A note on numbers. Prices change by country, store, season and quality, so every range in this guide is deliberately wide and hedged. Use the ranges to compare stages against each other, not to predict your bill. Check local prices before you commit, and wait for a sale on anything you do not need this week.
Stage 0: free fixes that change the kitchen
Free fixes are the foundation, and they are also the highest return in a small kitchen. They cost time, not money.
Empty, edit and clean
Pick one cabinet or one counter section at a time. Take everything out, wipe the surface and sort the items into keep, donate and discard. A small kitchen usually holds duplicates (three spatulas, two colanders), broken tools and gadgets used once. Check food for expiry dates, and discard anything that is clearly past safe use. Be honest about the item you have not used in a year. Removing 20 percent of what you own can make the room feel a size bigger.
Clear the counter first
The counter is the most valuable surface in a small kitchen, and the easiest to free. Keep only the items you use daily on it, such as a kettle, a cutting board or a coffee maker. Move the rest into cabinets, onto a shelf or out of the kitchen. A rule of thumb is that at least half of the usable counter should be empty at the start of cooking. For deeper ideas, read our guide to small kitchen counter organization.
Zone the kitchen
Group items by task: cooking near the stove, prep near the main counter, cleaning near the sink and food storage near the fridge. A zone cuts steps, so you handle fewer objects and spend less time. Moving the oils and spices next to the stove, and the cutting boards under the prep area, costs nothing and saves effort daily.
Use the cabinet space you already have
Rearrange so the heavy items are low and the daily items sit between hip and shoulder height. Stack lids by size. Put the tall items at the back and the short items in front. Move the rarely used roasting pan to a closet or a high shelf. Look for dead space: the top of the fridge, the inside of a cabinet door, the space above a doorway. Those need purchases only if you decide to add structure later.
Free light and air
Wash the window, remove heavy curtains and clean light fixtures and bulbs, because dirt dims a kitchen noticeably. Open blinds during the day. Move a lamp or a mirror to bounce light into a dark corner if you have one spare. Light is covered more in our guide to small kitchen lighting ideas.
Free swaps and borrowed items
Look in other rooms for a tray, a basket, a jar, a rack or a crate that can serve in the kitchen. Glass jars from sauces make good containers for dry goods once washed. A shoebox can serve as a drawer divider. Ask friends if you can borrow a tool before buying one you will use once. Local community groups and online marketplaces often give away or sell kitchen items for very little, so check them before a store.
Stage 1: the tiny spend
Stage 1 usually fits into a small amount, and the right items give the biggest daily payoff. Typical ranges here are very low per item, although the total depends on how many you buy.
Light
Better light is the most noticeable upgrade for the lowest cost. Under-cabinet lights, either adhesive plug-in strips or battery-powered pucks, add task light on the counter. Replace dim bulbs with bulbs that match the color of the light you want, in a warm or neutral range, and check the maximum wattage on the fixture before changing a bulb. Use only products rated for kitchens and keep cords away from water, the stove and the sink. If a fixture needs wiring, hire a qualified electrician or ask the landlord to do it.
Risers, dividers and hooks
A riser, a drawer divider and a few hooks create new layers and lanes inside the spaces you already own. They are among the cheapest storage tools, and most need no tools. Measure the space first, and choose items that suit your load. For ideas that avoid construction, see our post on small kitchen storage ideas without remodeling.
Basic organizers
A few clear containers keep dry goods and snacks visible, and labels cut the time spent searching. Reuse jars if you can, and buy only enough containers to fill one shelf at a time. Lidded boxes keep dust off the top of cabinets.
Cleaning supplies and small fixes
Tighten loose handles, wipe grease from cabinet doors, replace a worn sponge and clean the fridge seals. A kitchen that is clean and works smoothly looks better than one with new items and old grease. Use cleaning products as the label directs, and never mix them. Ventilate the room when cleaning.
Stage 2: small spend on structure
Stage 2 is where you buy a piece of furniture or a shelf that adds permanent capacity. Items here usually cost more than a hook but far less than a cabinet.
A cart or a slim rack
A narrow rolling cart adds counter and shelving where the room has none, and it can move when you need floor space. Measure the walkway first, and keep at least 36 inches clear in front of the stove and 30 to 36 inches elsewhere. A slim rack beside the fridge uses a gap that is otherwise wasted. For options, see our guides to small kitchen cart ideas and the best rolling kitchen carts.
Open shelving or wall rails
A single shelf above a window, a rail under the upper cabinets or a pegboard panel adds capacity at the cost of a few fasteners. In a rental, ask for permission before drilling. Never drill near wiring or pipes, and choose anchors for the wall type. If you cannot drill, use a freestanding shelf unit or a tension-based solution. Anchor any tall unit so it cannot tip, especially in homes with children.
A pantry zone
If you have no pantry, create one from a slim cabinet, a rack or a shelf unit. Keep it close to the kitchen and put the foods you use weekly in it. Our guide to small kitchen pantry ideas has plans for a range of sizes.
Removable finishes
Peel-and-stick tile, a removable backsplash and shelf liners change the look without construction. Use them where grease and heat are limited, away from the stove, and check that the surface is clean and dry before applying. Read the product instructions on heat limits. See our post on temporary backsplash ideas for details.
Stage 3: medium spend on looks and comfort
By Stage 3 the kitchen works better, so you can spend on how it feels.
Paint
Paint is one of the best-value upgrades. A light, warm color on the walls and a coat on dated cabinets can change the room. Choose low-VOC paint, ventilate the room well while painting and drying, and follow the cure time before loading shelves. In a rental, ask first. Use a cabinet-grade or kitchen-grade paint and prepare the surface by cleaning, degreasing, sanding lightly and priming, or the paint will peel. Wear a mask when sanding.
Hardware
New knobs and pulls cost little per piece but change the character of the cabinets. Measure the distance between the screw holes on the existing pulls so the new ones fit without drilling. Keep the old hardware if you rent so you can reinstall it when you move.
A faucet or a light fixture
These are the largest items we place in the medium stage. Replace them only if the old one is broken or very dated, and consider a landlord’s rules. Shut off the water or power before starting, and hire a licensed professional for any electrical work or for plumbing that you are not sure about.
Textiles and plants
A rug or a mat by the sink adds softness and protects the floor. Choose a low, washable one with a non-slip back so it does not become a trip hazard. A few herbs on the windowsill add life at little cost. Window film or a simple curtain can add privacy while keeping light.
Stage 4: large spend, only if you still want it
If you still dream of new counters, cabinets or flooring after the first three stages, the kitchen is probably worth the money. By then you will know your needs, so you will choose better. Large spends vary widely by region, materials and labor, so ask for several written quotes, and do not start until you have a budget with a buffer for surprises. Keep in mind that a rental owner, not the tenant, should handle these decisions. For ideas on how a full redo can be staged, read our guide to small kitchen makeover ideas.
Priority table: what to buy first
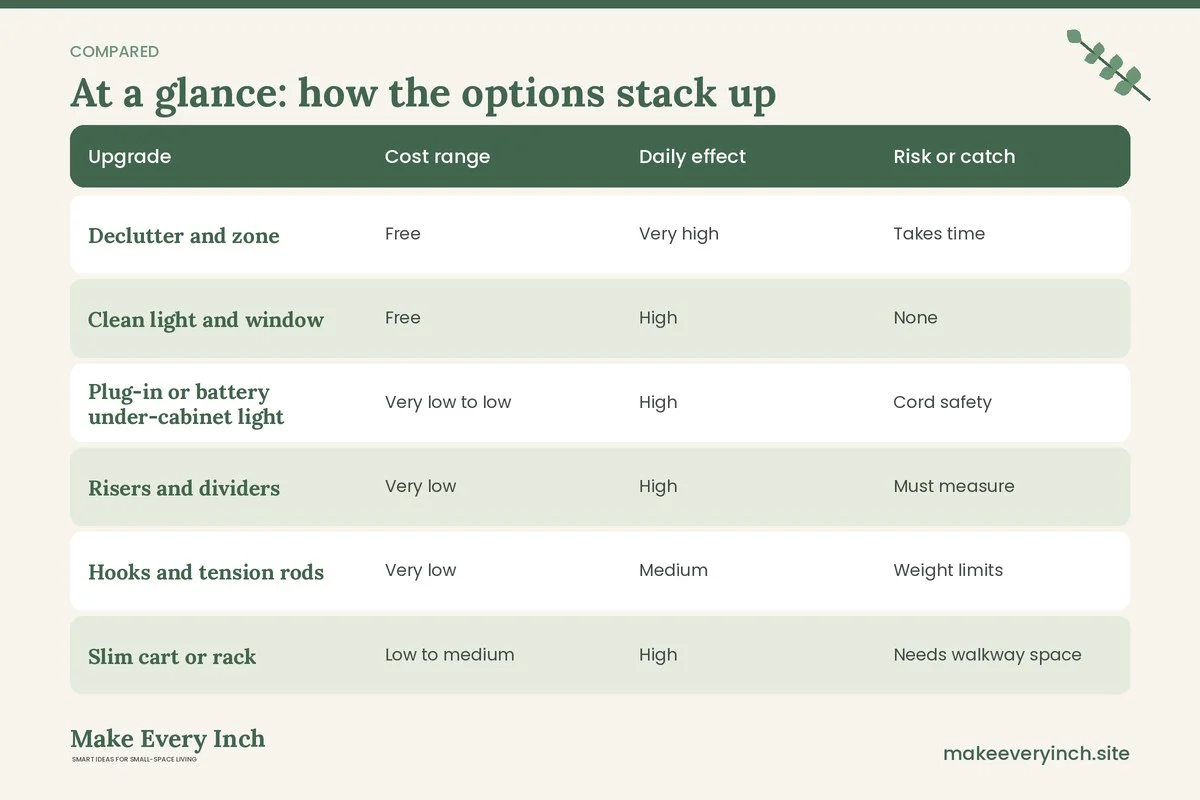
The table ranks common upgrades by cost range, effect and risk so you can choose in order. Ranges are rough and relative: “very low” is a few small items, “low” is a single useful piece, “medium” is a larger project and “high” is a major job.
| Upgrade | Cost range | Daily effect | Risk or catch | Best stage |
|---|---|---|---|---|
| Declutter and zone | Free | Very high | Takes time | 0 |
| Clean light and window | Free | High | None | 0 |
| Plug-in or battery under-cabinet light | Very low to low | High | Cord safety | 1 |
| Risers and dividers | Very low | High | Must measure | 1 |
| Hooks and tension rods | Very low | Medium | Weight limits | 1 |
| Slim cart or rack | Low to medium | High | Needs walkway space | 2 |
| Shelf or rail | Low to medium | Medium to high | Drilling, permission | 2 |
| Peel-and-stick backsplash | Low to medium | Medium | Heat near stove | 2 |
| Paint | Low to medium | High | Fumes, prep, permission | 3 |
| New hardware | Low | Medium | Hole spacing | 3 |
| Faucet or fixture | Medium | Low to medium | Plumbing or wiring | 3 |
| Counters, cabinets, floors | High | High | Cost, disruption | 4 |
Three example kitchens at three budgets
A galley kitchen with almost no money
A renter has a narrow galley kitchen and a very small budget. In Stage 0 they empty every cabinet, donate duplicates and move daily items to the cabinets nearest the stove. They wipe grease from the fronts and clean the window, which makes the room visibly brighter. In Stage 1 they buy a few risers and a drawer divider, and they add a small battery-powered light strip under the cabinet over the prep side. They do not spend on anything else for a month, and they find that the room already works better. For layout ideas in this shape, see our galley kitchen ideas.
An apartment kitchen with a modest budget
An apartment dweller has a bit more to spend and a kitchen with limited counters. After the free fixes, they add a narrow rolling cart for prep and a slim rack for cans. They install a peel-and-stick backsplash behind the sink only, with the landlord’s permission, and add a plug-in light. They also paint the walls a light, warm color using low-VOC paint, with the windows open. The total feels like a refresh, but nothing in the kitchen was altered permanently. For more ideas that suit this setup, read our small apartment kitchen ideas.
A tiny owner-occupied kitchen with a larger budget
An owner of a very small kitchen plans to improve it over a year. They follow the stages in order, spending on new hardware and a coat of cabinet paint in Stage 3. After living in the kitchen for months, they decide that the real limit is the counter, so they save for a better counter and a shelf instead of new cabinets. Because they waited, they avoided buying a layout that would not have helped. See our guide to tiny kitchen ideas for more on very small footprints.
Mistakes that waste a small-kitchen budget
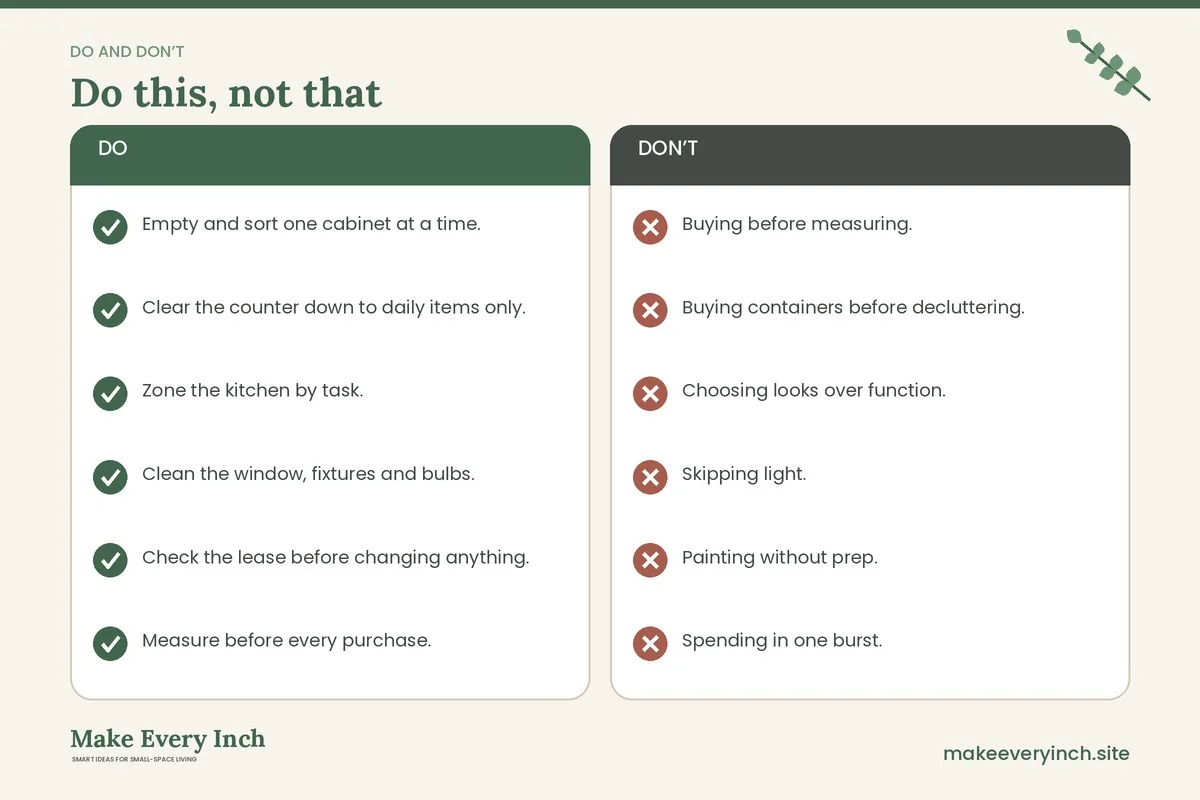
- Buying before measuring. Most returns are about size, so measure width, depth, height and clearance.
- Buying containers before decluttering. You end up storing things you should have removed.
- Choosing looks over function. A beautiful item that blocks the walkway is expensive in daily annoyance.
- Skipping light. A dim kitchen feels smaller and makes every task harder.
- Painting without prep. Grease and dust cause peeling, so clean, degrease and prime first.
- Spending in one burst. Spreading purchases lets you learn from each one.
- Forgetting the lease. Reversible changes protect a deposit, and permission protects you.
- Ignoring safety. Cheap electrical items, heavy loads on weak mounts and blocked vents cost more than they save.
Safety notes when you save money
Saving money should never mean saving on safety. Keep these rules in view.
- Electrical. Use products rated for kitchen use, keep cords dry and away from burners, and never overload a power strip. Hire a qualified electrician for any wiring.
- Ventilation and fumes. Open windows and use a fan when painting, using strong cleaners or applying adhesives. Choose low-VOC paint where possible.
- Anchoring. Anchor tall shelves and racks so they cannot tip, particularly where children live.
- Drilling. Never drill into a wall, tile or cabinet without permission, and avoid areas with wires or pipes.
- Heat. Keep paper, fabric and plastic racks away from the stove and oven, and check heat ratings for any finish near the stove.
- Water. Shut off the water before replacing a faucet, and test for leaks afterward.
A simple saving plan
If you cannot buy everything now, spread the work across months. A rough plan might look like this.
- Week 1: Stage 0 free fixes in one cabinet and the counters.
- Week 2: Finish Stage 0 for the rest of the kitchen and track what you wish you had.
- Weeks 3 to 4: Choose two Stage 1 items from your wish list and buy them.
- Month 2: Live with the changes and take notes on what still annoys you.
- Month 3: Buy one Stage 2 piece that solves the biggest annoyance.
- Later: Decide whether Stage 3 is worth it, and watch for sales on the items on your list.
Keep a running wish list with measurements and links. Waiting a few weeks removes impulse buys and gives you time to find a better price or a second-hand version.
Where second-hand shines
Second-hand shopping suits a small kitchen well, because many of the items are simple and durable. Look for carts, shelves, stools, trays, baskets and wooden boards. Check that anything with wheels rolls smoothly, that shelves are sturdy and that surfaces are clean and food-safe. Be more careful with items that touch food, such as old plastic containers or scratched non-stick pans, and skip any with cracks or peeling coatings. Wash and sanitize everything before use.
Checklist
- Empty and sort one cabinet at a time.
- Clear the counter down to daily items only.
- Zone the kitchen by task.
- Clean the window, fixtures and bulbs.
- Check the lease before changing anything.
- Measure before every purchase.
- Add light before adding decor.
- Buy risers, dividers and hooks first.
- Add one cart or rack only if the walkway allows.
- Test removable finishes in a hidden spot.
- Use low-VOC paint and ventilate.
- Keep a wish list and wait for sales.
- Leave a small buffer for surprises.
FAQ
How much should I budget for a small kitchen refresh?
It depends on your region, your starting point and how much you do yourself. A free-only refresh is possible, and a modest refresh with light, storage and paint often costs a fraction of a remodel. Set a number, add a buffer and follow the stages.
What is the first thing to spend money on?
Usually light, then simple storage structure such as risers and dividers. Both improve how the kitchen works every day for a small outlay.
Can I improve a rental kitchen on a budget?
Yes. Choose freestanding, removable and reversible items, and ask before painting or drilling. Our guide to renter-friendly kitchen upgrades lists safe options.
Is paint worth it in a small kitchen?
Often, because it affects every wall or cabinet front. Prepare the surface, use low-VOC paint and let it cure fully before loading shelves.
Should I buy a cart or add shelves?
If you have floor space and need counter, a cart is usually the more flexible choice. If the floor is tight, go vertical with a shelf or a rail. Our post on vertical storage ideas covers more options.
How do I avoid wasting money?
Measure first, declutter before you buy, spread purchases across stages and live with each change before the next. Wait for sales on anything that is not urgent.
What should I save for last?
Cabinets, counters, appliances and flooring. By then you will know exactly what the kitchen needs, and you may find you need less than you thought.
Keep going: Keep going with our cheap storage ideas for apartments, small kitchen lighting ideas and renter-friendly kitchen upgrades.
Save this guide for later
Pin the ideas you like to Pinterest so you can come back to them when you plan your space.