Small Kitchen Wall Storage Ideas
Quick answer: The best small kitchen wall storage ideas use a rail, a pegboard, a magnetic strip, a narrow shelf or a row of hooks, chosen by what you need to hold. Find studs for anything heavy, stay well under the stated load limit, keep items away from the stove and sink splash zone, and use adhesive or tension options if you rent and cannot drill.
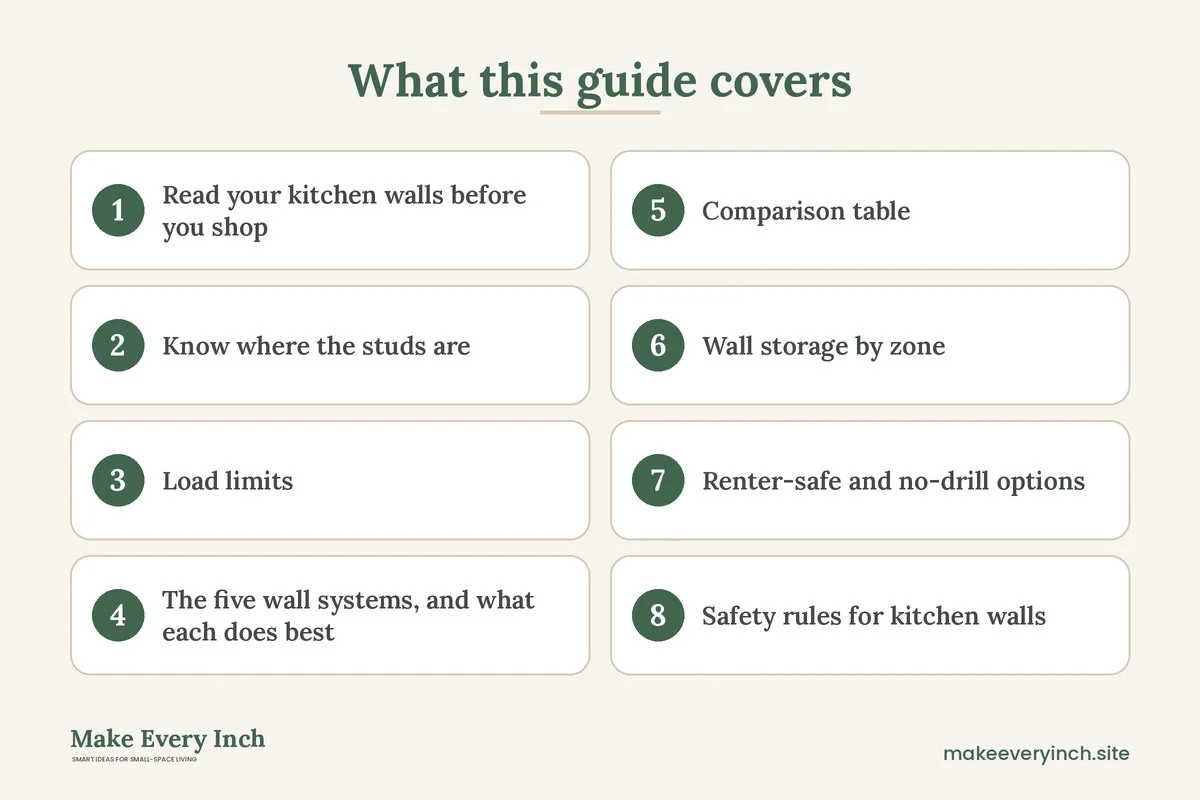
Small kitchen wall storage ideas are the fastest way to add capacity without losing a single inch of floor or counter. A wall is free real estate: it needs no cabinet box, no legs and no clearance for a door to swing. The catch is that kitchen walls are not like bedroom walls. They get grease, steam and heat, they carry heavy cast iron and glass jars, and in a rental they may be off limits to a drill. This guide is about the mechanics of hanging things safely in a kitchen: how to choose a system, where studs are, how to think about load limits, which parts of the wall to avoid, and how to hang storage without making holes. It stays focused on the wall itself. For the full range of storage tactics, including drawers, cabinets and furniture, read our main guide to small kitchen storage ideas, the wider small kitchen ideas pillar and the companion post on small kitchen organization ideas. If you plan to refresh the wall surface at the same time, our sibling post on small kitchen backsplash ideas for small spaces covers that side.
Read your kitchen walls before you shop
Not every wall suits every system. Spend ten minutes surveying the walls before you buy anything, and write down what you find.
- Wall material: Most homes have painted drywall, which holds screws well only when they hit a stud or use a proper anchor. Tile, brick, concrete and plaster behave very differently and often need special bits and professional advice.
- Surface condition: Adhesive grips clean, smooth, sealed surfaces. It struggles on textured, dusty, greasy or freshly painted walls, which can need weeks to cure.
- Heat and moisture: The wall behind a stove and beside a sink sees heat, steam and splashes. Adhesives soften with heat, and metal can rust in constant damp.
- Open runs: Measure the clear wall between counter and upper cabinets, the side of a refrigerator cabinet, the inside of a door, the end of a cabinet run and any blank strip beside a window.
- Obstacles: Note outlets, switches, thermostat controls, vents and pipes. Keep a clear zone around each, and never hang anything across a vent opening.
Photograph each wall before you start, and measure the height and width of every candidate space. A common surprise is that the gap between counter and upper cabinet is only 15 to 18 inches, which rules out tall items and favors slim rails and short hooks.
Know where the studs are
A stud is the vertical wooden or metal frame inside a wall. Fixings that bite into a stud hold far more than fixings in drywall alone. In many homes studs are spaced about 16 inches apart from center to center, and in some about 24 inches, though older or unusual buildings vary. Studs are often found next to outlets and switches, since electrical boxes are commonly fastened to them.
Ways to find a stud, from simplest to most reliable:
- Knock test: A hollow sound means empty wall, and a duller sound suggests a stud. This is a rough guide only.
- Stud finder: A small electronic device you slide along the wall. Calibrate it on a bare area first, and confirm a stud by checking for two edges.
- Magnet: A strong magnet can find the metal screws that hold drywall to the stud. Drag it slowly along the wall until it catches.
- Check an inconspicuous spot: A closet or the inside of a cabinet can reveal how the walls are built.
Stud finders do not tell you what else is behind the wall. Kitchens can hide wires and water or gas lines, especially near the sink, the stove and outlets. Keep screws away from the line directly above and below an outlet or switch, and do not drill near the stove or pipe runs without checking. If you are unsure, ask a professional. In a rental, never drill without written permission from your landlord, because a hole in the wrong spot can be costly to repair.
Load limits: a simple way to think about weight
Every product has a stated weight limit, and that limit assumes a specific wall and a specific installation. Treat it as a ceiling, not a target. A few habits keep you safe.
- Add up the real load. Weigh your heaviest planned items. A cast iron pan can weigh several pounds, a full set of glass jars far more, and a rail of mugs more than people expect. Include the weight of the hardware itself.
- Keep a safety margin. A sensible approach is to load a fixing to well under half of its rating, especially for adhesive systems, which can fail without warning as they age.
- Spread the load. Two or three fixings in separate studs hold more safely than one point. Long rails and shelves should meet a stud at both ends where possible.
- Think about dynamic load. Pulling a pan off a hook, or leaning on a shelf, adds force beyond the static weight. Heavy items that you grab daily need stronger support than decorative ones.
- Use the right anchor for the wall. Drywall anchors are rated for specific weights and wall thickness, and they vary widely. Read the packaging and match the fixing to the wall.
If an item is both heavy and valuable, such as a cast iron pan or glass jars of flour, choose a stud mount, or keep it low in a cabinet. Reserve adhesive systems for light things like towels, utensils and paper goods.
The five wall systems, and what each does best
Most small kitchen wall storage ideas fall into five families. Each has strengths and limits.
Rails and rods
A rail is a horizontal bar, usually with sliding hooks and sometimes a shelf or small baskets. It suits the strip of wall between counter and upper cabinets, and the side of a cabinet run. It holds utensils, mugs, small pots, cutting boards, wraps and spice tins. Rails are the most flexible system because you can slide hooks and move items, and they spread weight across two mounting points.
Pegboards
A pegboard is a panel with a grid of holes, with hooks, shelves and bins that you place and rearrange. It suits a blank section of wall, the side of a cabinet or a door. Its strength is adaptability, since you can change the layout as your needs change. Its weakness is bulk: a full board adds visual weight and can look cluttered. Mount it on studs or with spacers so the hooks have room to sit behind the board.
Magnetic strips
A magnetic strip holds ferrous metal items, such as knives and metal tins. It is slim, fast and works well beside the stove or above a counter. Choose a strong, well fixed strip, and make sure the surface is flat. Strips do not suit ceramic knives or non-magnetic cookware. Keep blades stored safely, with the edge facing the wall and away from children, and take care when pulling a knife off.
Shelves and ledges
A shelf holds items that cannot hang: plates, jars, bowls, cookbooks and plants. A narrow ledge 3 to 5 inches deep holds spice jars, oils and small jars without sticking out into a work area. A deeper shelf, 8 to 10 inches, holds plates and bowls but needs sturdy mounting. For more on the open look, see our guide to small kitchen ideas with open shelving.
Hooks
A hook is the simplest system. A single hook holds a mug, an apron, a colander or a bag. Hooks suit door backs, cabinet sides and the end of a wall. They need little space, but they only hold items with handles or loops, and they can look messy when overloaded.
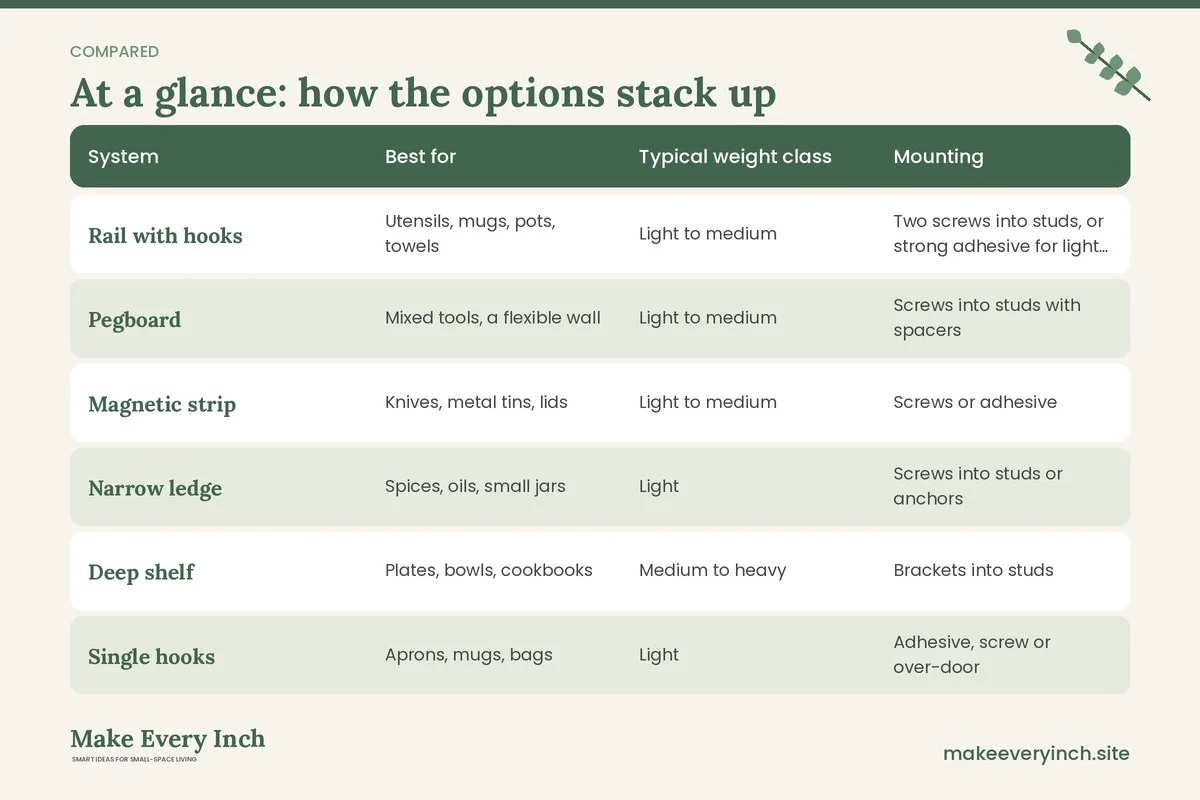
Comparison table: pick the system for the job
| System | Best for | Typical weight class | Mounting | Watch out for |
|---|---|---|---|---|
| Rail with hooks | Utensils, mugs, pots, towels | Light to medium | Two screws into studs, or strong adhesive for light loads | Overloading one hook |
| Pegboard | Mixed tools, a flexible wall | Light to medium | Screws into studs with spacers | Visual clutter |
| Magnetic strip | Knives, metal tins, lids | Light to medium | Screws or adhesive | Blade safety, strong pull-off force |
| Narrow ledge | Spices, oils, small jars | Light | Screws into studs or anchors | Items sliding off, grease build-up |
| Deep shelf | Plates, bowls, cookbooks | Medium to heavy | Brackets into studs | Needs sturdy mounting |
| Single hooks | Aprons, mugs, bags | Light | Adhesive, screw or over-door | Scatter and clutter |
| Tension rod | Cleaning supplies, wraps | Light | Pressure between two surfaces | Slipping if overloaded |
Wall storage by zone
Think about the kitchen as zones, and put each tool on the wall nearest where you use it. That is the difference between storage that works and storage that is only decoration.
The cooking zone
Keep tools you grab with one hand within reach of the stove: spatulas, ladles, tongs and a pot lid. A rail on the side of a nearby cabinet or a short run of wall holds them. Keep fabric items, paper and plastic well away from open flames and hot elements, and keep a clear gap, usually at least a hand’s width, above heat sources unless the manufacturer says otherwise. Do not hang anything over a gas flame or an electric element.
The prep zone
This is the counter where you chop and mix. Put knives on a magnetic strip within reach, cutting boards on a rail or in a slim rack, and a few small pots of herbs or a ledge of oils and salt. Keeping prep tools at eye level frees the drawers below for bulkier items.
The cleaning zone
Beside the sink, hang a rail for dish brushes, a drying cloth and a small dispenser. A tension rod under the sink holds spray bottles. Use rust-resistant materials here, and keep paper items off walls that get splashed. See also our post on small kitchen counter organization for what lives on the surface and what can move to the wall.
The coffee or tea zone
A small shelf or rail holds mugs, a kettle and tins. Leave a clear counter for the machine and a safe distance for cords. If you plug in a kettle or toaster, keep the cord away from the edge and avoid trailing it across a hot surface.
The pantry zone
Where the pantry is missing, the wall helps. A shelf or a set of narrow ledges holds jars, and a rail on the inside of a door holds packets. Our post on small kitchen ideas with no pantry covers more ways to make a pantry from nothing.
Renter-safe and no-drill options
Many tenants cannot drill, and even where small holes are allowed it is wise to ask first. Several options need no tools.
- Adhesive hooks and strips: Good for light items, such as towels and lightweight utensils. Clean the wall with a gentle cleaner, dry it fully, follow the weight rating and keep a generous safety margin. Do not use them on greasy or textured walls, or near heat.
- Over-the-door hooks and racks: They hang on the door edge and carry light to medium loads. Check the door can still close, and avoid doors that bump a wall.
- Over-the-cabinet hooks and rails: They loop over the top or the side of a cabinet door, and hold towels, lids and utensils.
- Tension rods: A rod wedged between two walls or under a cabinet holds wraps, cleaning products and hanging pots. Use it only where the rod is held between solid surfaces, and keep loads light.
- Freestanding wall units: A slim rack or ladder shelf that leans on the wall carries its weight on the floor. It can still tip, so anchor tall units where the lease allows, or choose a low, stable one.
- Magnetic hooks on a steel surface: A refrigerator side or a metal range hood often accepts magnets. Do not put magnets on a surface that gets hot, and check that the magnet does not scratch the finish.
- Removable adhesive systems: These work for light loads and can release without damage when removed as directed, but they can still lift paint on weak walls. Test a hidden spot first.
For more on this approach, read our guides to no-drill storage ideas for renters and renter-friendly shelving. If you want to upgrade the kitchen in other ways without a deposit risk, see renter-friendly kitchen upgrades.
When you move out, follow the removal instructions for each adhesive product, usually a slow stretch pulled parallel to the wall. If you drilled with permission, fill the holes with the right filler, sand and touch up the paint.
Safety rules for kitchen walls
- Anchor tall furniture: If you lean a ladder shelf or a rack against the wall, use anchors where allowed so it cannot tip onto a person.
- Respect the stove clearance: Keep flammable items such as towels, paper and wooden hanging tools well clear of heat. Follow the clearance guidance in the manual for your cooker and hood.
- Mind electrical safety: Do not screw into the wall near outlets, switches or visible cables. Keep cords away from water. Do not run a cord behind a rail where it could be pinched or damaged.
- Keep knives secure: Mount magnetic strips high enough to be out of a young child’s reach, and keep sharp edges turned in.
- Avoid hanging heavy items overhead where you stand: A heavy pan on a rail above your work spot is a hazard if it fails. Keep heavy loads low.
- Watch ventilation: Do not block range hood vents, ducts or air bricks with storage, and do not hang items in the flow of an extractor.
- Use low-VOC paint if you repaint: Ventilate the kitchen when painting or sealing, and let the surface cure before mounting adhesive.
Three example kitchens
A galley kitchen with 4 feet between the counters
A narrow galley has little floor and only one wall that is free of cabinets. The long wall above the counter has about 16 inches between counter and uppers. Install a stud-mounted rail with a short row of hooks along 36 inches, and hang the frequently used utensils from it. Add a magnetic strip near the stove for knives, and place a slim ledge on the end wall for oils and salt. Keep the opposite side clear so two people can pass. For more layouts in this shape, read our galley kitchen ideas.
A studio kitchenette with a renter’s rules
A kitchenette along one wall, with no drilling allowed, benefits from the sides of cabinets and the back of the door. Hang an over-the-door rack for wraps and bags, a pair of over-the-cabinet hooks for towels and a magnetic strip on the side of the refrigerator for tins. Add a freestanding ladder shelf that leans in a corner and is anchored with a removable strap where the lease allows. The wall itself stays untouched, and everything lifts out on move-out day. See also our guide to small apartment kitchen ideas.
An L-shaped kitchen with a blank end wall
An L-shaped kitchen often has a blank wall at the short end. Mount a pegboard on studs there, with a mix of hooks, a shelf and a basket for lids. Add a deeper shelf of 8 inches for plates above it, with brackets into two studs, and keep heavy things on the lower half. The pegboard becomes a feature that matches the room, and the counter below gets cleaner. For related ideas see small kitchen ideas with limited counter space.
How to hang a rail, step by step
1. Choose the height. Mark a height where the most-used item is easy to reach, usually 4 to 8 inches above the counter for tools, or at shoulder height for lightweight items. Leave at least 2 inches of clearance above hanging items so they can lift off.
2. Find the studs. Mark the center of at least two studs along the run. If the studs do not line up with your rail, use rated drywall anchors, and keep the load light.
3. Level it. Use a level or a taped string line. A small tilt looks obvious in a kitchen with straight counter edges.
4. Pre-drill pilot holes. Use a bit slightly smaller than the screw shank, and avoid drilling into tile without the right bit.
5. Fasten and test. Tighten the screws without overdoing it. Then pull down firmly with your hand before loading it, and add items gradually.
6. Arrange by weight. Keep heavy items near the studs and lighter ones in the middle.
If you rent, read the lease and ask first. If the answer is no, use a freestanding or door-based system instead.
Keeping a wall tidy
A wall of storage can turn into visual noise fast. A few rules keep it calm.
- Edit hard. Hang only what you use weekly. Store the rest in a cabinet.
- Group by material. Wood with wood, metal with metal, and one or two colors, keeps a busy wall looking intentional.
- Leave gaps. Empty space between groups gives the eye a rest.
- Clean on a schedule. Grease collects on anything near a stove. Wipe rails, hooks and ledges every week or two with warm soapy water, and dry them.
- Rotate the seasonal items. Put holiday or rarely used items away, and keep the wall for everyday tools.
Wall storage mistakes to avoid
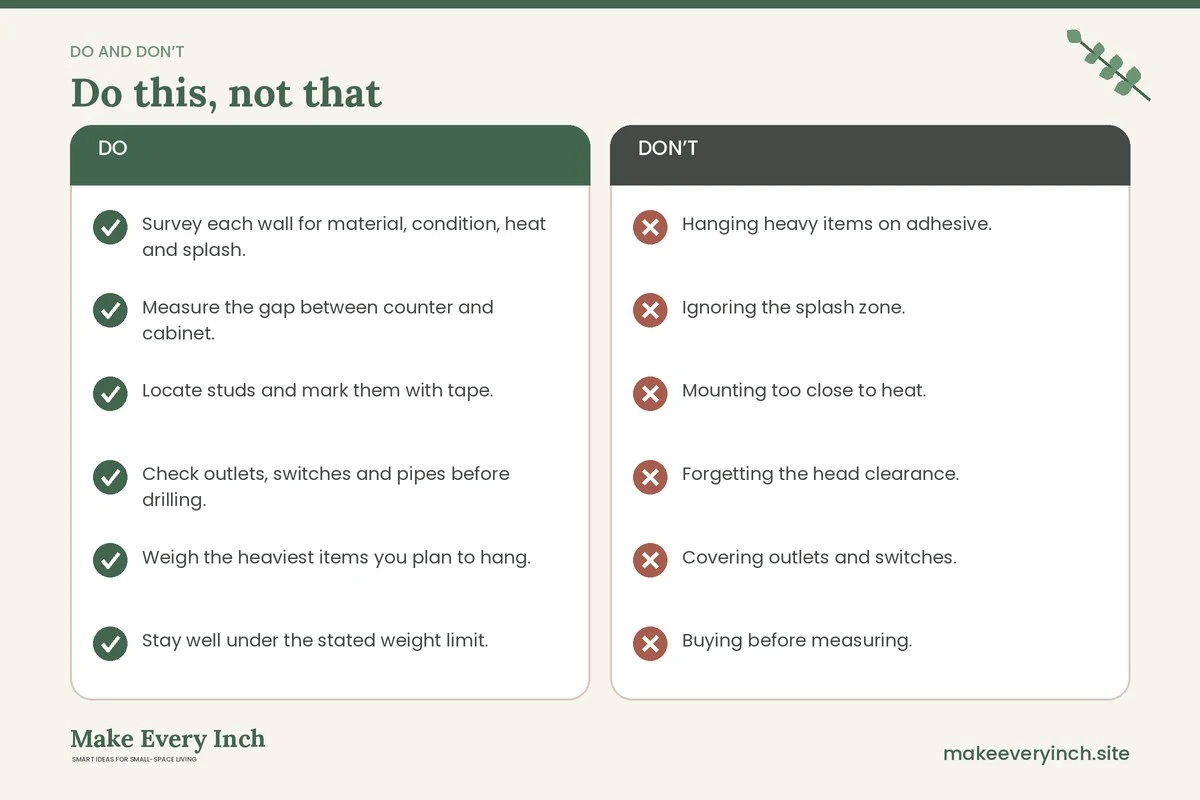
- Hanging heavy items on adhesive. Adhesive suits light loads only. Use screws into studs for heavy things.
- Ignoring the splash zone. Paper, untreated wood and cheap metal do not last next to a sink.
- Mounting too close to heat. The area beside a stove can be hot, and some materials warp or fail.
- Forgetting the head clearance. A rail at head height in a narrow galley is a hazard, so test by walking past.
- Covering outlets and switches. Keep them accessible, and do not hang items across them.
- Buying before measuring. Always measure the gap and plan on paper or with tape.
- Overloading a pegboard. A pegboard filled to the edge looks crowded and puts uneven load on the fixings.
Wall storage checklist
- Survey each wall for material, condition, heat and splash.
- Measure the gap between counter and cabinet.
- Locate studs and mark them with tape.
- Check outlets, switches and pipes before drilling.
- Weigh the heaviest items you plan to hang.
- Stay well under the stated weight limit.
- Keep flammable items clear of heat.
- Ask permission before drilling in a rental.
- Use adhesive only for light loads on clean, dry walls.
- Mount knives high and edge in.
- Test every fixing by pulling before loading.
- Wipe the wall system regularly.
FAQ
How much weight can a kitchen wall hold?
It depends on the wall and the fixing. A screw into a stud holds far more than an anchor in drywall alone, and adhesive holds the least. Follow the rating on the product, load it to well under that figure and ask a professional if you plan to hang something heavy.
Can I use a pegboard in a rental?
Often yes, if you mount it with permission, or lean a freestanding board against a wall. If you cannot drill, consider a door-hung or free-standing alternative, and check the lease first.
Do adhesive hooks work in a kitchen?
They can for light items on clean, dry walls away from the stove and sink. Heat, steam and grease weaken adhesive, so choose another system in those zones.
Where is the safest place to put a magnetic knife strip?
Choose a spot out of the reach of children, away from the edge of a busy walkway and near the prep area. Mount it firmly, with the blade edges facing in.
How high should a kitchen rail go?
Place it where the item is easy to grab, often 4 to 8 inches above the counter for tools, and keep at least 2 inches of clearance above the hanging item.
What if I do not know where the studs are?
Use a stud finder or a magnet, then confirm with two or three marks. If you still cannot find one, use rated anchors for light loads or choose a freestanding unit.
Will wall storage make my small kitchen look cluttered?
It can if you hang too much. Limit the wall to everyday tools, group like items, leave gaps and keep colors limited.
Keep going: Keep going with our guides to small kitchen cabinet organization ideas, small kitchen drawer organization ideas and vertical storage ideas.
Save this guide for later
Pin the ideas you like to Pinterest so you can come back to them when you plan your space.