13 Small Living Room TV Wall Ideas IKEA Shoppers Can Build From Flat-Pack
Quick answer: The best small living room TV wall ideas IKEA shoppers can build use modular flat-pack units: a low base cabinet, a row of wall cabinets or open shelves, and a wall-mounted screen set so its center sits near seated eye height, usually 40 to 44 inches from the floor. Plan the wall on paper in grid units, anchor every tall piece to the wall, and follow the TV and mount instructions for the fixings.
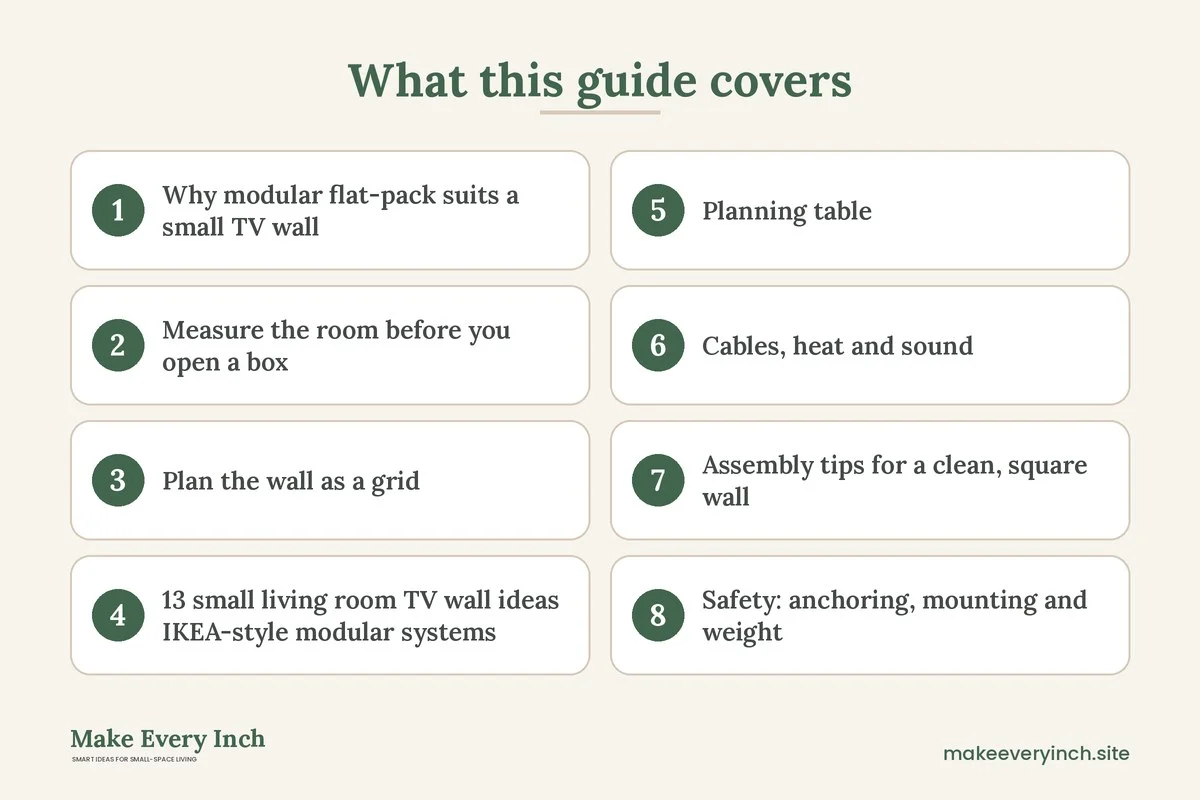
Small living room TV wall ideas IKEA fans love all share one trick: they treat the wall as a grid of standard boxes instead of one custom unit. Modular flat-pack furniture comes in repeating widths, depths and heights, so you can mix a low cabinet, a few wall boxes and a run of open shelves into a media wall that looks built-in without a carpenter. This guide explains how to think about a modular media wall, how to measure the room, how to plan the grid, and how to assemble and anchor it safely. It covers 13 layouts, a planning table, cable and heat advice, assembly tips, mistakes and a checklist. For the full overview of the topic, start with our main guide to small living room TV wall ideas, and see the wider small living room ideas pillar and our IKEA small space ideas roundup. No specific product names are used here, because ranges change often, so the plans work with any similar modular system.
Why modular flat-pack suits a small TV wall
A small living room usually has one wall that must do three jobs at once: hold the screen, store the media gear and display a few personal things. A custom built-in does all three beautifully, but it is slow and expensive. A modular flat-pack system gets you most of the way there because the pieces are designed to line up.
There are four reasons the approach works in tight rooms.
- Standard widths repeat. Cabinets and shelves often come in a small set of widths, commonly in the range of 15 to 30 inches per module. Repeating widths let you build runs that total a clean overall width.
- Depth is shallow and predictable. Wall units are often 10 to 15 inches deep, and base units 14 to 20 inches. Shallow depth keeps the room open.
- Parts are interchangeable. Doors, drawer fronts and legs can often be swapped for a different look, so a basic frame can read as modern, warm or minimal.
- You can build in stages. Buy the base cabinet first, add wall boxes when the budget allows, and finish with lighting and trim later.
The trade-off is that flat-pack panels are lighter than solid wood, and the quality of a finished wall depends on how carefully you assemble and anchor it. That is why this guide spends time on measuring, planning and safety.
Measure the room before you open a box
Modular systems reward precision. A quarter inch of error across a long run becomes a visible gap, and a wall that is not square will show it. Take these measurements before you plan a single module.
Measurements to record
- Wall width and height at three points, because walls and ceilings are rarely perfectly level. Use the smallest number.
- Viewing distance from the seat to the wall. This decides screen size and shelf placement.
- Seated eye height. Measure from the floor to your eyes while sitting on your usual sofa seat. Most people land between 38 and 44 inches.
- Obstacles. Window and door trim, baseboards, outlets, vents, radiators and switches. Mark them on your sketch.
- Floor and ceiling clearances. A baseboard or a ceiling edge can force you to shift modules by an inch or two.
The viewing distance rule of thumb
A common guide is to sit between 1.2 and 1.6 times the screen’s diagonal measurement away, depending on resolution and taste. For a 43 inch screen, that suggests about 4.5 to 6 feet. For a 55 inch screen, about 5.5 to 7.5 feet. In a small living room, with a seat only 6 to 8 feet from the wall, a screen in the range of 43 to 55 inches is usually plenty. A bigger screen in a tight room often feels overwhelming and shows more pixel structure. Check the guidance from the manufacturer of your TV for its own recommended range.
Plan the wall as a grid
Draw the wall on graph paper, with each square representing 2 inches. Mark the baseboard, the outlets and the ceiling line. Then cut paper rectangles for each module at the same scale. Move them around until the wall feels balanced.
A simple grid logic
- The base line. A low cabinet at the bottom anchors the wall. A height of 14 to 20 inches works for a low media unit, up to 30 inches if you want drawers at counter height.
- The screen zone. The screen sits above the base line, with its center at seated eye height, which is typically 40 to 44 inches from the floor. A 43 inch screen is about 21 inches tall, so its bottom edge lands around 30 to 33 inches up.
- The upper line. Wall boxes or shelves sit above or beside the screen. Keep the top line level with a door frame or the top of a window to give a calm edge.
- The side zones. Narrow columns beside the screen hold books, speakers or plants. Symmetry feels tidy. Asymmetry feels relaxed and uses less space.
Aim for margins of 2 to 4 inches between the screen and neighboring boxes, so the wall does not feel crowded. Leave 1/8 to 1/4 inch of play between modules to account for small differences in panel thickness.
13 small living room TV wall ideas IKEA-style modular systems make easy
The base cabinet layouts
1. One long low cabinet
A single low cabinet that spans the wall is the simplest modular plan. Choose a width that stops 6 to 12 inches short of each wall so the sides stay light. Doors hide the console, the router and cables, and the top holds a lamp and a plant. Mount the screen above on the wall.
2. Two base cabinets with a gap
Place two cabinets with a 10 to 20 inch gap between them, and drop a plant or a tall lamp in the gap. The gap breaks up a long run and gives air to a narrow room. A shelf or a bar between them can tie the pair together visually.
3. A floating base on the wall
Mount the base cabinet to the wall instead of setting it on legs. The floor stays visible beneath it, and a small room feels larger. Use the heavy-duty fixings recommended for the cabinet and the wall material, and follow the instructions to the letter. Never rely on a flimsy bracket, and do not load the cabinet beyond the stated weight limit.
4. A leg-raised cabinet
A cabinet on 4 to 6 inch legs lets you slide a robot vacuum under it and shows floor space. It suits small rooms with hard floors, where the visible floor adds length to the look of the room.
The wall box layouts
5. A single row of wall boxes
A row of wall cabinets mounted above the base unit, with the screen mounted to the wall between or in front of them, creates a built-in look. Keep the row to about 12 inches deep, and leave the middle zone open for the screen. Doors hide clutter, and a few open boxes hold decor.
6. Boxes flanking the screen
Place a tall box on each side of the screen, and mount the screen on the wall between them. The frame effect makes the screen look recessed. Keep the boxes about 12 inches deep so the screen does not sit in a canyon.
7. Staggered boxes for rhythm
Mount wall boxes at different heights in a loose grid. Open and closed fronts alternate. A staggered pattern adds visual interest without extra depth. It works well on a long wall, and it hides small cabling clutter behind doors.
The open shelf layouts
8. A shelf ladder on one side
A tall open shelf unit beside the screen holds books, baskets and a small speaker. Anchor it to the wall. It takes up only 12 to 16 inches of floor width and adds vertical storage. See our guide to vertical storage ideas for more ways to use height.
9. A shelf bridge over the screen
A long, narrow shelf above the screen holds light items such as a picture frame, a small plant or a trailing vine. Keep it at least 4 to 6 inches above the top of the TV so that heat and cables are not trapped, and keep the load light. This layout works only if the shelf can be fixed securely to studs or to anchors rated for the load.
10. A cube grid around the screen
A grid of square cubes forms a frame, with the screen mounted in the middle gap. Fill some cubes with baskets and leave others open. The grid reads as a deliberate design and organizes books and games.
The mixed and multi-purpose layouts
11. A media wall that doubles as a desk
In a studio or a room with a work corner, use one base cabinet as a low credenza and a pair of wall boxes beside it. A narrow shelf at desk height between the boxes forms a work surface. Use an organizer on the shelf and a clamp lamp. See our guide to best desks for small apartments if you need a desk-first plan.
12. A corner media wall
Place two modules at an angle in a corner, with the screen mounted on an articulating arm so it can swivel toward the sofa or the dining table. A corner wall frees the long wall for a sofa, but check that the arm and the screen clear the cabinet front when pulled out.
13. A storage-first wall with a hidden screen
Choose wall boxes with doors tall enough to cover the screen when it is off, or use a sliding panel. Closed doors turn a TV wall into a calm cabinet wall. Make sure there is airflow behind the doors and never close the doors while the TV is on, since the screen and gear need ventilation. This idea fits a bedroom or a multi-purpose room.
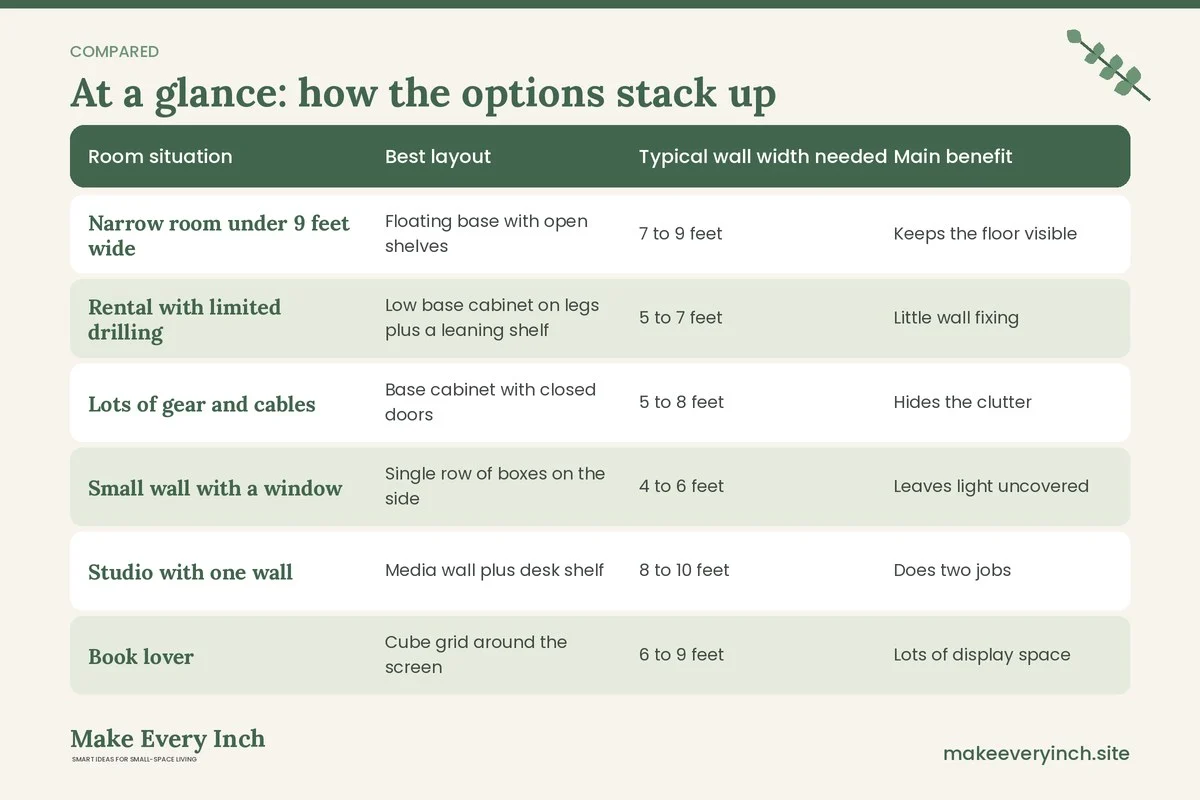
Planning table: choose your modular layout
Use the table to match your room to the idea that suits it. The numbers are rough guides, so adjust for your own wall.
| Room situation | Best layout | Typical wall width needed | Main benefit |
|---|---|---|---|
| Narrow room under 9 feet wide | Floating base with open shelves | 7 to 9 feet | Keeps the floor visible |
| Rental with limited drilling | Low base cabinet on legs plus a leaning shelf | 5 to 7 feet | Little wall fixing |
| Lots of gear and cables | Base cabinet with closed doors | 5 to 8 feet | Hides the clutter |
| Small wall with a window | Single row of boxes on the side | 4 to 6 feet | Leaves light uncovered |
| Studio with one wall | Media wall plus desk shelf | 8 to 10 feet | Does two jobs |
| Book lover | Cube grid around the screen | 6 to 9 feet | Lots of display space |
| Quiet, minimal look | One long low cabinet and a bare wall | 5 to 8 feet | Fewest lines |
Cables, heat and sound
A media wall succeeds or fails on the things you cannot see.
Cable management
Plan the route before you assemble. Many modular cabinets have cutouts or can be drilled for cable pass-throughs, but check the instructions first. Use the following approach.
- Keep power cables and signal cables bundled separately, and avoid coiling excess power cable tightly.
- Use a surge-protected power strip placed inside the base cabinet, and keep it accessible.
- Run a cable cover or a paintable raceway on the wall if you cannot hide the wire inside. Choose one rated for the wall and follow its instructions.
- If you want the wires inside the wall, ask a licensed electrician. Never run mains power cable inside a wall without proper in-wall rated cable and professional work, since it is a fire risk and often against code.
- Label the plug ends so that you can find them again.
Heat and ventilation
Consoles, cable boxes and game devices produce heat. Closed doors trap it. Leave a gap of at least an inch behind the gear, use open back panels or cut vents, and check the equipment’s own manual for clearance. If the doors have to be closed, consider a unit with an open back or use mesh door fronts.
Sound
Modular boxes are light, so they can rattle when a speaker or a subwoofer is placed on them. Use felt pads or small rubber feet under speakers. Keep subwoofers on the floor, not on a floating cabinet.
Assembly tips for a clean, square wall
Flat-pack assembly is straightforward, but a few habits make the finish look professional.
- Lay out every part first. Identify each panel and fixing against the instructions, and do not discard the spare screws until the build is done.
- Build on a soft surface. A rug or a blanket prevents scratches on the finish.
- Do not overtighten. Panels of particleboard or fiberboard can strip. Tighten until snug, then check square.
- Use a level, always. Check each module horizontally and vertically. Shim base cabinets with thin plastic wedges when the floor is not flat.
- Join modules together. Where the system allows, clamp or screw adjacent modules to each other, so the run behaves as one block.
- Hang the heaviest items last. Mount the screen after the modules are fixed and checked.
Safety: anchoring, mounting and weight
This is the part you should never skip. Tall or loaded furniture can tip, and a falling TV or cabinet can injure people and pets.
Anchoring furniture
Any tall unit, and any cabinet that holds heavy things, should be anchored to the wall using the anti-tip hardware that comes with it, or a similar kit. Fix into a stud where you can. If you cannot reach a stud, use anchors that are rated for the wall type, such as masonry anchors for brick or concrete and suitable toggles or hollow-wall anchors for drywall, always matching the rating to the load. Follow the furniture instructions for the number and position of fixings.
Mounting the TV
- Use a wall mount that is rated for the weight and the size of your screen, and that matches the hole pattern on the back of the TV.
- Follow the TV maker’s instructions and the mount’s instructions together. They set the screws, the spacing and the limits.
- Locate studs with a stud finder and mark them. If the studs do not line up with the mount, ask a professional about a stud-spanning plate or a different approach.
- Never mount a TV to a flat-pack cabinet panel, hollow shelf or thin back panel. The weight must go into the wall structure.
- Check for hidden pipes and wires with a detector before drilling.
- Ask a second person to help lift and hold the screen.
Rental homes
If you rent, read the lease before drilling. Many landlords allow small holes, and some do not. A freestanding base cabinet with anti-tip fixings in a few small holes is often an easier request than a full wall mount. A floor stand or a media console with a pole mount can also hold the screen without a wall fixing. For more options, see our guides to no-drill storage ideas for renters and renter friendly shelving, and the sibling post on renter-friendly TV wall ideas.
Children and pets
Keep cords out of reach, and fix every cabinet to the wall. Do not store heavy things high up. Avoid putting items that attract children, such as toys or sweets, on top of a tall unit.
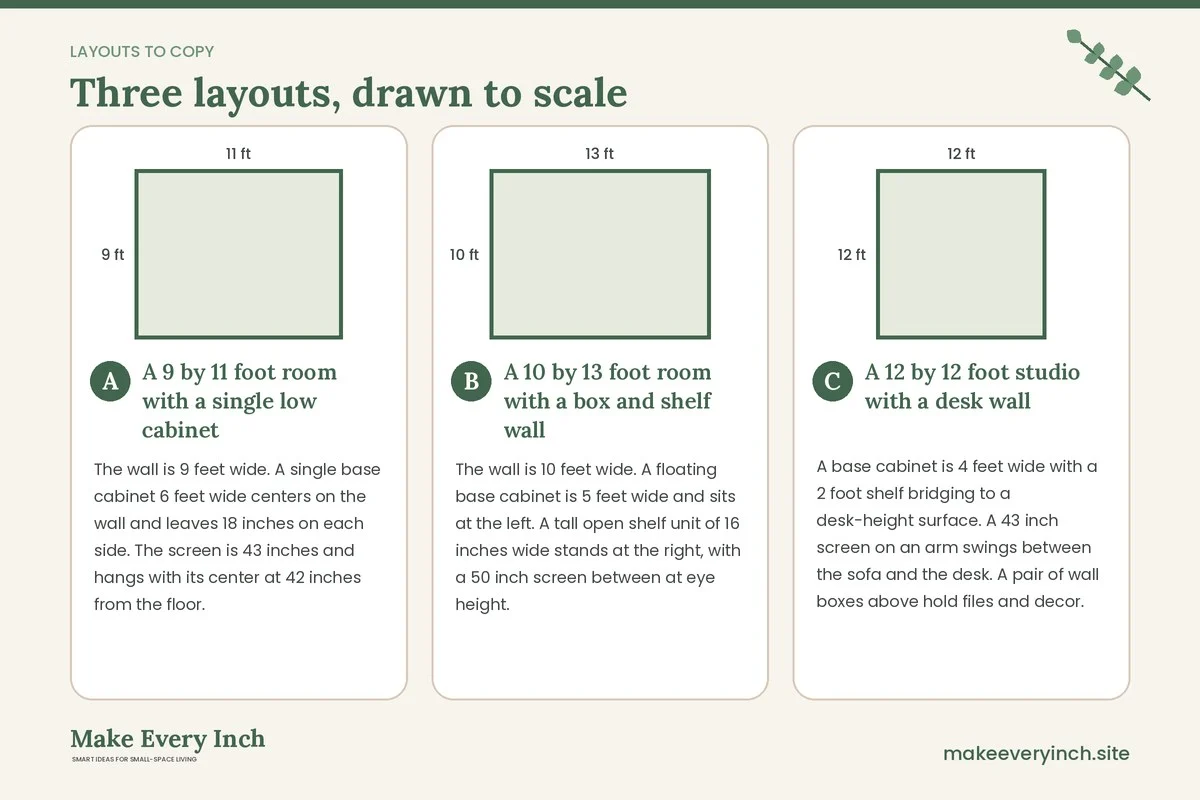
Three example walls
A 9 by 11 foot room with a single low cabinet
The wall is 9 feet wide. A single base cabinet 6 feet wide centers on the wall and leaves 18 inches on each side. The screen is 43 inches and hangs with its center at 42 inches from the floor. Two small wall shelves sit on the margins. The seat is 7 feet from the screen. The wall feels airy, and the cabinet hides the router and a game console.
A 10 by 13 foot room with a box and shelf wall
The wall is 10 feet wide. A floating base cabinet is 5 feet wide and sits at the left. A tall open shelf unit of 16 inches wide stands at the right, with a 50 inch screen between at eye height. A row of two wall boxes with doors sits above the base on the left. The look is asymmetrical, with the weight on the left and open shelves on the right. The sofa is 7.5 feet away.
A 12 by 12 foot studio with a desk wall
A base cabinet is 4 feet wide with a 2 foot shelf bridging to a desk-height surface. A 43 inch screen on an arm swings between the sofa and the desk. A pair of wall boxes above hold files and decor. The floor stays open, and the zone doubles as a media area in the evening and a work area in the day.
Style, color and finish
Modular systems come in many finishes, from white and warm wood to dark gray and painted tones. The finish decides how heavy the wall feels. Use the following guidance.
- White or pale finishes make a small wall recede and reflect light. They pair well with a white wall and a pale rug.
- Warm wood finishes add coziness and soften the black screen. Mix with a natural fiber rug.
- Dark finishes make the screen vanish when off, and they feel dramatic. Add lighting so the wall does not feel like a hole.
- Painted doors let you customize. A matte paint over a primer suited to laminated panels, following the paint maker’s instructions, can change the whole look. Check the surface before you start.
Add trim, panels or a simple frame around the modules to create a built-in look. A thin strip of wood trim fixed across the top of the run hides the gap to the ceiling.
Lighting the wall
Light turns a stack of boxes into a feature. Place a warm, dimmable light behind or beside the screen to reduce eye strain from the contrast between a bright screen and a dark wall. Adhesive or plug-in LED strips inside open shelves add a glow without hardwiring. Keep lights from reflecting on the screen. Our guide to small living room lighting ideas goes deeper.
Mistakes to avoid
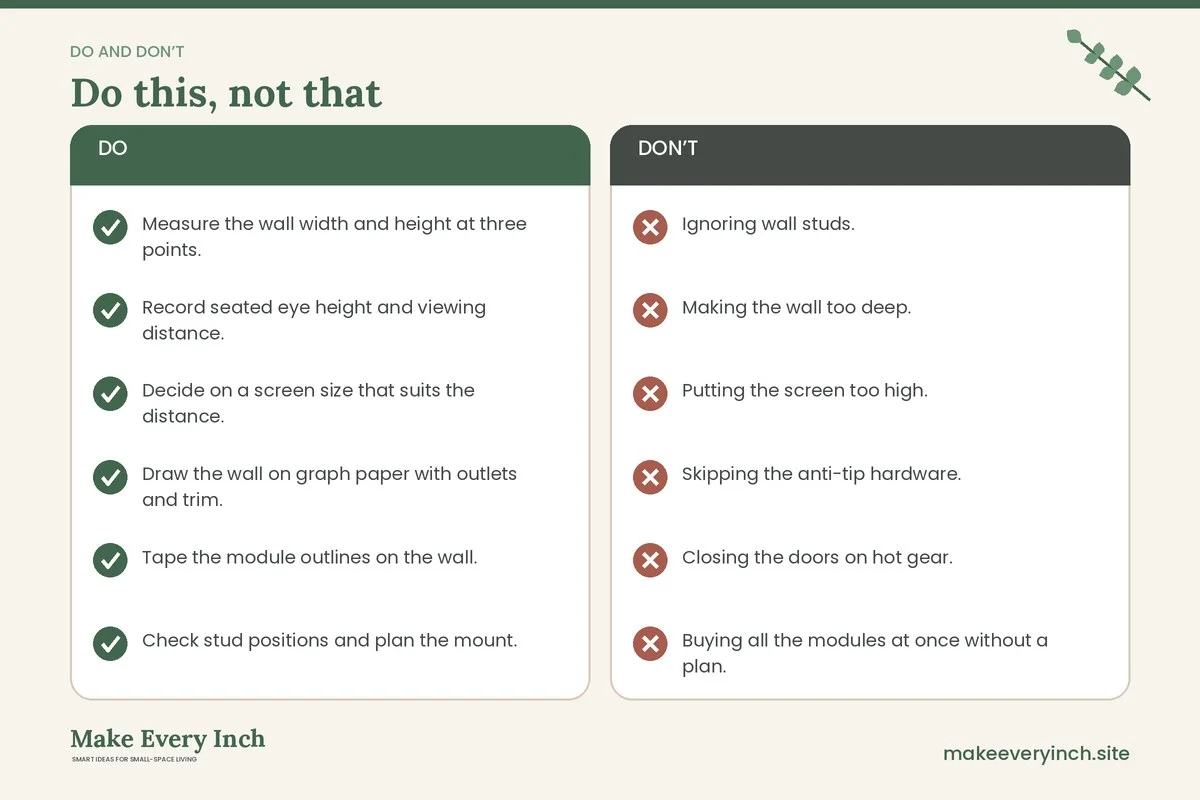
- Ignoring wall studs. Plan the screen position against the stud locations before you commit to the grid.
- Making the wall too deep. Anything over 16 inches in a small room can eat the walkway.
- Putting the screen too high. A screen above 55 inches off the floor strains the neck. Aim for the center at seated eye height.
- Skipping the anti-tip hardware. It is not optional on tall pieces.
- Closing the doors on hot gear. Always allow airflow.
- Buying all the modules at once without a plan. Draw it, tape it on the wall and live with it for a few days.
- Forgetting the outlet. Place the base cabinet so the outlets are reachable, or add a plan for the power strip.
- Mixing too many finishes. Pick two at most and repeat them.
Checklist
- Measure the wall width and height at three points.
- Record seated eye height and viewing distance.
- Decide on a screen size that suits the distance.
- Draw the wall on graph paper with outlets and trim.
- Tape the module outlines on the wall.
- Check stud positions and plan the mount.
- Confirm the weight rating of the mount and the TV.
- Plan the cable route and the power strip.
- Leave airflow for gear and the TV.
- Read the lease if you rent.
- Assemble on a soft surface and check each module for level.
- Fix tall and loaded units to the wall.
- Add lighting and decor last.
FAQ
How high should a TV be on a modular wall?
Set the center of the screen at about seated eye height, usually between 40 and 44 inches from the floor. If you often watch from the floor or a bed, lower it a little. Always check your own seat height.
Can I mount a TV on flat-pack cabinets?
Do not hang the screen from a cabinet panel. Mount it to the wall structure with a mount rated for the screen, and follow the instructions of the TV and the mount. Flat-pack panels are not designed to carry that load.
What is the best screen size for a small room?
For a seat 6 to 8 feet away, many people find 43 to 55 inches comfortable. A smaller screen is easier to blend into the wall. Choose according to the distance and the manufacturer’s guidance.
How deep should the media unit be?
Base units of 14 to 18 inches deep hold most gear, and wall boxes of 10 to 12 inches are enough for books and decor. Keep the whole wall under about 16 inches deep in a small room.
How do I hide the cables?
Use cutouts and pass-throughs inside the cabinet, a surge-protected strip, and a paintable cable cover on the wall. For wiring inside the wall, hire a licensed electrician.
Can I build this in a rental?
Often yes, with a freestanding base cabinet and anti-tip fixings that leave small holes. Ask your landlord, and consider a floor stand to avoid mounting the screen at all.
Do I need a special system for a corner?
No. You can mix modules at an angle, but check that doors and drawers open without hitting each other and that the screen arm can swivel freely.
Keep going: Keep planning with our small living room storage ideas, small living room layout ideas and the sibling guide to cozy small living room TV wall ideas.
Save this guide for later
Pin the ideas you like to Pinterest so you can come back to them when you plan your space.