Small Kitchen Ideas with Limited Counter Space: 14 Ways to Gain Room
Quick answer: The best small kitchen ideas with limited counter space work in this order: clear the counter down to a few daily items, then create temporary prep surfaces with a sink cover or stove cover, add a cart or drop-leaf shelf for overflow and move tools onto wall rails. Aim for one clear prep zone of about 24 by 24 inches beside the sink or stove, and use a simple prep routine so the zone is empty again when you finish.
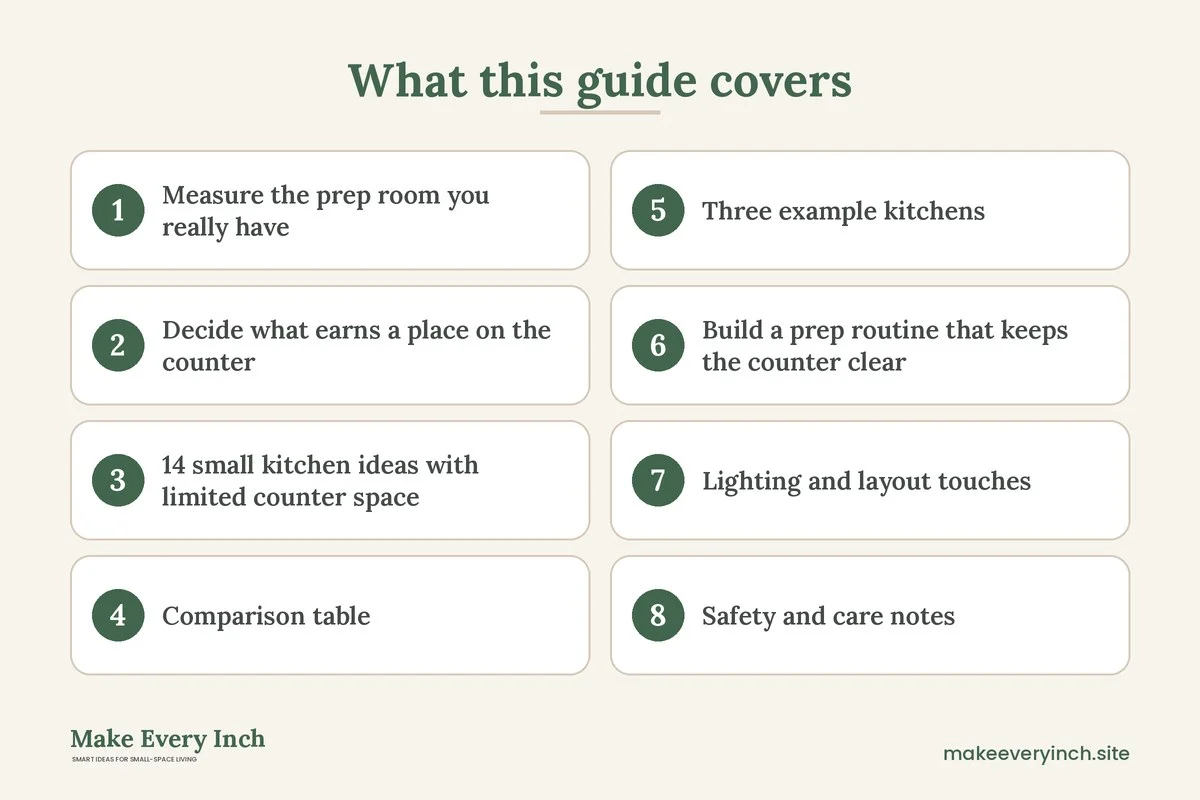
Small kitchen ideas with limited counter space begin with a hard truth: you probably cannot add more counter, so you have to make the counter you have act bigger. Many small kitchens have as little as two or three feet of usable surface, and appliances, a dish rack and mail tend to take most of it. When you try to chop an onion on a cutting board balanced across the sink, the problem becomes obvious. This guide takes a work-surface approach. It covers how to measure the prep room you really have, which items deserve counter space, how to borrow surfaces from the sink, the stove, a cart and the wall, 14 specific ideas, a comparison table, three example kitchens, prep routines for a busy week, safety notes and a checklist. For the full range of small-kitchen solutions, see our pillar guide to small kitchen ideas. This post is different from our guide to small kitchen counter organization, which is about arranging and sorting what sits on the counter. Here the focus is on creating working surface when there is almost none.
Measure the prep room you really have
Before you buy a cutting board or a cart, find out how much clear counter you have at the moment, and where it sits. Many people discover that the counter is long enough, but the pieces are the wrong ones, split by a stove, a sink and a fridge into patches of 8 to 12 inches.
The three-patch test
Walk around the kitchen and measure each stretch of counter between obstacles. Write down the length and depth of each one. A useful prep patch is at least 24 inches wide and 16 inches deep, which fits a cutting board, a bowl and a knife. Anything smaller is a parking spot, not a prep zone. Most small kitchens have one decent patch, one marginal patch and one useless corner.
The reach triangle
The best prep patch sits between the sink and the stove, because you wash, chop and cook within a step or two. Stand at that point and see if you can reach the sink tap, the stove knobs and a trash bin without moving your feet. If you can, protect this patch above all others. If you cannot, think about whether a cart or another surface can create a similar zone nearby.
Clear height matters
Measure the gap between the counter and the underside of the upper cabinets, which is often 15 to 20 inches. Tall appliances such as a stand mixer or a toaster oven may be too tall to use under the cabinet, which means they have to be pulled forward and eat even more counter. Knowing the clear height helps you choose which appliances stay and which go to a shelf.
Decide what earns a place on the counter
Counter space is the most expensive real estate in a small kitchen, and each item should pay rent. Use a simple rule: an item stays out only if you use it at least four times a week and it needs the counter to work.
The keep list
In many kitchens, the keepers are a kettle or coffee machine, a cutting board, a small crock for tools and a dish soap and sponge on a tray. These are used every day, and they are awkward to retrieve if they live elsewhere. If you bake every morning, a toaster might earn a spot. If you do not, it belongs elsewhere.
The move list
Move everything else. Blenders, food processors, stand mixers, rice cookers and air fryers can live in a lower cabinet, on a shelf or on a cart, and come out when needed. Bring them to the counter, use them and put them away straight after. Think of the counter as a work surface that is empty by default, not a storage shelf. Our post on small kitchen storage ideas gives more options for where the displaced items can go.
The out list
Mail, keys, school papers, chargers and decorative items do not belong on a kitchen counter at all. Give them a basket at the entry or a drop zone elsewhere. Even a tidy pile steals surface from the place where you need it most.
14 small kitchen ideas with limited counter space
Idea group 1: Borrow the sink
1. A sink cover or a cutting board that spans the basin
A board cut or sized to rest on the rim of the sink turns a wet area into a prep surface. Choose a board that fits the width and depth of your sink with an overhang of about 1 inch on each side, so it cannot slip in. A board with a juice groove or a raised lip helps keep liquids contained. Clear the sink first, and remove the board when you need to wash. This single move can add a 15 by 20 inch work surface, and it is one of the cheapest ways to gain room.
2. A roll-up drying mat over the basin
A roll-up rack sits over the sink and holds dishes to dry above the basin instead of on the counter. This frees 12 to 18 inches of counter that a dish rack usually takes, and the water drains into the sink. Use it for the day, then roll it up and store it in a drawer. In a rental, there is nothing to install.
3. An over-the-sink colander or a sliding shelf
A shelf that slides on the sink rim holds a colander, vegetables and a bowl while you prepare. It is helpful because you can wash and drain over the same space. Check that the sink rim is flat and that the shelf rests securely on both sides.
Idea group 2: Borrow the stove
4. A stove cover or a flat lid over the burners
A flat, sturdy cover that sits on top of a cool stove works as a counter when you are not cooking. Choose a cover made for your type of stove, whether gas, electric coil or smooth top, and check the maker’s weight limit. Never use a cover on a stove that is on or still warm, and never leave a cover in place when you start to cook. Remove it and put it somewhere safe before you light a burner or turn on an element.
5. A board over two burners
A heat-safe board that bridges two cool burners gives a small prep area, but it is only for cold prep. A gas stove with grates will hold a board if the grates are flat and stable. Take the board off before you light a burner. As a rule, keep a clear habit of removing it first, and consider a visual cue such as keeping the board on a hook beside the stove when not in use.
6. Prep the sequence around the stove
Plan the order of tasks so that the chopping happens first, on the borrowed surface, and the cooking happens afterward. When the burners are lit, the cover is off and the board moves to the sink. This simple sequence avoids using the stove as a counter while it is hot.
Idea group 3: Add surface you can move
7. A cart with a solid top
A rolling cart with a butcher-block or metal top, around 15 to 20 inches deep, adds 20 or more inches of working surface. Park it next to the main counter while you cook and roll it away to a wall afterward. Choose locking wheels, and make sure the top height matches your counter, which is commonly 36 inches. For choices and layouts, read our guide to small kitchen cart ideas and our list of the best rolling kitchen carts.
8. A drop-leaf or fold-down shelf
A drop-leaf table or a wall-mounted fold-down shelf folds flat when not in use. A depth of 12 to 16 inches suits a cutting board and a bowl. Wall-mounted versions need secure fixing into studs or proper anchors, so ask your landlord before you drill. In a rental, a freestanding drop-leaf cart is a safer option.
9. A pull-out cutting board in a drawer
Some cabinets have a slot for a pull-out board, and it can be added to a drawer top. If you have an empty drawer, a thick board cut to fit and resting on the drawer sides works as a second surface when the drawer is open. Do not load it heavily.
10. An over-the-counter shelf
A two-tier shelf over the counter or at the back of the counter lifts jars and small appliances off the work surface. It uses vertical space, not floor space. Choose one with legs that sit near the back wall, so it does not block the prep area. Test stability by pressing down before you load it.
Idea group 4: Take things off the counter
11. A wall rail with hooks
A rail on the wall between the counter and the upper cabinet holds tools, mugs and small pots. Hang the most-used items within easy reach, and leave the heavy ones to a lower location. A rail needs screws, so ask before drilling if you rent, or choose a tension or adhesive option with a weight rating higher than the load. See our guide to vertical storage ideas for more.
12. A magnetic strip for knives
A strip on the wall holds knives off the counter and gives the board more room. Mount it high enough to be out of a child’s reach, usually above 5 feet, and away from the sink spray. Knives should hang with the blade secured and the edge away from where you walk. If you cannot drill, put knives in a block that fits in a drawer.
13. Under-cabinet hooks and baskets
Hooks under an upper cabinet hold mugs and small tools, and a basket holds bread or onions. The dead space under the cabinet becomes useful. Our post about small kitchen lighting ideas explains how an under-cabinet light can sit in the same area, so plan the two together.
14. Move small appliances to a shelf or a cart
A toaster oven, a blender and a rice cooker take up a lot of room. Give them a dedicated shelf or the lower tier of a cart, and put the plug within reach. Pull one out, use it and put it back. This is the single most effective change in many kitchens, and it costs nothing.
Comparison table: which borrowed surface fits which task
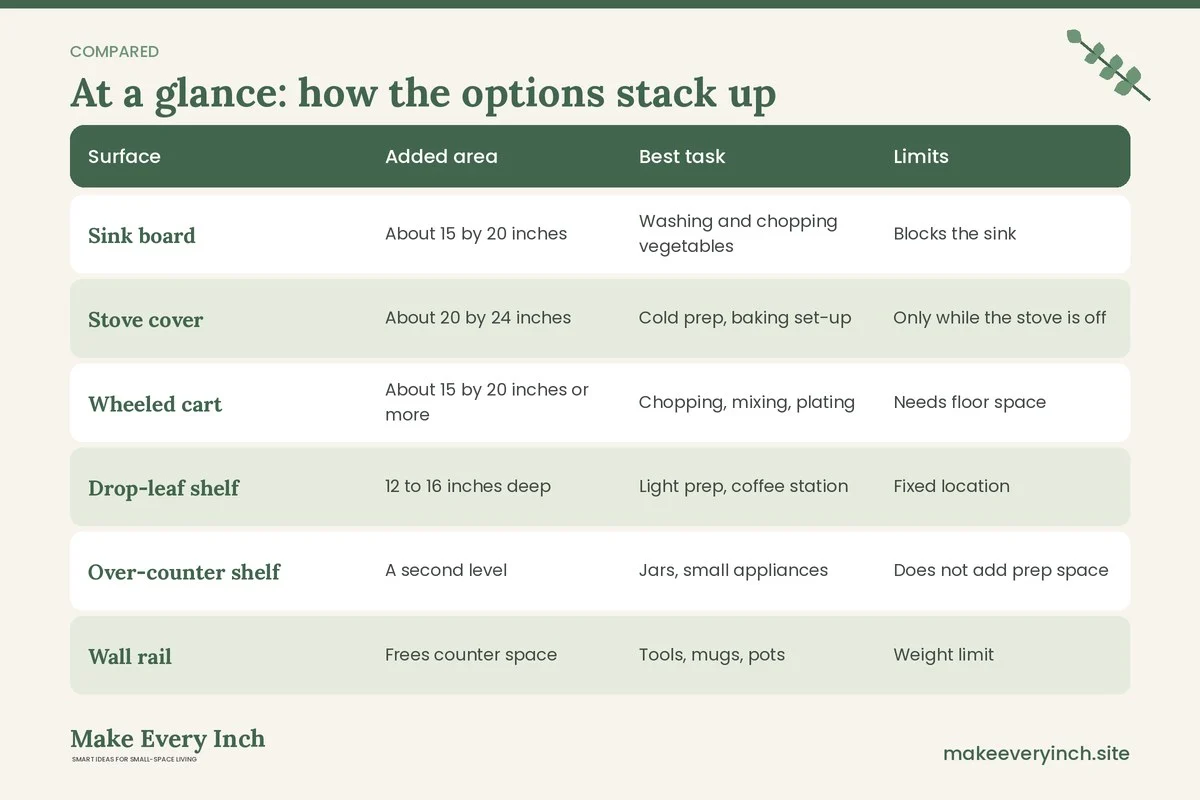
Not every surface suits every job. Use this table to match the surface to the task.
| Surface | Added area | Best task | Limits | Safety note |
|---|---|---|---|---|
| Sink board | About 15 by 20 inches | Washing and chopping vegetables | Blocks the sink | Remove before washing, keep dry |
| Stove cover | About 20 by 24 inches | Cold prep, baking set-up | Only while the stove is off | Never use while the stove is warm |
| Wheeled cart | About 15 by 20 inches or more | Chopping, mixing, plating | Needs floor space | Lock the wheels |
| Drop-leaf shelf | 12 to 16 inches deep | Light prep, coffee station | Fixed location | Anchor it securely |
| Over-counter shelf | A second level | Jars, small appliances | Does not add prep space | Keep it stable and avoid overloading |
| Wall rail | Frees counter space | Tools, mugs, pots | Weight limit | Fix properly or use a rated adhesive |
| Drawer board | Small | Small cutting jobs | Not heavy use | Support it fully |
Three example kitchens
A 6-foot single-wall kitchen with a short counter
This kitchen has a sink, a stove and 24 inches of counter between them. That patch is the whole prep zone, so it must be empty by default. A sink board adds 15 inches of surface when needed, and a narrow cart, 12 inches wide, parks at the end of the run for the mixer and the cutting boards. A magnetic strip takes the knives off the counter, and a rail holds the tools. A kettle and a crock of utensils are the only items on the counter. The rest lives in the cabinets. For related layouts, see our guide to tiny kitchen ideas.
A galley kitchen with the stove at one end
In a galley kitchen with two parallel runs, the walkway is often 36 to 42 inches wide. A cart would block it, so use a wall-mounted drop-leaf shelf on the shorter wall, or a board on the sink. A stove cover supplies room for cold prep. An over-the-counter shelf lifts jars off the counter, and the dish rack goes over the sink. See our guide to galley kitchen ideas for more layout detail.
A studio kitchenette with a small fridge
A studio kitchenette often has a two-burner stove, a small sink and one patch of counter. Here the cart is the most valuable item, because it provides the missing prep room. Place it against the end of the run, and when you cook, pull it out. Use the top of the fridge, with a bin, for light items only, and a rail for the tools. The cover over the burners supports cold prep. A tray holds the kettle and soap. For ideas that apply to a rental, read our post on small apartment kitchen ideas.
Build a prep routine that keeps the counter clear
Furniture can only do so much. A routine is what turns a cleared counter into a counter that stays clear.
Before you cook: the three-minute set-up
Clear the prep patch completely, and wipe it down. Take out the board, the knife and one bowl for scraps. Pull out only the appliances you will use. Put the compost bowl or scrap bag on the board’s edge, so you do not need to travel to the bin. This habit reduces the number of times you reach into cabinets.
While you cook: the clean-as-you-go rule
Wash each tool when you finish with it, and keep the sink free. Put used items into the sink or a basin, not on the counter. If a surface gets full, move to the next one, such as the cart or the board over the sink. A cook working in a small kitchen thinks in stages, so chop, cook, then plate.
After you cook: the five-minute reset
Wipe each surface, put the appliances back, hang the tools on the rail and return the borrowed surfaces to their places. A cover goes back on the stove only when it is cool. The goal is that the counter looks the same as it did before you started.
Weekly: the batch prep
If your counter is very limited, do a batch prep on the weekend. Wash and chop vegetables for the week while you have time, and store them in containers in the fridge. This reduces the amount of prep needed each night, so the small counter has less to do on weekdays.
Lighting and layout touches
Good light makes a small counter feel bigger and safer. A bright, even light on the prep patch lets you see the knife edge and the food. Under-cabinet strips or a clip-on lamp are a good choice, and plug-in options mean no wiring work. Keep cords tidy and away from the sink and the stove. Light colors on the counter reflect light, and a plain, clear surface looks larger than a busy one. If you rent and cannot change the counter, a large cutting board or a mat in a light color can change the feel.
Safety and care notes
A kitchen with little counter space invites improvisation, so safety needs extra attention.
- Never use the stove as a surface while it is warm. Check every burner and the oven before you place anything on top. Remove covers and boards before you start to cook.
- Keep cords and water apart. Place small appliances away from the sink, and do not run cords across a wet surface. Use outlets with protection if your home has them, and avoid daisy-chaining power strips.
- Lock the wheels. A cart that rolls while you chop is a risk. Lock the wheels before use, and keep the cart off the main walkway.
- Anchor wall-mounted items. A fold-down shelf, a rail or a magnetic strip must be fixed into studs or with the correct anchors. Do not exceed the weight rating. Never drill without permission in a rental.
- Store knives safely. Mount magnetic strips out of reach of children, and keep knives away from the edge of a board or cart.
- Ventilate when you cook. Use the fan or open a window, especially if you have moved appliances closer to the stove.
- Keep fabric away from heat. Cloths, mats and paper towels should not lie on or near a burner.
Common mistakes with limited counter space
- Keeping appliances out all the time. A toaster that you use twice a week should not occupy the best 12 inches of counter.
- Buying a cart that is too big. Measure the walkway first, and leave at least 30 to 36 inches of clear floor for moving around.
- Using the stove as storage. A pot on the stove top fills the surface and risks a spill when you need the burner.
- Skipping the reset. A prep zone that is full of yesterday’s items is no longer a prep zone.
- Ignoring vertical space. Walls and cabinet undersides can take the tools and mugs, which frees the counter.
- Forgetting the drop zone. Without a basket for keys and mail, those items will return to the counter.
- Buying many small organizers. Each one occupies counter space too. Use fewer, larger items that lift things off the counter, not onto it.
A simple, low-cost plan
You can improve a tight kitchen over a weekend without spending much. On the first day, clear the counter fully and decide what comes back. On the second day, place a board over the sink, move the tools to a rail or a crock and relocate the small appliances to a shelf. After a week, decide whether you need a cart. Second-hand shops and online marketplaces often sell small carts and boards, but check that wheels lock and that the top is stable. Add the stove cover and the roll-up rack only if you notice you need them.
Quick checklist
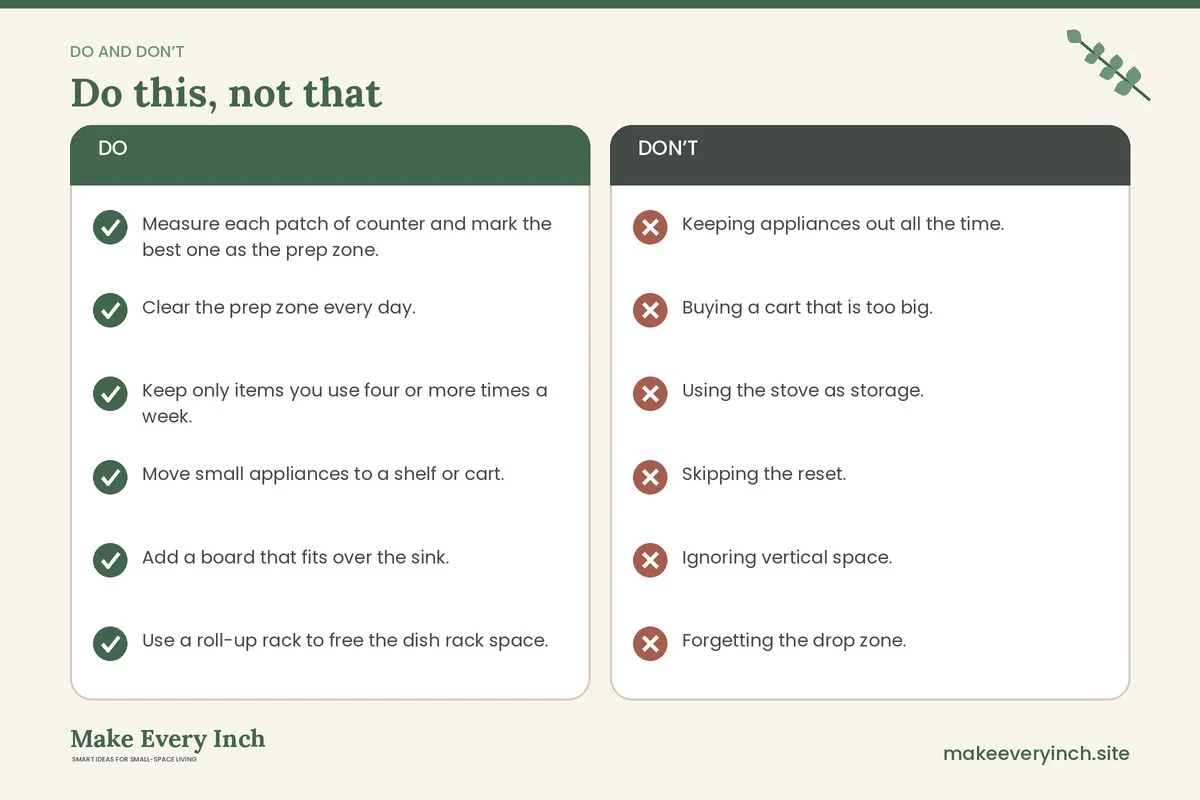
- Measure each patch of counter and mark the best one as the prep zone.
- Clear the prep zone every day.
- Keep only items you use four or more times a week.
- Move small appliances to a shelf or cart.
- Add a board that fits over the sink.
- Use a roll-up rack to free the dish rack space.
- Use a stove cover only when the stove is cool.
- Add a cart with locking wheels if the walkway allows 30 to 36 inches.
- Hang tools on a rail and knives on a magnetic strip.
- Fix wall items properly and ask before drilling.
- Place a basket at the entry for mail and keys.
- Follow a three-minute set-up and a five-minute reset.
FAQ
How can I get more counter space in a small kitchen without remodeling?
Borrow surfaces: place a board over the sink, use a stove cover when the stove is off, add a cart and move tools to a wall rail. Then clear the counter of anything you do not use daily.
Is it safe to use a stove cover as a counter?
It can be, if the stove is off and cool, the cover is made for your stove type and you stay within its weight limit. Always remove it before you cook, and never leave it in place when you turn on a burner.
What size cart works in a small kitchen?
Many people choose a cart about 12 to 20 inches deep and 15 to 30 inches wide. Leave 30 to 36 inches of clear walkway when the cart is parked, and choose locking wheels.
What should stay on the counter?
Keep only what you use at least four times a week and what needs the counter to work, such as a kettle, a cutting board and a small crock of tools. Move everything else to a shelf or cabinet.
Can renters add counter space without drilling?
Yes. A cart, a sink board, a roll-up rack and a freestanding drop-leaf all need no tools. For more options, see our list of renter-friendly kitchen upgrades.
How do I deal with no counter space and no pantry?
Treat the two as one problem. Put food in cabinets and carts so the counter stays clear. Our post on small kitchen ideas with no pantry shows how to store food in zones.
Where do I put the dish rack?
Over the sink on a roll-up rack, or inside a cabinet with a drip tray, if you have the room. Putting it on the counter takes the best prep space.
Keep going: Keep planning with our small kitchen ideas pillar guide, our small kitchen organization ideas and our small kitchen makeover ideas.
Save this guide for later
Pin the ideas you like to Pinterest so you can come back to them when you plan your space.