12 Small Room Decor Before and After Ideas with Makeover Steps
Quick answer: A small room decor before after makeover works best when you change things in a fixed order: clear the floor, fix the light, simplify the walls, then add color and texture. Photograph the room first, note three things that bother you, change one layer per weekend, and compare photos taken from the same doorway. Check the lease before painting or drilling.
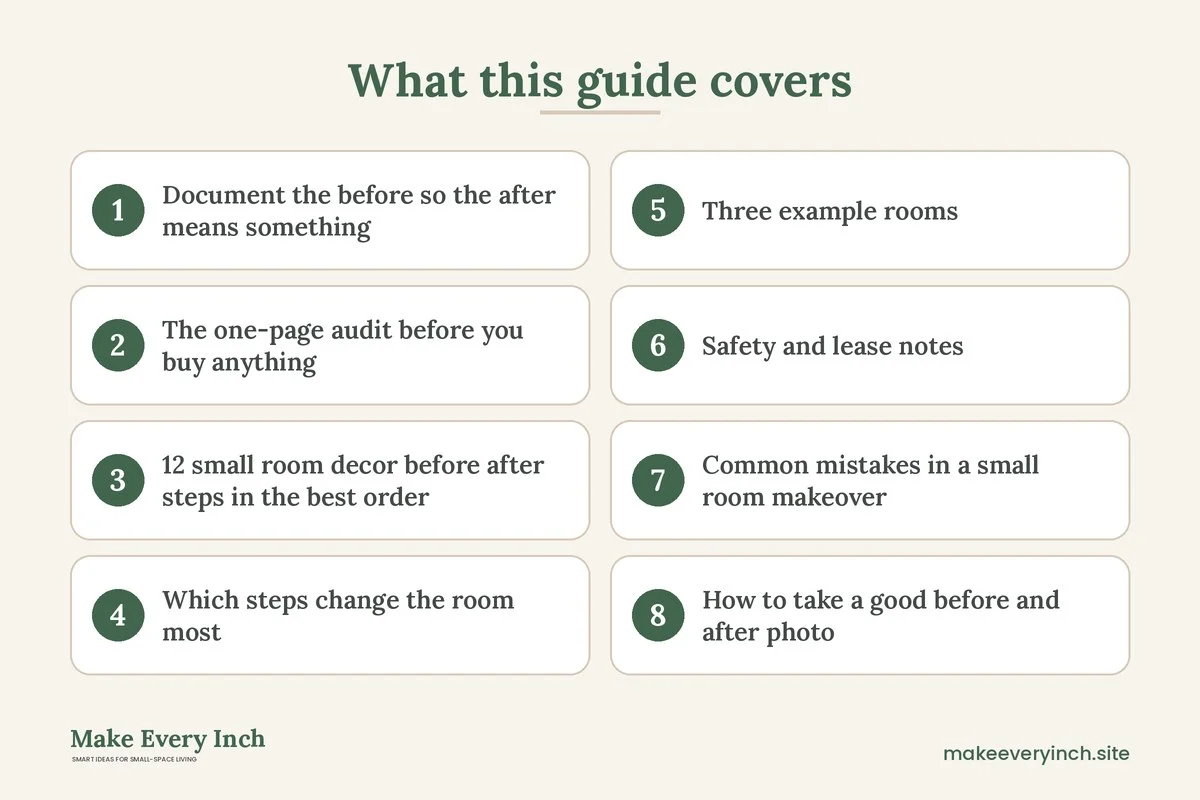
A small room decor before after project is satisfying because the proof is in the photos. You stand in the doorway, take a picture, spend a few weekends moving, editing and adding, then stand in the same spot and see what changed. The trouble is that many makeovers stall halfway. People buy a rug, a lamp and three cushions, and the room still feels cramped, because they changed the surface and skipped the structure. This guide gives you a sequence. It covers how to document the starting point, a one-page audit, 12 steps in the order that gives the biggest visible change for the least effort, a table that ranks each step by impact and effort, three example rooms with before and after numbers, safety and lease notes, mistakes and a checklist. For the wider topic, read our main guide to small room decor ideas, and for the room-specific versions see our posts on small bathroom ideas before and after, small kitchen before and after ideas and small dining room before and after ideas.
Document the before so the after means something
The most useful tool in a makeover is a phone camera used with discipline. Pick one spot, ideally the doorway or the corner diagonal to it, and take every photo from there at the same height, around chest level, with the lens pointing the same direction. Take one with the lights on and one with them off during the day, and one at night. Take a close shot of each wall, the floor and any corner that collects items. Save them in a folder named with the date.
Then write down three things that bother you. Be specific. “It feels messy” is vague, while “I cannot see the floor under the desk” and “the only light is the ceiling fixture” can be solved. Add one thing you love about the room, such as the window or a piece of furniture, so the makeover builds on it. Finally, draw a rough plan on paper with the room dimensions, door swing, window position, outlets and radiators. Most small rooms are between 70 and 120 square feet, and a simple sketch shows where the dead space is.
The one-page audit before you buy anything
Before spending money, answer five questions on paper. They decide which of the 12 steps you need most.
- What is on the floor? Count the pieces of furniture and the loose items. A room with more than six objects touching the floor in a 100 square foot space usually reads as crowded.
- Where does the light come from? List every source. A single overhead light flattens the room and casts shadows. Two or three sources at different heights add depth.
- What do the walls do? Count the frames, shelves and marks. A wall with many small pieces looks busy, while one large piece or none looks calm.
- How many colors do you see? Count the main colors, not counting white. More than four distinct hues in a small room tend to feel scattered.
- What does the eye land on first? If it lands on a pile or a cord, that is your first fix. If it lands on a window or a nice object, protect it.
Write the answers next to your photos. These notes become your brief. If you are tempted to skip this step, remember that a makeover without a brief tends to become a shopping trip.
12 small room decor before after steps in the best order
The order matters. Each step makes the next one easier and shows up clearly in the after photo. Do one or two per weekend and re-photograph after each.
Step 1: Clear the floor first
Take everything off the floor that does not belong there. Move boxes, bags, baskets and loose shoes to another room or a closed cabinet. Leave only furniture and a rug. This single step often makes the largest visible change, and it costs nothing. Photograph the room again before you add anything back. If the room has a closet, empty only what is on the floor of it, and do the closet separately.
Step 2: Reduce furniture to what you use daily
Note which pieces you used in the last week. A chair that holds laundry, a side table that holds nothing and a bookcase that is half empty are candidates to leave or relocate. Aim to keep the walkway at 30 to 36 inches wide between the main pieces and at least 24 inches where only one person passes. If a piece must stay, check whether a smaller version or a wall-hung version would work. Our post on small apartment decluttering ideas gives a method for sorting without regret.
Step 3: Fix the light
Most small rooms improve more from lighting than from any piece of decor. Replace a harsh overhead bulb with a warm one, around 2700 to 3000 kelvin, and add at least one lamp at a lower height. Place the lamp where the room is darkest, usually a corner, because lit corners make the walls look farther away. Plug-in wall lights and clip lights suit renters. Always check that the bulb’s wattage is within the fixture’s limit, keep cords out of walkways and avoid daisy-chaining power strips. For plans, see our guides to layered lighting ideas for small apartments and renter friendly lighting ideas.
Step 4: Edit the walls
Take down everything that has no meaning and look at the empty wall. Then decide on one focal point. A single large frame hung with its center about 57 inches from the floor, or a tight group that forms one rectangle, calms a wall. Keep 2 to 3 inches between frames in a group. If you rent, use removable options and test them on a hidden spot first. Never drill without written permission, and respect the weight rating on any adhesive product. Our post on renter friendly wall decor ideas covers options by risk level.
Step 5: Choose a palette of three
Pick one main color, one secondary and one accent. The main color covers about 60 percent of the room, the secondary around 30 percent and the accent around 10 percent. In a small room, light and mid-tone neutrals reflect light, and a single darker accent adds depth. If you want a deeper color, put it on one wall behind the bed or sofa rather than on every wall. For ideas, read about colors that make small rooms look bigger.
Step 6: Paint or cover, if the lease allows
Paint is the strongest change you can make, but only if you have permission. Ask in writing, and ask whether you must repaint at move-out. Choose a paint labeled low-VOC, open the windows, run a fan and keep children and pets out of the room until the smell has cleared and the paint has dried according to the can. Do not sand old paint in a home built before 1978 without checking for lead first. If paint is off the table, use a large piece of art, a fabric panel on a tension rod or a headboard to bring in color.
Step 7: Add a rug that anchors the furniture
A rug sets the zone and covers a worn floor. In a small room, choose one that is large enough for the front legs of the main furniture to sit on it. For a living room this is often 5 by 8 feet, and for a bedroom it should extend 18 to 24 inches beyond the bed on each side. Use a non-slip pad rated for your floor, and keep the edges flat so nobody trips. A flat weave is easier to vacuum and sits under doors.
Step 8: Raise the curtains and widen them
Hang the rod 4 to 6 inches above the window frame, or nearer the ceiling if the ceiling is low enough that it matters, and extend it 6 to 10 inches on each side so the curtains clear the glass when open. This makes the window appear larger and brings the eye up. Use a tension rod or an adhesive-mounted rod if you cannot drill. Keep cords for blinds out of reach of children and pets, since they are a strangulation hazard. See our post on renter friendly window treatment ideas.
Step 9: Add one mirror, placed with intent
A mirror across from a window doubles the daylight. A mirror facing a messy corner doubles the mess. Look at what the mirror will reflect before you hang or lean it. A leaning floor mirror needs to be secured against tipping, so use a wall anchor with permission or a wide, heavy base, and keep it away from children and pets who might push it. Glass should be framed or laminated, and never placed above a radiator.
Step 10: Add texture before pattern
A small room can hold plenty of texture, such as a woven throw, a linen cushion, a wood tray and a ceramic vase, because texture adds interest without visual noise. Pattern is trickier. Limit yourself to one or two scales, such as a large pattern on a rug and a tiny one on a cushion. Repeat each material at least twice in the room so it feels intentional.
Step 11: Bring in something living
A plant, a bunch of branches or a bowl of fruit makes a room feel alive. Choose plants by the light you have, and check that they are not toxic to the cats, dogs or children in the home before you buy them. Keep pots on trays so water does not mark the floor, and keep them away from heaters and vents.
Step 12: Style the surfaces last
Only now do you place the small items. Use groups of three or five in different heights on each surface, leave at least a third of every surface empty and keep a tray to corral anything that must live out. Rotate seasonal items rather than showing everything. If you are not sure when to stop, take a photo and remove one item. This step is the finishing touch, and it works only because the previous eleven steps cleared the ground.
Which steps change the room most
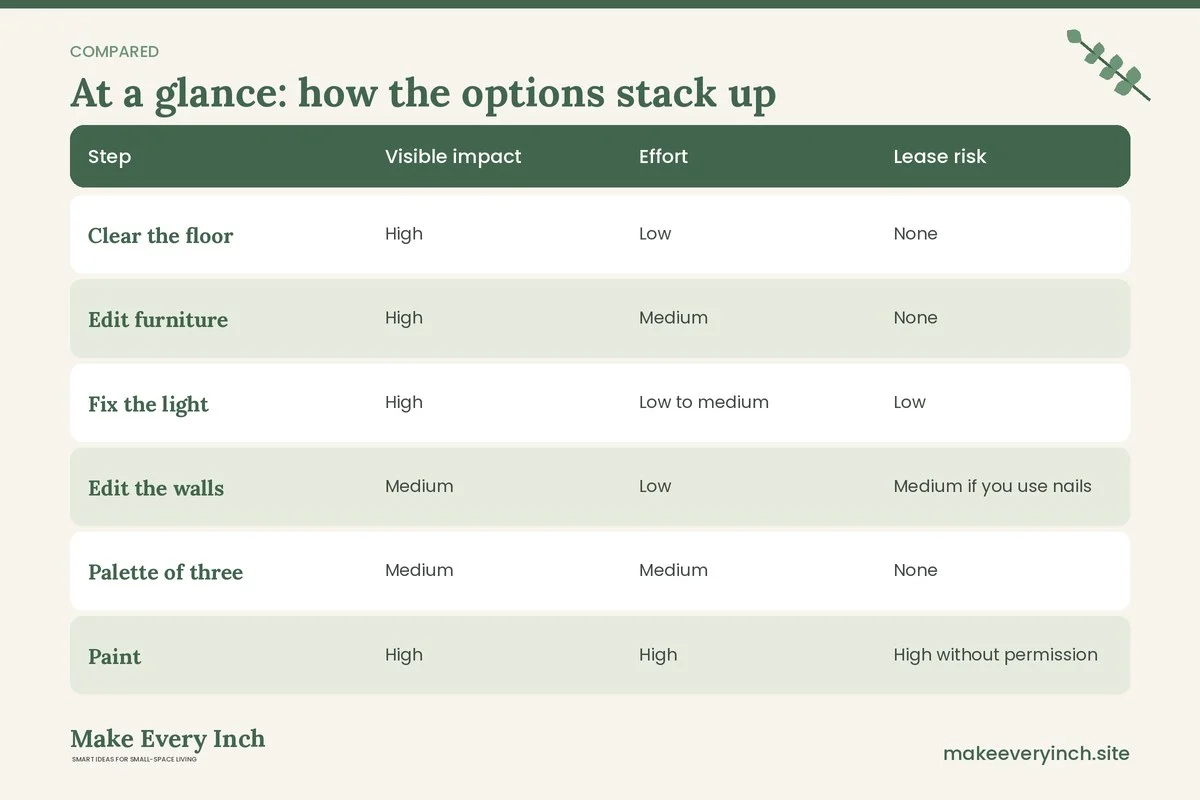
Use this table to plan your weekends. Impact is the visible difference in a photo. Effort covers time and money in broad terms. These are general guides, and your room may differ.
| Step | Visible impact | Effort | Lease risk |
|---|---|---|---|
| Clear the floor | High | Low | None |
| Edit furniture | High | Medium | None |
| Fix the light | High | Low to medium | Low |
| Edit the walls | Medium | Low | Medium if you use nails |
| Palette of three | Medium | Medium | None |
| Paint | High | High | High without permission |
| Rug | Medium to high | Medium | None |
| Curtains | Medium | Medium | Medium if you drill |
| Mirror | Medium | Low | Medium if you hang it |
| Texture | Medium | Low | None |
| Plants | Low to medium | Low | None |
| Style surfaces | Low to medium | Low | None |
The pattern is clear. The biggest changes cost the least, which is why the order starts with the floor and the light rather than with paint or accessories.
Three example rooms
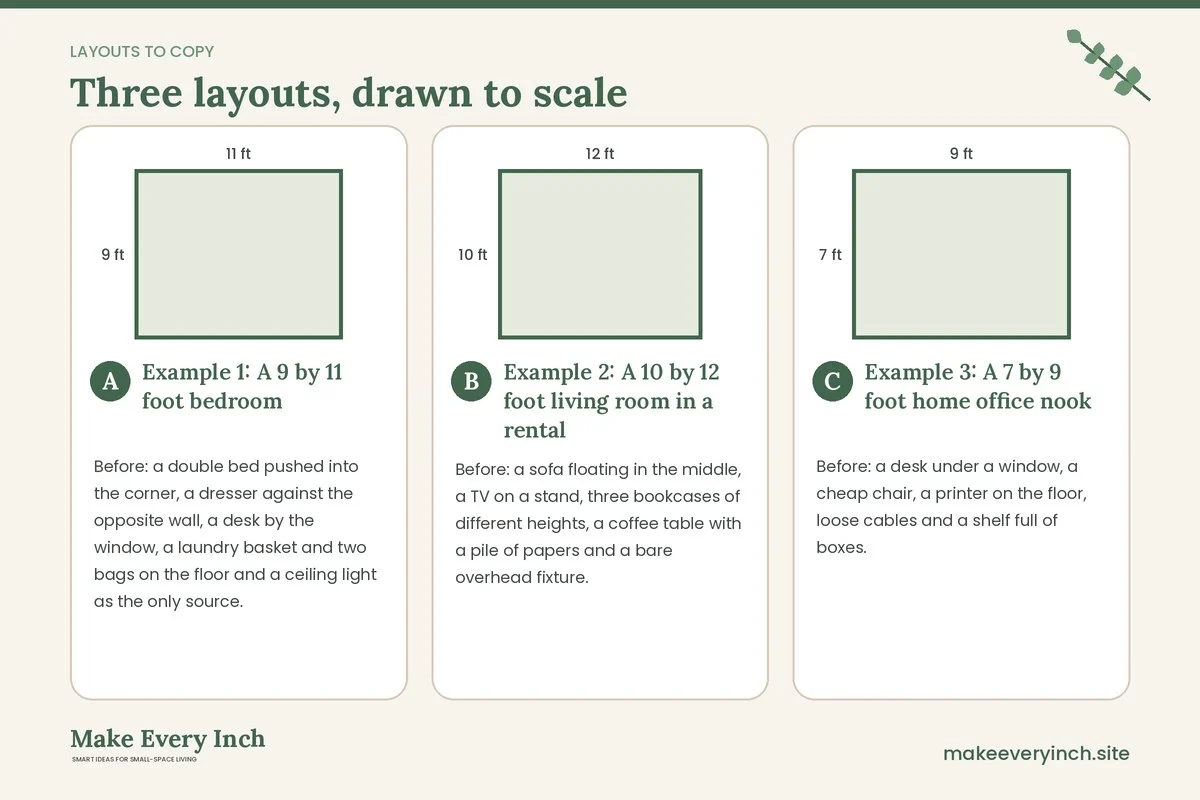
These examples are illustrations with typical measurements, not real projects. They show how the same 12 steps adapt to different rooms.
Example 1: A 9 by 11 foot bedroom
Before: a double bed pushed into the corner, a dresser against the opposite wall, a desk by the window, a laundry basket and two bags on the floor and a ceiling light as the only source. After: the bed moves to the center of the long wall, with a 24 inch path on each side. The dresser stays, and the desk becomes a wall-mounted fold-down version or a slim console. A pair of small lamps replaces the bedside clutter, and the ceiling bulb changes to a warm one. A 5 by 8 foot rug sits under the lower two-thirds of the bed. The palette is soft gray-green, off-white and warm wood, with one terracotta cushion as the accent. The result: the floor shows, the walls have one large piece above the bed and the room feels calm rather than packed. For more ideas, see our post on small bedroom decor that does not feel cluttered.
Example 2: A 10 by 12 foot living room in a rental
Before: a sofa floating in the middle, a TV on a stand, three bookcases of different heights, a coffee table with a pile of papers and a bare overhead fixture. After: the sofa moves against the long wall, with a console behind it to mark a small desk area. Two of the bookcases are consolidated into one tall unit that is anchored to the wall with the landlord’s permission, or replaced with a low unit if anchoring is not allowed. Tall furniture must always be anchored, because it can tip onto children. The coffee table is replaced with a round nesting pair. Plug-in sconces and a floor lamp add layers of light, curtains hang high and wide, and a large leaning mirror sits opposite the window. The palette is warm white, tan and navy, with a patterned rug as the one bold element.
Example 3: A 7 by 9 foot home office nook
Before: a desk under a window, a cheap chair, a printer on the floor, loose cables and a shelf full of boxes. After: the desk is a narrow 20 inch deep table, and the printer moves onto a shelf above the desk or into a cabinet so the floor stays clear. Cables go into a cord cover or a clip system, and power strips are mounted off the floor in a way that does not need drilling. A task lamp provides light to the side of the screen, which reduces glare. A pinboard hangs from a door-mounted hook or a tension setup. The palette is crisp white, light gray and one plant. The result: the nook looks like a small workstation rather than a dumping ground. Keep any heat-producing electronics ventilated, and do not stack items on top of a printer or a power adapter.
Safety and lease notes
A makeover should never create a hazard. Keep these rules in mind.
- Anchor tall furniture. Bookcases, dressers and tall cabinets should be fastened to the wall or wall studs using the hardware that comes with them, but only with the landlord’s permission if you rent. Ask whether they provide an alternative, such as a strap that attaches to the frame.
- Respect electrical limits. Do not overload sockets or power strips. Do not run cords under rugs, and keep them away from walkways and water.
- Ventilate when painting or using adhesives. Choose low-VOC products, open windows, run a fan and follow the label. Keep children, pets and anyone sensitive out of the room until the odor has cleared.
- Check weight limits. Adhesive hooks and strips have weight ratings. Stay well below the maximum and avoid hanging heavy mirrors with adhesive alone.
- Ask first. Never drill, paint or remove fixtures without permission. Photograph the walls before you start and keep the lease handy.
- Think about kids and pets. Secure cords, anchor furniture, keep small decor out of reach and check that plants are non-toxic.
- Wet areas. In a bathroom or near a sink, keep electrical decor away from water, and use only fittings rated for the location. Outlets near water should have GFCI protection, and an electrician should add one if it is missing.
Common mistakes in a small room makeover
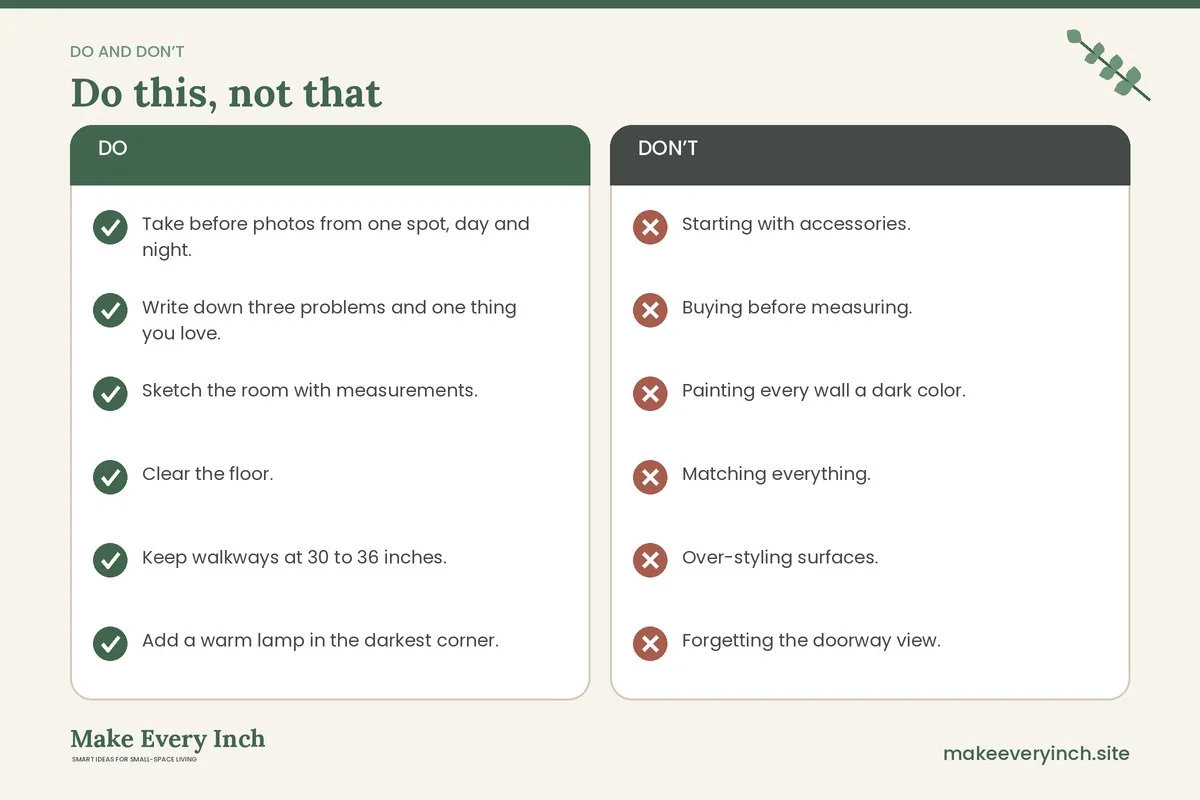
- Starting with accessories. Cushions and prints cannot fix a room with too much furniture or poor light.
- Buying before measuring. Measure the room, doors, stairs and walls before purchasing. A piece that does not fit the lift or the hallway is a costly lesson.
- Painting every wall a dark color. A deep color can look beautiful, but on all walls of a small room with little light, it can make the room feel smaller. Try one wall first.
- Matching everything. A room where every item is from one set looks flat. Mix two or three materials.
- Over-styling surfaces. Too many small items make the room look cluttered even when it is clean.
- Forgetting the doorway view. The first impression is from the door. Make sure that spot looks calm, with a clear path and one pleasant focal point.
- Skipping the after photo. Take it from the same spot, at the same time of day, so you can see what changed and decide what to do next.
For more on common errors, see our guide to small space decorating mistakes to avoid.
How to take a good before and after photo
A makeover photo is only useful if the two images can be compared. Stand in the same place, use the same lens setting and keep the camera level, with vertical lines straight. Shoot in daylight at the same time of day, with the curtains in the same position. Turn on the lamps for a second shot to show the lighting layers. Remove personal clutter from the frame, such as laundry or paperwork, in the after shot, but resist the urge to stage anything you would not normally keep. A natural photo teaches you more, because it shows whether the room works on an ordinary day. Review the photos after a week, and note what has crept back. That list becomes your next weekend’s project.
A four-weekend plan
If you want a schedule, here is one that fits most people.
- Weekend 1: photograph, audit, clear the floor and edit furniture.
- Weekend 2: fix the light, edit the walls and choose a palette.
- Weekend 3: paint or cover, add a rug and hang curtains.
- Weekend 4: add a mirror, texture and a plant, style the surfaces and take the after photos.
Leave a day between weekends for the room to settle. If something does not feel right, move it back. A makeover is a series of small edits, and you can always undo one.
Checklist
- Take before photos from one spot, day and night.
- Write down three problems and one thing you love.
- Sketch the room with measurements.
- Clear the floor.
- Keep walkways at 30 to 36 inches.
- Add a warm lamp in the darkest corner.
- Edit the walls to one focal point.
- Choose a palette of three colors.
- Get written permission before painting or drilling.
- Use low-VOC paint with ventilation.
- Anchor tall furniture.
- Check weight ratings on every hook and strip.
- Hang curtains high and wide.
- Place a mirror opposite a window, not a mess.
- Style the surfaces last.
- Take the after photos from the same spot.
FAQ
How long does a small room makeover take?
Many people finish in three to four weekends if they do one or two steps at a time. A room with paint and new furniture may take longer.
What is the cheapest change with the biggest effect?
Clearing the floor and changing the light. Both cost little and show clearly in photos.
Should I paint a small room white?
Light colors reflect more light, but white is not the only option. Soft warm neutrals, pale greens and light grays can work well. Consider the direction of the light and test a sample on the wall before committing.
Can I do a makeover in a rental?
Yes. Focus on lighting, rugs, curtains, leaning art and removable options, and get written permission for anything that touches the walls. See our post on renter friendly apartment decorating ideas.
How do I keep the room from sliding back to clutter?
Give every category of item a home, use a tray or basket for the things that must stay out and do a five-minute reset each evening. Our guide to small room decor ideas that avoid clutter explains how.
What if I like warm colors and wood?
Warm wood and earthy tones suit small rooms when the lighting is warm and the surfaces are not too busy. Read our post on small room decor ideas with warm wood. If you prefer a calmer palette, try small room decor ideas for neutral lovers.
Keep going: Keep going with our small room decor ideas, small home decorating ideas that feel cohesive and small space decorating ideas on a tight budget.
Save this guide for later
Pin the ideas you like to Pinterest so you can come back to them when you plan your space.