Small Kitchen Ideas with Open Shelving
Quick answer: The best small kitchen ideas with open shelving put only everyday, good-looking items on the shelves, keep them at least a few feet from the stove, and limit each shelf to what its rating allows. Mount brackets into studs or with the anchors the instructions call for, and plan on a quick wipe-down routine so dust and grease never build up.
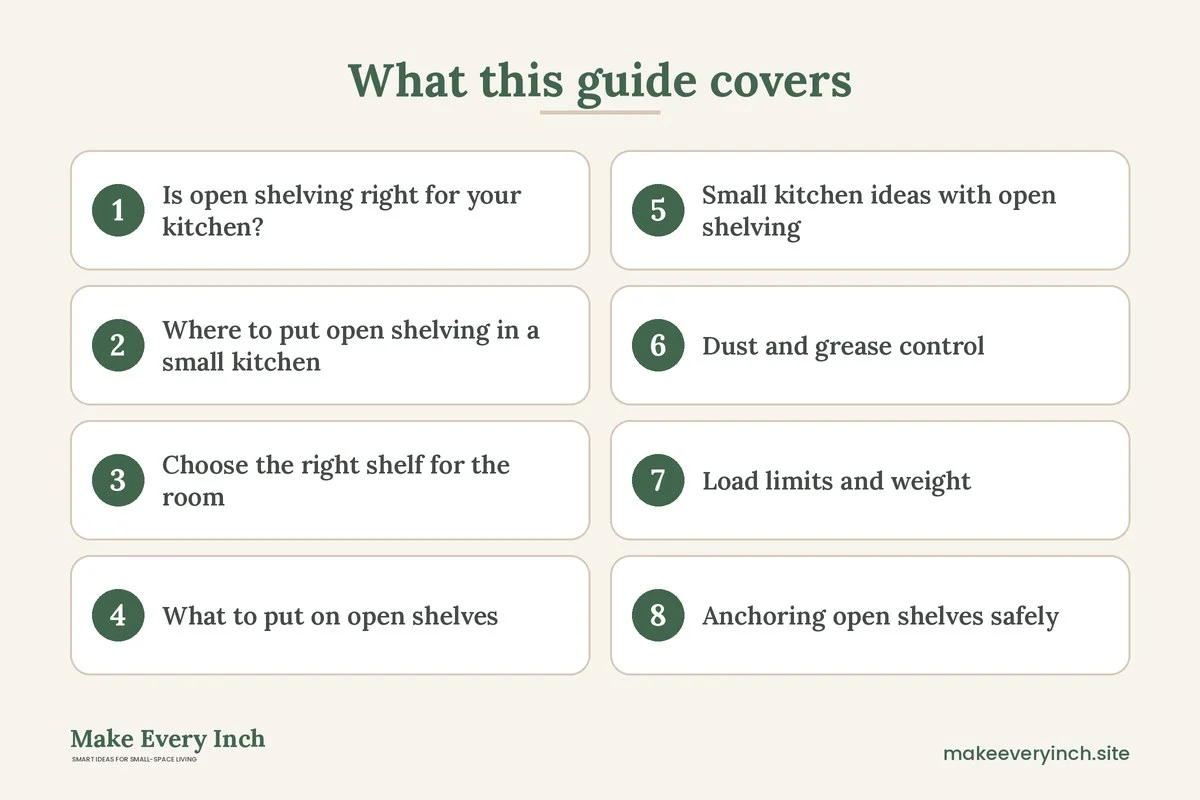
Small kitchen ideas with open shelving are popular for a reason. Shelves instead of upper cabinets make a tight room feel lighter, put the things you use within reach and let you show off a few pieces you love. They also expose everything: dust, grease, mismatched mugs and the day’s clutter. A shelf that looks beautiful in a photograph can become a chore in a real kitchen if you do not plan what goes on it. This guide covers whether open shelving suits your kitchen, how to choose positions and sizes, what to put out and what to hide, how to style the shelves, how to keep dust and grease under control, how to think about load limits and anchoring, and what to do if you rent. For the wider planning picture, see our hub guide to small kitchen ideas.
Is open shelving right for your kitchen?
Open shelving works best when you cook in a way that does not leave a film on every surface and when you are willing to keep the shelves edited. Ask yourself these questions honestly.
- How much do you fry? Frequent frying and searing throw fine grease into the air, and it settles on open items. If the shelves are close to the stove, expect more cleaning.
- Do you have enough matching, everyday items? Open shelves look calm when most of what they hold is a small set of white plates, glasses and bowls in a similar tone.
- Do you want to dust? Items on shelves collect dust, which mixes with kitchen air to form a sticky layer. A quick wipe once a week is reasonable. Doing nothing is not.
- Is the shelf wall in a clear spot? Shelves above a coffee station or beside a window are easier to keep clean than shelves over the cooktop.
- Do you need to hide clutter? If you have a lot of mismatched or ugly-but-necessary items, closed storage, as covered in our small kitchen storage ideas, may be a better main plan with open shelves as a small accent.
A useful compromise is to keep closed cabinets for bulk and messy items and use a short run of open shelves for the pieces you reach for daily. The mix is more forgiving than a whole wall of open shelving.
Where to put open shelving in a small kitchen
Position matters more than style. Think about what each location asks of you.
Beside or above the sink
A shelf near the sink keeps clean plates and glasses close to where you wash them. Keep it several inches from the splash zone, and consider a lip or rail to stop items from sliding. Moisture and steam are the main issues here, so choose finishes that tolerate humidity.
Over a coffee or tea station
A shelf above a small counter holds mugs, jars of tea and a few plants. This is one of the easiest areas to keep tidy, since it sees little grease.
On a blank wall near the table
A wall that faces the dining area collects less cooking residue. It is a good place for cookbooks, a few bowls and baskets.
In an alcove or between windows
A narrow shelf in a nook uses space that cabinets would waste. Use short shelves and keep the contents light.
Near the stove, with caution
A shelf close to the cooktop gets the most heat, grease and splatter. Keep flammable items, such as towels, paper and wooden spoons in cloth wraps, away from open flame and hot surfaces, and leave clear space as the cooktop and hood instructions recommend. Many guides suggest keeping shelves and anything combustible well away from the burners, and it is wise to check the manual of your cooktop and range hood for the clearances they require. If in doubt, place the shelf elsewhere.
Choose the right shelf for the room
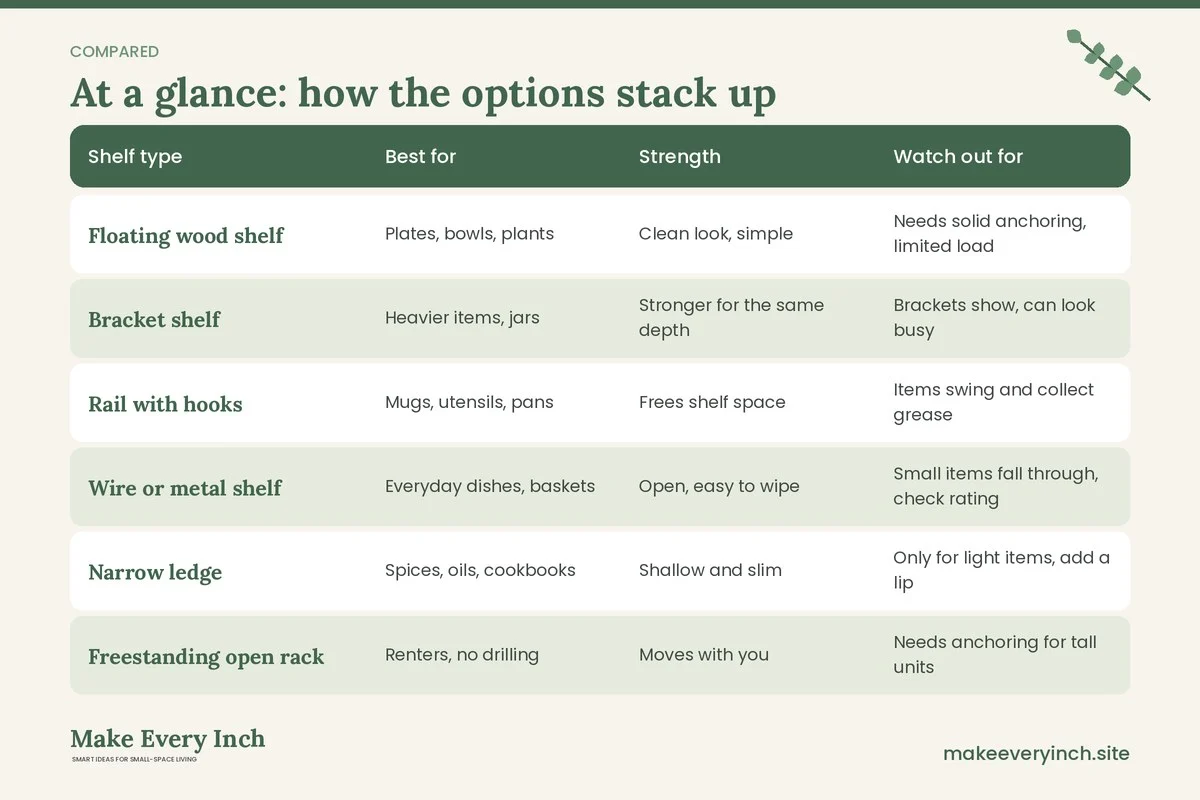
Shelf type changes how a small kitchen feels and how it works. Compare your options.
| Shelf type | Best for | Strength | Watch out for |
|---|---|---|---|
| Floating wood shelf | Plates, bowls, plants | Clean look, simple | Needs solid anchoring, limited load |
| Bracket shelf | Heavier items, jars | Stronger for the same depth | Brackets show, can look busy |
| Rail with hooks | Mugs, utensils, pans | Frees shelf space | Items swing and collect grease |
| Wire or metal shelf | Everyday dishes, baskets | Open, easy to wipe | Small items fall through, check rating |
| Narrow ledge | Spices, oils, cookbooks | Shallow and slim | Only for light items, add a lip |
| Freestanding open rack | Renters, no drilling | Moves with you | Needs anchoring for tall units |
Depth is the most important number. A shelf that is 8 to 10 inches deep holds bowls, mugs and small plates. A depth of 10 to 12 inches suits dinner plates. Over 12 inches starts to stick out into the room, and in a small kitchen it is easy to hit your head or catch your shoulder. Keep the bottom shelf at least 18 inches above the countertop for working, and check that you can reach the top shelf without a step stool for daily items.
What to put on open shelves
An open shelf is a display, so choose its contents the way you would edit a mantel. The aim is useful, attractive and low-maintenance.
Good candidates
- Everyday dishes: one set of plates and bowls in a single color. They are used often enough that dust never settles.
- Glasses and mugs: a handful of matching pieces, stacked or in a row.
- Glass jars of dry goods: flour, rice, pasta and beans in clear containers with tight lids look tidy and keep out dust. Label them.
- Cutting boards and trays: leaned against the wall, they add warmth and are easy to wipe.
- Cookbooks: two or three that you actually use.
- A plant or two: herbs on a bright shelf, or a trailing pothos in a pot with a saucer.
- One or two decorative pieces: a bowl, a framed print or a small lamp. The less, the better.
Things to keep out of sight
- Grease-prone items: oil bottles, frying pans and anything that sits near the stove all day.
- Plastic containers and mismatched lids: these make a shelf look messy. Keep them in a drawer.
- Lightweight, loose items: paper towels, bags and wrappers collect dust and fall off.
- Heavy appliances: a stand mixer or food processor can exceed the shelf’s capacity.
- Anything fragile that is hard to replace: a shelf in a busy kitchen is no place for a precious heirloom.
- Sharp knives: use a magnetic strip placed out of reach of children, or a block or drawer, and not an open shelf.
The 70 percent rule
Fill the shelves to about 70 percent. The empty 30 percent is what makes open shelving look calm instead of crowded. It also makes it easy to pull a plate without knocking over another one.
Small kitchen ideas with open shelving: styling rules
Styling is a set of simple habits, not a talent.
Limit your palette
Choose two or three main colors and repeat them. White and wood, or cream and black, are foolproof. A single accent color, such as green from plants, ties it together.
Group by height and shape
Place tall items at the ends, medium in the middle and low in front. Stack plates, group glasses by size, and put bowls inside one another.
Mix textures
A wood board, a ceramic bowl, a glass jar and a woven basket give variety without color. A small set of items in one material looks deliberate.
Leave breathing room
Leave a few inches between groups. A shelf with every inch used looks like a storeroom.
Add a little vertical interest
A leaning cutting board or a hung rail with a few hooks breaks the horizontal lines.
Light the shelves
A small strip light or a plug-in lamp under the shelf makes the contents glow and adds task lighting. Our post on small kitchen lighting ideas covers safe, simple options. Use fixtures meant for kitchens, keep cords tidy and away from water, and call a licensed electrician for any hard-wired work.
Dust and grease control
This is the real cost of open shelving, and it is manageable if you build a routine.
A weekly routine
- Quick wipe: once a week, run a dry or slightly damp microfiber cloth along each shelf and across the front of the items.
- Wash before use: dishes that have sat on the shelf for a few days may need a rinse before use, particularly in a kitchen that sees a lot of frying.
- Rotate: every month, swap the front and back items so that all of them get a turn.
Monthly deeper cleaning
- Empty one shelf at a time.
- Wipe the surface with warm, soapy water, then rinse and dry.
- Check the underside and edges, where grease accumulates.
- For painted or wood finishes, use a cleaner that suits the finish, and avoid soaking.
Reduce the problem at the source
- Use the range hood. Turn on the hood or an exhaust fan when you cook, and make sure it vents properly. Clean or replace the filters as the maker directs.
- Keep lids on pans. A splatter guard helps with searing.
- Open a window when the weather allows, for fresher air.
- Use jars with lids for anything that sits out.
- Choose wipeable finishes. A sealed or glossy surface cleans more easily than raw wood or matte paint.
- Avoid the stove zone. The farther the shelf is from the cooktop, the less grease it collects.
If you paint or refinish a shelf, use low-VOC products and ventilate the room while it cures. Follow the label directions for drying times.
Load limits and weight: how much can a shelf hold?
A shelf is only as strong as its weakest part, and that part is often the wall, not the board. Treat load limits seriously.
Know the rating
The maker’s instructions give a maximum load per shelf, often with a note about spacing the brackets and the wall type. Never assume a shelf can hold more than it states. Dishes are heavier than they look. A stack of ten dinner plates can weigh well over 15 pounds, and a row of full glass jars of grain can add up quickly. Add up the weight of what you plan to place and compare it to the rating, leaving a healthy margin.
Spread and place the weight smartly
- Heavy items low: keep the heaviest items on the lowest shelf, and lighter items higher.
- Center the load: weight placed at the middle of a bracketed span puts the least stress on the brackets and the wall.
- Avoid concentrated weight at the front edge. Put dense items toward the back of the shelf.
- Do not hang weight from a shelf meant only for resting loads. Hooks need their own ratings.
- Watch for sagging. A board that bends is telling you it is overloaded. Remove items and reassess.
Think about earthquakes and bumps
If you live somewhere with earthquakes, or have small children and pets, add a front lip or rail to the shelf, and use museum putty or non-slip liner for decorative items. Secure heavy or breakable pieces with a method suited to the item, and keep them low.
Anchoring open shelves safely
How you mount a shelf decides whether it is a feature or a hazard. Follow the instructions that come with your shelf, and treat these points as general guidance.
Find the studs
Wall studs are the vertical framing behind the drywall. A stud finder can locate them, and they are often spaced 16 inches apart, though that varies, so measure instead of guessing. Brackets or mounting rails that go into studs usually hold far more than ones in plain drywall. Where the instructions call for a stud connection, use it. If studs do not line up with your shelf, a mounting rail or cleat that spans several studs may help.
Use the right fixings
- Use the screws provided, or ones the maker specifies, at the correct length and diameter.
- Use anchors rated for the load when you cannot reach a stud. Different anchors suit different walls, and a plastic anchor in drywall may be suitable only for light loads. Read the packaging for the rating, and do not exceed it.
- Check what the wall is made of. Plaster, tile, brick and concrete each need their own drill bit and anchor. If you are unsure, ask a professional.
- Level and mark twice: a level and a pencil prevent crooked shelves and extra holes.
Before you drill
- Check for hidden hazards. Pipes and electrical wiring can run behind a kitchen wall, especially near sinks and outlets. A stud finder with live-wire detection can help, but it does not guarantee that the wall is clear. If you are unsure, hire a professional.
- Turn off power to circuits near the work if you are cutting into a wall or working near wiring.
- Wear eye protection and a dust mask, and use a drop cloth.
- Never drill without permission if you rent or share ownership. Ask in writing before you make holes.
Tall freestanding racks
An open rack that stands on the floor should be fastened to the wall with the anti-tip hardware that comes with it, following the instructions. In a rental, ask before drilling, and use only what the landlord allows. If the rack cannot be anchored, keep it short, load heavy items low and keep it away from children.
Renter-friendly open shelving
If you cannot drill, there are still options.
- A freestanding rack or bakers rack: it moves with you. Choose one with a stable base and keep the top light.
- A tension pole shelf: a floor-to-ceiling pole with shelves can hold light loads, and many do not mark walls. Follow the maker’s load limit and check that the ceiling is firm.
- Adhesive-mounted ledges and rails: some products are made for light loads. Follow the weight rating and the surface instructions to the letter, and test on a hidden area first.
- A rail over the sink with a cart below: pair a light rail with a rolling piece. Our guide to small kitchen cart ideas shows how.
- Leaning shelves: a ladder-style shelf leans against the wall. Anchor it if the instructions say so.
- A shelf on top of the counter: a stepped riser on the countertop adds a second level for jars and bowls without touching the wall.
For more ideas, see our list of renter friendly kitchen upgrades and the broader guide to renter friendly shelving.
Open shelving or upper cabinets? A quick comparison
| Question | Open shelving | Upper cabinets |
|---|---|---|
| Looks lighter in a small room | Yes | Less so |
| Hides clutter | No | Yes |
| Dust and grease | Collects both | Mostly protected |
| Daily access | Fast | One extra step |
| Cost and effort | Often simpler | Usually more involved |
| Best near the stove | Rarely | Usually |
Many small kitchens do best with a blend, such as cabinets on the stove wall and open shelves by the window or sink.
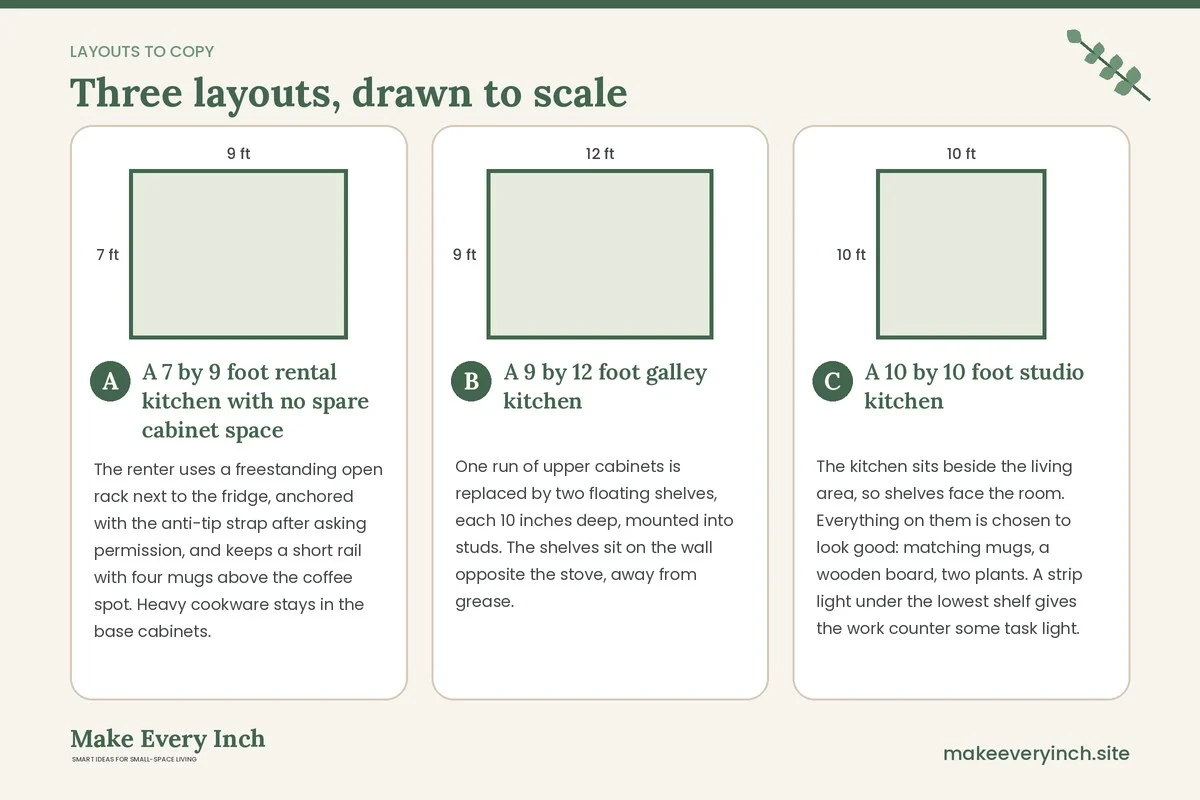
Three example kitchens
A 7 by 9 foot rental kitchen with no spare cabinet space
The renter uses a freestanding open rack next to the fridge, anchored with the anti-tip strap after asking permission, and keeps a short rail with four mugs above the coffee spot. Heavy cookware stays in the base cabinets. The shelves hold everyday plates, glasses and two jars. The kitchen reads as light, and nothing sits near the stove.
A 9 by 12 foot galley kitchen
One run of upper cabinets is replaced by two floating shelves, each 10 inches deep, mounted into studs. The shelves sit on the wall opposite the stove, away from grease. Plates and bowls fill the lower shelf, and the upper holds jars and a plant. If you have a narrow room like this, our galley kitchen ideas guide has layout help.
A 10 by 10 foot studio kitchen
The kitchen sits beside the living area, so shelves face the room. Everything on them is chosen to look good: matching mugs, a wooden board, two plants. A strip light under the lowest shelf gives the work counter some task light. Messy items stay in a cart in the corner. For a rolling option, take a look at the best rolling kitchen carts.
Open shelving checklist
- Decide where the shelves will go, and keep them away from the stove.
- Pick a depth of 8 to 12 inches to suit what you plan to store.
- Add up the weight of what you want to display.
- Check the shelf and bracket load ratings from the maker.
- Find studs, and use the fixings that the instructions require.
- Check for pipes and wiring before you drill.
- Ask permission if you rent.
- Fill shelves to about 70 percent.
- Keep heavy items low and fragile items safe.
- Plan a weekly wipe and a monthly deeper clean.
- Use the range hood when cooking.
- Use low-VOC finishes and ventilate when painting or sealing.
FAQ
Is open shelving practical in a small kitchen?
It can be, if you keep it edited and away from the stove. It saves visual space and puts daily items within reach, but it needs a regular wipe-down.
How do I keep open shelves from getting greasy?
Use the range hood, keep shelves away from the cooktop, store items in lidded jars, and wipe the shelves weekly. A sealed finish cleans more easily than raw wood.
How much weight can an open shelf hold?
That depends on the shelf, the brackets and the wall. Check the maker’s rating and follow the instructions for fixings. Do not exceed the stated load, and keep heavy items on the lowest shelf.
Do open shelves need to be screwed into studs?
Many do, especially for heavier loads. Follow the instructions that come with your shelf. If the instructions call for studs or specific anchors, use them. If you are unsure, ask a professional.
What should I put on open kitchen shelves?
Everyday plates, bowls, glasses, jars with lids, cutting boards and a plant or two. Leave out greasy items, loose paper and heavy appliances.
Can I do open shelving as a renter?
Yes, with a freestanding rack, a tension pole shelf or adhesive-mounted ledges for light loads. Ask your landlord before drilling.
How far should shelves be from the stove?
Follow the manual for your cooktop and range hood. As a general habit, keep shelves and flammable items well away from burners and out of the direct path of heat and splatter.
Keep going: Keep planning with our small kitchen organization ideas, small kitchen ideas with an island and small kitchen makeover ideas.
Save this guide for later
Pin the ideas you like to Pinterest so you can come back to them when you plan your space.