How to Make a Studio Apartment Feel Organized
Quick answer: To make a studio apartment feel organized, work on what the eye sees first. Edit down to what you use, sort what remains into categories, move most of it behind closed doors, give each zone a clear job, and finish with a five to ten minute daily reset. In one room, visual calm matters as much as real storage, so aim for clear surfaces, a few repeated materials and one open shelf at most.
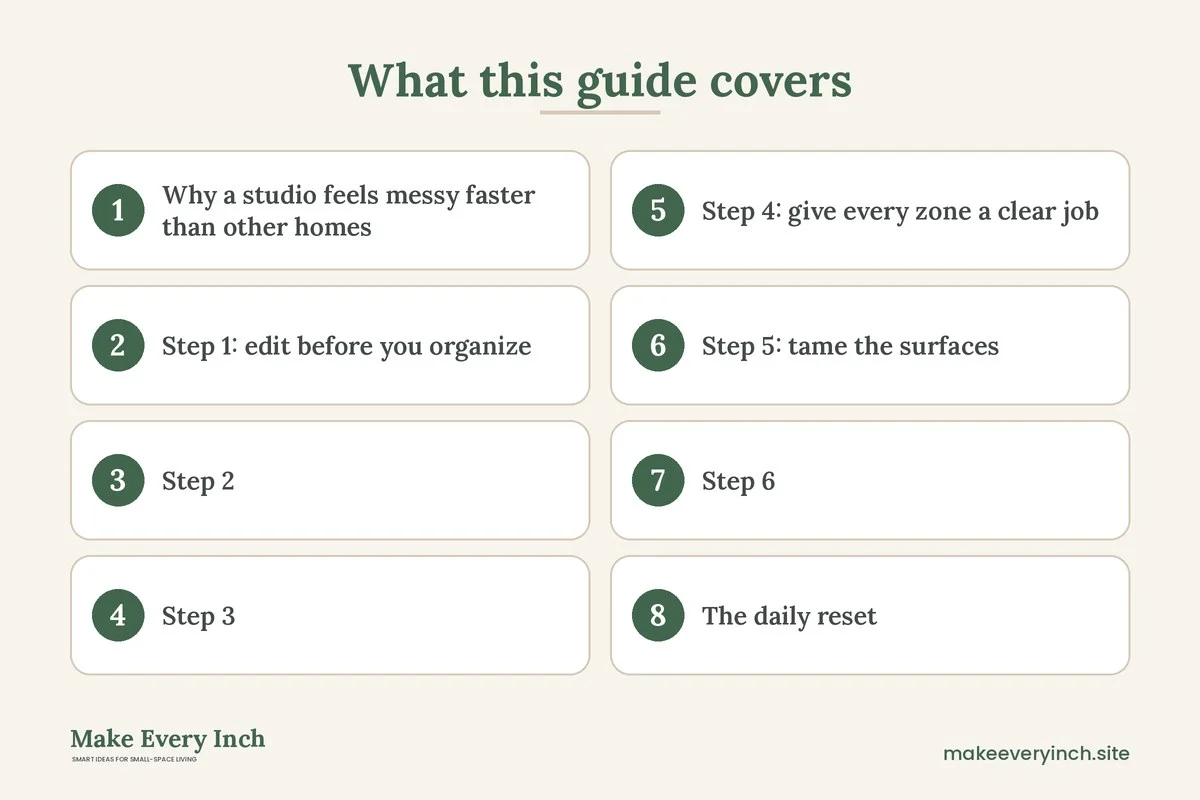
Learning how to make a studio apartment feel organized is different from learning how to store more. A studio puts the bed, the kitchen, the desk and the front door in one view, so every loose item competes for attention at once. A home can hold plenty of storage and still feel chaotic if the surfaces are busy. It can also hold very little and feel peaceful if the eye has somewhere to rest. This guide is a process, not a shopping list. It covers the edit, categories, closed storage, zones, the daily reset, a weekly and monthly rhythm, a comparison table, three example studios and a checklist. For the wider topic, read our main guide on studio apartment ideas, then pair it with the sister post on how to fit a desk into a studio apartment.
Why a studio feels messy faster than other homes
In a one-bedroom, the mess in the bedroom is behind a door. In a studio, it sits next to the sofa, the stove and the dining chair. Three things make the effect stronger.
- Everything is visible at once. There is no room to retreat to, so the eye registers every pile on every surface in a single sweep.
- Every zone shares air and light. The smell of cooking, the glow of a laptop and the sound of a hamper all reach the bed.
- Small amounts of clutter read as large. Ten loose objects on a 30-inch counter fill it, while ten objects on a long counter look sparse.
The goal is not an empty room. The goal is a room where the eye can find a few calm, flat areas and where each object has an obvious home. Designers often call this visual calm. It rests on four ideas: fewer visible items, repeated shapes and colors, clear flat surfaces and consistent places for things.
Step 1: edit before you organize
Organizing items you do not need only gives you tidy clutter. Start with an edit. The aim is to reduce what the studio must hold so every later step is easier. Our guide to small apartment decluttering ideas and the post on decluttering rules for small homes go deeper on the method, and the basics are below.
The three-pile edit
Take one category at a time and make three piles: keep and use, keep and store, and let go. Be strict with the first pile. If you have not used an item in a full year and it is not a keepsake or an emergency item, it probably belongs in the third pile.
Edit by category, not by room
Work through clothes, then kitchen items, then papers, then small objects, then sentimental items. Doing a whole category at once shows you how many duplicates you own. Most people find three or four of the same thing, and the edit takes minutes once the duplicates sit side by side.
Set a ceiling for each category
A ceiling is the number you agree to hold. It might be one shelf of books, two sets of sheets or one drawer of kitchen tools. When the container is full, something leaves before something enters. Ceilings stop slow creep, which is the main reason studios drift back to messy.
Take the visual edit seriously
After the practical edit, do a second pass for looks. Stand in the doorway and notice what draws your eye. Candidates are a pile of mail, a row of mismatched bottles, a stack of boxes and cables hanging from a shelf. Moving or hiding the three loudest items often changes the room more than the whole declutter.
Step 2: sort what stays into categories
Once you know what you own, define categories that make sense for how you live. A clear category list is the backbone of a studio, because every object then has a place to go and a reason to be there. A basic set looks like this.
- Daily wear and nightly items: the clothes you rotate, pajamas, a robe.
- Off-season and occasional: coats, bulky knits, guest bedding.
- Kitchen daily and kitchen occasional: the pans you use weekly and the ones you use twice a year.
- Bath and body: everything that lives in or near the bathroom.
- Paper and tech: documents, chargers, laptops, cables.
- Hobbies and projects: craft supplies, instruments, sports gear.
- Cleaning and household supplies: tools and products.
- Keepsakes: a small, contained collection.
Give each category a single location and a visible label. In a studio, the rule is one category, one place. If your tools live in the entryway, the closet and under the bed, you will never find them and you will keep buying new ones.
Step 3: move most of it behind closed doors
Closed storage is the quickest route to visual calm. A shelf with fifty objects reads as noise even when each object is neatly lined up. The same fifty objects in a cabinet read as a flat plane of wood or color. This is why storage with doors, lidded boxes and drawers do more for a studio than open shelving.
The 80 and 20 rule
Aim for roughly 80 percent of your belongings behind a door, a lid or a drawer, and 20 percent on view. The 20 percent should be items you love to see, such as a plant, a few books, a lamp and one piece of art. Treat this as a guide, not a rule to measure to the decimal.
Where closed storage fits in a studio
- Under the bed. Low lidded boxes or rolling drawers hold off-season clothes and linens. Measure the clearance first, which is often 6 to 12 inches. See our roundup of best beds with storage if you are choosing a frame.
- On top of the wardrobe. Matching lidded boxes fill the gap and hide the dust. Label the front.
- Behind the sofa. A shallow console or low cabinet turns the sofa back into storage as well as a divider.
- Inside the closet. Add a second rail, hanging organizers and stacking drawers so the whole height is used. Our post on DIY closet organization for small spaces shows how.
- Behind a curtain. In a rental, a curtain across a recess or a metal shelf unit is a gentle way to hide a mess. Use a tension rod if you cannot drill. See the guide to no-drill storage ideas for renters.
- Inside furniture that does two jobs. Ottomans, benches and coffee tables with lids hold blankets, shoes and spare bedding. Read about hidden storage ideas for more.
Keep the boxes and doors uniform
Visual calm comes from repetition. Choose one or two box styles and one or two colors, and repeat them. Twelve boxes in the same color look like a deliberate wall. Twelve boxes in different colors look like clutter in containers. If you use baskets, match the weave and tone.
Step 4: give every zone a clear job
A studio works best when it is read as a set of small rooms. Use rugs, lighting, furniture backs and color to suggest those rooms. Our guides on DIY room divider ideas for studio apartments and renter-friendly ways to divide a studio apartment cover dividing in detail. For organizing, the key is that each zone owns its own items.
- Sleep zone: bed, nightstand, a small lamp, a drawer of nightly items. Keep it free of work gear if possible.
- Living zone: sofa or chair, a table, a shelf of favorite things. The remote and throw blanket have a basket.
- Cooking and eating zone: the kitchen, plus a small table or counter bar. Everything for meals stays within arm’s reach of the stove and sink.
- Work zone: a desk or a fold-down surface, one drawer or box, a lamp. Close it at the end of the day.
- Entry zone: hooks, a mat, a tray for keys, a shoe rack. This zone controls what enters the room.
The entry zone matters most
Whatever comes in through the door decides how organized the room feels. Mail, coats, bags and shoes pile up at the entry first. A single tray, a few hooks and a small shoe rack stop the pile. The post on renter-friendly entryway organization ideas shows options that avoid drilling.
Define zones with light
Lighting zones the room without any furniture moves. A lamp by the bed, a pendant or lamp over the table and a task light at the desk each create a pool of light. When you switch off the work light in the evening, the desk visually recedes. Our guide to renter-friendly lighting ideas lists plug-in options.
Define zones with rugs and color
A rug under the sofa and another by the bed draws a boundary on the floor. Repeating a color in each zone ties them together. A calm palette of two or three tones keeps the whole studio from reading as separate rooms fighting each other.
Step 5: tame the surfaces
Flat surfaces collect clutter. In a studio, five surfaces carry most of the visual weight: the kitchen counter, the table, the nightstand, the desk and the top of any dresser. Give each a rule.
- Kitchen counter: keep no more than three to five objects out. Use a tray to group daily items, such as oil, salt and a cutting board. Put the rest in cabinets.
- Table: clear except for a bowl or plant. It is where you eat, so keeping it free makes meals feel like a reset.
- Nightstand: a lamp, a book, a glass. Everything else lives in the drawer.
- Desk: the laptop and one cup. Papers go in a file box or tray. See our post on how to fit a desk into a studio apartment for ways to make work gear disappear.
- Dresser top: a tray for jewelry and keys, one lamp or plant. No piles.
Use trays and groupings
A tray turns a handful of loose items into one object. Three small things on a tray look intentional, and three small things scattered look messy. Group in odd numbers, vary heights and leave empty space around each group.
Control the floor
Anything on the floor adds visual weight. Bags, laundry, shoes and boxes should have a place. A hamper with a lid, a shoe rack and a basket for bags at the entry cover most of the floor clutter. Aim for at least 24 to 36 inches of clear path through the room.
Step 6: cords, tech and the small stuff
Cables make a studio look busy. Group them with clips, sleeves or a cable box, and run them along baseboards. Our post on renter-friendly ways to hide cords covers methods that do not need tools. For safety, do not cover a power strip with fabric or push it into a closed space where it can overheat, and do not daisy-chain extension cords. Keep cords away from walkways and from heat sources, and check manufacturer instructions on any outlet strip.
Small items need a container, not a pile. Use a charging tray for phones and a small dish for coins and earbuds. Use a drawer divider in the kitchen drawer and a tiny box on the bathroom shelf. In a studio, the smaller the item, the more likely it is to spread, so give it a defined edge.
The daily reset
A reset is a short routine that returns the studio to its default state. It is the difference between a home that is organized once and a home that stays that way. Aim for 5 to 10 minutes, ideally at the same time every day, such as before bed or just after dinner.
- Dishes: wash or load and wipe the counter.
- Surfaces: return items to their homes. Use the tray rule for what remains.
- Bed: make it, or at least straighten the cover. A made bed is the largest flat area in a studio.
- Floor: put away shoes, bags and laundry.
- Work zone: close the laptop, put papers in the tray and switch off the lamp.
- Entry: empty the pockets and hang the coat.
- Lights: switch to the evening setting.
Put the reset on a timer for the first two weeks, and notice which step takes the longest. That step is probably missing a home. Fix the home and the routine shrinks.
Weekly and monthly rhythm
A daily reset handles the surface. A slightly deeper rhythm handles the rest.
Weekly (20 to 30 minutes)
- Wash the bedding or change it.
- Clear the fridge of expired items and wipe the shelf.
- Sort the mail and recycle what you do not need.
- Run the laundry and put it away the same day.
- Empty the entry tray and the bag by the door.
Monthly (30 to 60 minutes)
- Pick one category and edit it again.
- Check the under-bed and closet boxes and move out of season items.
- Wipe the inside of cabinets and drawers.
- Review what you bought and ask whether it earned its space.
Seasonally
- Swap clothes, switch the bedding weight and check the wardrobe for items that no longer fit or suit.
- Rotate the items on your open shelf so the display stays fresh without new purchases.
Comparison table: what changes the look most
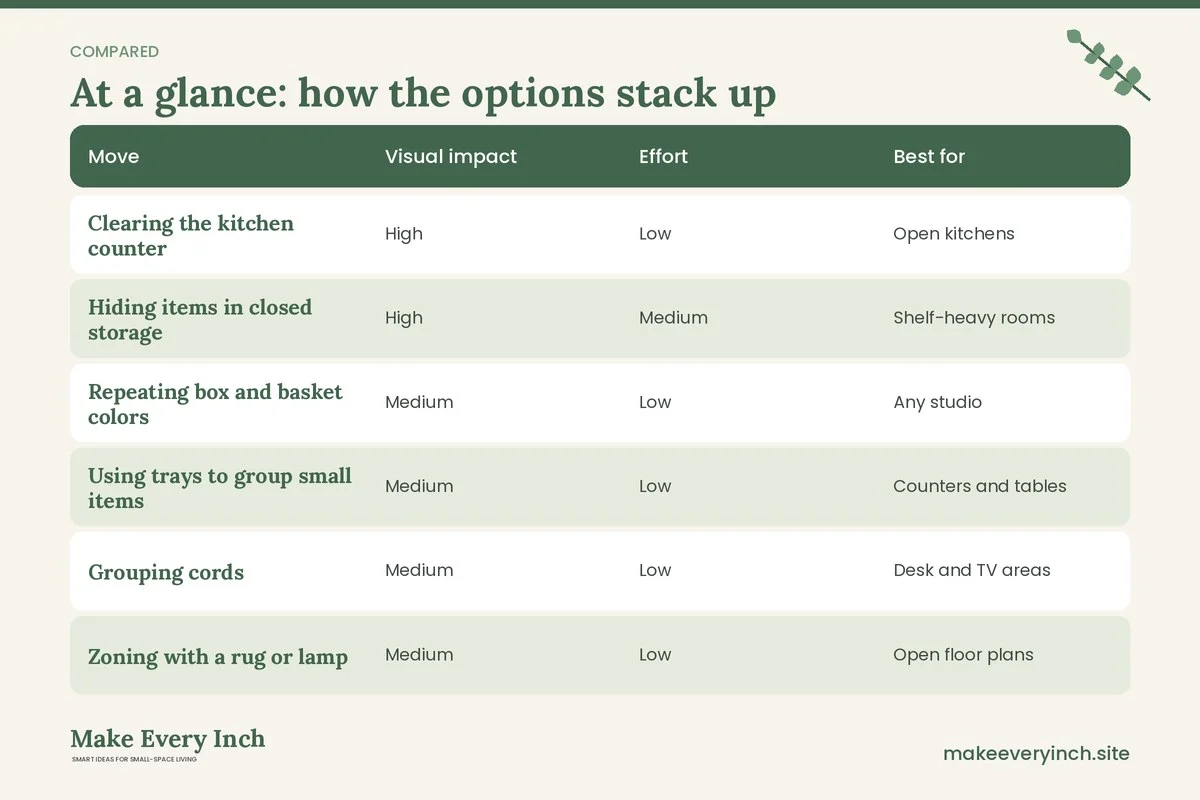
The table below compares common organizing moves by how much they change the look of a studio and how much effort they need. Treat the ratings as general guidance, since every home is different.
| Move | Visual impact | Effort | Best for |
|---|---|---|---|
| Clearing the kitchen counter | High | Low | Open kitchens |
| Hiding items in closed storage | High | Medium | Shelf-heavy rooms |
| Repeating box and basket colors | Medium | Low | Any studio |
| Using trays to group small items | Medium | Low | Counters and tables |
| Grouping cords | Medium | Low | Desk and TV areas |
| Zoning with a rug or lamp | Medium | Low | Open floor plans |
| A second closet rail | Medium | Medium | Crowded wardrobes |
| Under-bed lidded boxes | Medium | Low | Bed-in-view layouts |
| A daily reset | High | Low | Keeping results |
| Full declutter | Very high | High | Starting out |
Three example studios
A 350 square foot studio with a bed in view
The bed sits against the long wall, 8 feet from the front door, and is seen from the kitchen. The plan is to put the sleep zone behind a low shelf or a curtain, make the bed daily and use lidded boxes under it. A narrow wardrobe stands at the foot, topped with matching boxes. The kitchen counter holds a tray and a plant. The sofa sits across from the bed with a console behind it for mail and charging. The room reads as three calm areas instead of one crowded one.
A 450 square foot studio with an alcove
The alcove holds the bed, so a curtain on a tension rod hides it during the day. The main room has a sofa, a small table and a desk shelf. A wall of closed cabinets holds the kitchen overflow, books and the hobby gear. The rule is that only the table and two shelves are visible, and everything else lives behind a door. The room feels like a living room with the bed tucked away.
A 280 square foot micro studio
Here the secret is multi-use. A bench at the entry has a lid and holds shoes and a vacuum. The sofa converts to a bed and bedding lives in the bench. The wall holds a fold-down desk and a rail with hooks. A rolling cart serves as a pantry, a bar and a printer stand. Because every item is double duty, the room has few pieces and a lot of floor. The daily reset is five minutes because there is nowhere for clutter to hide.
Common mistakes
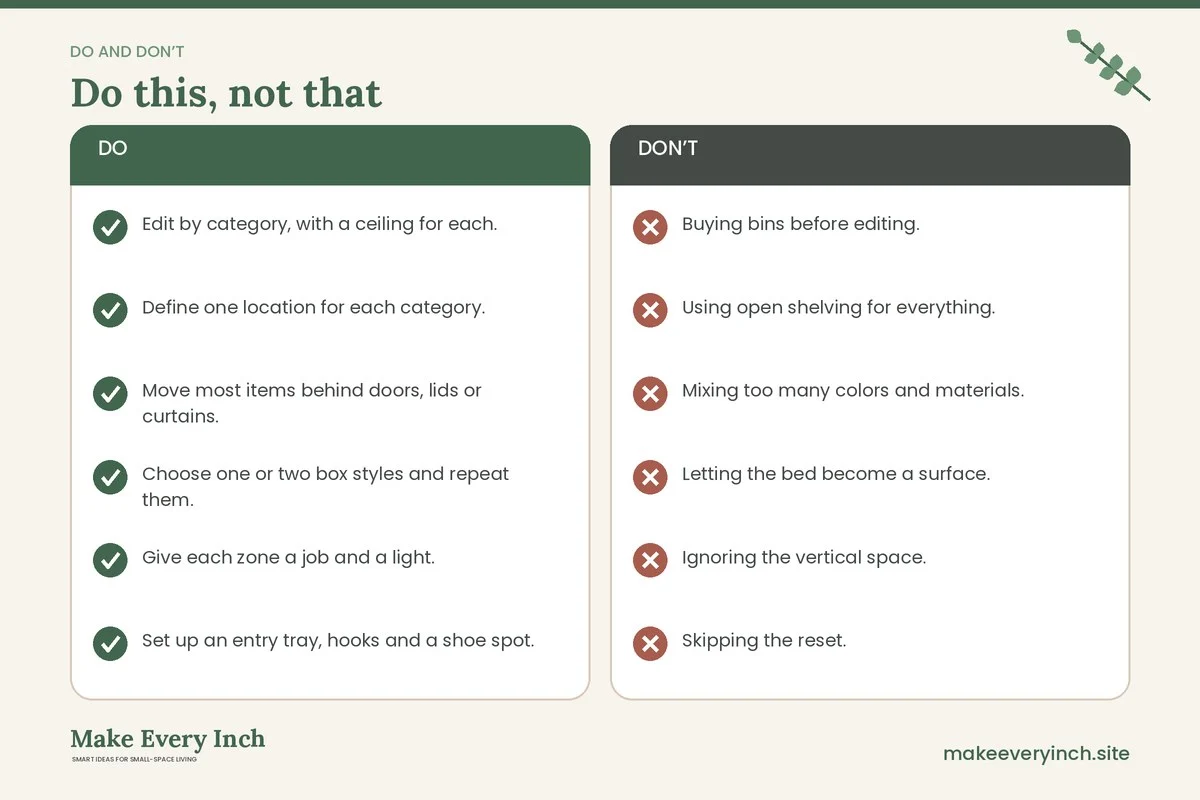
- Buying bins before editing. You will fill them and still feel overwhelmed.
- Using open shelving for everything. Open shelves show everything. Mix open and closed, with the closed side bigger.
- Mixing too many colors and materials. A calm palette helps more than a pretty storage item.
- Letting the bed become a surface. Clothes and bags on the bed make the whole room feel unmade.
- Ignoring the vertical space. Walls, door backs and the area above the wardrobe are free storage. Anchor tall furniture to the wall to prevent tipping, and ask your landlord before drilling.
- Skipping the reset. The reset is the habit that makes the system last.
For more on why systems fail, read our post on small home organization mistakes to avoid, and for habits that stick see small home organization ideas that actually last.
Safety and lease notes
- Anchor tall furniture. Wardrobes, bookcases and tall shelves can tip. Use the anchoring hardware that fits your wall, and ask permission first if you rent. Never drill into a wall without your landlord’s approval, and check for wires and pipes first.
- Keep exits clear. Do not block the route to the front door, windows or any fire exit with storage or dividers. Keep a clear path of at least 30 to 36 inches where you can.
- Mind electrical loads. Do not stack plugs on a single outlet or cover a power strip with boxes. Keep heat-producing devices away from fabric and paper.
- Ventilate. If you paint a cabinet, use a low-VOC product and open a window. Closed storage can hold moisture, so leave a little space for air in damp areas.
- Check the lease. Many leases limit changes to walls and fixtures. Freestanding and tension-based options are safer choices.
Organized studio checklist
- Edit by category, with a ceiling for each.
- Define one location for each category.
- Move most items behind doors, lids or curtains.
- Choose one or two box styles and repeat them.
- Give each zone a job and a light.
- Set up an entry tray, hooks and a shoe spot.
- Set a rule for each flat surface.
- Group cords and charge in one place.
- Make the bed daily.
- Start a 5 to 10 minute daily reset.
- Do a weekly and monthly sweep.
- Anchor tall furniture and keep exits clear.
FAQ
How do I make a studio apartment look less cluttered?
Start with an edit, move most items behind doors or lids, clear the counters and tables, and group small objects on trays. A short daily reset keeps it that way.
What is the fastest way to make a studio feel organized?
Clear the kitchen counter, make the bed and hide the loudest three items. These steps change what the eye sees first, and they take under an hour.
Is open shelving a bad idea in a studio?
Not always. Use it for the 20 percent you love to see and keep the rest closed. A single open shelf with a few items looks calm, while a wall of open shelves rarely does.
How do I organize a studio without drilling?
Use freestanding shelves, over-the-door hooks, tension rods, under-bed boxes and a rolling cart. Our guide to small space organization ideas lists many options that need no tools.
How often should I declutter a studio?
A light edit once a month and a deeper one each season usually keeps a studio manageable. If a category keeps growing, lower its ceiling.
How do I keep a studio organized with a small budget?
Use what you have, repeat a few containers, borrow storage from furniture and edit often. Organization is mostly about habits and less about buying.
Keep going: Keep going with our studio apartment ideas, how to fit a desk into a studio apartment and renter-friendly ways to divide a studio apartment.
Save this guide for later
Pin the ideas you like to Pinterest so you can come back to them when you plan your space.