14 Small Space Ideas with Built-In Storage for Every Wall
Quick answer: Small space builtin storage works best when it fills dead zones: alcoves beside a chimney breast, the wall above a door, under a window seat, around a bed and along the shortest wall. Plan depths of 12 to 24 inches, leave outlets and vents reachable, anchor tall units to studs and ask permission before cutting or drilling in a rental. A built-in look made from freestanding units is a good alternative.
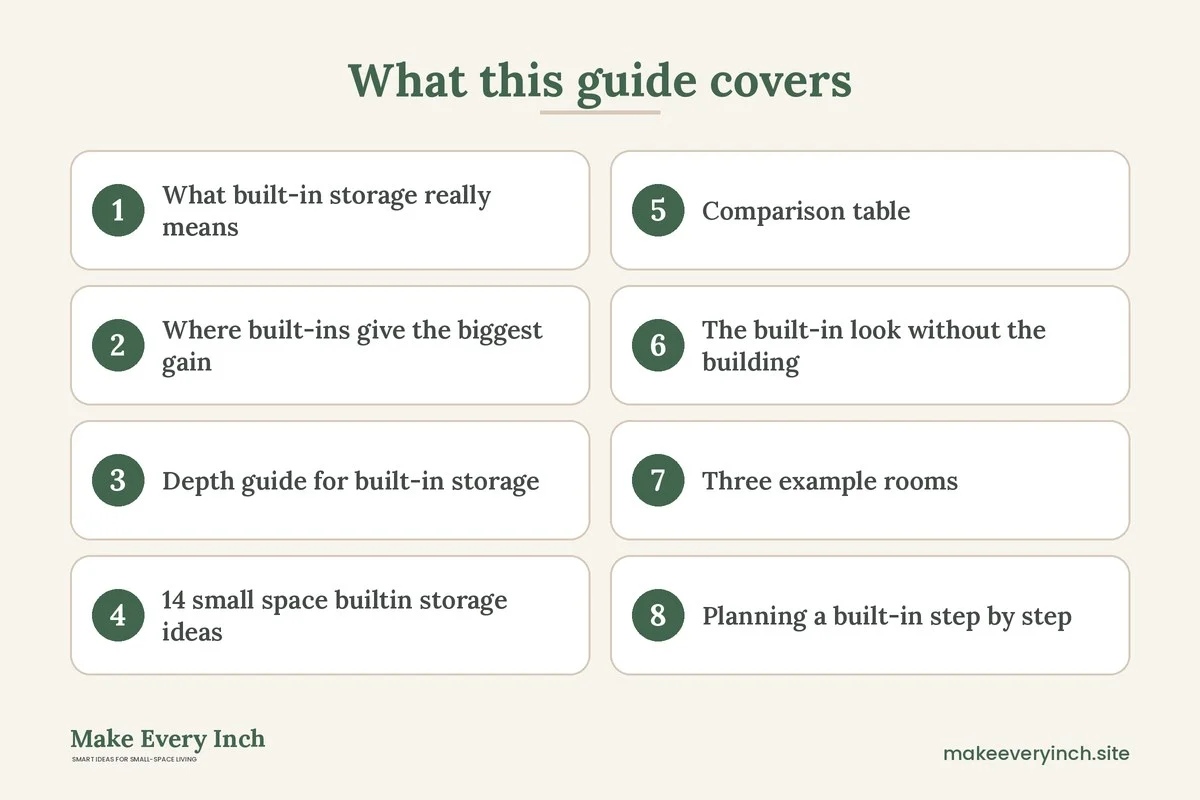
Small space builtin storage solves a problem that loose furniture cannot: the awkward gaps. A freestanding shelf leaves a strip of dead air at each side, a dresser stops short of the ceiling and a bed leaves a hole beneath it. A built-in fills those gaps so that walls, storage and seating become one surface. This guide explains where built-ins gain the most space, how deep each type should be, 14 ideas, a table that compares permanent and renter-friendly versions, three example rooms, safety rules and a checklist. For the broader shopping picture, see our pillar on the best furniture for small apartments, and for the floating counterpart to this post, read our sibling guide to wall-mounted furniture ideas for small homes.
What built-in storage really means
A true built-in is fixed to the structure of the home. It is cut to fit a wall, a recess or a corner, and it is finished with trim so that it looks like part of the architecture. That is its strength and its limit: it is permanent, it usually costs more than loose furniture and it is not easy to move. A semi-built-in is a set of freestanding units, installed in a row or in a recess, fixed to each other and to the wall, and finished with filler panels and trim. It gives most of the look with less commitment. A built-in look, the third option, uses ordinary furniture that is chosen to match the width of a wall and painted or trimmed to blend in.
Which approach suits you depends on tenure, budget and skills. Owners can cut into walls, subject to checks on structure and services. Renters should assume that anything fixed to the structure needs written permission and should lean toward the semi-built-in and built-in look. If you rent, also read our guide to renter-friendly storage ideas for small apartments.
Where built-ins give the biggest gain
Dead zones
Walk through the home and note every place where furniture does not fit. The usual candidates are the recess on either side of a chimney breast, the space above a door, a stair landing, the end of a hallway, the slope under a roof and the gap between a bed and a wall. These areas are often 12 to 30 inches deep and several feet tall, which suits storage well.
Full-height walls
A shelf unit that reaches the ceiling uses space that no one else uses. A wall that is 8 feet tall holds about twice the shelving of a 4-foot unit with the same footprint. Reserve the top shelves for items used a few times a year, and keep daily items between knee and shoulder height.
Zones that do two jobs
Seating that hides storage, beds that wrap around cupboards and stairs with drawers all gain a function without gaining footprint. These are the true multipurpose cases, and they tend to be the best value in a small home.
Depth guide for built-in storage
Depth decides what a unit can hold, and it decides how much floor area it takes. These ranges are common starting points, not fixed rules.
- Books and display: 8 to 12 inches. Deeper shelves collect clutter at the back.
- Folded clothes and linens: 14 to 18 inches.
- Hanging clothes: 22 to 24 inches for a standard hanger rail, or about 14 to 16 inches if you use a turned rail.
- Shoes: 8 to 12 inches for a tilted rack, 12 to 14 inches for a flat shelf.
- Kitchen items and small appliances: 12 to 20 inches.
- Under-seat storage: 16 to 20 inches for a bench seat with a lid or drawers.
Choose the narrowest depth that does the job. In a room 9 feet wide, a unit 24 inches deep takes more than a fifth of the width, so a 14-inch unit often makes more sense.
14 small space builtin storage ideas
Around the architecture
1. Alcove shelving beside a chimney breast
The recesses on each side of a chimney breast are the classic built-in site. Fill each with shelves from floor to ceiling, and add cupboard doors on the lower part to hide clutter. Keep the depth to match the breast, usually 10 to 14 inches. If the chimney is in use or has a flue, leave required clearances and check the guidance for the appliance.
2. A shelf wall above the door
A run of shelves above a door, 10 to 12 inches deep, holds baskets of seasonal items. It works in a hallway, a bedroom or a studio, where the wall is otherwise empty. Keep weight light because the span above a door can be weak. See our vertical storage ideas for more ways to use height.
3. A bookcase that frames a window
Shelves on each side and above a window form a niche that can hold a seat. Keep the glass and the window handle clear, and avoid blocking a radiator, because heat needs to circulate.
4. Under-stairs drawers and cupboards
If your home has stairs, the space beneath them can hold drawers, pull-out shelves and shoe racks. Because the roof of the space slopes, the deepest drawers go at the tall end, and shallow ones at the low end. Never block a fire escape route.
5. A closet-width wardrobe wall
Instead of one freestanding wardrobe, fill a whole wall with floor-to-ceiling cabinets. The doors can be sliding to save swing space, and the inside can include a rail, shelves and drawers. Our guide to small bedrooms without a closet gives layout options.
Seating and sleeping
6. A window seat with drawers
A bench 16 to 18 inches high and 16 to 20 inches deep, with lids or drawers, turns a window into a reading nook with storage underneath. Add hinge stays on lids to prevent them from slamming on fingers. For related seating, see our guide to the best storage ottomans.
7. A bed surrounded by cabinets
Cupboards at the head and sides of a bed form an alcove, and a shelf across the head replaces the nightstands. It works well in a room where the bed fills one wall. Leave 24 inches or more at the foot or one side so you can make the bed, and keep any overhead cabinet shallow and light. Our small bedroom storage ideas that save floor space post compares options.
8. A platform bed with drawers
A raised platform, 12 to 18 inches high, with deep drawers underneath, adds the equivalent of a dresser or two. Check that drawers can open fully without hitting a wall or a door. For a freestanding version, see the best beds with storage guide.
9. A banquette in the kitchen or dining area
An L-shaped bench along two walls seats several people in the space of two chairs, and the base holds pans, linens or small appliances. Seat height of 17 to 19 inches and a table 28 to 30 inches high work for most adults. Our ideas for small dining rooms with built-in seating go into more detail.
Work and living areas
10. A built-in desk with shelves
A desktop 20 to 24 inches deep, fixed between two side cupboards, with shelves above, forms a work nook in a corner or a closet. Leave room for knees, around 24 inches of width, and plan outlets and cable holes before building. See small home office ideas in a closet for layouts.
11. A media wall
A long, low unit with shelves and cabinets on each side of a TV puts the screen, the devices and the books in one frame. Provide ventilation for devices, and keep cables in a channel. For more layouts, read our small living room storage ideas.
12. A floor-to-ceiling shelf wall in the living room
A single wall of shelves, 10 to 12 inches deep, stores books, baskets and objects. Close the lower third with doors so the daily clutter disappears. Fix the whole unit to studs, because tall shelves are a tip-over risk.
13. A hallway cupboard run
A hallway is often 3 feet wide, and a 10-inch-deep cupboard on one wall leaves about 26 inches of passage. That is tight, so use shallow shelves and sliding or folding doors that do not swing into the path. See narrow hallway ideas for clearance rules.
14. A kitchen filler: tall pull-out pantry
A narrow gap between a fridge and a wall, even 6 to 10 inches wide, fits a pull-out tower with shelves. It turns dead space into a pantry. Check that the weight rating and the runners suit the load. For more ideas, see our guide to small kitchen ideas with no pantry.
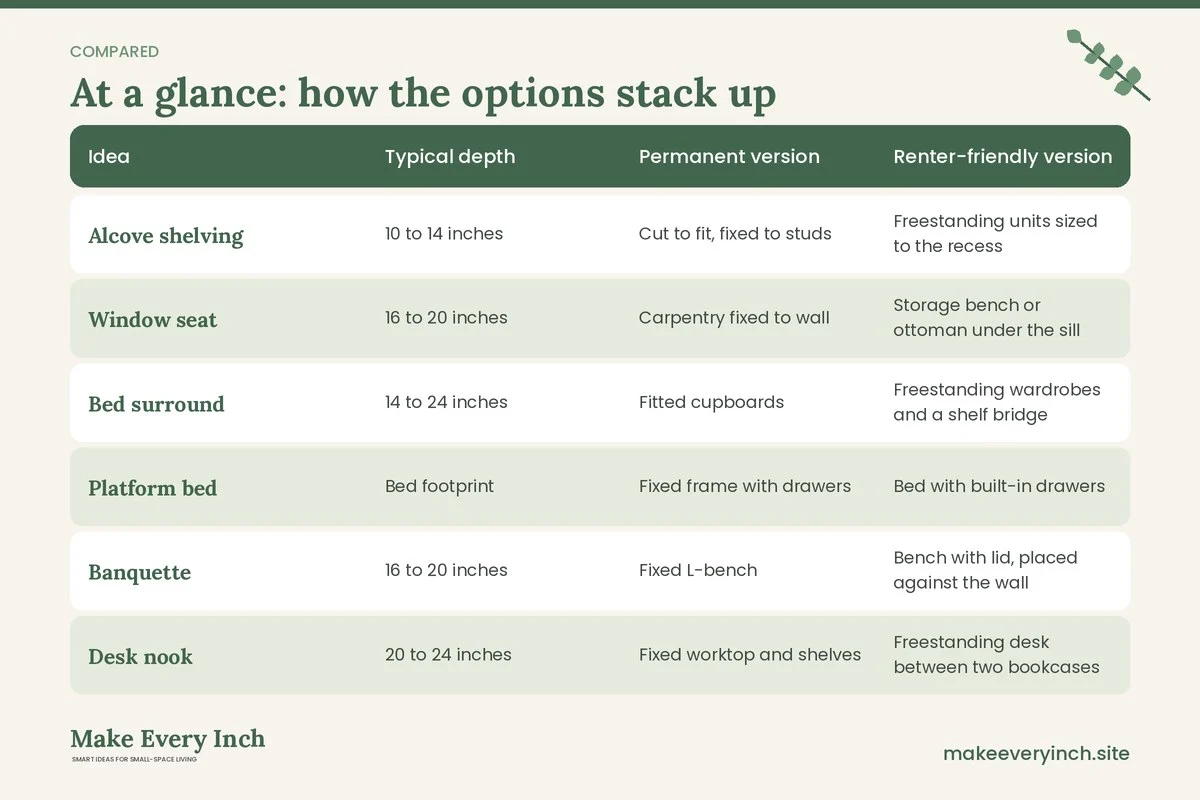
Comparison table: permanent and renter-friendly versions
Use the table to decide how far to go. If you rent, read the final column before you buy anything.
| Idea | Typical depth | Permanent version | Renter-friendly version |
|---|---|---|---|
| Alcove shelving | 10 to 14 inches | Cut to fit, fixed to studs | Freestanding units sized to the recess |
| Window seat | 16 to 20 inches | Carpentry fixed to wall | Storage bench or ottoman under the sill |
| Bed surround | 14 to 24 inches | Fitted cupboards | Freestanding wardrobes and a shelf bridge |
| Platform bed | Bed footprint | Fixed frame with drawers | Bed with built-in drawers |
| Banquette | 16 to 20 inches | Fixed L-bench | Bench with lid, placed against the wall |
| Desk nook | 20 to 24 inches | Fixed worktop and shelves | Freestanding desk between two bookcases |
| Media wall | 12 to 16 inches | Fitted cabinets | Low units with filler trim |
| Pull-out pantry | 6 to 10 inches | Fixed runners | Rolling slim cart on wheels |
The built-in look without the building
You can fake a built-in with ordinary furniture. Here are the steps.
1. Measure the wall. Choose units whose combined width fills the space, leaving a gap of no more than 1 inch each side.
2. Choose the same depth. Units of the same depth look uniform. If one is deeper, put it at the end.
3. Join the units. Link neighboring units with the connectors supplied, so they behave as one.
4. Fill the gaps. Use filler panels or trim strips between the unit and the ceiling, so the top does not leave a dusty gap.
5. Paint to blend. A single color on the units and the wall hides the joins. Use low-VOC paint, and open a window while it dries.
6. Anchor to studs. Tall units should be fixed to the wall using brackets or straps. In a rental, ask first.
7. Add trim. A strip of molding along the top and the base finishes the look. Peel-and-stick versions or light adhesive can work in a rental if the lease allows.
Our guide to IKEA small space ideas shows ways to combine modular units in this way, and our post on hidden storage ideas offers more disguise tricks.
Three example rooms
A 10 by 12 foot bedroom with no closet
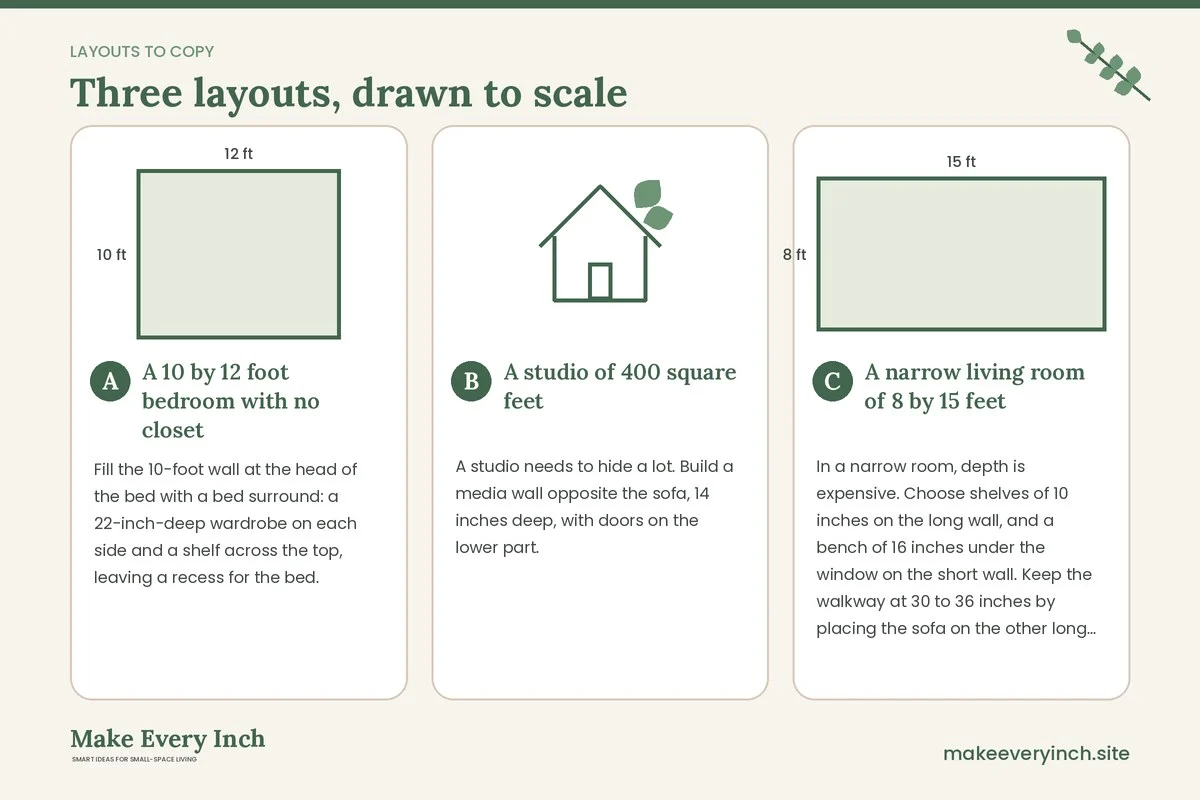
Fill the 10-foot wall at the head of the bed with a bed surround: a 22-inch-deep wardrobe on each side and a shelf across the top, leaving a recess for the bed. The recess needs to be at least as wide as the mattress plus 2 inches each side. Overhead storage is shallow and light, and the shelf is kept to the 12-inch depth. The room gains the equivalent of two wardrobes and two nightstands, and the floor space is left for walking. Use the checklist below to confirm that the bed can be made.
A studio of 400 square feet
A studio needs to hide a lot. Build a media wall opposite the sofa, 14 inches deep, with doors on the lower part. Put a window seat with drawers under the main window, 18 inches deep, and run shelves above the entry door for baskets. A pull-out pantry fills the gap beside the fridge. The result is a room where most items have a closed home, and the surfaces stay open. For layout ideas, see studio apartment storage ideas.
A narrow living room of 8 by 15 feet
In a narrow room, depth is expensive. Choose shelves of 10 inches on the long wall, and a bench of 16 inches under the window on the short wall. Keep the walkway at 30 to 36 inches by placing the sofa on the other long wall. If the room has chimney alcoves, fill them with the shelving instead of buying a separate bookcase. See our post on narrow living room ideas.
Planning a built-in step by step
1. List what you need to store. Group items by size and frequency of use.
2. Measure the space three times. Walls are rarely square, so measure at the top, middle and bottom.
3. Check the structure. Find studs, pipes, wires and vents. Ask a professional if you plan to cut into a wall.
4. Decide on the doors. Doors hide clutter but need swing space. Sliding doors save space, and open shelves are cheaper but need tidy contents.
5. Plan the electrics. Leave outlets reachable, add a cable route and never cover a socket without providing access.
6. Allow ventilation. Devices, radiators and heaters need air. Keep a clear gap around them.
7. Choose materials. Plywood and solid wood handle weight well, and boards with a laminate surface resist wear. Low-emission boards and low-VOC finishes help indoor air.
8. Build or buy in stages. Start with the part that solves the biggest problem and add the rest later.
Safety and permission notes
- Anchor tall units. A tall cabinet or bookcase can fall if it is bumped or climbed. Fix it to studs with brackets, and use anti-tip straps on loose furniture if the lease allows.
- Ask before drilling or cutting. Never fix anything to a rented wall without written permission. Some leases forbid it entirely.
- Avoid hidden services. Check for wiring and pipes before you drill, and keep away from lines above and below sockets.
- Leave heaters clear. Do not block radiators, vents, flues or electric heaters. Keep a safe gap, as set out by the appliance instructions.
- Do not block exits. Under-stair storage and hallway units must not narrow a route you would need in an emergency.
- Protect fingers. Lids, drawers and folding doors can trap fingers, so fit stays, soft closers or hinge guards where children are present.
- Ventilate when painting. Low-VOC paints and open windows reduce fumes, and sealed cabinets should be dry before closing.
Mistakes to avoid
- Building too deep. A unit that sticks out too far takes more floor than it saves.
- Ignoring the access. Drawers need space to open, and lids need space to lift.
- Forgetting the lighting. A dark recess or a closed cupboard needs a light, whether a plug-in strip or a battery puck. See our guide to renter-friendly lighting ideas.
- Filling every gap. A wall of cupboards can feel heavy. Leave a few open shelves or a lighter finish to keep the room calm.
- Skipping the plan for the future. Adjustable shelves allow the storage to change as your needs change.
- Overloading the top. Heavy items belong low, and light ones high.
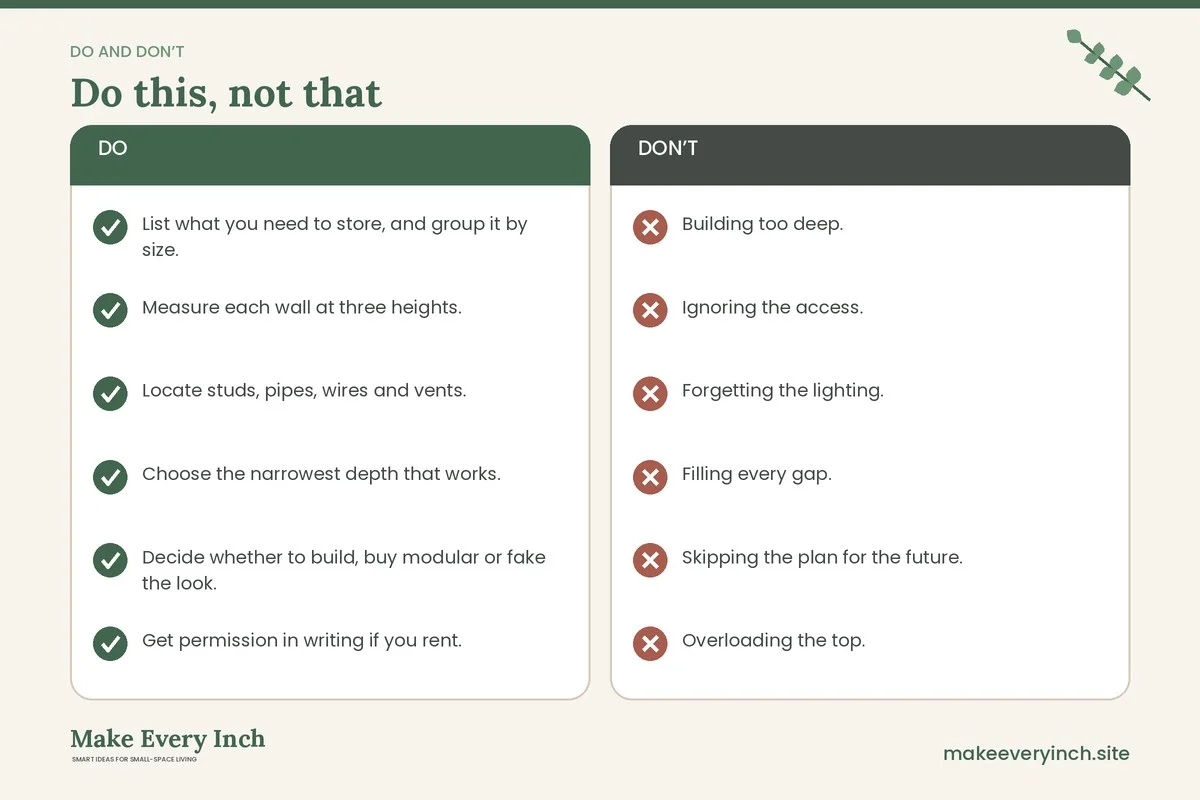
Checklist
- List what you need to store, and group it by size.
- Measure each wall at three heights.
- Locate studs, pipes, wires and vents.
- Choose the narrowest depth that works.
- Decide whether to build, buy modular or fake the look.
- Get permission in writing if you rent.
- Plan for outlets, cables and light.
- Keep radiators and vents clear.
- Anchor tall units to studs.
- Add stays or soft closers where fingers could be trapped.
- Use low-VOC paint, and ventilate.
- Photograph the room before you start.
FAQ
Is built-in storage worth it in a small space?
Usually yes, for dead zones such as alcoves, under stairs and above doors, because it uses space nothing else can. For open floor areas, a loose unit can be more flexible.
Can I add built-in storage in a rental?
Only with your landlord’s permission if it involves fixing to the structure. Without it, choose freestanding units sized to the space, and finish them with trim that you can remove.
How deep should built-in shelves be?
Around 8 to 12 inches for books and display, 14 to 18 inches for folded clothes and 22 to 24 inches for hanging. Choose the smallest depth that works for what you store.
What is the difference between built-in and fitted furniture?
The terms overlap. Built-in usually means carpentry made on site, while fitted often means units made elsewhere and installed. Both are fixed to the structure.
Does built-in storage add value to a home?
It can make a home more attractive, but the effect depends on quality, taste and the market. Do not count on a return when deciding.
How do I stop a tall built-in feeling heavy?
Use one color for the wall and the unit, include some open shelves and add lighting. Keeping the doors flat and handles slim also helps.
Keep going: Keep planning with our guides to small space organization ideas, small bedroom ideas and studio apartment ideas.
Save this guide for later
Pin the ideas you like to Pinterest so you can come back to them when you plan your space.