Damage-Free Hanging Ideas for Small Homes: Weights and Methods
Quick answer: Damagefree hanging small homes works best when you choose the method by two things: what the object weighs and what the surface is. Light items suit adhesive strips on clean, sound paint. Medium items suit tension rods, over-door hooks and ledges that stand. Heavy items should lean, sit on furniture or wait for written permission to use fixings. Never drill without permission.
Damagefree hanging small homes is a problem of matching, not of finding one magic product. Every object has a weight and a shape, every wall has a surface and a condition, and every lease has its own rules. When those three line up, a frame stays on the wall and comes off cleanly months later. When they do not, you get a crash at three in the morning or a patch of peeled paint at move-out. This guide treats hanging as a decision. It covers how to read your surface, how to estimate weight, a chart that pairs methods with loads, a step-by-step install, a removal routine, hanging by room and item, three example homes and a checklist. For the wider topic, read our hub guide on renter-friendly apartment decorating ideas, then come back to this guide when you are ready to hang something.
Step one: read the lease and photograph the wall
Before choosing a method, check what the lease permits. Some leases allow small nail holes, some allow adhesives only and some forbid every kind of attachment. If the wording is unclear, ask in writing and keep the reply. Photograph each wall in daylight, with the date visible, so you have a record of the original condition. Never drill into walls, ceilings, tile or door frames without permission, because a hole can hit wiring or pipes and can also cost you part of a deposit. Our guide to security-deposit-safe apartment upgrades explains which changes tend to be low risk.
Step two: identify the surface
Different surfaces behave very differently under adhesive and pressure. Spend ten minutes on a surface survey before buying anything.
Painted drywall
The most common wall. Smooth, sound, cured paint is the best surface for adhesive strips. Fresh paint needs time to cure fully, and many guidelines suggest waiting at least a few weeks, so check the product instructions. Flat and matte paints can lift more easily than satin or semi-gloss, since the surface is more porous. Do a hidden spot test before you commit.
Textured or dusty walls
Orange peel, knockdown or heavy texture gives adhesive less contact area, so it holds less weight and fails sooner. Treat these walls as unsuitable for adhesive, and use leaning, tension or furniture-based methods instead.
Tile, glass and sealed surfaces
Smooth, nonporous surfaces such as ceramic tile and glass often hold adhesive hooks well, which makes them useful for kitchen and bathroom items. Check that the grout lines are not under the strip, and avoid wet zones where steam may weaken the bond. Do not hang anything heavy above a bathtub or a sink.
Wallpaper, brick, concrete and plaster
Wallpaper can peel with the strip, so avoid adhesive unless you have tested it. Brick and rough concrete rarely accept adhesive, though shelf-style or leaning solutions work. Old plaster can be crumbly, so test carefully and keep loads minimal.
Doors, frames and windows
Hollow doors and window frames can often hold light over-door hooks that need no adhesive. Check the clearance so the door closes properly, and do not use over-door hooks on fire doors or on doors that must close and latch for safety.
Ceilings
Avoid anything heavy. Light, removable hooks for a lightweight hanging plant can work only where the lease and the product instructions allow it, and the load must stay well under the rating. A ceiling hook should never hold a swing, a heavy plant or anything people pull on.
Step three: estimate the weight
Weigh the object, including the frame, glass, hanging hardware and anything inside. A kitchen or bathroom scale works for small items. For a frame, weigh it with its glass in place. For a plant, weigh the pot, soil and saucer, and remember that watered soil is heavier than dry soil. Write down the weight in pounds.
Then add a safety margin. A common approach is to stay at half of the stated rating or lower, particularly for anything fragile, anything over a bed or sofa, or anything that could hurt someone if it fell. A wall mirror over a bed is a good example. If a failure would cause harm, choose a more secure approach or move the item somewhere safer, such as leaning it against the wall on the floor.
Consider the stress on the fixing as well as the weight. A tall, heavy object that leans out from the wall exerts more leverage than a flat frame. A towel hook that is tugged every day experiences repeated loads that a static picture does not. Pets and children also pull and bump things. In these cases, choose a lighter object or a more robust method.
A chart that pairs methods with loads
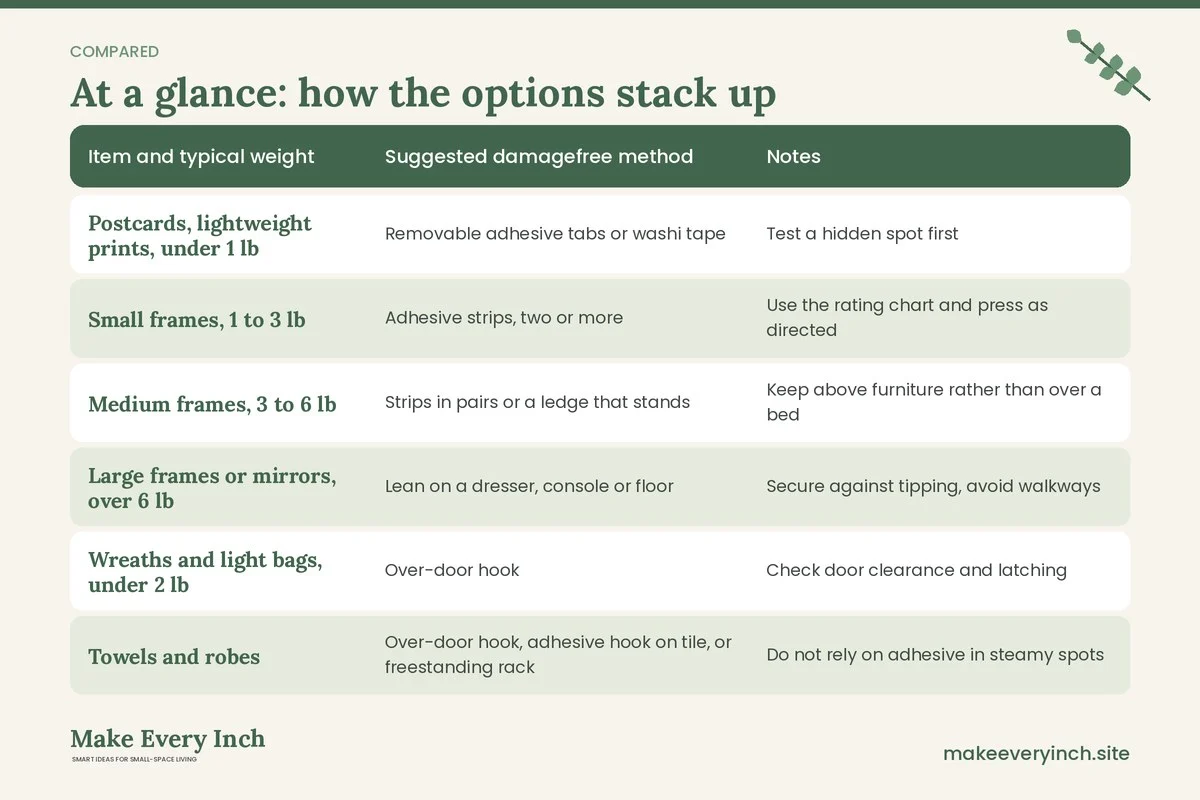
The numbers below are general working ranges, not guarantees. The product’s own instructions and weight rating always take priority, and your wall may behave differently.
| Item and typical weight | Suggested damagefree method | Notes |
|---|---|---|
| Postcards, lightweight prints, under 1 lb | Removable adhesive tabs or washi tape | Test a hidden spot first |
| Small frames, 1 to 3 lb | Adhesive strips, two or more | Use the rating chart and press as directed |
| Medium frames, 3 to 6 lb | Strips in pairs or a ledge that stands | Keep above furniture rather than over a bed |
| Large frames or mirrors, over 6 lb | Lean on a dresser, console or floor | Secure against tipping, avoid walkways |
| Wreaths and light bags, under 2 lb | Over-door hook | Check door clearance and latching |
| Towels and robes | Over-door hook, adhesive hook on tile, or freestanding rack | Do not rely on adhesive in steamy spots |
| Curtains and light tapestries | Tension rod in a recess or window frame | Keep within the stated rod capacity |
| Hanging plants, light | Tension rod or a floor stand | Mind the weight of wet soil |
| Shelves | Freestanding units and leaning ladder shelves | Anchor tall units where allowed |
| Heavy items, TVs, large shelves | Furniture-supported or permitted fixings only | Seek written permission |
Step four: install, one careful step at a time
Adhesive strips and hooks depend on technique as much as on the product. Follow the specific instructions that come with whichever product you choose, and use this routine as a general guide.
1. Clean the spot with a mild cleaner or rubbing alcohol on a cloth, and let it dry fully. Dust and oil are the main enemy of adhesion.
2. Check the temperature. Very cold or very hot surfaces can prevent a good bond, so most guidance calls for room temperature.
3. Mark the position with a pencil or a piece of low-tack tape, using a level.
4. Apply the strip to the object first, and then press the object to the wall for the time stated in the instructions, which is often around 30 seconds.
5. Wait before loading it. Many instructions suggest an hour or more before hanging a heavy item.
6. Check the item after a day, then again after a week. If you see the strip slipping, take the item down.
Some tips for specific tools follow.
Tension rods
A tension rod holds by pressure against two opposite surfaces. Place it in a solid recess, such as a window frame, an alcove or inside a closet, and twist until firm. Do not use it where the walls are weak or uneven. Keep loads inside the rod’s stated capacity and check the tension occasionally, since temperature and vibration can loosen it.
Over-door hooks and racks
These sit on the top edge of a door. Check that the door still closes, and avoid heavy loads that could bend the hardware or strain the hinges. Do not use them on a door that guards an exit route where a hanging item could obstruct a quick exit.
Picture ledges and leaning
A ledge that stands on a console, dresser or the floor holds frames without touching the wall. Leaning a large frame against the wall works best with a rubber or felt buffer at the base. Place the item where it will not be knocked by passing people, and secure the bottom edge so it cannot slide.
Washi tape and removable tabs
Light paper items work with low-tack tape or putty-style tabs. They can still mark delicate paint, so test first and remove slowly.
Step five: remove without damage
Removal matters as much as installation. Many wall failures happen during removal because people yank rather than release.
1. Hold the object in place and ease it off, not toward you.
2. Find the pull tab on the strip and stretch it slowly along the wall, parallel to the surface, rather than away from it.
3. Keep stretching until the strip releases. If the strip resists, a few seconds with a hair dryer on low heat can soften the adhesive, as long as the wall is dry and the dryer cord is kept away from water.
4. Do not leave strips on for years. Longer wear can make removal harder.
5. If residue remains, rub gently with a soft cloth. If paint lifts, stop and photograph it, then follow the lease guidance on repairs.
6. Check for marks in daylight and compare with your original photographs.
Hanging by room and item
Living room
Use leaned art above a console, a mirror leaning on the floor and a ledge that stands for the sofa wall. Keep heavier pieces off the wall above seating, since a fall causes the most harm there. See our guide to renter-friendly wall decor ideas for layouts, and our guide to small space wall art ideas for scale and spacing.
Bedroom
Avoid heavy items above the bed. Use curtains or a lightweight fabric hanging on a tension rod, a freestanding headboard or a leaning mirror. Lamps that sit on a table are safer than wall lamps that need wiring. For more ideas, read about small bedroom ideas for renters.
Kitchen
Adhesive hooks on tile work for lightweight items, and over-door racks help with towels and cleaning supplies. Keep hooks away from the stove and the sink splash zone, because heat and steam weaken adhesives. Rails and hooks that rely on a countertop clamp or a cabinet door can free wall space without fixing to it, and our guide to small kitchen wall storage ideas has more.
Bathroom
Steam, soap and temperature changes make bathrooms hard on adhesives. Choose freestanding racks, over-door hooks and shower caddies that hang from the rod where the rod is secure. Keep electrical items away from water, and use outlets protected by a ground fault circuit interrupter. See renter-friendly bathroom ideas for more.
Entryway
Use a freestanding coat rack, an over-door hook set or a leaning mirror. Read our guide to small entryway wall decor ideas and our guide to renter-friendly entryway organization for planning.
Hallway
A hallway gallery works with leaned frames on a long ledge that stands on a narrow console or with light frames on strips. Keep frames flat to the wall so people do not catch them, and avoid sharp corners at head height. See our guide to hallway gallery wall ideas for small homes.
Three example homes
Example 1: A studio with textured walls
The walls are textured, so adhesive is a poor choice. The plan uses a tall bookcase placed against the wall, with art leaned on its shelves, and a wire stretched between two tension rods in an alcove for postcards and lightweight cards. A floor mirror leans against the wall beside the window. The bookcase is anchored if the lease allows it, and the heaviest books are on the bottom shelves. Our guide to studio apartment ideas for renters shows other layouts.
Example 2: A one-bedroom with smooth painted walls
The walls are smooth and cured, so lightweight frames go on adhesive strips, two per frame. Heavier pieces lean on a console. A plant hangs from a tension rod across the window, and its pot is lightweight. Before the move-out, the owner removes each strip slowly along the wall and photographs the result.
Example 3: A shared apartment with strict rules
The lease forbids all changes. The plan uses freestanding shelves, leaned art, a hanging organizer on the back of the door and curtains on tension rods. Each roommate has a shelf, and the shared area uses a pinboard on a stand rather than a wall board. Nothing touches the walls, and the move-out check is simple.
Common mistakes
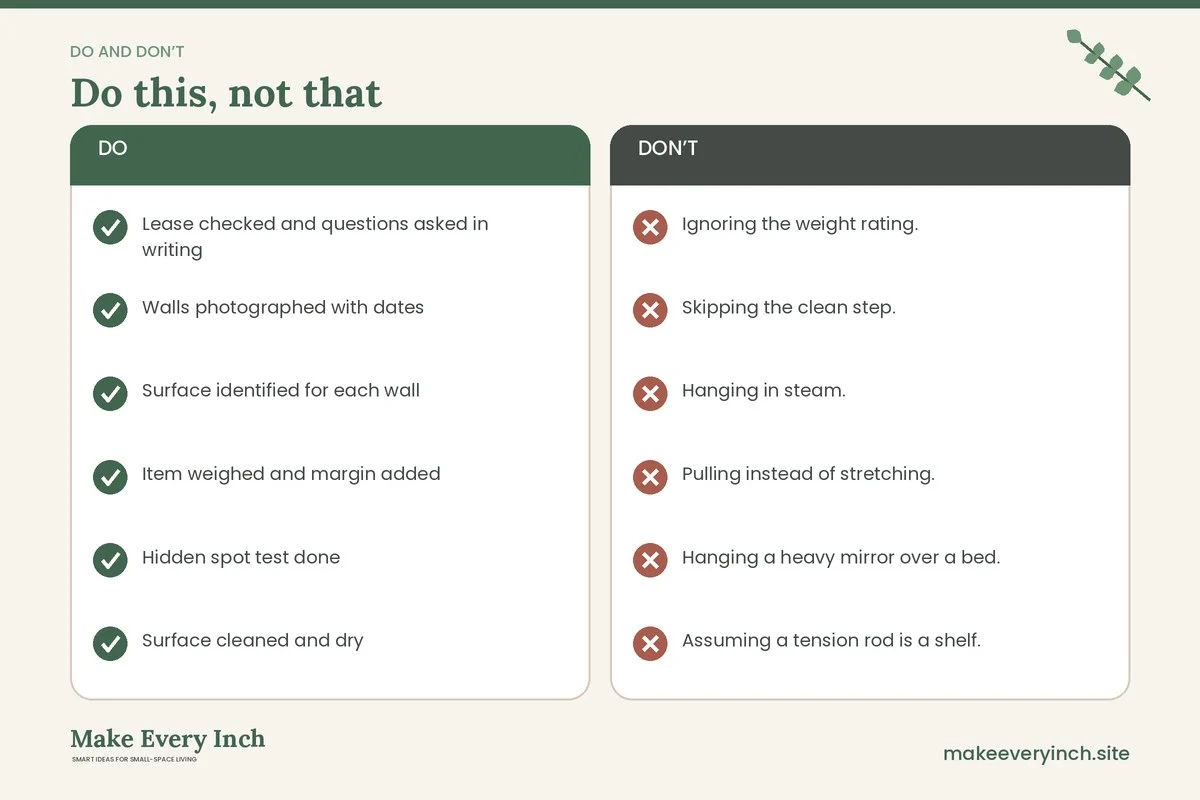
- Ignoring the weight rating. An overloaded strip fails, often long after you stop watching.
- Skipping the clean step. Dust is the usual cause of a fall.
- Hanging in steam. Adhesives weaken in bathrooms and above stoves.
- Pulling instead of stretching. Yanking is how paint comes off.
- Hanging a heavy mirror over a bed. If it falls, it is dangerous.
- Assuming a tension rod is a shelf. Treat the rating as the maximum, not the target.
- Drilling without permission. Never do it, even for one small hole.
Safety notes
- Keep anything heavy or breakable away from beds, cribs, sofas and walkways.
- Anchor tall furniture to the wall where the lease permits, and choose lower pieces where it does not.
- Keep cords tidy, avoid overloading outlets and never run a cord under a rug.
- Keep hanging cords, blind strings and loose ribbons out of reach of children and pets.
- Use a stable ladder or step stool, and have someone nearby for high items.
- Use low-VOC paint if you repaint with permission, and ventilate well.
- Never hang items from a smoke detector, sprinkler head or pipe.
The final checklist
- Lease checked and questions asked in writing
- Walls photographed with dates
- Surface identified for each wall
- Item weighed and margin added
- Hidden spot test done
- Surface cleaned and dry
- Method matched to weight and surface
- Level used and position marked
- Waiting time observed before loading
- Items rechecked after a day and a week
- Removal steps saved
- Tall furniture anchored or replaced
FAQ
Do damage-free hooks really leave no marks?
Results vary with the wall, the paint and how long the product stays up. Careful surface choice, a hidden spot test and slow removal reduce the chance of marks, but no method is guaranteed.
How long can I leave a strip on the wall?
Follow the product instructions. Many are intended for months to a few years, but older adhesive can be harder to remove and may leave residue.
What if a strip falls?
Take the item down, clean both surfaces and check the weight rating. If the wall surface is the problem, switch to leaning or tension-based methods.
Can I hang a TV without drilling?
Heavy electronics should rest on furniture or use a mount approved by the landlord. Never trust adhesive with a TV. See our guide to no-drill storage ideas for renters for options that avoid walls.
What is the safest option when I am unsure?
Lean the item on furniture or the floor, and keep it away from places where it could fall onto a person.
Keep going: Next, read our guide to renter-friendly shelving ideas without drilling, plan your space with how to make a rental feel like home without renovating and browse renter-friendly lighting ideas.
Save this guide for later
Pin the ideas you like to Pinterest so you can come back to them when you plan your space.