Small Kitchen Storage Mistakes to Avoid
Quick answer: The small kitchen storage mistakes to avoid most often are overfilled cabinets, doors and drawers that hit each other, heavy items stored overhead, deep shelves with no pull-out access, and buying organizers before measuring. Fix them in order: edit the contents, check clearances, move heavy items low, then add containers sized to the space you actually have.
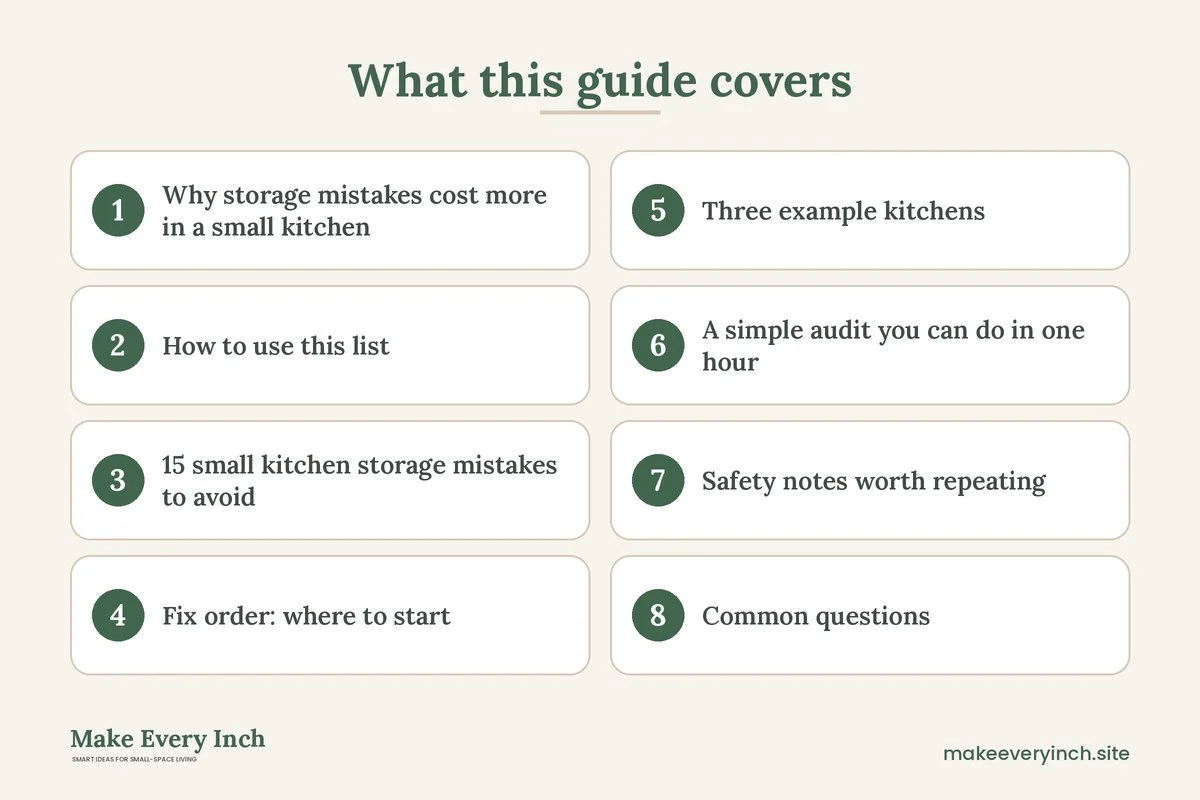
Small kitchen storage mistakes to avoid are usually quiet ones. Nobody sets out to jam a cabinet so full that a plate chips when the door closes, or to put a cast iron pan on a shelf above their head. These problems build up over months, one sensible-looking decision at a time, until the kitchen feels smaller than it is and every meal starts with a hunt. The good news is that most of these errors have simple fixes that cost little and take an afternoon. This guide walks through 15 common mistakes, explains why each one happens, and shows how to correct it. It also includes a fix-order table, three example kitchens, safety notes and a checklist. For the wider topic, read our main guide to small kitchen ideas, then pair this post with our guides to small kitchen storage ideas and small kitchen organization ideas.
Why storage mistakes cost more in a small kitchen
In a large kitchen, a poor storage decision is an annoyance. In a small kitchen, it is a daily tax. When you have perhaps 6 to 12 linear feet of counter and a handful of cabinets, every inch is working, and a wasted inch is felt immediately. A cabinet that holds only 70 percent of what it could, because of a bad shelf layout, means two or three more items stranded on the counter. A drawer that jams means you stop using it, and a stopped drawer is lost storage.
Mistakes also compound. An overfilled cabinet makes you buy a rack to hold the overflow, and the rack takes up counter space, so you buy a shelf to hold the things that were on the counter, and soon the room is full of solutions to problems that began with one crowded cupboard. Starting at the root, the mistake itself, is cheaper than layering fixes on top.
Finally, some mistakes are safety issues, not just inconveniences. Heavy cookware stored overhead, loose items stacked above a stove, and tall units that are not secured can all cause injuries. Where a mistake has a safety angle, the fix section says so.
How to use this list
Read through all 15 and mark the ones that sound familiar. Most kitchens have four to six. Do not try to fix everything in one weekend. The table later in this post sorts the fixes by effort and by how much space they usually recover, so you can start with the ones that give the biggest return for the least work.
Before you start, gather a tape measure, a notepad, a few boxes or bags for items you will remove, a damp cloth and a flashlight. A phone camera is useful for photographing the inside of each cabinet before you change it, so you can compare afterward and so you remember what lived where.
15 small kitchen storage mistakes to avoid
Mistakes about how much you keep
1. Overfilling cabinets until nothing can be reached
Why it happens: Cabinets look like free space, so items get added until the door barely closes. In practice, a cabinet stuffed past about 80 percent capacity forces you to remove three things to reach one, and you stop putting things back in the right place.
The fix: Aim to leave roughly 15 to 20 percent of each shelf empty. Remove duplicates, broken lids, mismatched containers and gadgets you have not used in a year. Store the leftovers elsewhere or let them go. Our guide to small kitchen cabinet organization ideas shows how to sort a cabinet into zones once it is edited.
2. Keeping duplicates and one-job gadgets
Why it happens: Gifts, sales and good intentions bring in a second whisk, a third colander, a garlic press, an avocado slicer and a sandwich maker. Each one is small, but together they fill a drawer.
The fix: Keep one good version of each tool and one multi-use tool in place of several single-use ones. A sharp knife replaces many slicers, and a box grater replaces several specialty graters. If you want a number, keep no more than two of any tool unless you cook for a crowd.
3. Storing rarely used items in prime space
Why it happens: Prime space is the shelf at chest height and the drawer right beside the stove. People fill it with whatever was unpacked first, including the turkey roaster, the fondue set and the punch bowl.
The fix: Rank what you own by how often you use it. Daily items belong between knee and shoulder height, near where you use them. Monthly items go on high or low shelves. Yearly items go in the least convenient spot, or outside the kitchen in a hall closet or under a bed. Our post on small apartment decluttering ideas gives a method for deciding what stays.
4. Buying in bulk without a place to put it
Why it happens: A large pack looks like a bargain, and the savings feel real. But a 12-roll pack, a giant bag of rice or a case of canned goods needs a home, and in a small kitchen it often takes over a whole shelf.
The fix: Only buy in bulk if the extra will fit in a defined spot, such as one bin or one shelf. Decant dry goods into stackable containers, and keep the backup supply in a closet or under a bed. If the bulk item will not fit in its allotted space, skip it.
Mistakes about access and clearance
5. Blocking doors and drawers with each other
Why it happens: In tight kitchens, a refrigerator door, a dishwasher door and a drawer can collide. Adding a rack, a cart or a trash can in the swing area makes it worse. A drawer that opens only 6 inches is a drawer you stop using.
The fix: Open every door and drawer fully, and note where it stops. Aim for at least 20 to 24 inches of clear room in front of the dishwasher and oven when they are open. If a cart is in the way, give it a parking spot that is out of the swing area. If a door hits a wall, a small bumper helps protect the paint. For more on layout, see our guide to small kitchen layout ideas for better workflow.
6. Putting a deep shelf behind a deep shelf
Why it happens: Standard base cabinets are about 24 inches deep, and upper cabinets are about 12 to 13 inches deep. Anything in the back of a deep shelf is invisible, so it becomes a graveyard of expired spices and forgotten pots.
The fix: Use one row per shelf in deep spaces, or add pull-out trays, lazy Susans or simple bins with handles. Slide-out organizers that fit inside an existing cabinet need no remodeling, as covered in our post on small kitchen storage ideas without remodeling. If you rent, choose freestanding versions that sit on the shelf and need no screws.
7. Stacking pots and pans in a tower
Why it happens: Stacking is the fastest way to fit a set of cookware into a cabinet. But you must lift the whole stack to reach the bottom pan, and metal scraping on metal ruins nonstick surfaces.
The fix: Store pans on edge in a vertical rack, or hang them on a rail. If you must stack, put a felt pad or paper towel between each pair and keep the stack to three or fewer. Store lids separately in a door-mounted holder or a file-style rack.
8. Ignoring the inside of cabinet doors
Why it happens: The inside of a door looks like wasted wall. People forget it can hold cutting boards, lids, foil and wrap, or a small row of hooks.
The fix: Add a light rack or an adhesive-backed organizer, but first measure the clearance between the door and the shelf items inside. An item that is 2 inches deep will hit a shelf that sits 1.5 inches away. Check the weight rating, and never drill into a rental door without permission. Adhesive options usually suit light loads only.
Mistakes about height and weight
9. Storing heavy items overhead
Why it happens: The upper cabinets are the most obvious empty space, so they take the stand mixer, the slow cooker and the stockpot.
The fix: Keep heavy items between waist and shoulder height or lower, and put light items above. A good rule is that nothing over about 10 pounds goes above shoulder height. Reaching up for a heavy pot with one hand is a common cause of strains and drops. Store the mixer in a low cabinet or on a rolling cart, and put baskets, paper goods and light serving dishes on the top shelves.
10. Storing items above the stove or the range hood
Why it happens: The cabinet above the stove is free real estate, and it seems wasteful to leave it empty.
The fix: Heat, grease and steam rise from the stove, and reaching over a hot burner is risky. Store only items that tolerate heat and are not needed while cooking, or leave the space for a vent hood or microwave, following the manufacturer’s clearance guidance. Never store flammable items such as paper towels or oil near a burner. Keep a clear path to the controls.
11. Leaving tall units unsecured
Why it happens: A tall rack, bookcase or pantry cabinet is the best way to go vertical. But a tall, narrow unit with heavy items near the top can tip, particularly if a child climbs it or a drawer is pulled open.
The fix: Anchor any tall unit to a wall stud with the hardware supplied, and put heaviest items on the lowest shelves. If you rent and cannot drill, ask your landlord, or choose a short unit and put a wide, low base under it. Never open several drawers of a tall freestanding unit at once.
12. Hanging too much from a rail or hook
Why it happens: Rails look attractive and free up drawer space. But a rail holding a full set of pans, ladles and mugs can exceed its load rating, and an adhesive hook has a lower limit than a screw.
The fix: Check the rating for the rail and for the hooks, and divide the load among several mounts. Add up the weight of what you want to hang. Leave a margin, perhaps 30 percent below the maximum. Stay clear of any area next to the burners where grease or heat can soften adhesive.
Mistakes about containers and buying
13. Buying organizers before measuring
Why it happens: Organizers look like instant solutions, and a set is easy to order. But a bin that is 1 inch too wide will not fit between the shelf sides, and a rack that is 1 inch too tall will not clear the shelf above.
The fix: Measure the width, depth and height of the space, and note the shelf spacing, the door swing and any hinge or pipe that sticks into the space. Subtract about half an inch on each dimension for clearance, then shop. Take a photo of the measurements with you. Our post on small kitchen drawer organization ideas gives drawer-specific measuring steps.
14. Choosing containers that waste space
Why it happens: Round containers and mismatched jars leave gaps. A shelf of round jars wastes roughly a fifth of the area between them compared with square ones. Large, bulky bins can hold less than the items they replace.
The fix: Choose square or rectangular stackable containers in a small number of sizes. Clear containers make contents visible and cut the number you need to open. Label the front, not the lid, so you can read it in a stack. For countertops, see our guide to small kitchen counter organization.
15. Putting too much on the counter
Why it happens: When cabinets are full, the counter becomes the overflow shelf. It starts with a toaster and a coffee maker and ends with a knife block, three canisters, a fruit bowl, a dish rack and a stack of mail.
The fix: Treat the counter as a work surface first. In many small kitchens, leaving 24 inches of clear counter next to the stove and 36 inches of clear work area near the sink allows comfortable prep. Move rarely used appliances into cabinets, and give each countertop item a reason to stay. If the counter is the problem, our guide to small kitchen ideas with limited counter space offers ways to add surface.
Fix order: where to start
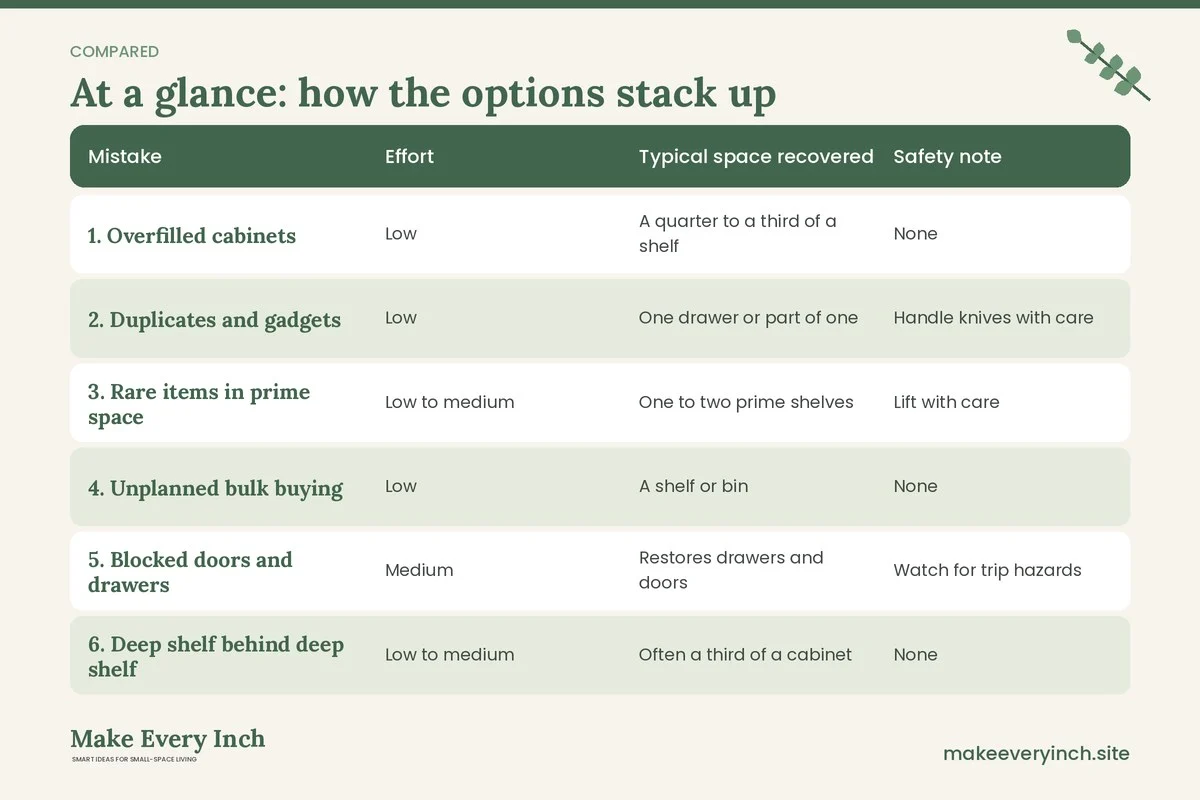
Not every fix is equal. Some cost nothing and recover a lot of space, while others are more work for a smaller gain. This table sorts the 15 mistakes by effort and likely return, using hedged ranges because every kitchen differs.
| Mistake | Effort | Typical space recovered | Safety note |
|---|---|---|---|
| 1. Overfilled cabinets | Low | A quarter to a third of a shelf | None |
| 2. Duplicates and gadgets | Low | One drawer or part of one | Handle knives with care |
| 3. Rare items in prime space | Low to medium | One to two prime shelves | Lift with care |
| 4. Unplanned bulk buying | Low | A shelf or bin | None |
| 5. Blocked doors and drawers | Medium | Restores drawers and doors | Watch for trip hazards |
| 6. Deep shelf behind deep shelf | Low to medium | Often a third of a cabinet | None |
| 7. Stacked pans | Low | One shelf or rack | Heavy items, lift with care |
| 8. Unused door interiors | Low | Several small items | Check rental rules and weight |
| 9. Heavy overhead storage | Medium | Frees upper shelves for light goods | Strong safety benefit |
| 10. Storage above the stove | Low | Not about space | Heat and fire safety |
| 11. Unsecured tall units | Low to medium | None, safety first | Anchor to a stud |
| 12. Overloaded rails | Low | Depends on load | Check load ratings |
| 13. Buying before measuring | Low | Avoids wasted purchases | None |
| 14. Wasteful containers | Medium | Often 10 to 20 percent of a shelf | None |
| 15. Cluttered counters | Medium | Restores 12 to 36 inches of counter | Keep burners clear |
Start with the items marked Low and with a safety benefit, namely 9, 10 and 11. They take the least effort and the safety gains are immediate. Then handle 1, 2, 3 and 4, which together clear the most room. The container and access fixes come last, because they depend on knowing what you are keeping.
Three example kitchens
These are illustrative composites, not real clients. They show how the same mistakes appear in different layouts and how the fixes change with the kitchen.
Example 1: a 5 by 8 foot galley
A galley kitchen has two facing runs with a walkway of perhaps 36 to 42 inches between them. The common mistakes here are 5 (blocked doors), 9 (heavy overhead storage) and 15 (cluttered counters). A trash can set in the walkway forces the dishwasher door to stop short, and a rolling cart parked at the end narrows the path to less than 30 inches. The stockpot and slow cooker sit on an upper shelf that is hard to reach in the narrow space.
The fix starts with the walkway. Move the trash can inside a base cabinet or to the end of the run, and give the cart a parking spot against a wall. Shift the stockpot and slow cooker to a low cabinet, and put light baskets above. Clear the counter nearest the stove, and move the toaster to a shelf. For more on this layout, see our guide to galley kitchen ideas.
Example 2: a studio kitchenette with no pantry
A kitchenette along one wall has maybe 8 to 10 feet of cabinets and no pantry. The typical mistakes are 1 (overfilled cabinets), 4 (bulk buying) and 14 (wasteful containers). Dry goods in their original bags slump in a deep cabinet, and a big pack of paper towels takes a whole shelf. Round jars waste the gaps.
The fix is to decant staples into square stackable containers, and to set a limit of one bin for bulk backups. Put a narrow rolling cart or a short shelf on a free wall for the overflow, and keep the paper goods in a closet. Our guide to small kitchen ideas with no pantry has more options for this setup.
Example 3: a rental kitchen with tall shelving
A rental has no room for another cabinet, so the tenant adds a tall metal shelf unit. The mistakes here are 11 (unsecured tall unit), 9 (heavy items high) and 12 (overloaded hooks). The heaviest appliance sits on the top shelf, the unit rocks slightly, and the adhesive hooks along the side hold a row of heavy mugs.
The fix is to ask the landlord about anchoring, or swap to a shorter unit. Move heavy appliances to the bottom shelf, keep only light items on top, and replace overloaded hooks with a freestanding mug tree. For rental-friendly options, see our guide to renter-friendly kitchen upgrades.
A simple audit you can do in one hour
If you want to check your kitchen for these mistakes without a big project, set a timer for 60 minutes and walk through this sequence.
- Minutes 1 to 10: Open every cabinet and drawer. Note any that are packed, stuck or hard to close.
- Minutes 10 to 20: Look up. List anything heavy on a high shelf, and anything above the stove.
- Minutes 20 to 30: Look at the counter. Count the items on it and ask which have a daily job.
- Minutes 30 to 40: Check tall furniture for stability and for wall anchors.
- Minutes 40 to 50: Check clearances. Open the dishwasher, oven, fridge and a drawer, and see where each stops.
- Minutes 50 to 60: Write a short list ordered by the table above. Choose one fix to do today.
You will usually find that two or three issues cause most of the frustration. Fixing those first gives you the biggest improvement for the least effort.
Safety notes worth repeating
- Anchor tall furniture. Use the hardware supplied, fasten to studs where possible, and ask permission before drilling in a rental.
- Mind the weight. Check ratings for shelves, rails, hooks and adhesive products, and stay below the limit.
- Keep heat away. Do not store flammable items near burners, and do not hang cloth near a flame.
- Plan electrical use. If you add a cart with a toaster or kettle, plug directly into a wall outlet and do not overload a power strip. Keep cords away from water and heat.
- Ventilate when cleaning or painting. If you repaint a cabinet interior, choose a low-VOC product and open a window.
- Lift with care. Store heavy items low and ask for help with large pots.
Common questions
How full should a small kitchen cabinet be?
A common guide is to leave about 15 to 20 percent of the space free. That gap makes items easy to reach and gives you room for new purchases. A cabinet packed to the limit is slow to use and tends to deteriorate quickly.
What is the single most common mistake?
Overfilling is probably the most common, because it feeds many of the others. When cabinets are too full, things end up on the counter, and organizers are bought to compensate. Editing the contents first often solves several problems at once.
Is it a mistake to use open shelving in a small kitchen?
Not necessarily, but it works best when you keep the contents tidy and limited. Open shelves show everything and collect grease and dust near a stove. Our guide to small kitchen ideas with open shelving covers when it helps and when it does not.
Can I fix these mistakes in a rental?
Most of them, yes. Editing, resizing containers, moving heavy items low and using freestanding organizers need no permission. Anything that involves drilling, including anchoring, needs your landlord’s approval.
Should I buy storage products first or declutter first?
Declutter first. You cannot size an organizer until you know what is staying. Edit, measure, then shop.
How do I know if a drawer is too crowded?
If you cannot see the bottom of the drawer, or if you have to push items down to close it, it is too crowded. Remove a third of the contents and see how it feels.
What should never go in the cabinet above the stove?
Avoid flammable or heat-sensitive items such as paper goods, plastic wrap and oils. Also avoid heavy items. Follow your appliance and vent manufacturer’s clearance guidance.
A final checklist
- Leave 15 to 20 percent of each shelf empty
- Remove duplicates and unused gadgets
- Put daily items between knee and shoulder height
- Keep heavy items low, with nothing over about 10 pounds above shoulder height
- Check that every door and drawer opens fully
- Keep 20 to 24 inches clear in front of open appliances
- Anchor tall units, with permission in a rental
- Check load ratings for rails and hooks
- Measure before buying any organizer
- Choose square, stackable containers
- Keep the counter near the stove and sink clear
- Photograph the before and after of each cabinet
Storage mistakes are rarely a sign that you are disorganized. They are usually a sign that the kitchen has changed more slowly than your belongings have. A little editing, a tape measure and a few safe, low-cost changes can make a small kitchen feel larger, calmer and easier to use.
Keep going: Ready to fix your kitchen? Start with the full guide to small kitchen ideas, then work through small kitchen storage ideas and small kitchen organization ideas. When you want to see how improvements look in practice, read small kitchen before and after ideas.
Save this guide for later
Pin the ideas you like to Pinterest so you can come back to them when you plan your space.