How to Add Counter Space to a Small Kitchen
Quick answer: To add counter space to a small kitchen, measure the room first, keep a 36 inch walkway where you can, then add surface in layers: a cart or narrow table for a movable work area, a drop-leaf or wall-mounted top that folds away, a cutting board that bridges the sink, and a stove cover for when the burners are cold. Check weight limits, lock casters, secure anything tall and never drill without permission.
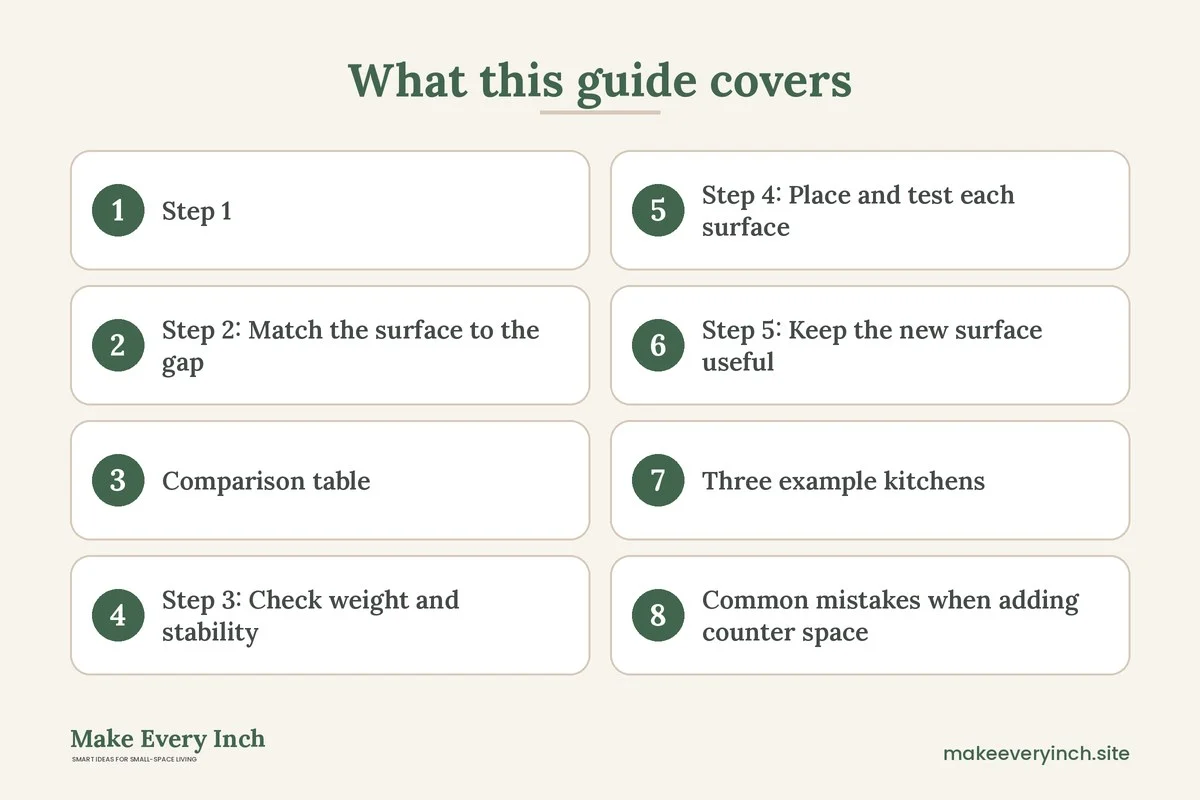
Learning how to add counter space to a small kitchen is mostly a question of order. Most people jump straight to buying a cart, then find it blocks the fridge door or wobbles under a stand mixer. A better route is to measure, choose the type of surface that fits the gap you actually have, check how much weight it must carry and then set it up so it is stable. This guide walks through that process step by step. It covers measuring, the main ways to add physical surface, a comparison table, weight and stability rules, three example kitchens, safety notes and a checklist. For wider context, read our main guide to small kitchen ideas, the companion pillar on small kitchen storage ideas and the closely related post on how to organize a small kitchen. If your problem is mostly clutter on the surfaces you already have, start with small kitchen counter organization instead, because adding surface to a cluttered kitchen simply gives you more places to pile things.
Step 1: Measure before you buy anything
Counter space is not only about square inches. It is about where the surface sits, how high it is and what you can reach from it. Spend ten minutes with a tape measure and a notebook before you shop.
Measure the room
Write down the length and width of the kitchen floor, then mark the swing of every door. Include the refrigerator door, the dishwasher door when open, the oven door and any cabinet doors that open into the walkway. Many small kitchens have a clear path of only 30 to 36 inches, and a new surface that narrows that path to 24 inches will make cooking feel worse, not better.
Measure the gaps
Look for dead zones. Typical candidates are the strip between the fridge and the wall, the gap beside the stove, the end of a run of cabinets, the wall above the trash bin, the corner nobody uses and the space under a window. Measure each gap’s width, depth and height. A gap that is 12 inches wide and 24 inches deep is enough for a slim cart. A gap that is only 8 inches wide may suit a rolling slim tower with a top, but not a cutting station.
Measure what must sit on the new surface
Weigh or estimate the heaviest thing that will live there. A stand mixer, a countertop oven and a full cast iron pan are all heavy, and each demands a firmer surface than a cutting board and a bowl. Note the footprint of the items, too. A microwave needs a flat top of around 18 to 20 inches wide, while a coffee maker needs 8 to 10 inches.
Decide what the new surface is for
Write one sentence for each new surface: “prep zone next to the stove,” “coffee station by the fridge,” “landing spot for groceries.” A surface with a job gets used. A surface without one becomes a drop zone for mail and keys.
Step 2: Match the surface to the gap
There are six main ways to add counter space to a small kitchen. Each solves a different problem, and most kitchens benefit from combining two.
Option A: A rolling cart or kitchen trolley
A cart is the fastest way to add a work surface because it needs no installation. Look for one with a top at counter height, usually 34 to 36 inches, so it lines up with your fixed counters. A matching height lets you slide items across rather than lift them. A top of around 16 to 20 inches deep and 24 to 30 inches wide suits most small kitchens. A shelf below stores pots, bowls or a bin. For a deeper look at features, see our guide to the best rolling kitchen carts and the layout ideas in small kitchen cart ideas.
Choose locking casters, or add locking ones. A cart that rolls while you chop is a hazard. Park it against a wall or cabinet when you work, and roll it out of the main path when you are done.
Option B: A drop-leaf or fold-down table
A drop-leaf table or a wall-mounted fold-down shelf gives you a large surface that disappears. A folded leaf can be only 6 to 10 inches deep. Open, it may be 24 to 30 inches deep and 36 to 48 inches wide. This works well in a galley or a narrow kitchen where a permanent table is impossible. In a rental, a freestanding drop-leaf table or a drop-leaf cart avoids wall mounting entirely.
Option C: A cutting board or sink cover
Over-the-sink boards and covers span the basin and give you 10 to 14 inches of extra width right where you need it for vegetable prep. Choose one that sits on the sink’s rim with lips on the underside, so it cannot slide. A board with a built-in colander or a drainer tray is useful, but make sure the sink is clean and dry before you put food on the board. Lift it off when you need to fill a large pot. Our post on small kitchen ideas with limited counter space covers more habits for living with a tight prep area.
Option D: A stove cover or noodle board
A flat board or a tempered cover over a cold stovetop turns the stove into a counter between meals. The key safety rule is simple: never place a cover on a burner that is warm, and never leave it on while cooking. Remove it fully before you turn anything on. With gas hobs, make sure the cover does not rest on the grates in a way that could shift. With electric or induction cooktops, check the manufacturer’s instructions about weight and surface contact. If you are not sure it is safe for your model, skip this option.
Option E: A wall-mounted shelf or fold-away top
A wall-mounted shelf at counter height can sit above a radiator cover, over a washing machine or beside the fridge. It is not a heavy-duty work surface, but it works for a coffee station, a toaster or a landing spot for the grocery bag. If you rent, check the lease and talk to the landlord before drilling. Where drilling is not allowed, read our no-drill storage ideas for renters and the list of renter-friendly kitchen upgrades.
If you do have permission to drill, find the studs, choose anchors rated for the load and ask a qualified person to help if you are unsure. A shelf that looks sturdy can pull out of drywall if it is fixed to the board alone.
Option F: A narrow table, bench or trolley used as a peninsula
A slim table of 12 to 16 inches deep can be pushed against the end of a counter to extend it in an L. This is a quick way to add 24 to 36 inches of surface where a cabinet run ends. It also works as a breakfast spot for one or two people if the height lines up with a stool. See small kitchen ideas with an island for more arrangements.
Comparison table: which option suits which kitchen
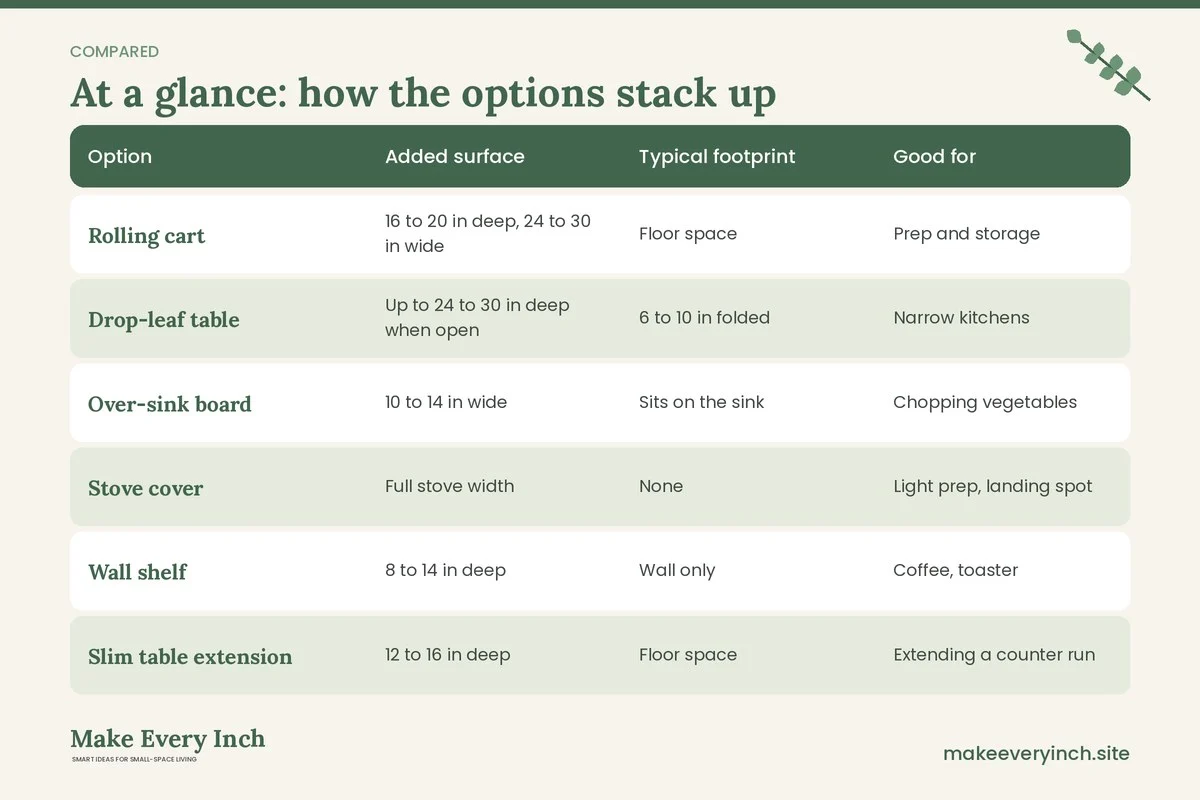
Use the table below as a filter. The weight column is a rough guide only. Always follow the maker’s rated load for the specific product, and treat any figure you cannot confirm as a limit to stay well under.
| Option | Added surface | Typical footprint | Good for | Watch out for |
|---|---|---|---|---|
| Rolling cart | 16 to 20 in deep, 24 to 30 in wide | Floor space | Prep and storage | Needs locking casters and a clear path |
| Drop-leaf table | Up to 24 to 30 in deep when open | 6 to 10 in folded | Narrow kitchens | Leaves must latch securely |
| Over-sink board | 10 to 14 in wide | Sits on the sink | Chopping vegetables | Sink must be clean and dry |
| Stove cover | Full stove width | None | Light prep, landing spot | Never use on a warm stove |
| Wall shelf | 8 to 14 in deep | Wall only | Coffee, toaster | Needs studs or proper anchors |
| Slim table extension | 12 to 16 in deep | Floor space | Extending a counter run | Must match counter height |
Step 3: Check weight and stability
Surface area is only useful if it can carry what you put on it. Many problems with added counters come down to two issues: too much weight on a light surface, and a surface that moves.
Know the load
Estimate the weight of what you will use. A stand mixer can weigh a considerable amount, and a countertop oven or a full bag of flour adds to that. Compare your estimate to the maker’s stated limit and leave a margin. A good rule of thumb is to load a surface to no more than about two thirds of its rated limit. If there is no stated limit, treat the surface as light duty and keep heavy appliances on a fixed counter.
Think about where weight sits
A load near the edge of a leaf or a corner of a shelf produces more strain on the supports than the same load in the center. Place heavy items over legs or brackets. On a drop-leaf, keep heavy objects off the leaf and use the leaf only for light prep.
Make carts and tables steady
- Lock the casters every time you work on a cart.
- Check that all four legs touch the floor. A small felt pad or a shim fixes a wobble.
- Keep heavy items on the lower shelf so the cart has a low center of gravity.
- Do not push on a cart’s top with force, for example when kneading dough, unless it is rated for it.
- Keep knives and hot pans away from the edge of a surface that someone might bump.
Anchor anything tall
A tall cart, a slim tower or a bookcase-style unit can tip if a child climbs it or a drawer is pulled out fully. Use an anti-tip strap or bracket where you have permission and, where you do not, choose low, wide pieces that sit securely. Never stack heavy items high on a narrow unit.
Keep electricity and water apart
If you set up a coffee station or a toaster on the new surface, keep appliances away from the sink and away from wet food prep. Do not run extension cords across the floor where a cart will roll over them. Use outlets that match the appliance’s power needs, avoid daisy-chaining power strips and unplug heat-producing appliances when you leave. Ask a qualified electrician if you want a new outlet; do not modify wiring yourself.
Step 4: Place and test each surface
Tape the footprint of the new surface on the floor or counter. Walk through your normal routine: bring in groceries, cook a meal, empty the dishwasher. Note any collision with a door or a person. Aim to keep a path of 30 to 36 inches where you can, and at least 24 inches in the tightest galley. Check that you can still open the oven, the dishwasher and the fridge fully.
Place the new surface close to where you need it. A prep surface belongs between the sink and the stove, in what is often called the work triangle. A coffee station belongs near the water and the outlet. A landing spot belongs close to the door. For more thinking on movement, see small kitchen layout ideas for better workflow.
Step 5: Keep the new surface useful
Extra counter space disappears quickly if it fills with clutter. Give each surface a rule.
- Keep it 70 percent clear. Leave most of the surface open for work, and let only the items you use daily stay on it.
- Use vertical space above. A rail or a shelf above the surface keeps tools off the top. Read vertical storage ideas for options.
- Clear it at night. A two-minute reset keeps the kitchen ready for the morning.
- Light the work area. Under-cabinet lighting makes a prep surface safer and easier to use. See small kitchen lighting ideas.
Three example kitchens
A galley kitchen of 8 by 10 feet
A galley has two parallel counters and a narrow aisle, often about 36 to 42 inches. A rolling cart would eat the aisle, so choose a fold-down shelf on the short end wall and an over-sink board. When the shelf is up, you have the full aisle. When it is down, you have a 24 by 30 inch prep top. A stove cover gives you a landing spot for grocery bags. This approach adds around 6 to 8 square feet of surface without adding permanent clutter. For more on this layout type, see our guide to galley kitchen ideas.
A studio kitchenette along one wall
A kitchenette often has a sink, a small fridge and 2 feet of counter. There is usually open floor on the other side. Add a slim 14 inch deep table at the end of the counter as an L, then place a cart with a shelf underneath on the other side of the fridge. Keep the cart’s top at counter height, so it behaves like an extension. Store small appliances on the cart’s lower shelf and bring them up when you cook. If the room is also your living space, tuck the cart against a wall at night. For a broader plan, see small apartment kitchen ideas.
An L-shaped rental kitchen with no wall mounting
A renter who cannot drill can still add surface. Place a freestanding drop-leaf cart in the corner, add a sink cover for prep and use a stove cover between meals. Keep a basket on the cart for the grocery landing spot, and use adhesive-free solutions such as tension rods for hanging tools. This setup adds around 8 to 10 square feet in total and leaves no marks on the walls. For ideas on keeping the cost down, look at small kitchen ideas on a budget.
Common mistakes when adding counter space
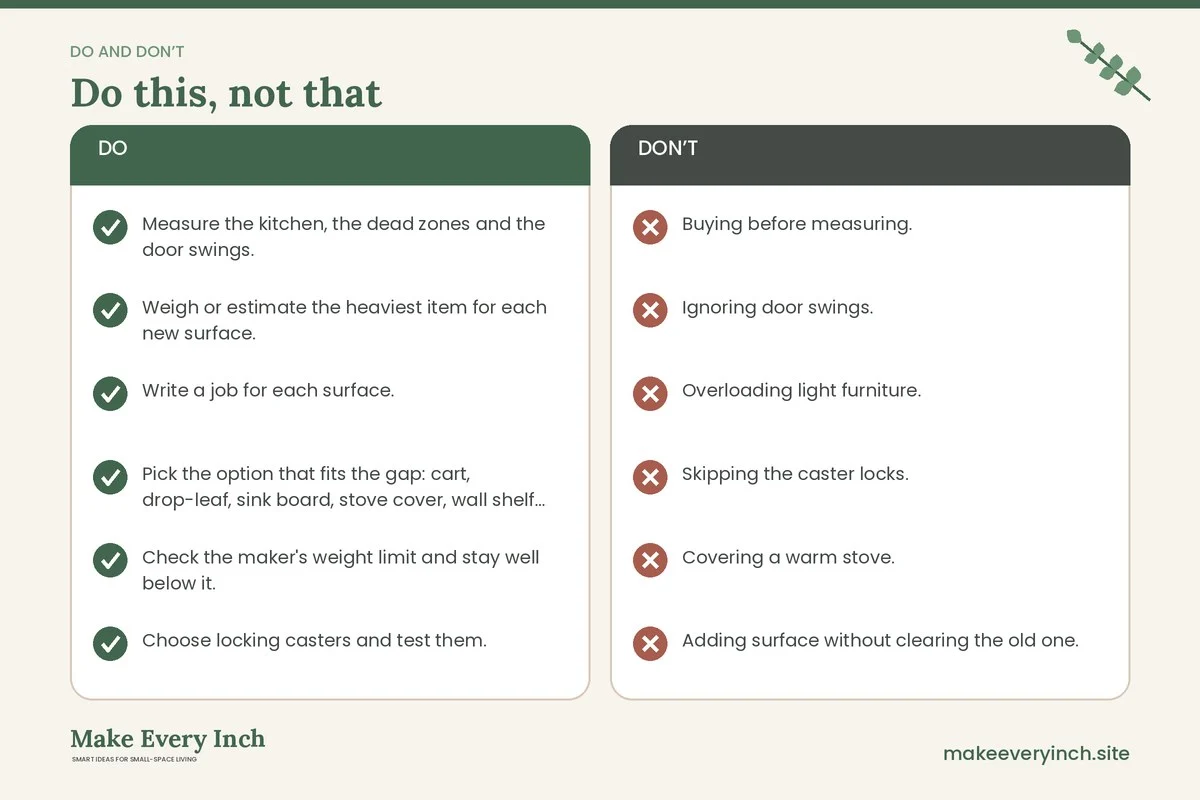
- Buying before measuring. A cart that is 2 inches too wide for the gap is useless, and a returned bulky item is a hassle.
- Ignoring door swings. A beautiful drop-leaf is no good if it blocks the dishwasher.
- Overloading light furniture. A bookcase or a decorative table may not hold appliances safely.
- Skipping the caster locks. A rolling cart can move while you chop or lean on it.
- Covering a warm stove. Wait until the stove is fully cool before covering it, and remove the cover before cooking.
- Adding surface without clearing the old one. Declutter first with the steps in small apartment decluttering ideas.
Quick safety notes
- Do not drill into walls, tiles or cabinets without permission from the owner or landlord.
- Use anchors that match the wall type, and fix wall shelves into studs where possible.
- Keep electrical cords off the floor and away from the sink.
- Never leave a cover on a stove that is in use or still warm.
- Keep heavy items low and near the center of a surface.
- Keep a clear path to the exit and to the fire extinguisher or alarm.
- If you use paint or sealant on a new wooden top, choose low-VOC products and open a window while it dries.
Checklist: how to add counter space in a weekend
- Measure the kitchen, the dead zones and the door swings.
- Weigh or estimate the heaviest item for each new surface.
- Write a job for each surface.
- Pick the option that fits the gap: cart, drop-leaf, sink board, stove cover, wall shelf or slim table.
- Check the maker’s weight limit and stay well below it.
- Choose locking casters and test them.
- Tape the footprint, then test your routine.
- Keep a path of 30 to 36 inches.
- Add lighting and a place for tools above or below the surface.
- Decide on a nightly reset.
- Review after two weeks and adjust.
FAQ
What is the cheapest way to add counter space to a small kitchen?
A cutting board that bridges the sink, a stove cover and a used table or cart are usually the lowest-cost ways. A second-hand piece in good condition often does the job.
How much counter space does a small kitchen need?
There is no single answer, but many designers suggest at least 24 inches of clear counter next to the stove and another 36 inches near the sink for prep. If you have less, add one or two of the options above.
Is a rolling cart safe for heavy appliances?
Only if the maker rates it for that weight. Locked casters, a low center of gravity and a stable floor make a difference. For very heavy items such as a stand mixer, keep them on a fixed counter where you can.
Can I add counter space in a rental?
Yes. Carts, freestanding drop-leaf tables, sink boards, stove covers and slim tables need no drilling. If you want a wall shelf, ask the landlord first.
Should the new surface match my counter height?
Ideally yes. A matching height lets you slide items across and keeps your back comfortable. A standard counter is around 36 inches, but check yours.
Where should I put a cart in a tiny kitchen?
Put it against a wall or cabinet during use, in a spot that does not block the fridge, oven or dishwasher. Roll it to a corner when it is not needed.
Keep going: Keep going with our guide to small kitchen ideas with limited counter space, the small kitchen organization ideas post and our practical how to organize a small kitchen walkthrough.
Save this guide for later
Pin the ideas you like to Pinterest so you can come back to them when you plan your space.